Table of Contents
Advertisement
Advertisement
Table of Contents

Related Manuals for Imation NEXSAN E Series


Summary of Contents for Imation NEXSAN E Series
- Page 1 NEXSAN E-SERIES™ FRU Removal and Replacement Guide For the Nexsan E60X™/E60XV™ and Nexsan E48X/™E48XV™ RAID Storage Expansion Units Document Number NXS-EX4U-MG Revision 01 NEXSAN 1445 Lawrence Drive, Thousand Oaks, CA 91320 | p. 866.4.NEXSAN | www.nexsan.com...
- Page 2 Unauthorized use, duplication, or modification of this document in whole or in part without the written consent of Imation is strictly prohibited. Imation reserves the right to make changes to this manual, as well as the equipment and software described in this manual, at any time without notice.
-
Page 3: Table Of Contents
Contents About this manual Audience Conventions Text Notes, tips, cautions, and warnings Contacting Nexsan Contacting service and support Related documents Safety notices viii Revision history NXS-EX4U-MG Rev. 01, February 2014: Old format: Version 3.2, October 2013 Version 3.1, March 2013 Version 3.0, October 2012 Version 2.9, September 2012 Version 2.8, July 2012... - Page 4 Dimensions, Nexsan E60X™/E60XV™ Dimensions, Nexsan E48X/™E48XV™ Power Cooling Materials Environment Chapter 2: Adding Modules Adding disk drives Chapter 2: Replacing Modules Power Supply Units (PSUs) Expansion Controllers Disk drives Front drive drawer fans Rear drive drawer fan assembly Glossary Nexsan Corporation Nexsan E60X™/Nexsan E48X™FRU Removal and www.nexsan.com Replacement Guide...
-
Page 5: About This Manual
WARNING: Warnings alert the user to items or situations which may result in severe injury or death to the user. Nexsan E60X™/Nexsan E48X™ Nexsan by Imation FRU Removal and Replacement Guide www.nexsan.com... -
Page 6: Contacting Nexsan
Contacting service and support Imation's Nexsan Technical Services Group provides worldwide assistance with installation, configuration, software support, warranty and repair for all Nexsan products. A variety of service and support programs are available to provide you with the level of coverage and availability your operation requires. - Page 7 Nexsan E-Series™ FRU Removal and Replacement Guide for the Nexsan E60™/E60V™/E60VT™/Nexsan E48™/E48V™/E48VT™ RAID Storage Units Nexsan E-Series™ Installation Guide for the Nexsan E60X™/E60XV™/Nexsan E48X/™E48XV™ RAID Storage Expansion Units Nexsan RAID Storage User Guide Nexsan E-Series™ Snapshots and Replication User Manual Nexsan E60X™/Nexsan E48X™ Nexsan by Imation FRU Removal and Replacement Guide www.nexsan.com...
-
Page 8: Safety Notices
Nexsan E-Series™ storage units do not have power switches. Do NOT attach the power cords until the unit is fully installed, with all disk drives in place. viii Nexsan by Imation Nexsan E60X™/Nexsan E48X™ www.nexsan.com FRU Removal and Replacement Guide... -
Page 9: Revision History
Guide for the Nexsan E60X™/E60XV™ and Nexsan E48X/™E48XV™ RAID Storage Expansion Units. NXS-EX4U-MG Rev. 01, February 2014: Changed formatting throughout to reflect Nexsan as an Imation brand; separated installation content from FRU replacement content into two documents; changed name of document to Nexsan E-Series™ FRU Removal and Replacement Guide for the Nexsan E60X™/E60XV™... -
Page 10: Version 2.6, March 2012
Delivery, page 7; added warning about allowing unit to come to room temperature under Before you begin, page 7; changed recommended rack size from 1,000 mm to 1,200 mm and added note about rear cable- Nexsan by Imation Nexsan E60X™/Nexsan E48X™... -
Page 11: Version 1.0A, December 2009
19; added and expanded warnings and cautions under Disk Drives, page 22; added photograph to page 23; expanded and clarified instructions under Disk Insertion, pages 23–24; added section Fan Replacement, pages 24–25. Version 1.0a, December 2009 First published version of this Hardware Manual. Nexsan E60X™/Nexsan E48X™ Nexsan by Imation FRU Removal and Replacement Guide www.nexsan.com... - Page 12 Revision history Nexsan by Imation Nexsan E60X™/Nexsan E48X™ www.nexsan.com FRU Removal and Replacement Guide...
-
Page 13: Chapter 1: Overview
(base model and V) of the Nexsan E60X™ and Nexsan E48X™ expansion systems. Where information applies to only one variant, that variant is specified. This chapter contains the following sections: Front panel Rear panel Drawer interior Physical characteristics Nexsan E60X™/Nexsan E48X™ Nexsan by Imation FRU Removal and Replacement Guide www.nexsan.com... -
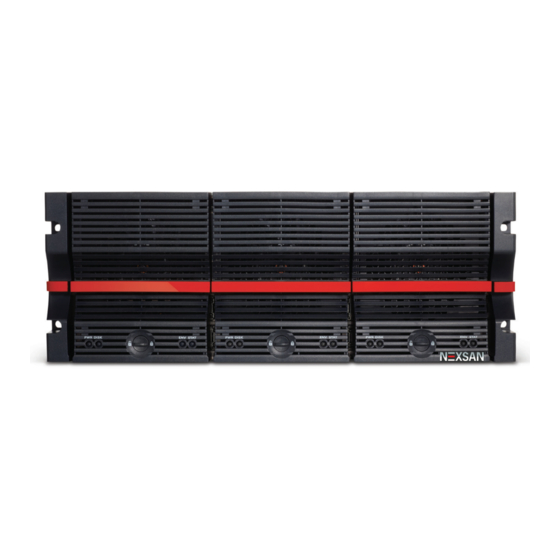
Page 14: Front Panel
Red indicates that one or more disk faults have been detected. The Disk Drives page (under RAID Information) in the graphical user interface (GUI) displays details (see the Nexsan RAID Storage User Guide). Nexsan by Imation Nexsan E60X™/Nexsan E48X™ www.nexsan.com... -
Page 15: Other Items
(see the Nexsan RAID Storage User Manual). Other items 7. Drawer Lock: Secures the drive drawer in place. When this lock is disengaged, the STAT LED turns amber. Nexsan E60X™/Nexsan E48X™ Nexsan by Imation FRU Removal and Replacement Guide www.nexsan.com... -
Page 16: Rear Panel
5. Four expansion ports (EXP IN 0 and 1, EXP OUT 0 and 1) per Expansion Controller: Mini-SAS 26 pin I- Pass (8088) expansion connectors, each with four 6Gb/s SAS links. Nexsan by Imation Nexsan E60X™/Nexsan E48X™ www.nexsan.com... -
Page 17: Leds
Solid red indicates that there is an issue with the Expansion Controller. The Environmental Information page (under System Information) in the graphical user interface (GUI) displays details (see the Nexsan RAID Storage User Guide). Nexsan E60X™/Nexsan E48X™ Nexsan by Imation FRU Removal and Replacement Guide www.nexsan.com... -
Page 18: Drawer Interior
For disk drive slots where no disk drive is installed, this LED is off. Nexsan by Imation Nexsan E60X™/Nexsan E48X™ www.nexsan.com... -
Page 19: Physical Characteristics
Power Two 1,600W load-sharing, hot-pluggable, redundant PSUs. Nexsan E60X™/E60XV™ nominal input voltage is 200–240VAC, 47–63Hz. Cordset specification in North America is IEC C13 to IEC C14 rated 250V/10A. Nexsan E60X™/Nexsan E48X™ Nexsan by Imation FRU Removal and Replacement Guide www.nexsan.com... -
Page 20: Cooling
Chassis, internal: Aluminium supports, steel divider plates, and steel sub-assemblies Fascia: ABS (blend) Thermoplastic UL 94 V.0 Environment Ambient operating temperature: 5°C–35°C (41°F–95°F) Minimum drawer operation temperature: 10°C (50°F) Nexsan by Imation Nexsan E60X™/Nexsan E48X™ www.nexsan.com FRU Removal and Replacement Guide... -
Page 21: Chapter 2: Adding Modules
WARNING: Risk of ELECTRIC SHOCK if components are removed or tampered with when unit power is on. ONLY a TRAINED OPERATOR may remove and replace the field-replaceable modules while power is on. This chapter contains the following section: Adding disk drives Nexsan E60X™/Nexsan E48X™ Nexsan by Imation FRU Removal and Replacement Guide www.nexsan.com... -
Page 22: Adding Disk Drives
Figure 2-2: Sliding the drive drawer out CAUTION: Do not lean on or place any heavy object on an open drive drawer. Doing so may damage the drawer slide mechanism or overbalance the rack. Nexsan by Imation Nexsan E60X™/Nexsan E48X™ www.nexsan.com... - Page 23 See Home Page in Chapter 3 of the Nexsan RAID Storage User Guide for more information. Nexsan E60X™/Nexsan E48X™ Nexsan by Imation FRU Removal and Replacement Guide www.nexsan.com...
- Page 24 Chapter 2: Adding Modules Nexsan by Imation Nexsan E60X™/Nexsan E48X™ www.nexsan.com FRU Removal and Replacement Guide...
-
Page 25: Chapter 2: Replacing Modules
ONLY a TRAINED OPERATOR may remove and replace the field-replaceable modules while power is on. This chapter contains the following sections: Power Supply Units (PSUs) Expansion Controllers Disk drives Front drive drawer fans Rear drive drawer fan assembly Nexsan E60X™/Nexsan E48X™ Nexsan by Imation FRU Removal and Replacement Guide www.nexsan.com... -
Page 26: Power Supply Units (Psus)
7. In the graphical user interface (GUI), go to the Home page and verify that the status bar for the new Power Supply Unit is green. See the Nexsan RAID Storage User Guide for more information. Nexsan by Imation Nexsan E60X™/Nexsan E48X™... -
Page 27: Expansion Controllers
Support the weight of the controller with your free hand while removing it. Figure 2-3: Removing the Expansion Controller 4. Make sure that the replacement Expansion Controller is right side up. The spring lock tab should be on the right. Nexsan E60X™/Nexsan E48X™ Nexsan by Imation FRU Removal and Replacement Guide www.nexsan.com... - Page 28 Click the Re-enable controller X button. d. Check the confirmation check box. e. Click Execute NOW. The RAID Controller is brought back online and connects to the replaced Expansion Controller. Nexsan by Imation Nexsan E60X™/Nexsan E48X™ www.nexsan.com FRU Removal and Replacement Guide...
-
Page 29: Disk Drives
Figure 2-6: Sliding the drive drawer out CAUTION: Do not lean on or place any heavy object on an open drive drawer. Doing so may damage the drawer slide mechanism or overbalance the rack. Nexsan E60X™/Nexsan E48X™ Nexsan by Imation FRU Removal and Replacement Guide www.nexsan.com... - Page 30 The STAT LED on the front of the drawer turns from amber to green to let you know that the drive drawer is properly latched. The DSK LED lights up green to let you know that all drives are functioning properly. Nexsan by Imation Nexsan E60X™/Nexsan E48X™...
- Page 31 See Home Page in Chapter 3 of the Nexsan RAID Storage User Guide for more information. Nexsan E60X™/Nexsan E48X™ Nexsan by Imation FRU Removal and Replacement Guide www.nexsan.com...
-
Page 32: Front Drive Drawer Fans
4. Open the drive drawer lid. 5. Unscrew the retaining screws on either side of the drive drawer. Figure 2-9: Unscrewing the drawer front assembly retaining screws Nexsan by Imation Nexsan E60X™/Nexsan E48X™ www.nexsan.com FRU Removal and Replacement Guide... - Page 33 12. In the graphical user interface (GUI), go to the Home page and verify that the status bar for the new fan assembly is green. See Home Page in Chapter 3 of the Nexsan RAID Storage User Manual for more information. Nexsan E60X™/Nexsan E48X™ Nexsan by Imation FRU Removal and Replacement Guide www.nexsan.com...
-
Page 34: Rear Drive Drawer Fan Assembly
4. On the fan assembly at the back of the drawer, press the release tabs inward. Then carefully pull the fan assembly out of the drawer. Figure 2-12: Disengaging and removing the rear fan assembly Nexsan by Imation Nexsan E60X™/Nexsan E48X™ www.nexsan.com... - Page 35 8. In the graphical user interface (GUI), go to the Home page and verify that the status bar for the new fan assembly is green. See Home Page in Chapter 3 of the Nexsan RAID Storage User Manual for more information. Nexsan E60X™/Nexsan E48X™ Nexsan by Imation FRU Removal and Replacement Guide www.nexsan.com...
- Page 36 Chapter 2: Replacing Modules Nexsan by Imation Nexsan E60X™/Nexsan E48X™ www.nexsan.com FRU Removal and Replacement Guide...
-
Page 37: Glossary
Only the last component in the wherein drives are loaded into the chassis in chain directly connects to the computing opposite-facing pairs. Disks in each pair rotate Nexsan E60X™/Nexsan E48X™ Nexsan by Imation FRU Removal and Replacement Guide www.nexsan.com... - Page 38 10, 100, 1,000, and 10,000 megabits per second (Mb/s). 10, 100, and 1,000Mb/s networks are often referred to as Gigabit. Approximately one billion 10BASE-T, 100BASE-T, and 1000BASE-T, (1,000,000,000) bits. Nexsan by Imation Nexsan E60X™/Nexsan E48X™ www.nexsan.com FRU Removal and Replacement Guide...
- Page 39 See “interconnect service module”. hot-plug To insert a new piece of hardware into a computerized system while the system is running. See also “hot-swap”. See “local area network”. Nexsan E60X™/Nexsan E48X™ Nexsan by Imation FRU Removal and Replacement Guide www.nexsan.com...
- Page 40 Each full- duplex channel, known as a SAS port, transfers rack mount data at 1.5Gb/s, 3Gb/s, or 6Gb/s in each Hardware for attaching devices to a rack. Nexsan by Imation Nexsan E60X™/Nexsan E48X™ www.nexsan.com FRU Removal and Replacement Guide...
- Page 41 2^40 (1,099,511,627,776) bytes (often called a “binary terabyte” and abbreviated “TiB”). TCP/IP Transmission Control Protocol/Internet Protocol. The set of communications protocols used for the Internet and other similar networks. Nexsan E60X™/Nexsan E48X™ Nexsan by Imation FRU Removal and Replacement Guide www.nexsan.com...
- Page 42 Glossary Nexsan by Imation Nexsan E60X™/Nexsan E48X™ www.nexsan.com FRU Removal and Replacement Guide...
- Page 43 Technical Services: 01332 291600, or +44 (0)1332 291600 outside of the UK E-mail: nexsansupport@imation.com E-mail: nexsansupport@imation.com Copyright © 2010–2014 Imation. All Rights Reserved. This product is protected by one or more of the following patents, and other pending patent applications worldwide: United States patents US8,191,841, ®...
Need help?
Do you have a question about the NEXSAN E Series and is the answer not in the manual?
Questions and answers