
Related Manuals for Thuraya MarineStar MNB-01


Summary of Contents for Thuraya MarineStar MNB-01
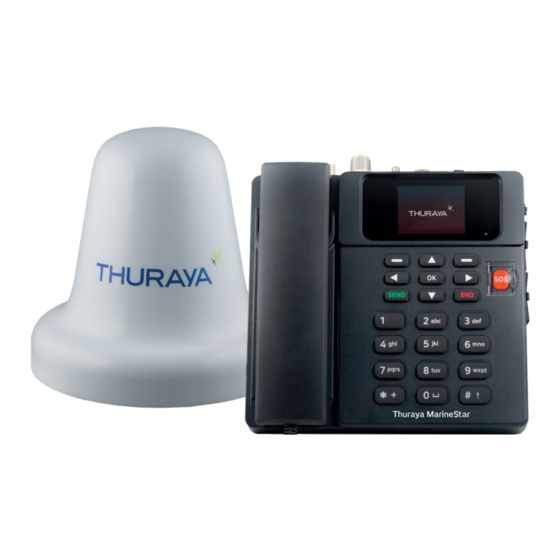
- Page 1 MNB-01 USER MANUAL V1.1 Note: MNB-01 is the product model number and the brand name may vary in different regions. In some countries, the model MNB-01 is branded as the Thuraya MarineStar.
-
Page 3: Table Of Contents
Equipment Ventilation ..........4 GETTING STARTED ..........23 Installing the SIM card..........23 Obtaining License/Approval for using Power up the MNB-01 ..........23 Thuraya MNB-01 .............5 Basic Terminal Set Up ..........24 Copyright ..............5 USING THE MNB 01 ....25 Trademarks..............5 Keypad- Description and Functions .... - Page 4 QUICK START GUIDE ....70 USING THE MNB-01..........70 GETTING STARTED ..........71 Installing the SIM card..........71 Power up the MNB-01 ..........71 Basic Terminal Set Up ..........72 Making / End a Voice Call ......... 72 Receiving a call ............. 73 Adjusting volume during a call ......
-
Page 5: Regulatory Information
Safety Summary For the sake of safety and protection, please read the user guide before you attempt to use the Thuraya MNB-01 system. In particular, read this safety section carefully. Keep this safety information where you can refer to it if necessary. -
Page 6: Service
Ship’s Power Supply The Thuraya MNB-01 (including to the Terminal and the Active Antenna) standby power is only less than 10 W, and the standard operation average power consumption is only 16 W. When low signal strength, burst power may beyond 20 W. -
Page 7: Obtaining License/Approval For Using Thuraya Mnb-01
To legally operate the Thuraya MNB-01 system, it is necessary to obtain permission from the local telecommunications regulatory authorities of the country you are operating from. Using your equipment in any country without permission causes you to run the risk of confiscation of the equipment by the local authorities. -
Page 8: Introduction
Thuraya satellite network. The MNB-01 also supports SMS services through its easy-to-use menu on the color LCD screen on the terminal. -
Page 9: Features
- Supports data entries of up to 10 types of fish species and respective catch weight. The data entry of fish species can also be entered from remote server if Integrated on the Thuraya network. - Supports vessel info and fish gear entries. -
Page 10: Recommended Cable Lengths For Active Antenna
Recommended cable lengths for active antenna SAT & GPS Cables Cable Type Cable Loss @ Max. Cable Length Typ. Cable Length Min. Cable Length 1.5GHz(dB/m) LMR-240 0.324 LMR-400 0.174 LMR-500 0.143 Operating Environment Antenna Unit (ADU) Operating Temperature -25 °C to +55 °C Storage Temperature -40 °C to +80 °C Base Terminal (BDU) -
Page 11: General Specifications
General specifications Service Voice Circuit switched Up to 160 characters (English) GmPRS 60Kbps / 15Kbps (Download / Upload) Ingress Protection Rating Base Terminal (BDU) IP 32 Antenna (ADU) IP 66 GPS specifications Number of Tracking Channels GPS Position Accuracy <10 m Time to First Fix Hot start <... -
Page 12: Mechanical Specifications
1525 – 1559 MHz, 1626.5 – 1660.5 MHz Polarization LHCP (Left Hand Circular Polarization) Axial ratio < 6 dB Gain-to-noise Temperature ratio -24 dB/K (Typ.), -22 dB/K (Min.) Compliance • Thuraya approved • Compliant to CE, RoHS, REACH, IEC60945 & 62368, RED & RCM... -
Page 13: Packing List
Packing list Base Terminal Active Antenna Antenna Mounting Kit Power Cable (L shaped based plate, 2 U (5 meters with 2P circular cable clamps, 4 M6 nuts & washers) connector) SAT RF Cable GPS RF Cable Miscellaneous (25 meters with N-type Male (25 meters with SMA Male (User manual, Wall mount paper, connectors) -
Page 14: Base Terminal
Base Terminal Introduction of Ports SOS Button SOS Button For emergency usage. To notify pre-configured contacts during an emergency. Press and hold the RED key for 2 seconds to trigger the alert. GPIO Port GPS Port Grounding Stud Extension Port DC Input SAT Port Grounding Stud... - Page 15 GPIO_1 IN GPIO_2 IN GPIO_3 OUT GPIO_4 OUT RJ-11 (Extension) To connect the analogue handset. Port Serial Port Earphone jack Power ON/OFF NMEA Port 3.5mm Audio This is the system voice port, which could connect a loud speaker to play the calling Port voice.
- Page 16 Micro USB Port SIM Card Slot SIM Card Slot To insert Thuraya SIM Card. Micro USB Port It is for terminal debugging. For more information, please contact your distributor.
-
Page 17: Antenna Unit
Antenna Unit SAT RF Cable GPS RF Cable The Antenna unit has two RF (female) connectors at its base. One connector is the SAT signal port (N-type connector), and the other is the GPS signal port (SMA connector). SAT RF Cable The SAT RF cable is 25 meters in length and is terminated with an N-type (male) connector at each end. -
Page 18: Installation
INSTALLATION This section describes how to install the Thuraya MNB-01 terminal and connect all the cables. Unpacking BDU DC power cable Mounting screws & washer Wall mount paper... -
Page 19: Installation Of Base Terminal
Installation of Base Terminal Select a suitable location inside the wheelhouse or the cabin room where you desire to place your Base Terminal. It is designed to operate in rooms with a temperature range from -15 °C to +55 °C. Mount your Base Terminal onto a wall or place it on a desk or tabletop. -
Page 20: Unpacking Adu
Unpacking ADU Base plate 25 meter SAT Cable 25 meter GPS Cable Butyl tape M5 SCREWS M6 NUTS U CLAMPS & WASHER Radiation hazard The MNB-01 antenna radiates 7.5 dBW EIRP. This translates to a minimum safety distance of 0.4 m from the antenna while it is transmitting, based on a radiation level of 10 mW/cm MICROWAVE RADIATION No personnel within safety distance... -
Page 21: Interference
Interference The antenna must be mounted as far away as possible from the ship’s radar and high power radio transmitters (including other Inmarsat based systems), because they may compromise the antenna performance. RF emission from radars might actually damage the antenna. The MNB-01 antenna itself may also interfere with other radio systems. -
Page 22: Installation Of Antenna Unit
Installation of Antenna Unit Select an ideal location above the deck where you desire to place your Antenna Unit. It is recommended to install it at a point where no surrounding obstacles should obstruct the open sky view to the antenna and make sure there is no other radio equipment or vessel funnel. - Page 23 M6 Nut(4ea) U damps(2ea) M6 Washer(4ea) M6 Split Washer(4ea) Connect the cables between Base Terminal and Antenna unit. - SAT RF cable shall be connected to the N-TYPE CONNETCOR of Antenna Unit. - GPS RF cable shall be connected to the SMA CONNETCOR of Antenna Unit. After tightening the connectors, wrap the connectors with Butyl tape supplied in the packaging or apply silicon sealant to make them waterproof.
- Page 24 Tighten a DC power cable to the DC connector of Base Terminal as follows. Connect the Base Terminal to a DC power source using the DC power cable supplied in the box. Recommended specifications are 12 V/3.6 A or 24 V/1.8 A.
-
Page 25: Getting Started
GETTING STARTED Installing the SIM card The Thuraya MNB-01 system requires a valid and active SIM card to access the satellite network and configure the settings of the Base Terminal. Follow these steps to install the SIM card: Unscrew the SIM card cover and flip it down. -
Page 26: Basic Terminal Set Up
Basic Terminal Set Up NOTE Before making a voice call, please make sure that: • The SIM card is properly inserted in the SIM card slot. • There should be at least 2 bars on the signal strength. -
Page 27: Using The Mnb 01
USING THE MNB 01 Left Function Key End Key Right Function Key Handset (Ring tone speaker underneath) Okay Key Keypad(Alpha-numeric) 4-Way Navigation Buttons 2.4 inch 65K color TFT LCD Screen Send Key SOS Button Keypad- Description and Functions Keys Description / Functions Left Function Key The Function of this key depends on the guiding text shown on the display above this key. - Page 28 Keys Description / Functions Right Function Key The Function of this key depends on the guiding text shown on the display above this key. Okay Key Pressing this key selects or confirms the function highlighted on the display. 4-Way Navigation buttons Press the 4-Way navigation buttons to scroll left, right, up and down on the display.
-
Page 29: The Home Screen
Network Indicator This indicator line shows the registration status and region information of the MNB- line 01 terminal or the GSM Mobile network operator sim card roaming on the Thuraya satellite network. Country Indicator This indicator line shows the Country information. -
Page 30: Status Indicators
Status Indicators Tables below explain the meaning of each status indicator displayed in the Home screen. Status Indicators Description Status Indicators Description Satellite signal SOS activated Status bar SOS message Radio silence Unread SMS Weak signal. Point antenna Voice mail towards satellite Roaming Voice mail + SMS... -
Page 31: Making / End A Voice Call
Making / End a Voice Call NOTE Before making a voice call, please make sure MNB-01 has registered the network and signal strength status indicator should be on ( ). There should be at least 2 bars on the signal strength. To make a call from the Base Terminal, off-hook the handset cradle and dial. -
Page 32: Using The Main Menu
Using the Main Menu Menu Flow schematic Messages Contacts Call logs New Message Search Missed calls Inbox Add contact Received calls Draft Group Outgoing calls Sent messages Speed dial Delete [A] Outbox Delete [A] Call duration Templates Memory status Settings [C] Info message Memory status Delete messages [A]... - Page 33 Network Security Settings Network mode [A] SIM pin code [C] Phone [C] SAT registration [A] Security code [C] Call [C] Preference [A] Call barring code [C] GmPRS [A] Fixed dialing [C] Language [C] Closed user group [C] Data connection [C] IMEI number Setup wizard [C] S/W version...
- Page 34 You can access the Main Menu by pressing the Left Function key or Key from the Home screen. The Main Menu includes 12 menu options with each menu option having their respective sub-menus. You can use the 4-Way navigation buttons to navigate to the desired menu option and press to confirm your selection.
- Page 35 Table below summarizes the functionalities within each menu option: Icon Description Messages This menu manages your user messages. Contacts This menu manages your user contacts. Call logs This menu allows you to manage your call history. Organizer This menu contains useful tools such as Calendar and calculator. Clock This menu is used to set the date and time.
-
Page 36: Messages
Messages Once you select the messages menu, you will see the below sub menu’s. New message You will be able to create new SMS either by input of text or from a standard template and send it as an SMS or email which is user defined. - Page 37 You can also save the incomplete messages as a draft by pressing Option > Save as draft. Inbox Once you received an incoming SMS, you will be able to view this information in this menu. You can choose to reply, forward, save the SMS as a template for future reference or delete it by selecting Options.
- Page 38 Sent messages You can view, forward or copy to templates the previously sent messages. Outbox Outbox contains messages that are not delivered. You can perform similar activities that are done in sent items. Templates The templates defined or saved can be sent instantly. You can modify existing ones or create new of your own.
- Page 39 Settings This section contains crucial information on the SMS and email centers which is to be defined for tracking purposes. Activate captain mode You can also activate the delivery report notification and enable/disable the request reply function. Maximum, 1 Hour, 6 Hours, 1 Day, 3 Days and 1 Week can be selected for the validity. NOTE Maximum settings as per the operator.
- Page 40 Select the SMS server or GmPRS server for Bearer mode. Info message This menu is used to display the information received from the system. Activate captain mode to access the Language menu under main menu settings. Memory status You can see the total and used memory of the device. The maximum storage space available in the phone is 550 (Inbox: 250, Draft: 100, Sent: 150, Outbox: 50).
- Page 41 Delete messages This menu is used when you want to delete the SMS’s from all menu’s under Messages. Activate admin mode.
-
Page 42: Contacts
Contacts The contacts menu helps you to manage your address book by saving and editing contacts on your device. Search This menu is used to find a contact saved in the device. Enter the name using the keypad. Add contact You can add a contact and save using this menu. - Page 43 Group You can create new or modify existing groups in which contact are added. Specific ringtones can be set for every group and also useful in sending group SMS. Speed dial This menu is used to assign contact numbers as speed dial from 1 to 9. They can be edited when needed. To add a contact to Speed dial, go to Menu >...
- Page 44 Memory status You can view how much memory is available on the phone for contacts. You can save contacts up to 255. NOTE Sim contact or memory is not displayed.
-
Page 45: Call Logs
Call logs Missed calls You can view the missed calls list and save it to contacts or delete it or dial-out by pressing key. Received calls You can view the received calls list and save it to contacts or delete it or dial-out by key. - Page 46 Call duration You can view the call duration by type or all combined. GmPRS usage duration can be viewed in this menu. All the durations can be reset in captain mode. NOTE Each log can store up to 20 records and shows call duration and time of call.
-
Page 47: Organizer
Organizer This menu is used to access useful tools like calendar and calculator. Calendar You can set reminders in this device. It can be viewed as a list or modified as needed. Select the date that you want to add the reminder. Add the reminder at the selected data by pressing Options >... - Page 48 Calculator You can use the calculator when needed. NOTE • Short-press for Dot or % Operation • Long-press to change between Dot(decimal point) and % Operation • Press # for -(Negative) operation...
-
Page 49: Clock
Clock You can set the alarms, date and time in this menu. Alarm You can view the alarms list and modify it. Select a day of the week (Multiple selections possible). Enter the time. Select an alarm sound. Turn On/Off the alarm. Press Save to apply the change. - Page 50 World time You can view the world times in different zones by selecting the location in world map. Select your city with the direction keys and press the OK button to save it. You will see that the world time is aligned in reference to the selected city next time you enter the world time menu.
-
Page 51: Sounds
Sounds You can manage the device activity sounds in this menu. Activate captain mode. Ringtone You can view and set the ringtone the type needed. Ringtone type You can enable or disable the ringing sound. Keypad tone You can enable or disable the keypad tone. Startup sound You can enable or disable the startup sound. -
Page 52: Network
Network You can manage the device network settings using the admin mode. Network mode This allows you to choose if the device needs to automatically or manually choose the network. Go to Menu > Network > Network mode and you many choose Automatic or Manual. Select OK. - Page 53 Preference Display the preferred list of networks registered on your SIM card. You can add or remove entries in this list.
-
Page 54: Security
Security You can manage the device security settings using the admin mode or captain mode. WARNING Do not lose the new passwords or codes if changed from the default. You may contact the service provider or may require factory reset if you lose the passwords. Please refer to page 55 for more information on factory reset. - Page 55 Security code The Captain can enable and set the device security code. NOTE The initial security code of your MNB-01 is ‘0000’ , and this code can be changed in the Change code menu. Call barring code The Captain can enter call barring code for call restriction functions. Call barring code varies with different service providers and should be supplied by your service provider when you start using the terminal.
- Page 56 Fixed dialing The Captain can view and modify fixed dialing settings. Fixed dialing is a function where only the predefined numbers can be called. To adding the new number PIN2 code shall be entered. Closed user group The Captain can enable/disable and set a preset for the CUG. To use the CUG function, please contact your service provider for details.
- Page 57 Factory reset The factory reset will restore the settings as the terminal was shipped in admin mode. You will lose your custom settings like contact, messages, tracking, SOS and all information saved on the terminal. Device SIM-Pairing This feature allows the device to be functionally locked with a specific SIM-card in admin mode. If you insert another SIM card that is not paired with the terminal, then you shall need to enter the special PIN security code to use the terminal.
- Page 58 The initial admin password of your MNB-01 is ‘00000000’ , and this password can be changed in the Change password menu. Crew calling The Captain can allow the onboard crew to use Thuraya pre-paid services by dialing a prefix. This feature is managed through in this menu.
- Page 59 Captain function You can enable/disable the Captain function and manage the captain level password for the device using admin mode. NOTE The initial captain password of your MNB-01 is ‘00000000’ , and this password can be changed in the Change password menu.
-
Page 60: Settings
Settings You can manage the device settings using the admin mode or captain mode. Phone You can manage the wallpapers, backlight of LCD using captain mode. Call You can manage the call settings, whitelist and blacklist of numbers and also send own number as an SMS to a requester using captain mode. - Page 61 GmPRS You can manage the APN type and enable/disable auto reject settings using admin mode. There are 3 Thuraya APNs available. Select one to use when there is more than one access point name. • GET (default, no compression) • GETLC (low compression, images will be compressed) •...
-
Page 62: Data Connection
Data connection You can manage the RS-232 serial port settings using captain mode. Data connection port for using GPS data or software upgrade can be configured. Serial is supported as a Data port. The speed of the Serial port can be set to one of 8 available speeds. Setup Wizard You can perform the basic settings programming using this easy to use menu using captain mode. - Page 63 Alert events You can enable/disable some useful trigger levels to be sent as a notification alert from the device to the SMS using admin mode. Changes in the status of Signal strength, GPS antenna, Power cycle, Reset, GPIO1 and GPIO2 are configured as events on the terminal and the status can be reported to the server from any of its previous states.
-
Page 64: Navigation
Navigation Current position View your current position or using an existing way point to find a relative position and send your current coordinates via SMS or email. Way points Navigate your way using a new way point or an existing one. You can send the way point via SMS or email to other MNB-01 or SMS/Email enabled terminals. -
Page 65: Sos
MNB-01 allows you to send SOS messages (SMS/email) to pre-determined recipients at the press of a SOS button during an emergency. Activate captain mode. Press and hold the Alert button for 2 seconds for the activation. Once the SOS is activated the icon will be shown and flashing in the status bar as per your configuration, And also the idle screen will be flashing in red. - Page 66 Message interval You can set the time interval of SOS transmission from device (every 3 minutes to every 24 hours). Output format You can set the output format of the SOS message.
-
Page 67: Location
Location Tracking There are four types of tracking available – By area, distance, time and speed. Activate admin mode. NOTE • Every Polygon entry once entered or accessed should be saved along with the area to avoid deletion of the entered data. - Page 68 For Distance type, you can input from 0.00 km to 999.99 km. For Speed type, you can input a lower (0 km) and upper speed limit (999 km) . For Time type, you can input from 3min up to 10 days for the frequency of outgoing messages.
- Page 69 Geofence There are two types of geofencing available – Restricted zone and radio silence. You can set 10 polygons of 3 to 100 geo-coordinates respectively. Activate admin mode. NOTE • Every Polygon entry once entered should be saved along with the area to avoid deletion of the entered data. •...
- Page 70 Fish Catch and Vessel details This menu is specifically designed to help fishermen record and send the fish catch details. You can enter the type of fish or specific code (1 to 10 quantities) of fish type and weight (1 to 99,999 kg) of the fish catch. You can also enter the vessel details like vessel name, registration number, IMO code and type of fish gear (1 to 5) used for the catch.
- Page 71 Settings You can set the list of tracking recipients (up to 5 – SMS/Email), defined the output format (Eg: Google format) as desired by the recipient and input the remote configuration server details/Short codes for third party tracking platform integrations. Access to this function is available in admin mode. Log list The device saves up to 4000 events occurring and shows up to 20 events in the list under the tracking section.
-
Page 72: Quick Start Guide
QUICK START GUIDE USING THE MNB-01 Left Function Key End Key Right Function Key Handset (Ring tone speaker underneath) Okay Key Keypad(Alpha-numeric) 4-Way Navigation Buttons 2.4 inch 65K color TFT LCD Screen Send Key SOS Button... -
Page 73: Getting Started
GETTING STARTED Installing the SIM card The Thuraya MNB-01 system requires a valid and active SIM card to access the satellite network and configure the settings of the Base Terminal. Follow these steps to install the SIM card: Unscrew the SIM card cover and flip it down. -
Page 74: Basic Terminal Set Up
Basic Terminal Set Up NOTE Before making a voice call, please make sure that: • The SIM card is properly inserted in the SIM card slot. • There should be at least 2 bars on the signal strength. Making / End a Voice Call NOTE Before making a voice call, please make sure MNB-01 has registered the network and signal strength status indicator should be on (... -
Page 75: Receiving A Call
Receiving a call When there is an incoming call, the MNB-01 terminal will: • Ring • The calling party’s number will be displayed on the screen. The corresponding name of contact will be displayed if the number is stored in the contacts. To answer an incoming call, pick up the handset from the cradle or from the analogue phone, if connected. -
Page 76: Troubleshooting
TROUBLESHOOTING Warnings Servicing MNB-01 does not contain consumer serviceable components. You are advised not to carry out any kind of troubleshooting. In case you face any problems, contact the service center. Only authorized service personnel can repair the equipment. Antenna and RF cables Use only MNB-01 antenna and RF cables that have been specifically designed for your terminal. -
Page 77: Faq
How to upgrade MNB-01? The Base Terminal can be upgraded via the Serial port. Please download the latest firmware and upgrader from Thuraya website. How to start and stop a GmPRS session? Step 1. Connect the MNB-01 with the PC/Laptop via Serial data able (RS-232 DB-9 cable). - Page 78 • Follow the steps below. Settings > Dial-up >Set up a new connection > Connect to the internet > Set up a new connection anyway > Dial-up > Set up a connection anyway • Enter Dial-up phone number ‘*99#’ and Connection name as ‘MNB-01’ or whatever you want and click ‘Create’...
- Page 79 Press #1 and off-hook the handset cradle for the transfer line. What are the basic information needed by the supplier while reporting a fault? Date of Purchase, thuraya sim-card number/MSISDN, IMEI number and Serial number are needed. How to extract device logs for maintenance? Go to Menu >...
-
Page 80: Warranty
WARRANTY This warranty table is only valid with all gaps fully filled by the dealer. • Date of Purchase: • Customer’s name, address, country and telephone number: • Write the IMEI here: • Dealer’s stamp and signature:... - Page 81 MEMO...
Need help?
Do you have a question about the MarineStar MNB-01 and is the answer not in the manual?
Questions and answers