
Related Manuals for NewAir AH-480


Summary of Contents for NewAir AH-480
- Page 1 AH-480 Panel Convection Heater OWNER’S MANUAL Read and save these instructions. Manual v1.2...
-
Page 2: Table Of Contents
Register Your Product Online ................3 Safety Information & Warnings ................4 Product Features ....................9 Assembly & Installation ..................11 Operating Instructions ..................13 Cleaning & Maintenance ..................14 Limited Manufacturer’s Warranty ..............15 SPECIFICATIONS AH-480 ODEL 120V~ OLTAGE 60Hz REQUENCY 1500W OWER Width: 18.9 in... -
Page 3: Register Your Product Online
REGISTER YOUR PRODUCT ONLINE Register Your NewAir Product Online Today! Take advantage of all the benefits product registration has to offer: Service and Support Troubleshoot, diagnose, and service issues faster and more accurately Recall Notifications Stay up to date for safety, system updates, and recall notifications... -
Page 4: Safety Information & Warnings
Do not attempt to repair or change any parts by yourself. If the supply cord is damaged, it must be replaced by the manufacturer, its • service agent or similarly qualified persons in order to prevent hazards. Please turn off and unplug the appliance before cleaning or maintenance. • newair.com... - Page 5 • Clean the surface of the appliance with a dry cloth. Do not use corrosive detergent or solvent to clean. Do not submerge the appliance with water. Please turn off and unplug the appliance when not in use. Make sure the power •...
- Page 6 • CAUTION: TO PREVENT ELECTRIC SHOCK, MATCH WIDE BLADE OF PLUG TO WIDE SLOT AND FULLY INSERT • ATTENTION : POUR éVITER LES CHOCS éLECTRIQUES, INTRODUIRE LA LAME LA PLUS LARGE DE LA FICHE DANS LA BORNE CORRESPONDANTE DE LA PRISE ET POUSSER JUSQU’AU FOND. • SAVE THESE INSTRUCTIONS newair.com...
- Page 7 Be sure to read all instructions before using this appliance and observe the following safety tips: Should the product stop working, please contact NewAir for assistance. Please do not attempt to repair it yourself. Taking it apart or making any changes to the product or its circuitry may lead to further hazard.
- Page 8 If the supply cord is damaged, do not attempt to repair it. Please contact NewAir for diagnosis and replacement. Do not fold the power cord or place heavy objects on it.
-
Page 9: Product Features
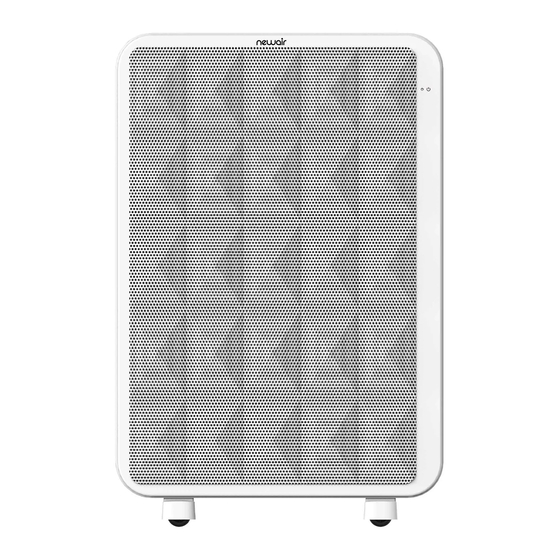
PRODUCT FEATURES PRODUCT DIAGRAM 1. Heater base 8. Power cord holder 2. Front panel 9. Casters 3. Rotary knob for power 4. Rotary knob for temperature 5. Power cord 6. Wall-mounting bracket 7. Back panel CONTROL PANEL: HIGH FEATURES:... - Page 10 3. Thermostat control: Conveniently allows you to set the product to the temperature you need. 4. Low noise when working. 5. Wall-mounted bracket and wheels allow the unit to be used anywhere. newair.com...
-
Page 11: Assembly & Installation
ASSEMBLY & INSTALLATION 1. Open the packaging and remove the parts. Confirm the product and parts are in good condition. 2. Attach the two base pieces to the bottom of the heater panel with the provided screws. 3. Connect the cord to an appropriate outlet. If there is power coming to the unit, the orange LED will be on, and the heater will be in standby mode. - Page 12 • Install the bracket onto the heater as shown in Fig.6. Insert a screw into the hole of the bracket and fix the screw into the rubber plug (hole C or hole D) 5.1 in 22.9 in Fig.6 Lower Bracket 3 in Fig.5 Hole Positions Drywall Anchors Screws newair.com...
-
Page 13: Operating Instructions
OPERATING INSTRUCTIONS • In standby mode, turn the power switch to “Low” or “High.” Next, turn the temperature setting switch to max. The heater will start to work its magic. • When the power switch is “Low,” the power is 750W. •... -
Page 14: Cleaning & Maintenance
• Don’t use gasoline, thinner and any other chemicals on the unit as they can easily damage the surface. • Please dry the heater before storing it. To dry it, place it in a dry and ventilated area. newair.com... -
Page 15: Limited Manufacturer's Warranty
When making a warranty claim, please have the original bill of purchase with the purchase date available. Once confirmed that your appliance is eligible for warranty service, all repairs will be performed by a NewAir™ authorized repair facility. The purchaser will be responsible for any removal or transportation costs.
Need help?
Do you have a question about the AH-480 and is the answer not in the manual?
Questions and answers