
Related Manuals for NewAir AH-450B


Summary of Contents for NewAir AH-450B
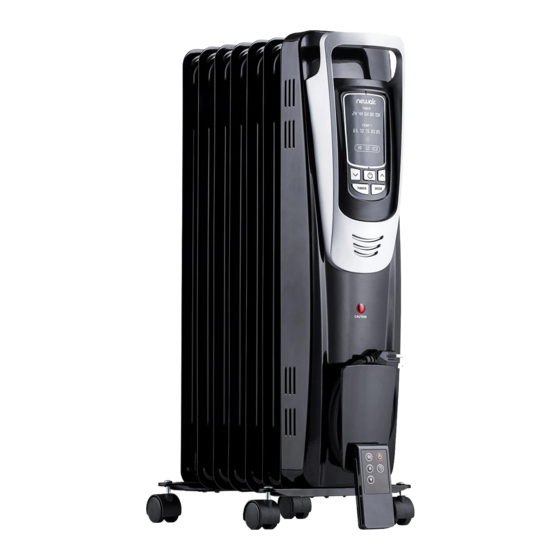
- Page 1 AH-450B Oil-Filled Radiator Heater OWNERS MANUAL Read and save these instructions.
- Page 2 Count on NewAir. As a proud NewAir owner, welcome to our family. There are no robots here, real people shipped your product and real people are here to help you.
-
Page 3: Table Of Contents
Assembly Instructions ..................6 Operating Instructions ..................7 Using the Remote Control ................9 Safety Features .................... 9 Cleaning & Storage..................... 10 Troubleshooting ....................10 Limited Manufacturer’s Warranty ..............12 SPECIFICATIONS AH-450B ODEL 120V OLTAGE 12.5A URRENT HI=1500W; LO=900W OWER... -
Page 4: Important Instructions
To reduce the risk of electric shock, this plug is intended to fit in a polarized outlet only one way. If the plug does not fit fully in the outlet, reverse the plug. If it still does not fit, contact a qualified electrician. http://www.NewAir.com... -
Page 5: Save These Instructions
This heater draws 12.5 A during operation. To prevent overloading a circuit, do not plug the heater into a circuit that already has other appliances working. : It is normal for the plug to feel warm to the touch; AUTION however, a loose fit between the AC outlet (receptacle) and plug may cause overheating and distortion of the plug. -
Page 6: Parts List
Make sure the heater is unplugged and in the “OFF” position. Turn the heater upside down. Attach the wheel-holding plates onto the heater as Fig.1 shows. The U plate is fixed between the last two fins and the other one is fixed under the http://www.NewAir.com... -
Page 7: Operating Instructions
metal control box. Fix the castors to the vertical axis of both the wheel holding plates. Insert the butterfly nuts and screw them in tightly. Turn the heater upright. Your heater is now ready for use. WARNING: Risk of fire. Do not operate heater without wheel assemblies attached. - Page 8 6. Timer setting A. Setting the timer to turn on the heater. When the heater is in stand-by mode (unit is plugged in but not operating), press the TIMER button to set the time at which the heater http://www.NewAir.com...
-
Page 9: Using The Remote Control
will turn on. The “2H” icon will be displayed on the control panel to indicate that the heater will turn on after 2 hours. Press the timer button repeatedly to automatically turn on the heater at any desired hour set in a sequence of 2-4-6-8-10. The timer is adjustable up to 10 hours with an interval rate of 2 hours. -
Page 10: Cleaning & Storage
Pack the heater in the original carton and store it in a cool and dry place. TROUBLESHOOTING Problem Possible Causes Solution The heater shut off There is no power. Be sure it is plugged in and unexpectedly or fails that the electrical outlet is to operate. working. http://www.NewAir.com... - Page 11 OPERATING INSTRUCTIONS section. If you still notice the same problem, remove the plug from the outlet and contact the NewAir Customer Support Department. The room is not hot The room is too large Close the window. Turn on enough.
-
Page 12: Limited Manufacturer's Warranty
When making a warranty claim, please have the original bill of purchase with purchase date available. Once confirmed that your appliance is eligible for warranty service, all repairs will be performed by a NewAir™ authorized repair facility. The purchaser will be responsible for any removal or transportation costs.
Need help?
Do you have a question about the AH-450B and is the answer not in the manual?
Questions and answers