Advertisement
Available languages
Available languages
Quick Links
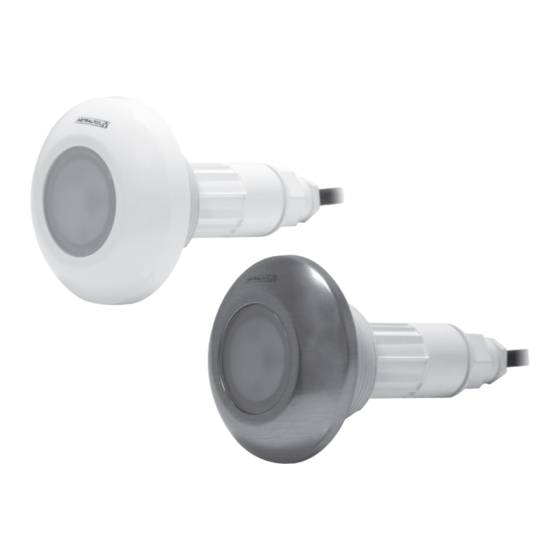
LUMIPLUS MINI V3 PROJECTOR
PROJECTEUR LUMIPLUS MINI V3
PROYECTOR LUMIPLUS MINI V3
PROIETTORE LUMIPLUS MINI V3
STRAHLER LUMIPLUS MINI V3
PROJETOR LUMIPLUS MINI V3
INSTALLATION AND MAINTENANCE MANUAL
MANUEL D'INSTALLATION ET D'ENTRETIEN
MANUAL DE INSTALACIÓN Y MANTENIMIENTO
MANUALE DI INSTALAZIONE E MANUTENZIONE
EINBAU-UND BETRIEBSANLEITUNG
MANUAL DE INSTRUÇÕES E MANUTENÇÃO
Advertisement

Related Manuals for Astralpool LUMIPLUS MINI V3 PROJECTOR


Summary of Contents for Astralpool LUMIPLUS MINI V3 PROJECTOR
- Page 1 LUMIPLUS MINI V3 PROJECTOR PROJECTEUR LUMIPLUS MINI V3 PROYECTOR LUMIPLUS MINI V3 PROIETTORE LUMIPLUS MINI V3 STRAHLER LUMIPLUS MINI V3 PROJETOR LUMIPLUS MINI V3 INSTALLATION AND MAINTENANCE MANUAL MANUEL D’INSTALLATION ET D’ENTRETIEN MANUAL DE INSTALACIÓN Y MANTENIMIENTO MANUALE DI INSTALAZIONE E MANUTENZIONE EINBAU-UND BETRIEBSANLEITUNG MANUAL DE INSTRUÇÕES E MANUTENÇÃO...
-
Page 3: Installation
ENGLISH IMPORTANT: The instruction manual you are holding includes essential information on the safety measures to be im- plemented for installation and start-up. Therefore, the installer as well as the user must read the instructions before beginning installation and start-up. Keep this manual for future reference. - Page 4 3 - Insert the cable in the piping, ease the spotlight in and turn 90º clockwise (Fig. 5). 4 - Put the face plate into place with the logo facing the top of the fixture. (Fig. 5) C) On flush wall conduits. (Fig. 2c) Recess required: 15660/15661/Accessories required: 62395/Siphon required: Yes Procedure: 1 - Place the Ø3.5 O-ring seal on the adaptor.
- Page 5 Procedure: 1 - Screw the adaptor into the nozzle. 2 - Insert the cable in the piping, ease the spotlight in and turn 90º clockwise (Fig. 5). 3 - Put face plate into place with the logo facing the top of the fixture (Fig. 5). Spas and prefabricated pools (2”...
-
Page 6: Caractéristiques Générales
FRANÇAIS IMPORTANT: le manuel d’instructions que vous avez entre les mains contient des informations de première importance sur les mesures de sécurité à adopter au moment de l’installation et de la mise en service. Il est par conséquent indis- pensable que l’installateur et l’utilisateur lisent attentivement les instructions avant de commencer le montage et la mise en marche. - Page 7 Procédure : 1- Coller la buse adaptée au type de tube. 2- Visser l’adaptateur inclus sur le projecteur. 3- Insérer le câble dans la buse, entrer le projecteur et tourner à 90º dans le sens des aiguilles d’une montre (fig. 5). 4- Placer l’enjoliveur et orienter le logotype dans la partie supérieure.
- Page 8 Procédure : 1- Visser adaptateur sur la buse. 2- Insérer le câble dans la buse, entrer le projecteur et tourner à 90º dans le sens des aiguilles d’une montre (fig. 5). 3- Placer l’enjoliveur et orienter le logotype dans la partie supérieure. (fig. 5) SPA ou Piscine préfabriquée (filetage 2”) fig.
-
Page 9: Instalación
ESPAÑOL IMPORTANTE: El manual de instrucciones que usted tiene en sus manos, contiene información fundamental acerca de las medidas de seguridad a adoptar a la hora de la instalación y la puesta en servicio. Por ello, es imprescindible que tanto el instalador como el usuario lean las instrucciones antes de pasar al montaje y la puesta en marcha. Conserve este manual para futuras consultas acerca del funcionamiento de este aparato. - Page 10 Procedimiento: 1- Encolar boquilla adecuada para el tipo de tubo. 2- Roscar adaptador incluido en el proyector. 3- Insertar el cable dentro la boquilla, entrar el proyector y girar 90º en sentido horario (Fig. 5). 4- Colocar el embellecedor y orientar el logotipo en la parte superior. (Fig. 5) C) En pasamuros frontal liso.
- Page 11 Ayudándose de una broca de vaso, realizar un agujero circular de 60 mm de diámetro en la pared. Procedimiento: 1- Roscar adaptador en la boquilla. 2- Insertar el cable dentro la boquilla, entrar el proyector y girar 90º en sentido horario (Fig. 5). 3- Colocar embellecedor y Orientar el logotipo en la parte superior.
-
Page 12: Installazione
ITALIANO IMPORTANTE: Il manuale d’istruzioni in suo possesso contiene informazioni fondamentali sulle misure di sicurezza da adottare per l’installazione e la messa in servizio. Per ciò è imprescindibile che sia l’installatore che l’utente leggano le istruzioni prima di iniziare il montaggio e la messa in servizio. Conservi questo manuale per poter consultare in futuro in merito al funzionamento di questo apparecchio. - Page 13 2- Avvitare l’adattatore incluso nel proiettore. 3- Inserire il cavo nella bocchetta, inserire e il proiettore e ruotare di 90° in senso orario (Fig. 5). 4- Montare la cornice di finitura e posizionare il logo verso l’alto. (Fig. 5) C) In raccordo passamuro frontale liscio. (Fig. 2c) Incasso richiesto: 15660 / 15661 / Accessori necessari: 62395 / È...
- Page 14 Procedura: 1- Avvitare l’adattatore alla bocchetta. 2- Inserire il cavo nella bocchetta, inserire il proiettore e ruotare di 90° in senso orario (Fig. 5). 3- Montare la cornice di finitura e posizionare il logo verso l’alto. (Fig. 5). SPA o Piscina Prefabbricata (Filetto 2”) Fig 4 Dovranno essere utilizzati i codici speciali del Proiettore Lumiplus Mini V3 per vasche SPA o piscine prefabbricate (vedere elenco nell’ultima pagina).
- Page 15 DEUTSCH WICHTIG: Das Handbuch mit den Betriebsanleitungen, das Sie in Händen halten, enthält wichtige Information über die anzuwendenden Sicherheitsmaßnahmen für die Installation und Inbetriebnahme. Es ist daher unerläßlich, daß die An- weisungen vom Installateur und vom Benutzer vor der Montage und Inbetriebnahme aufmerksam durchgelesen werden. Bewahren Sie dieses Handbuch auf, falls Sie zu einem späteren Zeitpunkt Informationen über die Funktion dieses Apparates nachschlagen möchten.
- Page 16 B) An Düse mit Gewinde G1”1/2 geklebt an Rohr Ø63. (Abb. 2b1, 2b2) Erforderlicher Einbau: 35418 für Rohr Ø63 PN-06 / 35421 für Rohr Ø63 PN-10 Benötigtes Zubehör: Keines / Siphon erforderlich: Ja Vorgehensweise: 1 - Passende Düse für den Rohrtyp ankleben. 2- Enthaltenen Adapter am Projektor anschrauben.
- Page 17 Benötigtes Zubehör: Keines / Siphon erforderlich: Ja Mit einem Bohrer ein kreisförmiges Loch mit 60 mm Durchmesser in die Wand bohren. Vorgehensweise: 1- Den Adapter an die Düse anschrauben. 2- Das Kabel in die Düse einführen, den Projektor einsetzen und um 90º im Uhrzeigersinn drehen (Abb. 5). 3- Die Blende anbringen und das Logo nach oben drehen.
- Page 18 PORTUGUÊS IMPORTANTE: O manual de instruções que você tem nas mãos contém informação fundamental sobre as medidas de segurança a tomar ao realizar a instalação e a colocação em funcionamento. Por isso, é imprescindível que tanto o ins- talador como o utilizador leiam as instruções antes de realizar a montagem e a colocação em funcionamento. Guarde este manual para futuras consultas sobre o funcionamento deste aparelho.
- Page 19 Procedimento: 1- Encaixar boquilha adequada ao tipo de tubo. 2- Enroscar o adaptador incluído no projetor. 3- Introduzir o cabo dentro da boquilha, introduzir o projetor e rodar 90º no sentido dos ponteiros do relógio (Fig. 5). 4- Colocar o embelezador e orientar o logótipo na parte superior (Fig. 5). C) Numa bucha de passagem frontal lisa (Fig.
- Page 20 2- Introduzir o cabo dentro da boquilha, introduzir o projetor e rodar 90º no sentido dos ponteiros do relógio (Fig. 5). 3- Colocar o embelezador e orientar o logótipo na parte superior (Fig. 5). Spas ou piscinas pré-fabricadas (rosca 2”) Fig. 4 Dever-se-ão utilizar os códigos especiais do projetor Lumiplus Mini V3 para spas ou piscinas pré-fabricadas (ver lista na última página).
- Page 22 FIG. 1 Ø63 PN-06 Ø63 PN-10 Ø63 PN-06 Ø63 PN-10 35421 62395 35418 Ø2 (PN-10) Ø3 (PN-06) 15658 15660 53956 15659 15661 62395 62395 Ø3,5 FIG. 2...
- Page 23 27084 15664 15665 06544 Ø60 38805 59983 53862 Ø60 FIG. 3 Ø60 FIG. 4...
- Page 24 OPEN CLOSE FIG. 5 FIG. 6 FIG. 7...
- Page 25 59971, 59972, 59975, 59976, 59979, 59980 69633, 69634, 69635, 69636, 69637, 69638 *...
- Page 26 ENGLISH Pos. Code Description Pos. Code Description 4403010060 NOZZLE REMOVER 4403010063 1 1/2" THREAD ADAPTOR 4403010064 WIRE CONNECTOR 4403010061 LUMIPLUS MINI V3 P. FACEPLATE (CONCRETE POOLS) 4403010076 TR 12X2 STUFFING BOX ASSEM- BLY COVER 4403010062 LUMIPLUS MINI V3 P. FACEPLATE INOX EFFECT (CONCRETE POOLS) 4403010065 LUMIPLUS MINI CABLE...
- Page 27 ITALIANO Pos. Codice Descrizione Pos. Codice Descrizione 4403010060 CHIAVE BOCCHETTA 4403010063 ADATTATORE AVVITABILE 1 1/2” 4403010064 CAPPUCCIO COLLEGAMENTO 4403010061 COPERCHIO LUMIPLUS MINI V3 P. CEMENTO 4403010076 GRUPPO TAPPO PREMISTOPPA TR12X2 4403010062 COPERCHIO LUMIPLUS MINI V3 P. CEMENTO INOX EFFECT 4403010065 CAVO LUMIPLUS MINI 4403010071 COPERCHIO LUMIPLUS MINI V3...
- Page 28 59973, 59974, 59977, 59978, 59981, 59982 ENGLISH Pos. Code Description Pos. Code Description 4403010060 NOZZLE REMOVER 4403010064 WIRE CONNECTOR 4403010061 LUMIPLUS MINI V3 P. FACEPLA- 4403010076 TR 12X2 STUFFING BOX TE (CONCRETE POOLS) ASSEMBLY COVER 4403010062 LUMIPLUS MINI V3 P. FACEPLATE 4403010065 LUMIPLUS MINI CABLE (CONCRETE POOLS) INOX EFFECT...
- Page 29 FRANÇAIS Pos. Code Description Pos. Code Description 4403010060 CLÉ POUR EMBOUT 4403010064 CAPUCHON BRANCHEMENT 4403010061 COUVERCLE LUMIPLUS MINI V3 4403010076 ENSEMBLE BOUCHON PRESSE- P. BÉTON ÉTOUPES TR 12X2 4403010062 COUVERCLE LUMIPLUS MINI V3 4403010065 CÂBLE LUMIPLUS MINI P. BÉTON INOX EFFECT 4411030612 ADAPTATEUR TUYAU FLEXIBLE ESPAÑOL...
- Page 30 SACOPA, S.A.U. PRODUCTS: LUMIPLUS MINI V3 SPOTLIGHT PRODUITS: PROJECTEUR LUMIPLUS MINI V3 PRODUCTOS: PROYECTOR LUMIPLUS MINI V3 PRODOTTI: PROIETTORE LUMIPLUS MINI V3 PRODUKTE: STRAHLER LUMIPLUS MINI V3 PRODUTOS: PROJETOR LUMIPLUS MINI V3 DÉCLARATION CE DE CONFORMITÉ DECLARATION CE OF CONFORMITY Les produits énumérés ci-dessus sont conformes à: The products listed above are in compliance with: La Directive de compatibilité...
- Page 31 KEY / SYMBOLOGIE / SIMBOLOGÍA / SIMBOLOGIA / SYMBOLE / SIMBOLOGIA Under no circumstances should the luminaire be stared into for one minute or more at distances equal to or less than 20 cm. Doing so could damage eyesight / Ne jamais regarder fixement le luminaire pendant plus d’une minute à...
- Page 32 1/2 “ “ Made in Spain Sacopa, S.A.U. Pol. Ind. Poliger Sud – Sector I 17854 Sant Jaume de Llierca (Spain) ASTRALPOOL Avda. Francesc Macià, 60, planta 20 08208 Sabadell (Barcelona) Spain 59971E201 info@astralpool.com Rev. 05 • We reserve to change all or part of the articles or contents of this document, without prior notice.
Need help?
Do you have a question about the LUMIPLUS MINI V3 PROJECTOR and is the answer not in the manual?
Questions and answers