Table of Contents
Advertisement
MHG
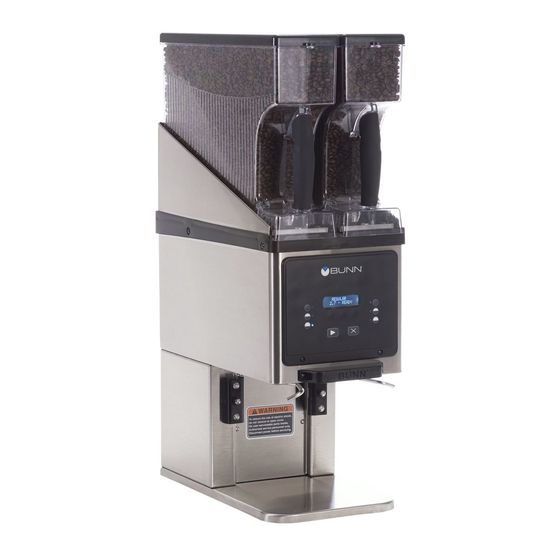
Multi-Hopper Grinder and Storage System for use with Smart Funnel
®
Models Featuring Software 101.00+
PROGRAMMING MANUAL
To ensure you have the latest revision of the Operating Manual, or to view the Illustrated Parts Catalog, Programming Manual, or
Service Manual, please visit the Bunn-O-Matic website, at www.bunn.com. This is absolutely FREE, and the quickest way to obtain
the latest catalog and manual updates. For Technical Service, contact Bunn-O-Matic Corporation at 1-800-286-6070.
Bunn-O-Matic Corporation
Post Office Box 3227, Springfield, Illinois 62708-3227
Phone (217) 529-6601 | Fax (217) 529-6644
www.bunn.com
55956.0000 B 12/19 © 2019 Bunn-O-Matic Corporation
Advertisement
Table of Contents

Subscribe to Our Youtube Channel
Related Manuals for Bunn MHG Series


Summary of Contents for Bunn MHG Series
- Page 1 To ensure you have the latest revision of the Operating Manual, or to view the Illustrated Parts Catalog, Programming Manual, or Service Manual, please visit the Bunn-O-Matic website, at www.bunn.com. This is absolutely FREE, and the quickest way to obtain the latest catalog and manual updates.
-
Page 2: Table Of Contents
CONTENTS Operating Controls ........................3 Accessing Programming ......................4 Programming Lockout........................4 Name Hopper ..........................4 Recipe Menu ..........................5 Review Recipes ..........................5 Modify Recipes ..........................5 Remove Recipes .......................... 6 Set Password ...... -
Page 3: Operating Controls
PROGRAMMING OPERATING CONTROLS (left) (right) GRIND STOP Grind Pad (a) – Pressing initiates a timed grind cycle. Stop Pad (b) – Pressing ends the operation of the grinder. Pads (c) – “Hidden” buttons used to navigate setup and programming menus. Pads (d) –... -
Page 4: Programming Lockout
6. The next screen will ask “Are you sure?”. Select YES to save the name. Note: If the hopper wasn’t named when performing this procedure, ensure the hopper is properly installed on top of the grinder as described in the Installation and Operating manual, available on the BUNN website. -
Page 5: Recipe Menu
Recipe Menu The follow outlines the navigation flow for the RECIPE sub-menus. REMOVE RECIPE REMOVE RECIPE RECIPES REVIEW RECIPES REVIEW RECIPES RECIPES REMOVE RECIPE REVIEW RECIPES RECIPES SELECT SELECT REMOVE RECIPE SELECT REVIEW RECIPES REMOVE RECIPE REVIEW R SELECT SELECT REVIEW RECIPES SELECT RECIPES... -
Page 6: Remove Recipes
RUN TIME: 10 (-) DONE (+) 9. Use the plus (+) or minus (-) buttons under the display to increase or decrease the grind time. 10. Select DONE to proceed with the changes. 3 BATCHES DONE? 11. The next screen will ask “3 BATCHES DONE?”. If so, select YES to save the changes. RUN TIME: 10 (-) DONE (+) Selecting NO will allow the operator to make more adjustments to the remaining batches... -
Page 7: Set Language
Accessing “Test Switches” will give you the option of selecting the control switches individually and displaying the switch name on the display screen for switch recognition. Pressing the right hidden button under the BUNN logo button will exit the test mode. To access Test Outputs: 1. Ensure machine is powered on. -
Page 8: Serial Asset Number
LEFT FREQUENCY LEFT FREQUENCY RIGHT FREQUENCY LEFT FREQUENCY 125.7 Khz *Adj 1 125.7 Khz Adj 1 125.7 Khz Adj 1 Test Frequency 125.7 Khz Adj 1 The menu screen is used to see and test the frequency value for the read/write coils that may or may not be on the equipment. -
Page 9: Factory Defaults
Factory Defaults This function allows the operator to reset the grinder to factory settings. To access Factory Defaults: 1. Ensure machine is powered on. 2. Access programming. 3. The first screen should read “NAME HOPPER”. Use the right hidden button to navigate to “SERVICE”. 4. - Page 10 Update USB Programming 1. Press and hold right hidden button to enter set up menus. (Reference page 10 of Installation and Operating manual.) Scroll to “REVIEW RECIPES?” screen, and push the button under “YES”. The scroll to each coffee name corresponding to the names on the hoppers being used, and press the button under “SHOW”. Record the grind times for each batch size of each coffee used, for later use.
- Page 11 COMMUNICATING WITH THE GRINDER To Write A Name To A Hopper P2822 092718...
- Page 12 COMMUNICATING WITH THE GRINDER (Continued) Timer Adjustment (Control Board) Three different batch settings are selectable for each hopper. Each batch is independently adjustable by setting the length of time a slide gate opens to allow beans to drop into the grinding chamber. A second time setting for each batch determines how long the grind motor continues to run after the slide gate closes.
- Page 13 COMMUNICATING WITH THE GRINDER (Continued) To Change Language P4339 092718...
- Page 14 COMMUNICATING WITH THE GRINDER (Continued) To Review Or Change Grind Time P4256 092718...
- Page 15 COMMUNICATING WITH THE GRINDER (Continued) To Restore Factory Defaults or Test Outputs and Switches P4257 092718...
- Page 16 COMMUNICATING WITH THE GRINDER (Continued) Resetting The Grinder Memory (To Match Chart Below) 1. Unplug grinder from the outlet. 2. Press in and hold both the STOP and GRIND buttons and plug cordset into the outlet. After a short pause, the display will show four rows of dashes.
- Page 17 COMMUNICATING WITH THE GRINDER (Continued) Entering A Coffee Name Using A Recipe Card Press the STOP button and place the chip portion of the card under the sensor coil on the front of the grinder. The LCD display will enter the RECIPE CARD menu. P2821 092718...
Need help?
Do you have a question about the MHG Series and is the answer not in the manual?
Questions and answers