Table of Contents
Advertisement
Advertisement
Table of Contents
Troubleshooting

Related Manuals for Misonix neXus


Summary of Contents for Misonix neXus
- Page 1 ® Ultrasonic Surgical Aspirator System Instructions for Use...
- Page 2 Instructions For Use – neXus Ultrasonic Surgical Aspirator Doc #: 100-10-1000 rev A...
-
Page 3: Table Of Contents
8.6 Footswitch Faults ................................... 46 8.7 Handpiece Faults ..................................47 8.8 Aspiration Troubleshooting ..............................48 8.9 Irrigation Troubleshooting ..............................48 Specifications ....................................50 Service, Repair and Technical Correspondence .......................... 51 Instructions For Use – neXus Ultrasonic Surgical Aspirator Doc #: 100-10-1000 rev A... - Page 4 Instructions For Use – neXus Ultrasonic Surgical Aspirator Doc #: 100-10-1000 rev A...
-
Page 5: General Safety Statements
Portable and mobile RF communication equipment (including peripherals such as antennas) should be no closer than 30 cm (12 inches) to any part of the neXus, including the cables supplied with the neXus Otherwise degradation of the performance of this equipment could result. - Page 6 (Table 201) The neXus Ultrasonic Surgical Aspirator System is intended for use in the electromagnetic environment specified below. The customer or the user of neXus Ultrasonic Surgical Aspirator System should ensure that it is used in such an environment. Emissions test Compliance Electromagnetic environment –...
- Page 7 The neXus Ultrasonic Surgical Aspirator System is intended for use in the electromagnetic environment specified below. The customer or the user of the neXus Ultrasonic Surgical Aspirator System should assure that it is used in such an environment. IEC 60601...
- Page 8 The neXus Ultrasonic Surgical Aspirator System is intended for use in the electromagnetic environment specified below. The customer or the user of the neXus Ultrasonic Surgical Aspirator System should assure that it is used in such an environment. Immunity test...
- Page 9 The neXus Ultrasonic Surgical Aspirator System is intended for use in an electromagnetic environment in which radiated RF disturbances are con- trolled. The customer or the user of the neXus Ultrasonic Surgical Aspirator System can help prevent electromagnetic interference by maintaining a minimum distance between portable and mobile RF communications equipment (transmitters) and the neXus Ultrasonic Surgical Aspirator System below, according to the maximum output power of the communications equipment.
-
Page 10: Electrical Safety Statement
1.2. Electrical Safety Statement The neXus Ultrasonic Surgical Aspirator System is designed and tested to comply with UL 60601-1 and EN 60601-1 WARNING The neXus Ultrasonic Surgical Aspirator System generates high voltages within the console itself and the connected handpiece. To avoid injury, the console should never be operated before ensuring that its cover is properly closed and not tampered with. -
Page 11: Summary Of Safety Notices
However, the user is advised to read the entire manual and operate the device only in accordance with all of the instructions contained herein. Servicing of this device should only be performed by qualified technicians authorized by Misonix, Inc. There are no service controls accessible to the user. -
Page 12: List Of Warnings
RF Monoplar Hand Switch cable and for monopolar cautery guidelines. The neXus Long or Short Handpieces can deliver RF energy via its attached probe tip when connected to a 3 party electrosurgical generator using the RF Monopolar Handswitch Cable accessory. Misonix recommends use of the electrosurgical generators listed in Table 4.5 of the SonaStar Long and Shot Handpiece IFU that have been validated... - Page 13 Additional external irrigation, e.g. by administering sterile saline with a syringe over the distal tip portion, may be necessary for removal of very dense, hard osseous structures of the skull, when using the neXus Ultrasonic Surgical Aspirator System accessories.
- Page 14 Additional external irrigation, e.g. by administering sterile saline with a syringe over the distal tip portion, may be necessary for removal of very dense, hard osseous structures of the skull, when using the neXus Ultrasonic Surgical Aspirator System accessories.
- Page 15 The neXus system should be fully tested and inspected prior to each procedure. The console, footswitch, handpieces, all cables and accessories should be examined for proper appearance and condition. The neXus device will alert the user if the batteries in the footswitch are low. Replace batteries immediately following the procedure. ...
-
Page 16: Explanation Of Symbols
Restricted to sale by or on the order of a physician only Lot or batch code Do Not expose to Temperatures greater than indicated Do Not expose to Humidity greater than indicated Instructions For Use – neXus Ultrasonic Surgical Aspirator Doc #: 100-10-1000 rev A p 15... - Page 17 Linear Mode Active Vacuum System On Vacuum System Off Irrigation System Lap/Endo Mode Off Lap/Endo Mode On Exit button to return to the Main screen Instructions For Use – neXus Ultrasonic Surgical Aspirator Doc #: 100-10-1000 rev A p 16...
- Page 18 Resume Prime Irrigation Skip Priming Cycle Handpiece Not Connected Handpiece Connected Tubeset Not Connected Tubeset Connected Irrigation Pump Door Open Irrigation Pump Door Closed Settings Instructions For Use – neXus Ultrasonic Surgical Aspirator Doc #: 100-10-1000 rev A p 17...
-
Page 19: Indications And Contraindications
2. Indications and Contraindications 2.1. Indications for Use The Misonix Inc. neXus® Ultrasonic Surgical Aspirator System is intended for the fragmentation, emulsification and aspiration of both soft and hard (i.e.bone) tissue. The indications for use for the Standard Handpiece in combination with BoneScalpel®... -
Page 20: Intended Use Environment
Operating room environment 2.3. Contraindications 2.2.1 The neXus Ultrasonic Surgical Aspirator System probe tips are not indicated for and should not be used for direct contact with cardiac tissue (direct cardiac application). 2.2.2 The irrigation pump is not indicated for and should not be used for the administration of parenteral fluids, infusion of drugs, or for any life sustaining purposes. -
Page 21: Considerations During Clinical Use
4. Considerations During Clinical Use WARNING The neXus Ultrasonic Surgical Aspirator System and its accessories may emit harmful acoustic pressure if exposure exceeds recommended limits. Refer to Section 3 for exposure limits. WARNING Contact to vibrating elements like extension and ultrasonic tip may cause burns and should be avoided by all means. - Page 22 Additional external irrigation, e.g. by administering sterile saline with a syringe over the distal tip portion, may be necessary for removal of very dense, hard osseous structures of the skull, when using the neXus Ultrasonic Surgical Aspirator System accessories. CAUTION Ultrasonic energy is inhibited if excessive physical force is applied to the ultrasonic tip;...
-
Page 23: Wound Debridement Applications / Use (E.g. Sonicone Applications)
A lower amplitude setting in combination with higher irrigation would reduce the potential for tissue necrosis. • The various disposable attachments (i.e. aspiration probes, etc…) are considered the applied part. Instructions For Use – neXus Ultrasonic Surgical Aspirator Doc #: 100-10-1000 rev A p 22... -
Page 24: System Overview
Principle of Operation The neXus Ultrasonic Surgical Aspirator System is comprised of a generator which converts mains voltage and frequency to a 22.5 kHz (Standard Handpiece) or 23.0 kHz (SonaStar Short & Long Handpiece) electrical signal depending upon the handpiece and accessories that are connected to the console. -
Page 25: Console Setup And Use
Power Cord U.S.A. & Mexico WARNING The neXus console automatically adjusts for the mains voltage and frequency. Confirm that the correct fuses are being used. Refer to section 10 in instructions for fuse replacement. Care should be taken to stay within the general operating conditions. -
Page 26: Initial Setup
CAUTION Do not transport the neXus console with the IF bag attached to the IV pole. 6.2.5 Obtain the wireless footswitch and place it in the vicinity of the console. NOTE: The wireless footswitch is factory paired to the console. Confirmation that the footswitch is communicating to the console can be found in section 6.4.6. -
Page 27: Power Up And Setup
The Startup Screen is the first thing you see upon power up. This screen will progress to the Setup Screen within 5 seconds (see section 6.12 for powering down). Figure 6.3.1 Startup Screen Instructions For Use – neXus Ultrasonic Surgical Aspirator Doc #: 100-10-1000 rev A p 26... - Page 28 The handpiece receptacle will turn from blue to green and the User Screen will check the handpiece graphics box to indicate the handpiece is correctly connected. The handpiece connection allows the neXus console to differentiate between universal handpieces and SonaStar handpieces automatically.
-
Page 29: Tubing Connection
Incorrect routing of irrigation tubing will result in no flow of irrigation solution to the tip; this may cause damage to the handpiece. Figure 6.4.1.1 Standard Handpiece Tubing Connected Figure 6.4.1.2 Long & Short Handpiece Tubing Connected Instructions For Use – neXus Ultrasonic Surgical Aspirator Doc #: 100-10-1000 rev A p 28... - Page 30 Do not pinch the soft silicone tube when the latch is locked. o Do not pinch barb fittings when closing the latch. 6.4.2.2 Aspiration Tubing Installation Instructions For Use – neXus Ultrasonic Surgical Aspirator Doc #: 100-10-1000 rev A p 29...
-
Page 31: Handpiece Assembly & Disassembly
Use caution when assembling components. 6.5 Handpiece Assembly & Disassembly See separate Handpiece IFU’s: Sonastar IFU 100-24-1000 Standard Handpiece IFU 100-21-1000 Instructions For Use – neXus Ultrasonic Surgical Aspirator Doc #: 100-10-1000 rev A p 30... -
Page 32: Priming Irrigation Tubing
Skips priming cycle. Caution: Irrigation tubing needs to be primed prior to use. Not doing so can damage the probe/tip Figure 6.6.3 Priming Button Definitions Instructions For Use – neXus Ultrasonic Surgical Aspirator Doc #: 100-10-1000 rev A p 31... -
Page 33: Main Screen With A Standard Handpiece (E.g. Bonescalpel Or Sonicone)
The default amplitude. The default setting is 70%. setting for amplitude is 70. Green Ready Status Bar Figure 6.4.2 Main Screen with Standard Handpiece Connected Instructions For Use – neXus Ultrasonic Surgical Aspirator Doc #: 100-10-1000 rev A p 32... - Page 34 2. Touching the slider bar icon and moving right to left, while remaining contact with the screen 3. Touching a single point along the scale bar, resulting in a direct adjustment to that position Instructions For Use – neXus Ultrasonic Surgical Aspirator Doc #: 100-10-1000 rev A...
-
Page 35: Main Screen With A Sonastar Handpiece (E.g. Sonastar Short Or Sonastar Long)
The aspiration can be set between o and 100. Press + to increase and - to decrease the aspiration. The default setting is 50%. Green Ready Status Bar Instructions For Use – neXus Ultrasonic Surgical Aspirator Doc #: 100-10-1000 rev A p 34... - Page 36 (Standby mode), the system will go into a Suspend Mode in which aspiration is not active. The aspiration feature can be re-activated by depressing any footswitch pedal. Instructions For Use – neXus Ultrasonic Surgical Aspirator Doc #: 100-10-1000 rev A...
-
Page 37: Mode Selection & Functionality
System Check After preparing the system for use, a System Check should be performed prior to use ensuring proper functionality. Upon success completion of the System check, as described below, the neXus Ultrasonic Surgical Aspirator System is now ready for use. -
Page 38: Footswitch Connectivity & Functionality
Low Footswitch Battery. ON-SCREEN NOTIFICATION Caution: Change batteries immediately following procedure FOOTSWITCH Footswitch NOT Communicating with Console. CONNECTION LOST ON-SCREEN Bring footswitch closer to the console. NOTIFICATION Instructions For Use – neXus Ultrasonic Surgical Aspirator Doc #: 100-10-1000 rev A p 37... - Page 39 6.11.3 Pairing the Footswitch to the Console The nexus footswitch is paired to the console prior to delivery to the end customer. If a replacement footswitch is required, the following 5 steps are required to pair the footswitch to the console.
- Page 40 Step 5: Verify that the footswitch is connected to the console by depressing footpedal. The footswitch icon shall turn green when the footpedal is depressed Instructions For Use – neXus Ultrasonic Surgical Aspirator Doc #: 100-10-1000 rev A p 39...
-
Page 41: Powering Down The Console
Powering Down the Console The neXus console can be placed into “Power Standby” by pressing and holding the soft power button on the front panel. In this mode, the screen is turned off and power is in standby. Pressing again “wakes up” the display and starts the setup sequence. If the device is already setup, the Main screen shall appear. -
Page 42: Cleaning Console
7. Cleaning Console Follow manufacturer’s directions for preparing solutions. Misonix recommends the use of EPA certified CaviWipes® or equivalent quaternary ammonium compound surface disinfectant wipe. Please follow manufacturer’s instructions for surface cleaning and disinfection of hard non-porous surfaces, including, without limitation, the use of personal Protection Equipment (PPE) for Bloodborne Pathogens. -
Page 43: Faults, Indicators & Troubleshooting
Footswitch Faults Handpiece Faults Faults on the neXus system can result in a notification, allowing for correction and dismissal. Or, faults can require a system reset. CAUTION Improper use or adjustment of this device may invalidate the Misonix, Inc. Warranty agreement. -
Page 44: Electrical Faults
WARNING If a Mains Power fuse fails after replacement when the unit is reactivated, discontinue use of the device and contact an authorized Misonix representative. Instructions For Use – neXus Ultrasonic Surgical Aspirator Doc #: 100-10-1000 rev A p 43... -
Page 45: Mechanical Faults
Defective Handpiece If corrective action steps above are followed and fault continues, the handpiece may need to be replaced. Table 8.2: Frequency Fault Notification Instructions For Use – neXus Ultrasonic Surgical Aspirator Doc #: 100-10-1000 rev A p 44... -
Page 46: Power Supply Faults
Press the System Reset Button and try again. If corrective action steps above are followed and fault continues, the console may need to be replaced. Table 8.4: Communication Faults Instructions For Use – neXus Ultrasonic Surgical Aspirator Doc #: 100-10-1000 rev A p 45... -
Page 47: Temperature Faults
Main screen. Possible Cause Corrective Action Low battery Press the Exit Button and continue procedure. Replace battery immediately following the procedure. Table 8.6.1: Low Battery Notification Instructions For Use – neXus Ultrasonic Surgical Aspirator Doc #: 100-10-1000 rev A p 46... -
Page 48: Handpiece Faults
8.6.2 Footswitch Connection Lost Notification The footswitch for the neXus console uses wireless RF technology. If the wireless connectivity is lost, the console will display a fault notification. As a result, the console functionality will be disabled. Fault Type Fault Screen... -
Page 49: Aspiration Troubleshooting
Set ultrasound to STANDBY. Open pump cover. Check if pump rollers are rotating when depressing footswitch. Replace console if they don’t. Table 8.9: Troubleshooting – Insufficient Irrigation Instructions For Use – neXus Ultrasonic Surgical Aspirator Doc #: 100-10-1000 rev A p 48... - Page 50 Do not operate pump with pump cover in raised position. Rollers might pinch loose clothing or fingers. Personal injuries may result. For all other malfunctions please contact Misonix or a Misonix authorized representative for service. Instructions For Use – neXus Ultrasonic Surgical Aspirator...
-
Page 51: Specifications
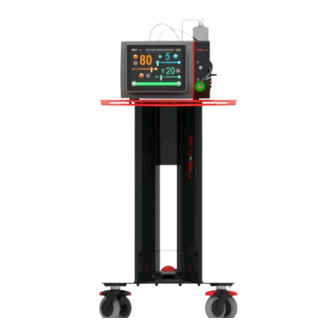
51.5” H x 25.5” W x 27.5” D | 1308mm H x 648 mm W x 699mm D Dimensions – Console w/Cart 95 lbs | 43.1 kg Weight – Console w/Cart Table 9.1 Console specifications Instructions For Use – neXus Ultrasonic Surgical Aspirator Doc #: 100-10-1000 rev A p 50... -
Page 52: Service, Repair And Technical Correspondence
Never pull on the power cord to remove it from the receptacle. WARNING The neXus console automatically adjusts for the mains voltage and frequency. Confirm that the correct fuses are being used. Refer to section 10 in instructions for fuse replacement. - Page 53 Replace Fuses and reinsert holder into socket Connect power cord to neXus Splash screen shall appear followed by the setup screen the rear of the console Table 10.2 Console Fuse Replacement Instructions For Use – neXus Ultrasonic Surgical Aspirator Doc #: 100-10-1000 rev A...
- Page 54 10.2.1 Periodic Maintenance CAUTION: All periodic maintenance is to be performed by the hospital’s technical staff, trained OR staff member or by a Misonix Inc authorized technical personnel. Under normal conditions, the filter should be changed at 6-month intervals. 10.2.2 Replacing the External Filter Disconnect the aspiration line from the filter.
- Page 55 11. Repair, Service and Replacement Parts All requests for repairs and replacement parts should be directed to Misonix or an authorized Misonix representative. Always provide model and serial number of malfunctioning items. When returning items include model, serial and RMA number as well as purchase order number on all documents. Always prepay return shipping and specify method of shipment.
- Page 56 1938 New Highway Farmingdale, NY 11735 By returning any material to Misonix, Inc. the customer or the customer’s agent must certify that any and all materials so returned are or have been rendered free of any hazardous or noxious matter or radioactive contamination and are safe for handling under normal repair shop conditions.
Need help?
Do you have a question about the neXus and is the answer not in the manual?
Questions and answers