Table of Contents
Advertisement
Advertisement
Table of Contents

Related Manuals for VTech Kidizoom Action Cam HD


Summary of Contents for VTech Kidizoom Action Cam HD
- Page 1 Parent’s Guide 91-003673-006...
-
Page 3: Included In This Package
INTRODUCTION Capture videos and photos of all your adventures with the Kidizoom ® Action Cam HD by VTech . Built with you in mind, the Action Cam HD ® can go anywhere you do with two included mounts so you can attach it to a bike, skateboard and more. - Page 4 Action Cam HD Waterproof Case Camera Holder Kidizoom ® Bike Mount Mounting Attachment Adhesive Flat Mount Wide Angle Lens micro-USB Cable Wrist Strap* Floating Mount Note: The metallic coating part on Kidizoom Action Cam HD is ® insulating. *Wrist Strap must be removed from the Action Cam HD before putting into the waterproof case to avoid water leaking!
- Page 5 WARNING: All packing materials such as tape, plastic sheets, packaging locks, removable tags, cable ties and packaging screws are not part of this toy and should be discarded for your child’s safety. NOTE: Please keep this parent’s guide as it contains important information.
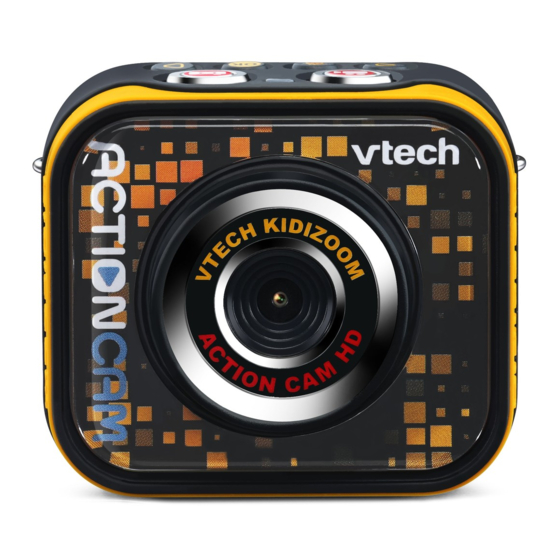
- Page 6 PRODUCT LAYOUT AND BUTTONS K I D I Z O O M A C T I O N C A M H D...
- Page 7 Master Power Switch When the switch is set to 0 , the unit is disconnected from the battery and the battery will not charge. Move the switch to 1 connect the unit to the battery and allow it to be recharged. Note: It is not necessary to move the switch to the off position when the camera is in daily use.
-
Page 8: Product Specification
PRODUCT SPECIFICATION Display 1.8” colour LCD Language Multilingual (US English, UK English, Deutsch, Español, Français, Nederlands) Photo Resolution 1280 X 720 (HD) - does not support photo effects. 640 X 480 (SD) Video Resolution 1280 X 720 (HD) - does not support video effects, and only available when using a memory card 320 X 240 (240p) - Page 9 Optimum 32°F - 104°F (0°C to 40°C) Operating and Charging Temperature Important Note: • The camera itself is not waterproof. It should be correctly inserted into the included waterproof case for underwater use. Read through the details and instructions about the waterproof case before using. •...
-
Page 10: Getting Started
GETTING STARTED When you use Kidizoom Action Cam ® HD for the first time, you will need to switch the master power switch to on. Locate the master power switch on the bottom of the camera, then move it to the 1 position When the camera is switched off, it will not be possible to charge the camera or... -
Page 11: Automatic Shut-Off
BATTERY LIFE Like with other electronic devices, more frequent usage means the battery will drain more quickly. Some activities will be more demanding on the battery, such as photo and video taking. For continuous photo or video taking, the battery will last for approximately 2.5 hours. For typical usage, the battery will last around a day. - Page 12 • Keep the battery out of the reach of children. • Keep the battery dry. • Examine the battery charging cord periodically for conditions that may result in the risk of fire, electric shock, or injury to persons (such as damage to the output cord, housing, or other parts) and that, in an event of such conditions, the battery charging cord should not be used until properly repaired or replaced.
-
Page 13: Memory Card Installation
MEMORY CARD INSTALLATION Action Cam HD is compatible with microSD/microSDHC Kidizoom ® memory cards up to 32 GB. • Make sure the camera is turned off. • Locate the memory card slot at the side of the camera. • Pull up the rubber cover. •... -
Page 14: Take Photos
TO BEGIN USING KIDIZOOM ® ACTION CAM HD Make sure the master power switch is in the 1 position and charge the camera first before using. Note: It is not necessary to move the master power switch to off when used daily. - Page 15 Note: VTech ® camera is mounted for sports, such as on a bike or skateboard. Please refer to the Settings section of this guide to enable the camera screen auto-off function. Home menu...
- Page 16 A USB port is usually marked with this symbol: • You will see a removable drive called VTech 5202, please use this to transfer files to and from the camera. There is another removable drive called VT SYSTEM, which is for the storage of system data only.
- Page 17 The self-timer will be set to off automatically every time the camera is switched off. recommends setting the screen to auto-off when the Note: VTech ® camera is mounted for sports, such as on a bike or skateboard. Please refer to the Settings section of this guide to enable the camera screen auto-off function.
- Page 18 • Press the left or right buttons to cycle through different video themes and effects. If you are using a memory card, you can select to record a HD video. Self-timer • Turn the self-timer function on in the settings menu to allow a countdown period before the video starts recording.
-
Page 19: Slow Motion Video
Action Videos Select the Action Videos icon from the Home Menu to take stop motion, fast motion, slow motion or reverse videos. Press left or right buttons to select the mode you would like to use and press the OK Button to confirm. -
Page 20: Reverse Video
• In the preview screen, press the OK Button to start and stop recording, the video will take some time to save. When you see the play icon, you can review the video immediately or you can watch it later in Gallery. Reverse Video The recorded video will be saved in reverse. - Page 21 Move the camera physically to control the target frame. Point to the waste and press the OK button to collect it. 3. Skate Challenge Let’s go on a skateboarding adventure! Avoid the obstacles and collect flags during your trip! Press the left and right buttons to control the character, avoiding obstacles and collecting flags along the way! Settings...
- Page 22 OK button to confirm. If it is turned on, the screen will automatically turn off after a certain amount of time in Camera mode, Video mode or Time-Lapse mode. Note: For safety, VTech highly recommends setting the screen to ®...
- Page 23 Note: Please leave your camera set to the default value unless you are travelling. For most cases, the frequency of EU is set to 50 Hz and that of US is set to 60 Hz. If you still see flickering in the preview screen, please try another setting.
-
Page 24: Care And Maintenance
CARE & MAINTENANCE • Keep the rubber cover of the micro-USB port and memory card slot tightly closed while it is not in use in order to prevent dust or water from getting into it. • Keep the camera clean by wiping it with a slightly damp cloth. •... -
Page 25: Troubleshooting
TROUBLESHOOTING Go through this section if you experience difficulty in operating Kidizoom Action Cam HD. ® Problem Solution 1. Turn the master power switch off for 30 seconds. 2. Turn the master power switch on again and then press the home button to turn it on. - Page 26 I have purchased a Kidizoom Action Cam HD, but it will not work ® with my PC, my PC is looking for a driver. I have searched the internet and cannot find a VTech Action Cam HD driver. What Kidizoom ®...
- Page 27 storage device driver may be available. Again, please check with your PC manufacturer. Question 2: What is the ISO value (light sensitivity) of the Kidizoom Action Cam ® Answer: The Kidizoom Action Cam HD uses an auto-ISO value. It auto ®...
- Page 28 Answer: If you connect Kidizoom Action Cam HD to your computer and ® access it as an external drive, you can select multiple pictures to delete at any one time. Question 7: If you accidentally delete the pictures by reformatting, is there any way to get them back? Answer: Unfortunately, if you delete the pictures by formatting the internal...
- Page 29 KIDIZOOM ® ACTION CAM HD ACCESSORIES Waterproof Case Camera button Video button Strap hook Strap hook Buckle handle Mic hole Case body Tripod / bike mount screw hole Left button Right button Home (On/Off) OK button button Buckle Screw Screw Floating handle Angle adjustment...
- Page 30 Insert the camera into the waterproof case 1. Be sure you have inspected the O-ring (refer to the later section for details about inspecting the O-ring) and checked for water leaks before inserting the camera. 2. To avoid water leaking, if you have attached a wrist strap to the camera, you must detach it before inserting the camera to this unit.
- Page 31 5. Close the case cover and the buckle to hold the cover in position. Push the buckle handle towards the case body to tighten the buckle. 6. Mount the waterproof case onto the Floating mount. Align the tripod screw hole on the waterproof case to the screw of the Floating mount.
- Page 32 • Do not throw this unit into the water. • Do not leave this unit under direct sunlight or in a very hot and humid place for a long period of time. If you cannot avoid leaving this unit under direct sunlight, be sure to cover it with a towel or other protection.
- Page 33 Perform the above maintenance each time you use this unit. In the unlikely event that a malfunction of this unit causes damage due to water leakage, VTech does not guarantee against damage to the ® equipment contained in it (camera, battery pack, etc.) and the recorded...
-
Page 34: Wide Angle Lens
Wide Angle Lens With the Wide Angle Lens installed on Kidizoom Action Cam HD, ® you can take photos or videos with a wider view. Install the Wide Angle Lens to the Action Cam HD 1. Align the Wide Angle Lens to the Camera Lens of the Action Cam 2. - Page 35 Bike Mount / Adhesive Mount / Camera Holder Camera Holder Bike mount Adhesive mount (mounting attachment + adhesive flat mount) Screw Detachable buckle...
- Page 36 QUICK SETUP GUIDE Make Kidizoom Action Cam HD ready to be mounted ® Insert your Kidizoom Action Cam HD into the camera holder / ® waterproof case if you would like to attach it to the bike mount or adhesive mount. To insert Kidizoom Action Cam HD into the holder, align the camera ®...
- Page 37 3. Pull out the handle as illustrated. 4. Attach the head tube clamp onto the head tube of the bike. Note: It is recommended to mount the camera on the head tube of the bike instead of the handle bar as illustrated. 5.
- Page 38 7. The camera is affixed on the bike and ready for use. Loosen the angle adjustment handle and you can rotate the angle adjustment arm to adjust the capture angle. 8. Tighten the angle adjustment handle after you have set the capture angle.
- Page 39 5. It is recommended that the adhesive flat mount stay on the surface at room temperature for 1 day before using to allow the ultimate strength to be achieved. At room temperature, approximately 50% of the ultimate strength will be achieved after 20 minutes, 90% after 24 hours and 100% after 72 hours.
- Page 40 Suggested usages for Kidizoom Action Cam HD ® Normal Outdoor Photo taking Bike / Scooter Ride Recording Skateboard Ride Recording Underwater Recording *Wrist Strap must be removed from the Action Cam HD before putting into the waterproof case to avoid water leaking!
- Page 41 WRIST STRAP ATTACHMENT INSTRUCTIONS Wrist Strap must be removed from the Action Cam HD before putting into the waterproof case to avoid water leaking! Step 1: Locate the thread loop on the end of the strap. Insert it into the groove behind the bar and then push it through. Step 2: Feed the end of the strap up through the loop and pull it all the way through.
-
Page 42: Consumer Services
Read our complete warranty policy online at vtech.co.uk/warranty. Australian Customers: VTECH ELECTRONICS (AUSTRALIA) PTY LIMITED – CONSUMER GUARANTEES Under the Australian Consumer Law, a number of consumer guarantees apply to goods and services supplied by VTech Electronics (Australia) Pty Limited. Please refer to vtech.com.au/consumerguarantees for further information. - Page 43 Visit our website for more information about our products, downloads, resources and more. www.vtech.co.uk www.vtech.com.au TM & © 2019 VTech Holdings Limited. All rights reserved. Printed in China. 91-003673-006 UK...
Need help?
Do you have a question about the Kidizoom Action Cam HD and is the answer not in the manual?
Questions and answers