Table of Contents
Advertisement
Advertisement
Table of Contents

Subscribe to Our Youtube Channel
Related Manuals for ZOJE 9610


Summary of Contents for ZOJE 9610
- Page 2 2016 01 Notes for using this operation manual and parts book 1 This book is applicable to sewing machines which have the same plate number as shown on the cover of this book 2 This book was prepared based on information available in January 2016 3 Parts ares subject to changes in design without prior notice.
- Page 3 … … … … … … … … … … … … … … … … … … … … … … … … … … … 7 - 1 7.01 7.01 9610 9610 …………………………………………………………7 - 1 …………………………………………………………7 - 1 7.02...
- Page 4 9.03.04 在 9620机型上针的上升,旋梭到针的距离,针的高度和护针器…………9 - 5 9.03.05 在9610S和9610机型上针的上升,旋梭到针的距离,针的高度和 护针器…………………………………………………………………………9 - 7 9.03.06 在 9620机型上从垂直于缝纫方向看机针的位置 ………………………9 - 9 9.03.07 在 9610机型上从垂直于缝纫方向看机针的位置……………………… 9 - 10 9.03.08 开梭器的高度和行程 ………………………………………………………9 - 11 9.03.09 在 9620机型上进给轮高度的调整 ………………………………………9 - 12 9.03.10 在 9610机型上进给轮高度的调整 ………………………………………9 - 13 9.03.11 线迹长度控制的偏心度调整...
- Page 5 ) ……………………………………………… 9 - 40 9.05 9.05 -D3 ………………………………………………………… 9 - 41 -D3 ………………………………………………………… 9 - 41 9.05.01 9.05.01 ( ( 9610 9610 ) …………………………… 9 - 41 ) …………………………… 9 - 41 9.05.02 9.05.02 ………………………………………… 9 - 42 ………………………………………… 9 - 42 9.05.03 9.05.03...
- Page 6 …………………………………………………………………… …………………………………………………………………… Preparation 7 - 1 7 - 1 7.01 7.01 Inserting needle on model 9610 ……………………………… Inserting needle on model 9610 ……………………………… 7 - 1 7 - 1 7.02 7.02 Inserting the needle on model 9620 ………………………………………… Inserting the needle on model 9620 …………………………………………...
- Page 7 9.03.06 9.03.06 9 - 9 9 - 9 9.03.07 9.03.07 Needle position crosswise to sewing direction on the 9610…………………… Needle position crosswise to sewing direction on the 9610…………………… 9 - 10 9 - 10 9.03.08 9.03.08 Height and stroke of the bobbin case opener …………………………………...
- Page 8 9.03.22 Thread check spring (9610) … … … … … … … … … … … … … … … … Thread check spring (9610) … … … … … … … … … … … … … … … …...
- Page 9 Safety Safety Safety Safety 1.01 1.01 Safety symbols Safety symbols Danger! Danger! Points to be observed Points to be observed Danger of injury for operating and Danger of injury for operating and specialist personnel specialist personnel Caution Caution , , ,...
- Page 10 Safety Safety 1.03 1.03 Danger Danger , , , , 、 、 A working area of 1 meter is to be kept free both in front of and behind A working area of 1 meter is to be kept free both in front of and behind the machine in operation so that the machine is always easily the machine in operation so that the machine is always easily accessible.
- Page 11 Safety Safety Switch the machine off before tilting it backwards! Switch the machine off before tilting it backwards! Danger of injury if the machine is started accidentally! Danger of injury if the machine is started accidentally! Do not operate the machine wihout its take-up-lever guard ! 3 Do not operate the machine wihout its take-up-lever guard ! 3 Danger of injury due to the motion of the take-up lever! Danger of injury due to the motion of the take-up lever!
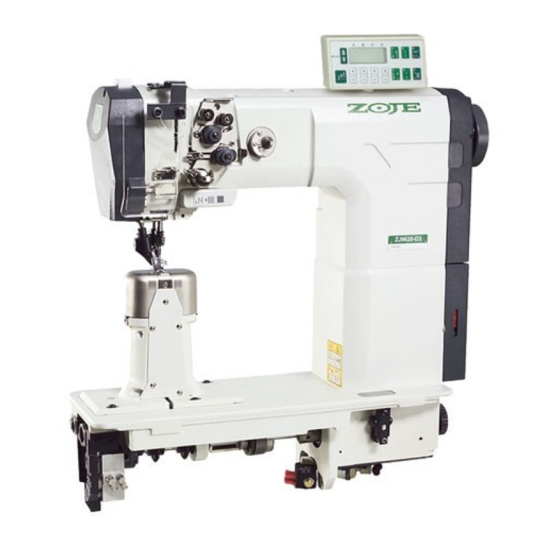
- Page 12 , 、 、 Is a double-needle, high-speed post bed sewing Is a double-needle, high-speed post bed sewing machine with driven feed wheel and roller presser. machine with driven feed wheel and roller presser. 9610 9610 、 、 , , 、...
- Page 13 9610 9610 2400 2400 79 dB(A) 79 dB(A) …………………………… … …………………………… … ≤ ≤ ■ ■ 9610 at a speed of 2400spm 9610 at a speed of 2400spm 79 dB(A) 79 dB(A) 9620 9620 1600 1600 ………………………………… ………………………………… ≤ ≤...
- Page 14 Specifications Specifications 3.02 3.02 Needles and threads Needles and threads (Nm) (Nm) 9620 9620 9610 9610 1/100mm 1/100mm 40/3 134-35 90 14 120 14 15/3 134-35 Thread thickness Thread thickness Needle Needle 9620 9620 9610 9610 (Nm) max. (Nm) max.
- Page 15 Explanation of symbols Explanation of symbols Explanation of symbols Explanation of symbols , , In this Instruction Manual, work to be carried out or important information In this Instruction Manual, work to be carried out or important information is accentuated by symbols which have the following meanings: is accentuated by symbols which have the following meanings: ,...
- Page 16 Controls Controls 5.01 5.01 ( ( ) ) Keys on the machine head (only for machines with-D3 9610 ) S Keys on the machine head (only for machines with-D3 9610 ) S , , , , , , As long as key...
- Page 17 Controls Controls 5.03 5.03 Pedal Pedal Neutral position Neutral position Sewing Sewing ( ( 、 9610S 、 9610S ) ) .... Raiser roller presser(on machines with- Raiser roller presser(on machines with- 、 9610S 、 9610S ) ) -D.. -D.. Trim sewing threads (on machines with-D..) Trim sewing threads (on machines with-D..) 5.04...
- Page 18 Controls Controls 5.06 5.06 Key for setting stitch length Key for setting stitch length ( ( 7.08 7.08 ) ) The stitch length is set by pressing key 1 The stitch length is set by pressing key 1 and turning the balance wheel (see and turning the balance wheel (see Chapter 7.08 Setting the stitch length Chapter 7.08 Setting the stitch length...
- Page 19 Installation and commissioning Installation and commissioning Installation and comminssioning Installation and comminssioning The machine must only be installed and commissioned by qualified The machine must only be installed and commissioned by qualified personnel! personnel! All relevant safety regulations must be strictly adhered to! All relevant safety regulations must be strictly adhered to! ,...
- Page 20 Installation and commissioning Installation and commissioning 6.02 6.02 Fitting the reel stand Fitting the reel stand ● ● 。 。 ● Fit the reel stand as shown in Fig. ● Fit the reel stand as shown in Fig. 6.03 6.03 Maschine ausschalten! Maschine ausschalten! Verletzungsgefahr durch unbeasichtigtes...
- Page 21 Installation and commissioning Installation and commissioning 6.02 6.02 Fitting the reel stand Fitting the reel stand ● ● 。 。 ● ● 。 。 ● Fit the reel stand as shown in Fig. ● Fit the reel stand as shown in Fig. ●...
-
Page 22: Installation And Commissioning
安装和试车 Installation and commissioning 试车 6.04 Commissioning ● 检查机器是否有损坏,特别是电缆线有无损坏。 ● 彻底清洁机器,然后涂油或加油(请参见第11章“维护与保养”) ● 由专业人员检查。机器的电动机是否允许用已有的电源电压驱动,电动机是 否正确地在接线盒里接线。在任何有出入的情况下,决不许开车。 ● Check the machine, particularly the electrical wiring for any damage. ● Clean the machine thoroughtly and then oil it or fill oil in (see Chapter 11 Care and maintenance). - Page 23 安装和试车 Installation and commissioning 台板开槽部位尺寸 6.06 Tilted work base 安装台板 6.07 Mounting the table top...
- Page 24 7.01 7.01 9610 9610 Inserting needle on model 9610 Inserting needle on model 9610 Switch the machine off! Danger of injury if the machine is started Switch the machine off! Danger of injury if the machine is started accidentally!
- Page 25 Preparation Preparation 7.02 7.02 9620 9620 Inserting the needle on model 9620 Inserting the needle on model 9620 Switch the machine off! Danger of injury if the machine Switch the machine off! Danger of injury if the machine is started accidentally ! is started accidentally ! 134-35 134-35...
- Page 26 Preparation Preparation 7.03 7.03 Winding the bobbin thread; adjusting the primary thread tension 9-03 9-03 , , 3 , 3 , Place an empty bobbin Place an empty bobbin into bobbin winder spindle . into bobbin winder spindle . Thread the bobbin as shown in Thread the bobbin as shown in Fig.
- Page 27 机器准备 Preparation 取出/装入梭壳 7.04 Removing/Inserting the bobbin case 关闭机器电源! 有被机器意外地起动伤害的危险! Switch the machine off! Danger of injury if the machine is started accidentally ! 取出梭壳: Removing the bobbin case: ● 打开柱式底板帽。 ● 抬起梭门闩1并取出梭壳2。 ● Open the post cap. ● Raise latch 1 and remove bobbin case 2. 装入梭壳:...
- Page 28 9610 9610 Threading the needle thread and regulating its tension on Threading the needle thread and regulating its tension on model 9610. model 9610. Switch the machine off! Switch the machine off! Danger of injury if the machine is started accidentally!
- Page 29 Preparation Preparation 7.07 7.07 9620 9620 Threading the needle thread and regulating its tension on Threading the needle thread and regulating its tension on model 9620 model 9620 Switch the machine off! Switch the machine off! Danger of injury if the machine is started accidentally! Danger of injury if the machine is started accidentally! ,...
- Page 30 Preparation Preparation 7.08 7.08 Setting the stitch length Setting the stitch length , , Press key Press key and at the same time turn the balance wheel until the and at the same time turn the balance wheel until the stitch setter clicks into position.
- Page 31 Care and Maintenance Care and Maintenance Care and Maintenance Care and Maintenance ………………………………………… ………………………………………… , , , , ( ( ) ………………………………… ) ………………………………… , , ……………………………………………………… ……………………………………………………… , , …………………………………………………………… …………………………………………………………… ……………………………………………… ……………………………………………… , , ……………………………………… ……………………………………… Clean Clean ……………………………...
- Page 32 Care and Maintenance Care and Maintenance 8.02 8.02 Clean the air filter of the air-filter/lubricator Clean the air filter of the air-filter/lubricator Switch the machine off! Switch the machine off! Disconnect the air hose at the air-filter/lubricator. Disconnect the air hose at the air-filter/lubricator. Draining water bowl Draining water bowl ,...
- Page 33 Care and Maintenance Care and Maintenance , , , , , , Bring the needle bar to its highest position. Bring the needle bar to its highest position. Open the post cap and remove the bobbin case Open the post cap and remove the bobbin case cap and the bobbin.
- Page 34 Care and Maintenance Care and Maintenance 8.05 8.05 Oil bowl for hook lubrication Oil bowl for hook lubrication Check the oil level before each use. Check the oil level before each use. There must always be oil in reservoir . 1 There must always be oil in reservoir .
- Page 35 Care and Maintenance Care and Maintenance 8.07 8.07 Lubricating the bevel gears Lubricating the bevel gears Switch the machine off! Switch the machine off! Danger of injury if the machine is started accidentally! Danger of injury if the machine is started accidentally! All bevel gears must be supplied with new grease once a year.
- Page 36 Adjustment Adjustment Adjustment Adjustment Unless stated otherwise, during all adjustment work the machine must be Unless stated otherwise, during all adjustment work the machine must be disconnected from electric and pneumatic power supply! disconnected from electric and pneumatic power supply! Danger of injury if the machine is started accidentally! Danger of injury if the machine is started accidentally! 9.01...
- Page 37 9.03 Adjusting the basic machine Adjusting the basic machine 9.03.01 9.03.01 9610 9610 Needle position in sewing direction on the 9610 , , , , Requirement Requirement With the stitch length set at its minimum, the needle should be positioned With the stitch length set at its minimum, the needle should be positioned in the centre of the needle hole, as seen in the direction of sewing.
- Page 38 Adjustment Adjustment 9.03.02 9.03.02 9620 9620 Neelde position in sewing direction on the 9620 Neelde position in sewing direction on the 9620 , , Requirement Requirement The needle should be positioned in the centre of the needle hole as seen The needle should be positioned in the centre of the needle hole as seen in the direction of sewing.
- Page 39 Adjustment Adjustment 9.03.03 9.03.03 Prelininary adjustment of the needle height Prelininary adjustment of the needle height , , 21 mm 21 mm Requirement Requirement When the needle bar is at top dead centre, there must be a clearance When the needle bar is at top dead centre, there must be a clearance of approx.
- Page 40 Adjustment Adjustment 9.03.04 9.03.04 9620 9620 , , , , Needle rise, hook clearance, needle height and needle guard Needle rise, hook clearance, needle height and needle guard on the 9620 on the 9620 , , 2.0 mm 2.0 mm ,...
- Page 41 Adjustment Adjustment 1 2 3 4 5 6 7 1 2 3 4 5 6 7 , , , , , , , , , , 2.0 mm 2.0 mm , , , , , , , , , , (...
- Page 42 9.03.05 9610 9610 , , , , Needle rise, hook clearance, needle height and needle guard Needle rise, hook clearance, needle height and needle guard on the 9610 on the 9610 , , 2.0 mm 2.0 mm , , 0.05 0.05...
- Page 43 Adjustment Adjustment "0.8". "0.8". 1 2 3 4 5 1 2 3 4 5 , , , , , , 2.0 mm 2.0 mm , , , , , , ( ( ) ) Set stitch length at Set stitch length at 0.8 .
- Page 44 Adjustment Adjustment 9.03.06 9.03.06 9620 9620 Needle position crosswise to sewing direnction on the Needle position crosswise to sewing direnction on the 9620 9620 , , Requirement Requirement As seen crosswise to the sewing direction, the needles must As seen crosswise to the sewing direction, the needles must penetrate in the centre of their needle holes.
- Page 45 Adjustment Adjustment 9.03.07 9.03.07 9610 9610 Needle position crosswise to sewing direnction on the Needle position crosswise to sewing direnction on the 9610 9610 , , Requirement Requirement As seen crosswise to the sewing direction, the needle must penetrate in As seen crosswise to the sewing direction, the needle must penetrate in the centre of the needle hole.
- Page 46 Adjustment Adjustment 9.03.08 9.03.08 Height and stroke of the bobbin case opener Height and stroke of the bobbin case opener , , 0.5 mm 0.5 mm Requirement Requirement 1. The top edges of the bobbin case opener 1. The top edges of the bobbin case opener and bobbin case and bobbin case should...
- Page 47 Adjustment Adjustment 9.03.09 9.03.09 9620 9620 Height of the feed wheel on the 9620 Height of the feed wheel on the 9620 , , ( ( 0.8 mm 0.8 mm ) ) , , 0.3 mm 0.3 mm Requirement Requirement 1.
- Page 48 Adjustment Adjustment 9.03.10 9.03.10 9610 9610 Height of the feed wheel on the 9610 9610 Height of the feed wheel on the 9610 9610 、 、 ( ( 0.8 mm 0.8 mm ) ) Requirement Requirement Feed wheel should protrude from the needle plate by tooth height (appro.
- Page 49 Adjustment Adjustment 9.03.11 9.03.11 Stitch length control eccentric Stitch length control eccentric , , 3 mm 3 mm , , Requirement Requirement When the needle (with maximum stitch length set), coming from When the needle (with maximum stitch length set), coming from top dead centre, is top dead centre, is 3 mm...
- Page 50 Adjustment Adjustment 9.03.12 9.03.12 Stitch length scale disk Stitch length scale disk , , , , Requirement Requirement When the stitch length control device is locked in position, and the maxi- When the stitch length control device is locked in position, and the maxi- mum stitch length is set, the marking line of the highest number on the mum stitch length is set, the marking line of the highest number on the scale disk...
- Page 51 When the maximum length is set, the linkage rod , or lingkage rods on the model 9625 and 9610, must be able to move freely when the on the model 9625 and 9610, must be able to move freely when the balance wheel is turned.
- Page 52 Adjustment Adjustment 9.03.14 9.03.14 Shaft crank to roller presser drive Shaft crank to roller presser drive , , Requirement Requirement When the maximum stitch length is set, the linkage rods When the maximum stitch length is set, the linkage rods must be must be able to move freely at their left and right point of reversal when the balance...
- Page 53 Adjustment Adjustment 9.03.15 9.03.15 sser and feed wheel sser and feed wheel , , 7 mm 7 mm Requirement Requirement When the presser bar lifter is raised, the clearance between the When the presser bar lifter is raised, the clearance between the roller presser and the feed wheel must be roller presser and the feed wheel must be 7 mm...
- Page 54 Adjustment Adjustment 9.03.16 9.03.16 Roller presser Roller presser , , , , , , ( ( 9620 9620 ) ) , , ( ( 9620 9620 ) ) Requirement Requirement When the roller presser When the roller presser is touching the feed wheel is touching the feed wheel it must: it must:...
- Page 55 Adjustment Adjustment 9.03.17 9.03.17 Stitch length on stitch length scale Stitch length on stitch length scale , , , , 30 mm 30 mm Requirement Requirement When the stitch length is set at 3 , and after the needle When the stitch length is set at 3 , and after the needle has entered a strip of leather has entered a strip of leather 11 times...
- Page 56 Adjustment Adjustment 9.03.18 9.03.18 Synchronization of roller presser and feed wheel Synchronization of roller presser and feed wheel , , Requirement Requirement After After 30 needle penetrations 30 needle penetrations in a strip of leather the total length from the in a strip of leather the total length from the first the the last penetration should be the same, both in the lower and the first the the last penetration should be the same, both in the lower and the...
- Page 57 Adjustment Adjustment 9.03.19 9.03.19 ( ( 9620 9620 ) ) Retainer(only on 9620) Retainer(only on 9620) , , , , , , , , 0.2 - 0.3 mm 0.2 - 0.3 mm Requiement Requiement The retainer The retainer must: must: 1.
- Page 58 Adjustment Adjustment 9.03.20 9.03.20 Knee lever Knee lever , , , , Requirement Requirement 1. before the roller presser rises, the knee lever must still have a slight play. 1. before the roller presser rises, the knee lever must still have a slight play. 2.
- Page 59 Adjustment Adjustment 9.03.21 9.03.21 Needle thread tension release Needle thread tension release , , 0.5 mm 0.5 mm , , Requirement Requirement 1. when the presser bar lifter is raised, the tension discs 1. when the presser bar lifter is raised, the tension discs should be should be pressed at least...
- Page 60 Adjustment Adjustment 9.03.22 9.03.22 (9610 (9610 Thread check spring (9610 Thread check spring (9610 model model 7 mm 7 mm , , Requirement Requirement 1. the movement of thread check spring 1. the movement of thread check spring should be completed when should be completed when the needle point penetrate the fabric (spring stroke approx.
- Page 61 Adjustment Adjustment 9.03.23 9.03.23 ( 9620 ( 9620 Thread check springs ( 9620 Thread check springs ( 9620 model model 7 mm 7 mm , , Requirement Requirement 1. The movement of thread check springs 1. The movement of thread check springs should be completed should be completed when the needle points penetrate the fabric (spring stroke appro...
- Page 62 Adjustment Adjustment ( ( ) ) ( ( ) ) ( ( ) ) ( ( ) ( ) ( , , ( ( ) ) Adjust support Adjust support (screw ) according to (screw ) according to Requirement 1 Requirement 1 Adjust the spring tension of thread check spring Adjust the spring tension of thread check spring...
- Page 63 Adjustment Adjustment 9.03.24 9.03.24 Bobbin winder Bobbin winder , , , , 1 mm 1 mm , , Requirement Requirement 1. when the bobbin winder is engaged, the winding spindle must be 1. when the bobbin winder is engaged, the winding spindle must be driven relilably.
- Page 64 Adjustment Adjustment 9.03.25 9.03.25 Pressure of roller presser Pressure of roller presser Requirement Requirement The material must be fed smoothly. No pressure marks should be visible The material must be fed smoothly. No pressure marks should be visible on the material. on the material.
- Page 65 9.03.26 9.03.26 Lubrication Lubrication , , Requirement Requirement After a running time of After a running time of 10 seconds 10 seconds a fine line of oil should form on a strip a fine line of oil should form on a strip of paper held next to the hook.
- Page 66 Adjustment Adjustment 9.03.27 9.03.27 Re-engage safety coupling Re-engage safety coupling , , The coupling The coupling is set by the manufacturer. When the thread jams, the is set by the manufacturer. When the thread jams, the coupling coupling disengages in order to avoid damage to the hooks. disengages in order to avoid damage to the hooks.
- Page 67 Adjustment Adjustment 9.04 9.04 Adjusting the thread trimmer -D Adjusting the thread trimmer -D 9.04.01 9.04.01 Resting position of the roller lever/ radial position of the Resting position of the roller lever/ radial position of the control cam control cam ,...
- Page 68 Adjustment Adjustment 9.04.02 9.04.02 Position of the thread catcher holder Position of the thread catcher holder , , ( ( ) ) Requirement Requirement 1. there should be a minimum amount of play between toothed wheel 1. there should be a minimum amount of play between toothed wheel and toothed segment .
- Page 69 Adjustment Adjustment 9.04.03 9.04.03 Distance between thread catcher and needle plate Distance between thread catcher and needle plate , , ( ( ) ) Requirement Requirement During its swivel movement thread catcher During its swivel movement thread catcher should not pass the should not pass the edge of the needle plate (see arrow).
- Page 70 Adjustment Adjustment 9.04.04 9.04.04 Position of the thread catcher Position of the thread catcher 0.1 mm 0.1 mm , , 2.5~ 3 mm 2.5~ 3 mm Requirement Requirement 1. the bottom edge of the thread catcher 1. the bottom edge of the thread catcher should be at a distance should be at a distance 0.1 mm...
- Page 71 Adjustment Adjustment 9.04.05 9.04.05 Knife position and knife pressure Knife position and knife pressure , , Requirement Requirement 1. the knife 1. the knife should be touching the needle plate. should be touching the needle plate. 2. the knife pressure should be set as low as possible but the 2.
- Page 72 Adjustment Adjustment 9.04.06 9.04.06 Bobbin thread retaining spring Bobbin thread retaining spring , , Requiement Requiement 1. the bobbin thread clamp spring should be guided reliably in the thread groove of the thread 1. the bobbin thread clamp spring should be guided reliably in the thread groove of the thread catcher .
- Page 73 Adjustment Adjustment 9.04.07 9.04.07 Manual cutting test Manual cutting test , , , , , , , , Requirement Requirement 1. when thread catcher 1. when thread catcher is on its forward stroke, it must not carry bobbin is on its forward stroke, it must not carry bobbin thread thread forward too.
- Page 74 Adjustment Adjustment 9.04.08 9.04.08 Releasing the tension Releasing the tension , , 0.5 mm 0.5 mm Requirement Requirement When the magnet is activated, tension discs When the magnet is activated, tension discs must be at least must be at least 0.5 mm 0.5 mm apar...
- Page 75 Adjustment Adjustment 9.04.09 9.04.09 9620 9620 Linkage rod Linkage rod (only for the 9620) (only for the 9620) , , Requirement Requirement When the thread trimmer is in its resting position, the drive levers When the thread trimmer is in its resting position, the drive levers must be must be parallel.
- Page 76 ) ) 9625 9625 9610 9610 Needle in needle hole Needle in needle hole (only for 9625 and 9610) (only for 9625 and 9610) , , , , Requirement Requirement When the maximum stitch length is set, the needle must be the same...
- Page 77 Adjustment Adjustment 9.05.02 9.05.02 Coupling for roller presser drive Coupling for roller presser drive 3 mm 3 mm Requirement Requirement There must be a distance of There must be a distance of 3 mm 3 mm between coupling half between coupling half and locking disc and locking disc of the drive mechanism.
- Page 78 Adjustment Adjustment 9.05.03 9.05.03 9620 9620 Bevel gears for feed wheel drive Bevel gears for feed wheel drive (on the 9620) (on the 9620) 14 mm 14 mm Requirement Requirement 1. bevel gear 1. bevel gear must fit well on the left side. must fit well on the left side.
- Page 79 Adjustment Adjustment 9.05.04 9.05.04 ( ( 9620 9620 ) ) Bevel gear play Bevel gear play (on the 9620) (on the 9620) , , , , Requirement Requirement 1. when sewing forwards, there must be a slight play between bevel gears 1.
- Page 80 Adjustment Adjustment 9.05.05 9.05.05 9610 9610S 9610 9610S 、 、 Bevel gears for feed wheel drive on the 9610 Bevel gears for feed wheel drive on the 9610 and 9610S and 9610S ( ( ) ) 13 mm 13 mm...
- Page 81 9610 9610S 9610 9610S 、 、 ) ) 、 、 Bevel gear play (on the 9610 9610 ) Bevel gear play (on the 9610 9610 ) , , , , Requirement Requirement 1. when sewing forwards, there must be a slight play between bevel gear 1.
- Page 82 9.05.07 9.05.07 ( ( 9610SA 9620 9610SA 9620 ) ) 、 、 Bevel gear play (on the 9610 Bevel gear play (on the 9610 9620 9620 , , , , Requirement Requirement 1. when sewing , there must be a slight play between bevel gear 1.
- Page 83 PARTS BOOK...
- Page 84 Housing sections 13(for 9610 ) 15(fo r 9620)
- Page 85 Safety plate 10 10005539 螺钉 M5×6 Screw M5×6 11 10005008 支板 Trestle board 12 10005122 螺钉 M6×10 Screw M6×10 13 10005426 支脚(9610专用) Bracket (For 9610) 14 10004974 螺钉 M6×10 Screw M6×10 15 10042081 支脚(9620专用) Bracket (For 9620) 16 10041427 一体机面板☆...
- Page 86 Needle head parts (1) 42 42 28~30 37~39 ee page 28~30...
- Page 87 Needle head parts(1) 2. 机头零件(1) 序号 件号 数量 DESCRIPTION 名称 Part No. 10005309 螺钉 M4×6 Screw M4×6 10041433 电磁铁安装板 Electromagnet plate 10041495 平头滚针 Needle roller 10003152 螺钉 M5×5 Screw M5×5 10041437 曲柄 Crank 10041428 一体机滚轮联接电磁铁 Bobbin join electromagnet 10041435 挡圈 Thrust collar 10041432 主曲柄...
- Page 88 Needle head parts (2) see page 17 see page 17 see page 3 23 (for 9620) 26 (for 9620)
- Page 89 3. 机头零件(2) Needle head parts(2) 序号 件号 数量 DESCRIPTION 名称 Part No. 10005546 压杆轴套 Strut bar bearing 10005312 螺钉 M6×8 Screw M6×8 10009187 螺钉 M6×8 Screw M6×8 10012162 螺钉 M5×5 Screw M5×5 20003486 压脚扳手 Presserfoot spanner 10005412 抬压脚手柄轴套 Presser feet handle bushing 10005549 螺钉...
- Page 90 Needle head parts (3) see page 13 (for 9620) (for 9610) 29~36 29~36 25~27 (for 9620) 42~43 (for 9610) 20 (for 9610) 44~45 (for 9620) 21 22...
- Page 91 Screw M6×14 41 10008049 针杆架轴套 Needle bar bush 42 10006103 机针134PCL90/14 (for 9610-M) Neddle 134PCL 90/14 (for 9610-M) 43 10004103 机针134PC120/19 (for 9610-H) Neddle 134PCL 120/19 (for 9610-H) 44 10001375 机针134-35 90/14 (for 9620-M) Neddle 134-35 90/14 (for 9620-M) 45 10030202 机针134-35120/19 (for 9620-H) Neddle 134-35 120/19 (for 9620-H)
- Page 92 Needle head parts (4) 5 (for 9610) 23~24...
- Page 93 10005118 左右过线勾 Left and right wire hook 10007096 螺钉 M5×10 Screw M5×10 10041831 过线板 Thread guide plate 10005112 夹线器 (9610专用) Conductor holder (for 9610) 10009669 卡圈 Collar 10004977 挑线簧限位板 Spring guard 10005252 过线钉 10005302 夹线大板组件 Bobbin winder tension disc asm 10 10005032 销钉...
- Page 94 Needle head parts (5) 1(For 9620) 13 14 21~22 21~22...
- Page 95 6. 机头零件(5) Needle head parts(5) 序号 件号 数量 DESCRIPTION 名称 Part No. 10014515 夹线器 (9620专用) Conductor holder (for 9620) 10009669 卡圈 Collar 10004977 挑线簧限位板 Spring guard 10005252 过线钉 10002149 夹线板大组件 Bobbin winder tension disc asm 10005032 销钉 5×8 Screw pin 5×8 10005289 防转长销钉...
- Page 96 Arm parts (1) see page 7 13 12 20~22 see page 25...
- Page 97 7. 机臂零件(1) Arm parts(1) 序号 件号 数量 DESCRIPTION 名称 Part No. 10010953 螺钉 M5×10 Screw M5×10 10005466 螺钉 M6×0.75×7 Screw M6×0.75×7 10041482 曲柄主轴组件 Counter weight assy 10003578 主轴前轴承 6204ZZNR Bearing 6204ZZNR 10012162 螺钉 M5×5 Screw M5×5 10005327 绕线主动轮 Pulley 10041479 一体机同步带 Synchronous belt 10009187 螺钉...
- Page 98 Arm parts (2) (for 9610) 5~12 (for 9620) 18~25 see page 7 35~38 see page 3 35~38 see page 15...
- Page 99 8. 机臂零件(2) Arm parts (1) 序号 件号 数量 DESCRIPTION 名称 Part No. 10009008 螺钉 M6×16 Screw M6 ×16 10041469 摆动架滑块槽 Crank slider groove 10001459 上边轴曲柄 Crank 10041468 摆动架滑块 Crank slider 10005255 滚针轴承 Needle bearing (1) 10007324 滚针轴承 Needle bearing (1) 10007325 滚针轴承...
- Page 100 Arm parts (3) see page 5 see page 5 see page 47...
- Page 101 9. 机臂零件(3) Arm parts(3) 序号 件号 数量 DESCRIPTION 名称 Part No. 10005509 弹簧螺钉 Spring Screw 10005001 螺钉 M6×30 Screw M6×30 10005504 调节螺母 M6 Nut M6 10004998 压紧杠杆 compress lever 10005145 螺钉 M6×7.2 Screw M6×7.2 10001947 卡圈 collar 10005078 卡圈 collar 10041478 压脚拉杆...
- Page 102 Arm parts (4) see page 13 9 10...
- Page 103 10. 机臂零件(4) Arm parts(4) 序号 件号 数量 DESCRIPTION 名称 Part No. 10005108 过线器 Thread guide 10004976 过线杆组件 Thread crossing column assy 10005359 调节簧座 Thred tension disk 10005069 过线器压簧 Spring 10005520 夹线调节螺母 M6 Nut M6 10004970 六角螺母 M6 Nut M6 10005384 过线柱 Thread crossing column 10005149 绕线器...
- Page 104 Bedplate psrts (1) see page 15 see page 25 see page 15 see page 15 13( for 9610)
- Page 105 11. 底板零件(1) Bedplate parts (1) 序号 件号 数量 DESCRIPTION 名称 Part No. 10005258 螺钉 M6×0.75×5 Screw M6×0.75×5 10005477 15输送主轴挡圈 Shaft collar 20000485 针杆架轴套组件 Bearing bush assy 10041425 一体输送主轴 Transport major axis 10005212 万向联接头 Universal coupling head 10010953 螺钉 M5×10 Screw M5×10 10005194 15输送主轴挡圈垫片...
- Page 106 Bedplate psrts (2) see page 37 see page 35 see page 35...
- Page 107 10005345 卡圈 Collar 10005409 12万向联接轴挡圈 shaft collar 10012162 螺钉 M5×5 Screw M5×5 10038490 万向联接轴A(for 9610) Universal coupling spindle A (for 9610 10042082 双针万向联接轴 (for 9620) Universal coupling spindle (for 9620) 10005250 离合器 Clutch 10004969 离合器小连接 Clutch minor connector 10005300 螺钉 M6×0.75×8 Screw M6×0.75×8...
- Page 108 Bedplate psrts (3) see page 13 see page 23 see page 23 see page 15 25~27...
- Page 109 Bedplate parts (3) 13. 底板零件(3) 序号 件号 数量 DESCRIPTION 名称 Part No. 10005549 螺钉 M6×5 Screw M6×5 10005142 下轴轴承套 Lower shaft rear bush 10007152 轴承 Bearing 10009187 螺钉 M6×8 Screw M6×8 10041637 下轴宽带轮 Lower shaft sprocket 10024829 针距调节器部件 Guage regulator component 10005350 螺钉...
- Page 110 Bedplate psrts (4) see page 29 see page 33 (for 9610) 24(for 9620)
- Page 111 14. 底板零件(4) Bedplate parts (4) 序号 件号 数量 DESCRIPTION 名称 Part No. 10005507 针脚调节装置 Stitch adjusting assembly 10005420 调节器摆动板焊接件 Adjusting plate 10005238 针距调节装置轴卡圈 Ccollar 10005080 调节器角钢 Angle adjustment 10002788 销 4×30 Pin 4×30 10005457 转动扭簧 Spring 10005078 卡圈 Collar 10005266 摆动轴 Shaft 10003027 螺母...
- Page 112 Hook post , left(1) for 9620 (for -D) 1 (for -M) see page 31 2 (for -H) 11(for -M) 64~65 60~61 12(for -H) 67~68 32~35 45~48 45~48 50~53 see page 27 see page 45...
- Page 113 15. 旋梭左支座(1) Hook post,left(1) 序号 件号 数量 DESCRIPTION 名称 Part No. 10005378 薄料旋梭(for -M) Hook-thin (for -M) 10004081 厚料旋梭(for -H) Hook-thickness(for -H) 10005393 梭壳组件 Bobbin case asm 10004944 板式弹簧螺钉Ⅰ Screw 10005206 板式弹簧螺钉Ⅱ Screw 10005488 板式弹簧 Spring plate 10005555 梭头体 Hook-top 10005066 弹簧片...
- Page 114 Hook post , left(2) see page 29 (for 9620) 22~24 26~27 26~27 26~27 22~24 37 38 44~46 see page 29...
- Page 115 16. 旋梭左支座(2) Hook post,left(2) 序号 件号 数量 DESCRIPTION 名称 Part No. 10005398 端面轴承 End bearing 10005052 垫圈 Washer 10007377 滚针轴承 Needle bearing 10007376 滚针轴承 Needle bearing (2) 10007275 滚针轴承 Needle bearing (2) 10007274 滚针轴承 Needle bearing (2) 10005259 旋梭传动轴轴套 Hook shaft sleeve 10005383 挡圈...
- Page 116 Hook post , right(1) for 9610 and 9620 1 (for -M) 50~51 2 (for -H) 46~47 53~54 11(for -M) 12(for -H) 31~34 see page 45 see page 35 see page 27 31~34...
- Page 117 17. 旋梭右支座(1) Hook post,right(1) 序号 件号 数量 DESCRIPTION 名称 Part No. 10005378 薄料旋梭(for -M) Hook-thin (for -M) 10004081 厚料旋梭(for -H) Hook-thickness(for -H) 10005393 梭壳组件 Bobbin case asm 10004944 板式弹簧螺钉Ⅰ Screw 10005206 板式弹簧螺钉Ⅱ Screw 10005488 板式弹簧 Spring plate 10005555 梭头体 Hook-top 10005066 弹簧片...
- Page 118 Hook post , right(2) for 9610 and 9620 7(for 9620) 13~16 see page 33 34(for 9610) 33(for 9610) 7(for 9620) see page 33 13~16...
- Page 119 29 10005119 螺钉 M6×0.75×6 Screw M6×0.75×6 30 10006297 旋梭传动齿轮Ⅰ The hook driving gearⅠ 31 10009008 螺钉 M6×16 Screw M6×16 32 10005550 垫圈 Φ6 Washer Φ6 33 20013282 单针侧盖板A喷漆 (for 9610) One needle plate measuring(for 9610) 1 34 20003490 侧盖板I(for 9610) Plate measuring...
- Page 120 Feed wheel post , left 55~56 58~59 39~40 27~29 23~24 23~24...
- Page 121 19.送料支座 Feed wheel post ,left 序号 件号 数量 DESCRIPTION 名称 Part No. 10005139 螺钉 M5×12 Screw M5×12 10005016 垫圈 Φ5 Washer Φ5 10004978 螺钉 M6×8 Screw M6×8 10005257 偏心销 10009741 螺钉 M4×6 Screw M4×6 10005407 油塞 Oil wick 20013283 送料支座D喷漆 Feeding support D paint 10009533 螺钉...
- Page 122 Feed wheel mounting plate 25(N1.2-1.8,S2.4) 7(N1.8-2.0,S2.8) for 9620-H for 9620-H 26(N2.0-2.4,S2.4) 8(N2.0-2.4,S2.8) 10~11 22~23 12~13 see page 35 14(N1.8-2.0,S2.8) for 9620-H 15(N2.0-2.4,S2.8; N1.2-1.8,S2.4; N2.0-2.4,S2.4) see page 31 21(N1.8,S3.2) (for 9620) 16(N1.8,S3.2) (for 9620-M) 18~19 17(N1.8,S3.2) (for 9620-H)
- Page 123 Feed wheel mounting plate 20.送料轮托盘 序号 件号 数量 DESCRIPTION 名称 Part No. 10030181 送料轮调整块 Feeding wheel adjusting block 10030180 送料轮 Feeding wheel 1001580 螺钉 M4×10 Screw M4×10 10009008 螺钉 M6×16 Screw M6×10 10005550 垫圈 Φ6 Washer Φ6 10002545 螺钉 M4×6 Screw M4×6 10039214 双针针板组件(N1.8-2.0,S2.8) Double needle plate assembly(N1.8-2.0)
- Page 124 Backtacking mechanism see page 31 see page 37 for 9610 see page 31 for 9620 see page 31 see page 49...
- Page 125 21.倒缝装置 Backtacking mechanism 序号 件号 数量 DESCRIPTION 名称 Part No. 10007075 574倒缝传动齿轮Ⅰ 574 Backstitch transmission gear 10005549 螺钉 M6×5 Screw M6×5 10005540 轴 Shaft 10005432 开口挡圈 Collar 10003586 轴承 608ZZ Bearing 608ZZ 10038315 倒缝支座 Backstitch transmission 10038316 复位弹簧勾 Spring hook 10009741 螺钉...
- Page 126 ( - ) Thread tirmmer (-D) see page 49 see page 9 or 11 see page 49 see page 45 see page 45...
- Page 127 22.剪线结构(-D) Thread tirmmer (-D) 序号 件号 数量 DESCRIPTION 名称 Part No. 10001510 松线电磁铁 Loose line electromagnet 10001511 挺线电磁铁帽 M4 Nut M4 10002129 螺钉 M3×5 Screw M3×5 10001506 松线电磁铁安装板 Mounting plate 10001948 螺钉 M5×10 Screw M5×10 10001657 电磁铁挺线钉 Tension release pin 10006402 剪线电磁铁整组...
- Page 128 ( - ) Thread tirmmer (-D) see page 25 see page 43 for 9610 see page 43 see page 33 for 9620 see page 33 see page 29...
- Page 129 23.剪线结构(-D) Thread tirmmer (-D) 序号 件号 数量 DESCRIPTION 名称 Part No. 10001501 剪线摆动杆销 10012162 螺钉 M5×5 Screw M5×5 10001503 剪线摆动杆组件 Swing rod assembly 10012162 螺钉 M5×5 Screw M5×5 10005409 12万向联接轴挡圈 Retaining ring 10001504 剪线摆动拉杆 Shear line swing rod 10001947 剪线摆动杆销卡圈 Collar 10001946 剪线摆动拉杆弹簧...
- Page 130 Atutomatic presser foot lifter see page 17 see page 1 see page 51 see page 49...
- Page 131 24.自动抬压脚 Automation presser foot lifter 序号 件号 数量 DESCRIPTION 名称 Part No. 10001489 操纵顶柱复位板 Reset plate 10005260 垫圈 Φ4 Washer Φ4 10005003 螺钉 M5×8 Screw M5×8 10005514 操纵顶柱组件 Manipulating the top column assembly 10005158 操纵顶柱弹簧 Spring 10005053 操纵顶柱 Manipulating of the top pillar 10009741 螺钉...
- Page 132 Elecctric control 16(for -D) 4(for -D3) 17(for -BD) see page 43 see page 43 see page 3 see page 47 see page 15 see page 1 see page 41 see page 51...
- Page 133 25.电控 Electric control 序号 件号 数量 名称 DESCRIPTION Part No. 10003141 螺钉 M5×20 Screw M5×20 10007637 螺钉 M5×40 Screw M5×40 10041727 一体机下罩盖☆ Cover 10050042 WR58L-01-01电控☆(for -D3) Electronic control 10048630 电源转接线 The power adapter cable 10048216 主控线 Main control line 10048222 点动倒缝开关线 Swich line 10048217 倒缝开关线...
- Page 134 Accessories components (1) 1 (for 9620) 21 (for 9610) 22 (for 9620) 8 (for 9610) 4 (for 9610) 23 (for 9610) see page 47...
- Page 135 Pedal 20 10048223 踏板螺钉 Self tapping Screw pp g 21 10007130 二线线架(for 9610) Two wire frame component (for 9610)(1) 22 10053011 双针线盘 (for 9610) Wire coil bracket(for 9620) 23 10053010 过线架(for 9610) Lead wire frame (for 9620) 24 10053012 限位勾...
- Page 136 Accessories components ( ) 2 see page 1 see page 19 see page 19 33~34 (for 9610) 35~36 (for 9620)
- Page 137 Medium screwdriver 32 10005461 梭心 Bobbin 33 10006103 机针134PCL 90/14(for 9610-M) Needle 134PCL 90/14 (for 9610-M) 34 10004103 机针134PCL120/19(for 9610-H) Needle 134PCL120/19 (for 9610-H) 35 10001375 机针134-35 90/14(for 9620-M) Needle 134-35 90/14 (for 9620-M) 36 10030202 机针134-35120/19(for 9620-H) Needle 134-35120/19 (for 9620-H)
Need help?
Do you have a question about the 9610 and is the answer not in the manual?
Questions and answers