
Subscribe to Our Youtube Channel
Related Manuals for Magnetic Autocontrol MHTM MicroDrive Access Series


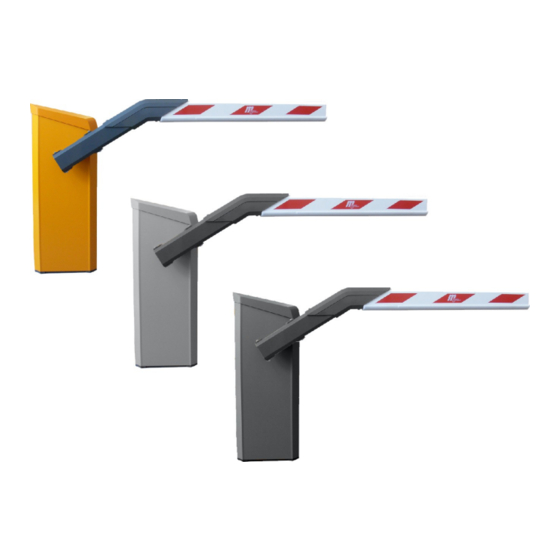
Summary of Contents for Magnetic Autocontrol MHTM MicroDrive Access Series
- Page 1 Operating Instructions Barrier MHTM MicroDrive Access and Parking Doc-ID: 5815,5013US Version: 05...
- Page 2 MAGNETIC Automation Corporation 3160 Murrell Road Rockledge, Florida, 32955 Tel.: +1 321 635 8585 Fax: +1 321 635 9449 E-Mail: info@ac-magnetic.com Internet: www.ac-magnetic.com 5815,5013US / Version 05...
- Page 3 Barrier MHTM MicroDrive Access and Parking Important Safety Instructions Important Safety Instructions Read and follow all instructions. Never let children operate or play with barrier controls. Keep the remote control (where provided) away from children. Personnel should keep away from a barrier arm in motion ...
- Page 4 Barrier MHTM MicroDrive Access and Parking 5815,5013US / Version 05...
-
Page 5: Table Of Contents
Barrier MHTM MicroDrive Access and Parking Contents Contents General ..................9 Information regarding the operating instructions ... 9 Pictogram explanation ..........10 Limitation of liability ............11 Copyright protection ............. 11 Scope of delivery ............12 Warranty ..............12 Customer service ............12 UL-Declaration ............. - Page 6 Barrier MHTM MicroDrive Access and Parking Contents Parking ................ 35 4.3.1 Dimensions and weight ....... 35 4.3.2 Electrical connection ........36 4.3.3 Operating conditions ........36 4.3.4 Operating times ........... 36 Control unit ..............37 Plug-in module "Detector A–B" ........38 Plug-in module "Radio"...
- Page 7 Barrier MHTM MicroDrive Access and Parking Contents 8.10 Assemble barrier arm type "VarioBoom" ..... 66 8.11 Assemble edge protection ........... 66 8.12 Assembling flange and barrier arm ......67 8.13 Conversion "left version" – "right version" ....71 8.14 Check and set the balancing springs in the lever system ............
- Page 8 Barrier MHTM MicroDrive Access and Parking Contents 12 Malfunctions ..............106 12.1 Safety ..............106 12.2 Malfunction table – barrier malfunctions ....107 12.3 Warning and interference messages on the display . 111 12.3.1 Event, warning and error messages – Logic control (Control unit) ......
-
Page 9: General
Barrier MHTM MicroDrive Access and Parking General General Information regarding the operating instructions These operating instructions provide crucial information on handling of MAGNETIC barriers MHTM MicroDrive. Pre-requisite for safe working is the observance of all specified safety notes and instructions. In addition, the local accident prevention regulations valid at the barrier's area of application and general safety regulations have to be complied with. -
Page 10: Pictogram Explanation
Barrier MHTM MicroDrive Access and Parking General Pictogram explanation Warning notes Warning notes are characterised by pictograms in these operating instructions. The warning notes are followed by signal words expressing the scale of the hazard. It is absolutely essential to observe the notes and to proceed with caution in order to prevent accidents as well as bodily injuries and property damage. -
Page 11: Limitation Of Liability
Barrier MHTM MicroDrive Access and Parking General Limitation of liability All specifications and notes in these operating instructions were compiled with consideration to the valid standards and regulations, the state of the art as well as to our long-standing knowledge and experience. -
Page 12: Scope Of Delivery
Barrier MHTM MicroDrive Access and Parking General Scope of delivery The scope of delivery comprises: 1 barrier housing incl. drive unit and control 1 Barrier 2 Mounting profiles 2 Warning signs Edge protection Options if applicable ... -
Page 13: Environmental Protection
Barrier MHTM MicroDrive Access and Parking General Environmental protection NOTICE Danger for the environment by improper disposal of components or the barrier! In case of improper disposal of components or the barrier, damage to the environment may result. – Observe the local and national laws and directives. -
Page 14: Safety
Barrier MHTM MicroDrive Access and Parking Safety Safety Intended use of the barriers The MAGNETIC MHTM MicroDrive barrier is intended for installation only on passageway used for vehicles. Pedestrians must be supplied with a separate access opening. The pedestrian access opening shall be designed to promote pedestrian usage. Locate the barrier such that persons will not come in contact with the vehicular passageway during the entire path of travel of the vehicular barrier. -
Page 15: Non-Intended Use
All uses not described as intended use are prohibited. No accessories must be connected or installed if they are not specified expressly according to quantity and characteristics and approved by Magnetic Autocontrol. WARNING Non-intended use is dangerous! Every non-intended use can lead to dangerous situations. -
Page 16: Operator's Responsibility
Barrier MHTM MicroDrive Access and Parking Safety Operator's responsibility The operator must comply with the statutory obligations regarding work safety. In addition to the work safety notes in these operating instructions, the safety, accident prevention and environmental provisions applicable for the area the barrier is used in must be complied with. In particular, the operator must: gather information on applicable work protection provisions. -
Page 17: Specialists And Operating Personnel
Barrier MHTM MicroDrive Access and Parking Safety Specialists and operating personnel 2.4.1 Requirements WARNING Risk of injury in case of inadequate qualification! Improper handling can lead to considerable bodily injuries and property damage. – Have any activities only carried out by the individuals designated for that purpose. -
Page 18: Personal Protective Equipment
Barrier MHTM MicroDrive Access and Parking Safety Personal protective equipment It is necessary to wear personal protective equipment when dealing with the barrier so as to minimise health hazards. Before carrying out any work, properly dress in the necessary protective equipment such as work clothes, protective gloves, safety shoes, helmet and wear during work. -
Page 19: Hazard Notes And Occupational Safety
Barrier MHTM MicroDrive Access and Parking Safety Hot surfaces CAUTION Danger of burns! … indicates the presence of a hot surface. Non- observance of the safety instructions can lead to minor injuries. This pictogram is fixed on the following component: –... - Page 20 Barrier MHTM MicroDrive Access and Parking Safety DANGER Electric voltage – missing protective facilities Mortal danger by electric voltage! The safety installations that are required according to regional and local regulations must be provided by the customer. Usually these are: –...
- Page 21 Barrier MHTM MicroDrive Access and Parking Safety Entering the danger area WARNING of the barrier Danger from entering the danger area! The MAGNETIC MHTM MicroDrive barriers are intended exclusively for closing off passages for motor vehicles and trucks. For vehicles that cannot be detected by induction loops, additional safety measures must be provided.
- Page 22 Barrier MHTM MicroDrive Access and Parking Safety WARNING Improper transport Danger from improper transport of the barrier arm and housing! The weight of the barrier arm or housing can severely injure a person! – Have them transported by specialists only. –...
- Page 23 Barrier MHTM MicroDrive Access and Parking Safety Insufficient fixing WARNING Risk of injury at insufficient fixing! Insufficient fixing of individual components such as barrier housing, barrier arm and additions permitted by the manufacturer can cause severe injury! – Only qualified and skilled personnel are allowed to assemble the barrier and the appropriate components.
- Page 24 Barrier MHTM MicroDrive Access and Parking Safety CAUTION Illegible signage Risk of injury by illegible symbols! Labels and signs can become dirty or unrecognisable in the course of time. – Always keep safety, warning and operating notes in a good readable condition. –...
-
Page 25: Danger Area
Barrier MHTM MicroDrive Access and Parking Safety Danger area Danger of crushing and shearing, WARNING barrier arm Danger of crushing and shearing when the barrier opens or closes! When a barrier opens or closes, the barrier arm may lead to severe crushing or injury! –... -
Page 26: Identification
Barrier MHTM MicroDrive Access and Parking Identification Identification Type plate The type plate is provided inside at the barrier housing, next to the hood attachment. Fig. 3: Type plate Type code Serial number Power supply, Frequency Nominal current consumption (max. peak current consumption) + additional current consumption when using the service socket Power consumption Operating time (Opening time/closing time) -
Page 27: Type Code
Barrier MHTM MicroDrive Access and Parking Identification Type code – Position Description 1 – 13 Product group: ACCESS Magnetic.Acess ACCESS-L Magnetic.Access lang ACCESS PRO Magnetic.Access Pro ACCESS PRO-L Magnetic.Access Pro lang ACCESS PRO-H Magnetic.Access Pro hoch ACCESS SEL Magnetic.Access Select ACCESS SEL-L Magnetic.Access Select lang PARKING... -
Page 28: Overview: Barrier Types, Barrier Arms, Flanges And Control Units
Barrier MHTM MicroDrive Access and Parking Identification Overview: Barrier types, barrier arms, flanges and control units The following table shows the essential features of the different barrier types. Barrier type Barrier arm Flange Control Unit Parking VarioBoom Vario flange Parking Pro VarioBoom Vario flange MGC-Pro... -
Page 29: Technical Data
Barrier MHTM MicroDrive Access and Parking Technical data Technical data Access 4.1.1 Dimensions and weight Fig. 4: Dimensions barrier system and barrier arm profile – "Access" series Dimensions in inch or feet are without parenthesis. Dimensions in mm are in parenthesis. Object such as wall, building, etc. -
Page 30: Electrical Connection
Barrier MHTM MicroDrive Access and Parking Technical data Designation Unit Access Access Pro Access Select Line width ft (m) (3.66) (4.57) (3.66) (6.10) (3.66) (6.10) Barrier housing in (mm) → See page 29, Fig. 4. (width x depth x height) 12.4 x 14.2 x 36.0 (315 x 360 x 915) Weight barrier housing lbs (kg) -
Page 31: Operating Times
Barrier MHTM MicroDrive Access and Parking Technical data 4.1.4 Operating times Designation Unit Access Access Pro Access Select Opening time/ Closing time Table 5: Operating times – "Access" series 5815,5013US / Version 05... -
Page 32: Access Pro H
Barrier MHTM MicroDrive Access and Parking Technical data Access Pro H 4.2.1 Dimensions and weight Fig. 5: Dimensions barrier system and barrier arm profile – "Access Pro H" series Dimensions in inch or feet are without parenthesis. Dimensions in mm are in parenthesis. Object such as wall, building, etc. -
Page 33: Electrical Connection
Barrier MHTM MicroDrive Access and Parking Technical data Designation Unit Access Pro H ft (m) 12 (3.66) 15 (4.57) 20 (6.00) Line width ft (m) (3.66) (4.57) (6.00) Barrier housing in (mm) → See page 32, Fig. 5. (width x depth x height) 12.4 x 14.2 x 43.9 (315 x 360 x 1115) Weight barrier housing lbs (kg) -
Page 34: Operating Times
Barrier MHTM MicroDrive Access and Parking Technical data 4.2.4 Operating times Designation Unit Access Pro H ft (m) 12 (3.66) 14 (4.3) 20 (6.00) Opening time/ Closing time Table 9: Operating times – "Access Pro H" 5815,5013US / Version 05... -
Page 35: Dimensions And Weight
Barrier MHTM MicroDrive Access and Parking Technical data Parking 4.3.1 Dimensions and weight Fig. 6: Dimensions barrier system and barrier arm profile – "Parking" series Dimensions in inch or feet are without parenthesis. Dimensions in mm are in parenthesis. Object such as wall, building, etc. VarioBoom (barrier arm) with octagon arm profile Barrier, left version Barrier, right version... -
Page 36: Electrical Connection
Barrier MHTM MicroDrive Access and Parking Technical data Designation Unit Parking Parking Pro Parking Select Line width ft (m) (3.66) (3.66) (3.66) Barrier housing in (mm) → See page 35, Fig. 6. (width x depth x height) 12.4 x 14.2 x 36.0 (315 x 360 x 915) Weight barrier housing lbs (kg) 88.2 (40) -
Page 37: Control Unit
Barrier MHTM MicroDrive Access and Parking Technical data Control unit Designation Unit (MAGNETIC Gate Controller) Supply voltage V DC Current consumption ─ max. 1 A, max. 300 mA + current consumption of the different plug-in modules Power consumption ─ max 24 W, Max. -
Page 38: Plug-In Module "Detector A-B
Barrier MHTM MicroDrive Access and Parking Technical data Plug-in module "Detector A–B" Designation Unit Plug-in module "Detector A–B" Current consumption Number of loop detectors ─ 2 (A and B) Inductance range 70 to 500 µH Number of induction loop ─ 10 levels sensitivity levels Response sensitivity... -
Page 39: Design And Function
Barrier MHTM MicroDrive Access and Parking Design and function Design and function Design 5.1.1 Access and Parking Fig. 7: Barrier system design series "Access" and Series "Parking" Barrier housing VarioBoom (barrier arm) Pendulum support from 15 ft (4.57 m) barrier arm length Empty conduits for mains cable, control lines and induction loop Concrete foundation with reinforcement 5815,5013US / Version 05... -
Page 40: Access Pro H
Barrier MHTM MicroDrive Access and Parking Design and function 5.1.2 Access Pro H Fig. 8: Design barrier series "Access Pro H" Barrier housing MicroBoom Access Pro H Pendulum support from 15 ft (4.57 m) barrier arm length Empty conduits for mains cable, control lines and induction loop Concrete foundation with reinforcement 5815,5013US / Version 05... -
Page 41: Function
Barrier MHTM MicroDrive Access and Parking Design and function Function The barrier consists of a barrier housing with drive system and a barrier arm. The drive system consists of an electric motor, control unit, and the lever system. The lever system locks the barrier arm in both end positions. -
Page 42: Transport And Storage
Barrier MHTM MicroDrive Access and Parking Transport and storage Transport and storage Safety Improper transport WARNING Danger from improper transport of the barrier arm and housing! The weight of the barrier arm or housing can severely injure a person! – Have transport performed by specialists only. –... -
Page 43: Transport Inspection
Barrier MHTM MicroDrive Access and Parking Transport and storage Personal protective equipment The following must be worn during all transport work: Work clothes Protective gloves Safety shoes Protective helmet. Transport inspection Immediately check the delivery after receipt for completeness and transport damages. -
Page 44: Transport
Barrier MHTM MicroDrive Access and Parking Transport and storage Transport Barrier housing and barrier arm are delivered separately. The lifting gear must be designed for the weight of the barrier housing and barrier arm. For transport barrier modules refer to the safety notes on page 42, chapter 6.1. -
Page 45: Design Notes For Induction Loops
Barrier MHTM MicroDrive Access and Parking Design notes for induction loops Design notes for induction loops → For assembly and inspection, see page 56, chapter 8.4. Please observe following points when dimensioning the induction loops: Induction loops respond only to metal. The mass is thereby not ... - Page 46 Barrier MHTM MicroDrive Access and Parking Design notes for induction loops Arrangement passenger car loops – passage with long opening loop Fig. 10: Passenger car loops – passage with long opening loop Safety loop Opening loop Barrier Due to a long opening loop vehicles can drive through without needing to stop.
- Page 47 Barrier MHTM MicroDrive Access and Parking Design notes for induction loops Arrangement of truck/ passenger car loops Fig. 12: Truck/passenger car loops Safety loop truck (inductance L1) Safety loop passenger car (inductance L2) Opening loop truck and passenger car Barrier Observe overall inductance "L ".
-
Page 48: Assembly And Installation
Barrier MHTM MicroDrive Access and Parking Assembly and installation Assembly and installation Safety → See also safety notes on page 18, chapter 2.6 "Occupational safety and special dangers". WARNING Non-intended use Non-intended use is dangerous! Any use of the barriers other than intended and/or in a different manner can cause hazardous situations. - Page 49 Barrier MHTM MicroDrive Access and Parking Assembly and installation General WARNING Danger by inappropriate installation! Inappropriate installation can cause severe injuries! – Only specialist personnel or electrical specialists must perform any assembly and installation tasks. – Prior to work, ensure that there is sufficient assembly space.
-
Page 50: Required Steps
Barrier MHTM MicroDrive Access and Parking Assembly and installation Required steps The following steps are to be completed prior to assembly and installation: Laying the foundation with reinforcement for the barrier and install empty conduits. Set up foundation for light barrier post and empty conduits. ... -
Page 51: Foundation And Empty Conduits
Barrier MHTM MicroDrive Access and Parking Assembly and installation Foundation and empty conduits Fig. 13: Assembly barrier system Dimensions in inch or feet are without parenthesis. Dimensions in mm are in parenthesis. Object such as wall, building, etc. Keep a safety distance of at least 2 ft (610 mm) between the barrier →... -
Page 52: Foundation And Empty Conduits For The Barrier
Barrier MHTM MicroDrive Access and Parking Assembly and installation 8.3.1 Foundation and empty conduits for the barrier Assembly site The assembly site must meet the following requirements: The barrier must be visible from the operating person. The barrier must not be put up where there is a danger of ... - Page 53 Barrier MHTM MicroDrive Access and Parking Assembly and installation Laying the foundation, Installing empty conduits Fig. 14: Foundation plan Dimensions in inch or feet are without parenthesis. Dimensions in mm are in parenthesis. Foundation anchor (4 pcs.) Optional when using loop connection; empty conduit for loop connection, diameter: 1.14 in (29 mm) Empty conduit for induction loop, diameter: 1.14 in (29 mm) Empty conduit for control lines, diameter: 1.14 (29 mm)
-
Page 54: Foundation And Empty Conduits For Light Barrier Post
Barrier MHTM MicroDrive Access and Parking Assembly and installation Place reinforcement grid pursuant to Fig. 15 in the foundation hole. Place empty conduits pursuant to Fig. 14 in the foundation hole. Close empty conduits to prevent water from entering. Fill concrete foundation pursuant to Fig. 13. Create flat line in the base area. - Page 55 Barrier MHTM MicroDrive Access and Parking Assembly and installation Laying the foundation, installing empty conduits Fig. 16: Foundation plan for light barrier post Dimensions in inch or feet are without parenthesis. Dimensions in mm are in parenthesis. Foundation anchor (4 pcs.) Concrete foundations (C35/45 XD3 XF2) Optional for light barriers: Empty conduit for receiver connection line...
-
Page 56: Assembly And Installation Of Induction Loops
Barrier MHTM MicroDrive Access and Parking Assembly and installation Assembly and installation of induction loops Depending on the application safety installations must be installed on site. Induction loops, light barriers, etc. can be used as safety installations. The safety installations must ensure that the barrier closes only after the vehicle has passed through. - Page 57 Barrier MHTM MicroDrive Access and Parking Assembly and installation Please observe following points when installing the induction loop: Loop geometry and clearances Install the loop symmetrically to the barrier arm. Please make sure that the barrier arm is attached to the side of the barrier housing.
-
Page 58: Induction Loops
Barrier MHTM MicroDrive Access and Parking Assembly and installation 8.4.2 Induction loops The induction loops are available as ready assembled cables in various lengths from several manufacturers. Make sure that they meet the specification described in these operating instructions. Alternatively a loop can be manufactured from single wire. The following requirements must be fulfilled: Wire cross section: 18 to 16 AWG (0.75 to 1.5 mm ... - Page 59 Barrier MHTM MicroDrive Access and Parking Assembly and installation Lay the loop carefully into the groove and push it down by means of a blunt object, such as a piece of wood. The insulation must by no means be damaged. To avoid slipping of the loop, fix the loop using small wooden wedges.
-
Page 60: Installing Induction Loops Under Interlocking Stone Paving
Barrier MHTM MicroDrive Access and Parking Assembly and installation 8.4.5 Installing induction loops under interlocking stone paving Fig. 20: Installing an induction loop under interlocking stone paving Dimensions in inch are without parenthesis. Dimensions in mm are in parenthesis. Barrier housing Paving Loop cable Sand bed... -
Page 61: Unpacking
Barrier MHTM MicroDrive Access and Parking Assembly and installation Unpacking The individual packages are packed according to the expected transport conditions. Only environment-friendly materials have been used for the packaging. The packaging should protect the individual components against transport damages, corrosion, etc up to the assembly. Therefore do not destroy the packaging and remove only directly before assembly. -
Page 62: Assemble Housing
Barrier MHTM MicroDrive Access and Parking Assembly and installation Assemble housing The barrier housing is attached by 4 foundation anchors via 2 mounting profiles. The mounting profiles are included in delivery. Requirements mounting material MAGNETIC Automation Corporation recommends using ∅ 3/8" anchor bolts. -
Page 63: Assemble Light Barrier Post
Barrier MHTM MicroDrive Access and Parking Assembly and installation Assemble light barrier post The light barrier post is attached with 4 foundation anchors each. Requirements mounting material MAGNETIC Automation Corporation recommends using ∅ 3/8" anchor bolts. → Refer to the anchor bolt manufacturers installation requirements. -
Page 64: Assemble Safety Light Barrier
Barrier MHTM MicroDrive Access and Parking Assembly and installation Assemble safety light barrier Only MAGNETIC safety light barriers must be used. 8.9.1 Assemble transmitter Fig. 22: Assemble the transmitter's light barrier housing on the barrier housing Dimensions in inch or feet are without parenthesis. Dimensions in mm are in parenthesis. -
Page 65: Assemble Receiver
Barrier MHTM MicroDrive Access and Parking Assembly and installation 8.9.2 Assemble receiver Fig. 23: Assemble the receiver's light barrier housing on the post Dimensions in inch or feet are without parenthesis. Dimensions in mm are in parenthesis. Light barrier post Light barrier housing Drill holes for blind rivet nut Hexagon socket screws 5 AF... -
Page 66: Assemble Barrier Arm Type "Varioboom
Barrier MHTM MicroDrive Access and Parking Assembly and installation 8.10 Assemble barrier arm type "VarioBoom" The barrier arm type "VarioBoom" is delivered in two parts. Short barrier arm profile with assembled connection plates, half- shells and end caps. Long barrier arm profile ... -
Page 67: Assembling Flange And Barrier Arm
Barrier MHTM MicroDrive Access and Parking Assembly and installation The edge protection is included in the delivery loosely in 6.56 ft (2 m) pieces. If the barrier was ordered with the light strips option, the barrier arm is delivered with the mounted edge protection. The number of edge protections is according to the length of the long barrier arm profile. - Page 68 Barrier MHTM MicroDrive Access and Parking Assembly and installation Assemble flange at barrier arm Remove end cap from the barrier arm. Fig. 24: Disassemble end cap. Slide the shorter slot unit and the additional sheet into the groove on the barrier room bottom. Fig.
- Page 69 Barrier MHTM MicroDrive Access and Parking Assembly and installation Install the flange at the barrier arm with the 4 Torx screws. The shorter protrusion of the flange must point towards the barrier arm end. Tighten screws twice in sequence to ensure that all screws are tightened correctly.
- Page 70 Barrier MHTM MicroDrive Access and Parking Assembly and installation Assemble barrier arm 10. Push barrier arm with pre-assembled flange onto the flange shaft. Fig. 30: Assemble flange with barrier arm 11. Align barrier arm vertically. 12. Install the flange on the flange shaft using the 4 hexagon socket screws.
-
Page 71: Conversion "Left Version" - "Right Version
Barrier MHTM MicroDrive Access and Parking Assembly and installation 8.13 Conversion "left version" – "right version" Danger of injury CAUTION Danger of injury! There is a danger of injury when mounting the barrier arm. – Barrier arm as of a length of 14.8 ft (4.5 m) must be installed by two persons. - Page 72 Barrier MHTM MicroDrive Access and Parking Assembly and installation Remove the flange with the barrier arm. Fig. 31: Disassemble flange with barrier arm Move flange shaft Remove the v-ring from the flange shaft. Fig. 32: Remove the v-ring 10. Slightly loosen the two hexagon socket screws 10 AF of the clamping lever at the flange shaft.
- Page 73 Barrier MHTM MicroDrive Access and Parking Assembly and installation 11. Unhook the balancing springs in the lever system. The balancing springs must be relieved. For this, press a tool straight through the upper tool bore. The lever arm is pressed from the dead point.
- Page 74 Barrier MHTM MicroDrive Access and Parking Assembly and installation Align barrier arm, switch on power 23. Push the barrier into the top-most position. The clamping lever supply must be at the stop for the position "opening". If required, push straight through the upper tool bore with a tool to press the lever arm from the dead point.
-
Page 75: Check And Set The Balancing Springs In The Lever System
Barrier MHTM MicroDrive Access and Parking Assembly and installation 8.14 Check and set the balancing springs in the lever system Danger of crushing, lever system WARNING Danger of crushing at opened barrier housing at the lever system! The lever system in the barrier housing can cause serious crushing injuries! –... -
Page 76: Setting Balancing Springs
Barrier MHTM MicroDrive Access and Parking Assembly and installation Fig. 34: Balancing springs in the lever system. Barrier arm Balancing spring Screw with locknuts 8.14.1 Setting balancing springs Check and adjust balancing Check balancing springs with the motor warm from operation. springs Secure barrier danger area e.g. - Page 77 Barrier MHTM MicroDrive Access and Parking Assembly and installation Adjust balancing springs: Remove the barrier housing hood. Remove the rear barrier housing door. Adjust springs with a wrench via the screws with locknuts. The barrier arm lowers: The spring force is too low. ...
-
Page 78: Overview Table Balancing Springs
Barrier MHTM MicroDrive Access and Parking Assembly and installation 8.14.2 Overview table balancing springs NOTE! The following overview tables "Balancing springs" do not take into consideration any attachment parts. For barrier arms with attachment parts, the required number of springs may deviate from the number of springs in the overview table. - Page 79 Barrier MHTM MicroDrive Access and Parking Assembly and installation The following overview tables apply for barriers with MicroBoom. The strong springs are marked with a yellow dot at the suspension bolt. Overview table balancing springs for barriers with MicroBoom without pendulum support Line width Number springs weak Number springs strong...
-
Page 80: Equipment Plan Balancing Springs
Barrier MHTM MicroDrive Access and Parking Assembly and installation 8.14.3 Equipment plan balancing springs The balancing springs are aligned as follows for the barriers MAGNETIC MHTM MicroDrive Access and Parking. Fig. 36: Equipment plan balancing springs Front Barrier arm Rear Weak springs Strong springs (marked with a yellow dot at the suspension bolt) -
Page 81: Align Barrier Housing And Light Barrier Post
Barrier MHTM MicroDrive Access and Parking Assembly and installation 8.15 Align barrier housing and light barrier post WARNING Falling components Risk of injury from falling components! Falling components such as the barrier housing can cause severe injury! – When aligning the barrier housing and light barrier post, loosen the attachment screws only slightly. -
Page 82: Installing Warning Signs
Barrier MHTM MicroDrive Access and Parking Assembly and installation 8.16 Installing warning signs Warning signs for the barrier A minimum of two warning signs have be installed, one on each side of the barrier where easily visible. Two warning signs for the barrier are part of delivery. -
Page 83: Electrical Connection
Barrier MHTM MicroDrive Access and Parking Electrical connection Electrical connection Safety → See also safety notes on page 18, chapter 2.6 "Occupational safety and special dangers". DANGER Electric voltage – inadequate qualification Mortal danger by electric voltage! Risk of injury in case of inadequate qualification! –... - Page 84 Barrier MHTM MicroDrive Access and Parking Electrical connection DANGER Electric voltage Mortal danger by electric voltage! Touching live parts can be lethal. Damage to the insulation or to individual compo- nents can be lethal. – Switch off the power supply immediately in case of damage to the insulation and arrange repair.
- Page 85 Barrier MHTM MicroDrive Access and Parking Electrical connection Electromagnetic interference NOTICE Electromagnetic interferences may cause malfunctions of the barrier or adjacent devices! The barrier is approved for industrial, residential, commercial and business use. Operation in other electro-magnetic environmental conditions may cause interferences or malfunctions.
-
Page 86: Installing Electrical Protective Devices
Barrier MHTM MicroDrive Access and Parking Electrical connection Installing electrical protective devices The safety installations that are required according to regional and local regulations must be provided by the customer. Usually these are: Ground fault circuit interrupter (GFCI) Circuit-breaker ... - Page 87 Barrier MHTM MicroDrive Access and Parking Electrical connection DANGER! Mortal danger by electric voltage! Disconnect barrier system power supply. Ensure that the system is powered down. Secure against reactivation. Strip-off cable and core insulation – Strip-off mains supply and cores according to the following preparation of the wiring figure.
-
Page 88: Connect Customer's Control Lines (Signalling Devices)
Barrier MHTM MicroDrive Access and Parking Electrical connection Connecting mains supply Fig. 40: Connecting the mains supply Terminal clamps for mains supply Phase L Neutral conductor N Ground conductor PE Connect customer's control lines (signalling devices) The following connections are available for control and feedback on customer’s side: 8 Digital inputs for controlling the barrier. -
Page 89: Connecting Safety Devices
Barrier MHTM MicroDrive Access and Parking Electrical connection Fig. 41: Connecting the control lines Cable opening rear Control unit Cable tie metal tabs Cable opening front Cable clamps 9.4.1 Connecting safety devices As safety devices, you must connect safety loops or safety light barriers to the control unit. -
Page 90: Plausibility Check Of The Safety Devices
Barrier MHTM MicroDrive Access and Parking Electrical connection 9.4.2 Plausibility check of the safety devices NOTE! The plausibility check is deactivated by default in barriers in Deadman operation at a closing speed ≥ 2.2 seconds. The plausibility check prevents that the barrier can be operated without safety device or with defective safety device. -
Page 91: Connecting Safety Loop
Barrier MHTM MicroDrive Access and Parking Electrical connection 9.4.3 Connecting safety loop The safety loop is connected to the plug-in module "Detector 1 (A- B)", clamps A or clamps B. → See page 131, chapter 17.1 "Wiring diagrams". The clamp function parameters can be set in the menu "Detector 1 (A-B)"... -
Page 92: Connect And Test The Safety Light Barriers
Barrier MHTM MicroDrive Access and Parking Electrical connection 9.4.4 Connect and test the safety light barriers Connecting safety light Connect the transmitter and receiver connection lines of the safety barrier light barriers to clamps X11 and X20. By default, MAGNETIC installs a jumper between terminals X11 OUT and IN. -
Page 93: Connecting Emergency Opening Contacts
Barrier MHTM MicroDrive Access and Parking Electrical connection Check safety light barrier function Perform function test by holding an object into the light path between the transmitter and receiver. The following items must be met: The yellow LED at the receiver must go out. ... -
Page 94: Digital Inputs
Barrier MHTM MicroDrive Access and Parking Electrical connection 9.4.6 Digital inputs Technical data → See page 37, chapter 4.4. Freely parameterisable and firmly NOTE! assigned input functions For barriers with a control unit MGC-Pro the digital input functions can be freely parameterised. The control unit MGC-Pro is installed in the following barrier types: –... -
Page 95: Digital Outputs And Output Relays
Barrier MHTM MicroDrive Access and Parking Electrical connection 9.4.7 Digital outputs and output relays Technical data →See page 37, chapter 4.4. Freely parameterisable and firmly NOTE! assigned output functions For barriers with a control unit MGC-Pro the digital output and the output relays functions can be freely parameterised. -
Page 96: Checking The Electrical Connection
Barrier MHTM MicroDrive Access and Parking Electrical connection Checking the electrical connection The following points have to be checked after the electrical installation of the barrier: Are the following electrical protective devices installed: 2-pole main switch, circuit breaker and ground fault circuit interrupter? Is the power cable connected to the terminal in compliance with ... -
Page 97: 10 Start-Up And Operation
Barrier MHTM MicroDrive Access and Parking Start-up and operation 10 Start-up and operation 10.1 Safety → See also safety notes on page 18, chapter 2.6 "Occupational safety and special dangers". WARNING General Danger by inappropriate start-up and operation! Inappropriate start-up and operation can cause severe or lethal injuries. -
Page 98: Commissioning
Barrier MHTM MicroDrive Access and Parking Start-up and operation 10.2 Commissioning Check before The following inspections must be performed prior to initial start-up: to initial start-up Checks whether the transport protection was removed. Check electrical connections. Check barrier arm position. ... -
Page 99: Switching On And Off The Barrier
Barrier MHTM MicroDrive Access and Parking Start-up and operation 10.3 Switching on and off the barrier NOTICE A too early mains voltage power up after a shut down can result in damage of the equipment! – Wait for at least 10 seconds after shutting off the mains voltage before you switch the mains voltage on again. -
Page 100: 10.4 Opening And Closing The Barrier Manually
Barrier MHTM MicroDrive Access and Parking Start-up and operation Switching off Remove the barrier housing hood. Remove the barrier housing door. Switch off the barrier via the double pole mains switch. Depending on the settings of the lever system's balancing spring and the settings in the menu "Power failure", the barrier boom opens or closes. -
Page 101: Putting The Barrier Temporarily Out Of Operation
Barrier MHTM MicroDrive Access and Parking Start-up and operation 10.5 Putting the barrier temporarily out of operation High wind speeds WARNING Risk of injury from barrier arm in case of high wind speeds! The barrier arm is no longer securely locked with the mains voltage off. -
Page 102: 11 Cleaning And Maintenance
Barrier MHTM MicroDrive Access and Parking Cleaning and Maintenance 11 Cleaning and Maintenance 11.1 Safety → See also safety notes on page 18, chapter 2.6 "Occupational safety and special dangers". WARNING General Danger by inappropriate cleaning and maintenance! Inappropriate cleaning and maintenance can cause severe or lethal injuries. -
Page 103: Cleaning
Barrier MHTM MicroDrive Access and Parking Cleaning and Maintenance 11.2 Cleaning The cleaning interval essentially depends on the environmental conditions and the climate. Aggressive cleaning aids and NOTICE substances Unit damage possible! Aggressive detergents and consumables may damage or destroy components, electric cables, or the coating of the barrier. -
Page 104: Maintenance Schedule
Barrier MHTM MicroDrive Access and Parking Cleaning and Maintenance 11.5 Maintenance schedule The following describes the maintenance work that is necessary for optimal, trouble-free operation. Maintenance intervals must be observed. If increased wear of individual components or functional groups is revealed during regular inspections, the operator must reduce the required maintenance intervals on the basis of the actual signs of wear. - Page 105 Barrier MHTM MicroDrive Access and Parking Cleaning and Maintenance Interval Maintenance work To be carried out by Every 12 months Perform all monthly and semi-annual maintenance Electrician / work. specialist Check the barrier's mechanics. MHTM MicroDrive service specialist Check the spring setting of the lever system. Check barrier arm position.
-
Page 106: 12 Malfunctions
Barrier MHTM MicroDrive Access and Parking Malfunctions 12 Malfunctions This chapter describes possible causes of malfunctions and trouble shooting tasks. Contact your dealer in case of malfunctions that cannot be repaired by means of the following information. Procure spare parts from your dealer or directly from the manufacturer. -
Page 107: Malfunction Table - Barrier Malfunctions
Barrier MHTM MicroDrive Access and Parking Malfunctions Danger of injury after WARNING lightning strike Danger of injury from total outage or barrier malfunction after lightning has hit the barrier! If the barrier is struck by lightening, this may lead to total outage or malfunction of the barrier. - Page 108 Barrier MHTM MicroDrive Access and Parking Malfunctions Malfunction: Barrier does not open. Possible cause Corrective action Removal by Power supply is not connected Switch on power supply. Electrical specialist Check power supply. Error present. The corresponding Depending on error message, check MHTM MicroDrive error message is displayed.
- Page 109 Barrier MHTM MicroDrive Access and Parking Malfunctions Malfunction: Barrier does not close. The display shows: Possible cause Corrective action Removal by Loop not connected. Connect loop MHTM MicroDrive service specialist Detector mode incorrectly Check parameterisation of the MHTM MicroDrive parameterised. detector module and correct if service specialist required.
- Page 110 Barrier MHTM MicroDrive Access and Parking Malfunctions Malfunction: Barrier does not close immediately after through traffic, but only after the hold-open time. Possible cause Corrective action Removal by Opening signal is active for too long. Shorten opening signal to max. Electrical specialist 1 second.
-
Page 111: 12.3 Warning And Interference Messages On The Display
Barrier MHTM MicroDrive Access and Parking Malfunctions Malfunction: Menu items of the plug-in modules, such as "Detector 1 (A-B) are displayed but cannot be operated. Possible cause Corrective action Removal by The SW-version of the plug-in Use plug-in module with a SW MHTM MicroDrive ... -
Page 112: Event, Warning And Error Messages - Logic Control (Control Unit)
Barrier MHTM MicroDrive Access and Parking Malfunctions NOTE! With some messages, the control unit tries to reset the cause of the message. If the attempt was successful, the message is displayed as WARNING. If the attempt failed, the message is displayed as ERROR. - Page 113 Barrier MHTM MicroDrive Access and Parking Malfunctions Number Description Possible cause Corrective action FF05 Book contact / At the "Boom contact" input, Barrier with SwingAway and Swing-sway active boom ejection was detected. automatic return: Wait for WARNING delay. Barrier with SwingAway and ...
-
Page 114: Event, Warning And Error Messages - Motor Gw
Barrier MHTM MicroDrive Access and Parking Malfunctions Number Description Possible cause Corrective action 6000 Module update A firmware update was not Restart the control unit error performed correctly. ERROR If the error continues to be present, perform the update again via the service module. - Page 115 Barrier MHTM MicroDrive Access and Parking Malfunctions Number Description Possible cause Corrective action 3221 Undervoltage Undervoltage was recognised The message may occur at an impact below the cut off angle. WARNING Check if an impact has occurred below the cut off angle.
- Page 116 Barrier MHTM MicroDrive Access and Parking Malfunctions Number Description Possible cause Corrective action FF30 Impact detection Current increase and speed Check safety devices. deviation WARNING Adjust menu "Cut off angle" → See separate document "Description of control units MGC and MGC Pro for MHTM MicroDrive...
-
Page 117: Event, Warning And Error Messages - Detector
Barrier MHTM MicroDrive Access and Parking Malfunctions 12.3.3 Event, warning and error messages – Detector The warning messages "FF4B" and "FF4C" are also reported through the output function "Error". Number Description Possible cause Corrective action FF4A Hardware error Internal HW function test failed Perform reset. -
Page 118: Reset The Barrier
Barrier MHTM MicroDrive Access and Parking Malfunctions 12.4 Reset the barrier Control unit reset is performed as follows: Switch of power supply and switch it on again after 10 seconds. Press the two middle operating buttons on the control unit ... -
Page 119: Closing Or Opening The Barrier Arm In Case Of Power Failure
Barrier MHTM MicroDrive Access and Parking Malfunctions 12.5 Closing or opening the barrier arm in case of power failure In case of power failure, the barrier arm may be in the lower or upper dead point. I.e. the barrier arm can no longer be easily moved manually. -
Page 120: Repair
Barrier MHTM MicroDrive Access and Parking Repair 13 Repair 13.1 Safety → See also safety notes on page 18, chapter 2.6 "Occupational safety and special dangers". WARNING General Danger by inappropriate repair! Inappropriate repair can cause severe or lethal injuries. –... -
Page 121: 13.2 Spare Parts
Barrier MHTM MicroDrive Access and Parking Repair 13.2 Spare parts WARNING Risk of injury by incorrect spare parts! Incorrect or defective spare parts can result in damage, malfunctions or total failure and also impair safety. – Use only the manufacturer's original spare parts. - Page 122 Barrier MHTM MicroDrive Access and Parking Repair Disassemble old barrier arm with Disassemble flange from the flange shaft together with the flange barrier arm. For this, loosen the 4 hexagon socket screws 10 AF at the flange. Remove the flange with the barrier arm. Fig.
- Page 123 Barrier MHTM MicroDrive Access and Parking Repair 10. Slide the shorter slot unit and the additional sheet into the groove on the barrier room bottom. Fig. 50: Install lower slot nut and additional sheet Shorter slot nut Additional sheet 11. Place the longer slot nut on the upper side of the barrier arm. Fig.
- Page 124 Barrier MHTM MicroDrive Access and Parking Repair 13. Install end cap to the barrier arm. Fig. 53: Install end cap Attach the new barrier arm with 14. Push barrier arm with pre-assembled flange onto the flange flange shaft. 15. Align barrier arm vertically. 16.
-
Page 125: Decommissioning, Disassembly And Disposal
Barrier MHTM MicroDrive Access and Parking Decommissioning, disassembly and disposal 14 Decommissioning, disassembly and disposal A barrier that is no longer usable should not be recycled as a complete unit, but disassembled into individual components and recycled according to material types. Non-recyclable materials have to be disposed of in an environmental-friendly manner. - Page 126 Barrier MHTM MicroDrive Access and Parking 5815,5013US / Version 05...
-
Page 127: Ul-Declaration
C E R T I F I C A T E O F C O M P L I A N C E 20131119-E136510 Certificate Number E136510-20110610 Report Reference 2013-NOVEMBER-19 Issue Date MAGNETIC AUTOCONTROL GMBH Issued to: GRIENMATT 20 79650 SCHOPFHEIM GERMANY DOOR, DRAPERY, GATE, LOUVER, AND WINDOW This is to certify that OPERATORS AND SYSTEMS... - Page 128 C E R T I F I C A T E O F C O M P L I A N C E 20131119-E136510 Certificate Number E136510-20110610 Report Reference 2013-NOVEMBER-19 Issue Date This is to certify that representative samples of the product as specified on this certificate were tested according to the current UL requirements.
- Page 130 Barrier MHTM MicroDrive Access and Parking 5815,5013US / Version 05...
-
Page 131: Appendix
Barrier MHTM MicroDrive Access and Parking Appendix 17 Appendix 17.1 Wiring diagrams Following wiring diagrams apply to standard barriers. Observe the customer specific wire diagrams for customer specific barriers if applicable. 5815,5013US / Version 05... - Page 132 Barrier MHTM MicroDrive Access and Parking Appendix 5815,5013US / Version 05...
-
Page 141: Index
Barrier MHTM MicroDrive Access and Parking Index Index Access Danger area ............25 Decommissioning ..........125 Design ............. 39 Technical data ..........29 Temporarily ...........101 Access Pro H Design Design ............. 40 Access .............39 Technical data ..........32 Access Pro H ..........40 Assemble housing .......... - Page 142 Barrier MHTM MicroDrive Access and Parking Index Instructed People ..........17 Intended use ............14 Safety ..............14 Cleaning ............102 Commissioning ..........97 Limitation of liability ..........11 Electrical connection ........83 Loop detector plug-in module Maintenance ..........102 Technical data ..........
- Page 143 Barrier MHTM MicroDrive Access and Parking Index Warning signs .............82 Warnings ............111 WARNING ............111 Warranty .............12 Warning messages WARNING ......111 Warning notes ............ 10 5815,5013US / Version 05...
- Page 144 MAGNETIC Automation Corporation Address sales partner: 3160 Murrell Road Rockledge, Florida, 32955 Tel.: +1 321 635 8585 Fax.: +1 321 635 9449 E-Mail: info@ac-magnetic.com Internet: www.ac-magnetic.com...
Need help?
Do you have a question about the MHTM MicroDrive Access Series and is the answer not in the manual?
Questions and answers