Greenwood Unity CV2SVGIP Installation Instructions Manual
Decentralised mechanical extract ventilation (dmev)
Hide thumbs
Also See for Unity CV2SVGIP:
- Homeowner's manual (16 pages) ,
- User/homeowner manual (9 pages)
Table of Contents
Advertisement
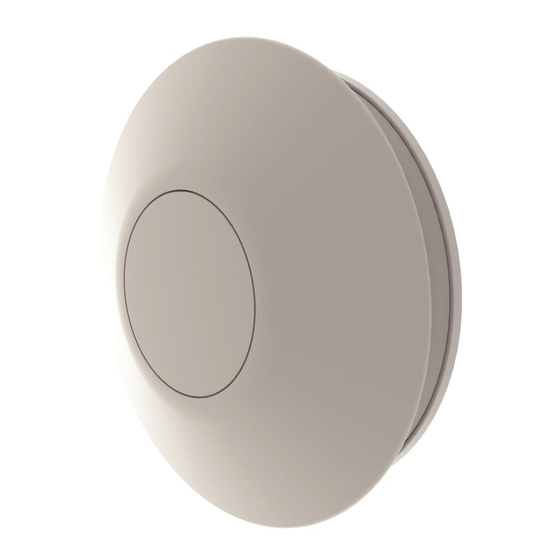
Unity CV2GIP / CV2SVGIP
Decentralised Mechanical Extract Ventilation (dMEV)
Installation Instructions
Commissioning Data:
Notice:
For Wall Mounting:
To be completed by the
To ensure IPX5 install fan with
Commissioning Engineer.
Refer to User / Homeowner Guide
orientation
arrows facing upwards.
also supplied.
(See section 2.3, figure 5)
Advertisement
Table of Contents

Subscribe to Our Youtube Channel
Related Manuals for Greenwood Unity CV2SVGIP


Summary of Contents for Greenwood Unity CV2SVGIP
- Page 1 Unity CV2GIP / CV2SVGIP Decentralised Mechanical Extract Ventilation (dMEV) Installation Instructions Commissioning Data: Notice: For Wall Mounting: To be completed by the To ensure IPX5 install fan with Commissioning Engineer. Refer to User / Homeowner Guide orientation arrows facing upwards. also supplied.
-
Page 2: Table Of Contents
Contents Page General Description / Physical Specification Installation Instructions General Preparation Positioning / pplication Wall Mounting Ceiling Mounting Ducting Guidelines Electrical Wiring SELV Box Installation On Site Commissioning / Set Up To disassemble the unit, disconnect from mains supply and use a screwdriver to segregate the electronic components and motor from the plastic housing. -
Page 3: General Description / Physical Specification
(ceiling and wall installations) and to meet the performance requirements of all ‘wet’ rooms within a dwelling. The Unity CV2GIP / CV2SVGIP features new Greenwood TimerSM RT Greenwood HumidiSM RT technology (fully automatic integral delay / over-run timer and humidity functions) which monitor the homeowners’... - Page 4 1.1.7 arning: This appliance can be used by children aged from 8 years and above and persons with reduced physical, sensory or mental capabilities or lack of experience and knowledge if they have been given supervision or instruction concerning use of the appliance in a safe way and understand the hazards involved.
-
Page 5: Installation Instructions
2.0 Installation Instructions General Preparation 2.1.1 The Unity CV2GIP / CV2SVGIP fan is supplied with a 100mm nominal spigot for connection of ducts for installation. 2.1.2 100mm diameter rigid duct should be used to provide the best performance levels required for compliance with Building Regulations. Technical Services can be contacted on +44 (0) 1276 408402 should you have any questions in respect of this. -
Page 6: Wall Mounting
Wall Mounting 2.3.1 Determine the most ideal location for the unit for this installation, also taking account of the electrical services. 2.3.2 Ensure there is adequate access for installation and eventual replacement. Note: The electronics cover has been designed to retain and hold screws, for ease, when positioning/mounting the product to a surface. -
Page 7: Ceiling Mounting
Ceiling Mounting 2.4.1 Determine the most ideal location for the unit for this installation, also taking account of the electrical services. 2.4.2 Ensure there is adequate access for installation and eventual replacement. Note: The electronics cover has been designed to retain and hold screws, for ease, when positioning/mounting the product to a surface. -
Page 8: Ducting Guidelines
Ducting Guidelines 2.5.1 100mm nominal diameter spigot is provided for connection to ducting. Ductwork should be securely connected to fan spigot. Failure to do this will cause unnecessary air leakage and may impair performance. 2.5.2 ll duct connections require sealing. Where ducts are installed against a solid structure this can be difficult to achieve. -
Page 9: Electrical
The Unity CV2GIP fan is double insulated and does not require an earth. 2.6.3 The Unity CV2SVGIP SELV fan is a class III and does not require an earth. 2.6.4 triple-pole switch having a minimum contact separation of 3mm must be 2.6.5... -
Page 10: Wiring
2.6.8 Wiring Details • Strip cable to correct lengths as shown in Figure 2 - Diagram 2.a. • Insert cable through cable entry point ( ), and then clamp cable using the cable clamp (B). • Push the wires into the terminal block (C) as per wiring diagram (see section 2.7). -
Page 11: Selv Box Installation
2.6.9 Fan Specifications IPX5 Wall, IPX4 Ceiling 220-240V ~ 50Hz / 1Ph 230V Model: 5 Watts max. IPX5 Wall, IPX4 Ceiling 24DC: between controller SELV Model: and fan 220-240V ~ 50Hz / 1Ph 5 Watts max. Mains: Fixed flat wiring 2 core 1mm , 3 core Cable Sizes: 1/1.5mm... - Page 12 2.8.4 Insert mains cable ( ) and clamp using cable clamp provided (B). 2.8.5 Push the wires into the terminal block (C) as per the wiring diagram (see section From To CV2SVGIP Mains 2.7). Tighten the terminal Fan Terminal Supply block screws and ensure a good connection.
-
Page 13: On Site Commissioning / Set Up
On Site Commissioning / Set Up 2.9.1 This section covers set up, configuration of the unit for installation and altering pre-set factory settings. 2.9.2 Removal of the Front Cover and Control Panel Functions Twist outer front cover anti-clockwise to remove. You will then see the Control Panel. - Page 14 2.9.3 Commissioning Step 1 On first power up, both Bathroom and Kitchen Room Press Bathroom or Kitchen button - light will go solid selection button lights should start to flash to indicate that Step 2 an appropriate installation Boost irflow button will flash setting needs to be selected.
- Page 15 2.9.4 To Reactivate Commissioning Mode Press any button to activate the panel. The current fan setup / status should be shown via the panel lights. To enter the commissioning mode press and hold [-/+] buttons simultaneously for approximately 3 seconds until the Bathroom & Kitchen lights flash –...
- Page 16 © Copyright Zehnder Group UK Ltd 2017. Zehnder Group UK Limited Watchmoor Point, Camberley, Surrey, GU15 3 D Customer Services: +44 (0) 1276 408404 Technical Services: +44 (0) 1276 408402 Email: info@greenwood.co.uk Web: www.greenwood.co.uk 05.10.920 Issue 6 September 2017...
Need help?
Do you have a question about the Unity CV2SVGIP and is the answer not in the manual?
Questions and answers