Table of Contents
Advertisement
Quick Links
Advertisement
Table of Contents

Related Manuals for Vivitek HK2200 Series


Summary of Contents for Vivitek HK2200 Series
- Page 1 User Manual HK2200 HK1288 UHK328 UHK268 VW268 MH3000K Series...
- Page 2 FCC Notice This equipment has been tested and found to comply with the limits for a Class B dig- ital device, pursuant to part 15 of the FCC Rules. These limits are designed to provide reasonable protection against harmful interference in residential installation. This equipment generates, uses and can radiate radio frequency energy and if not installed and used in accordance with the instructions, may cause harmful interference to radio communications.
- Page 3 Safety instructions Read all of these instructions before you operate your projector and save for future reference. 1. Read instructions All the safety and operating instructions should be read before the appliance is operated. 2. Notes and warnings All notes and warnings in the operating instructions should be adhered to. 3.
- Page 4 Notes on the AC Power Cord AC Power Cord must meet the requirement of countries where you use this projector. Please confirm your AC plug type with the graphics below and ensure that the proper AC Power Cord is used. If the supplied AC Power Cord does not match your AC out- let, please contact your sales dealer.
-
Page 5: Table Of Contents
Table of Contents Introduction ................... 6 Shipping contents ..........................6 Projector Overview ..........................7 Controls and functions ................. 8 Projector & Remote control ........................8 Installing the Batteries .......................... 10 Remote Control Operation ........................11 Positioning your projector ..............12 Choosing a location .......................... -
Page 6: Introduction
Introduction Shipping contents Carefully unpack and verify that you have all of the items shown below. If any of these items are missing, please contact your place of purchase. Standard accessories Projector Remote control AAA batteries*2 HDMI cable Power cord Quick start guide Warranty card Safety guide... -
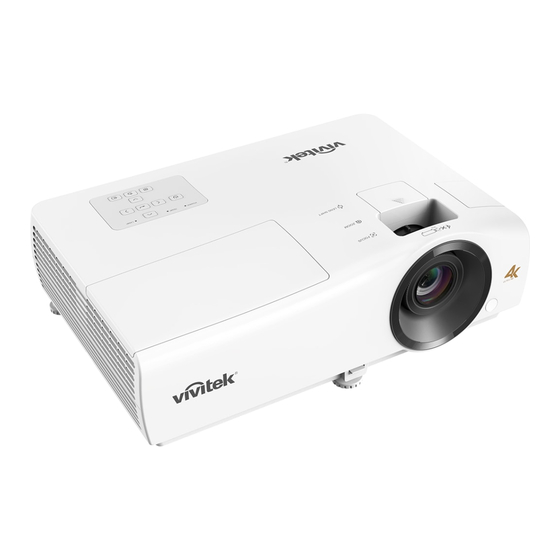
Page 7: Projector Overview
Projector Overview 1. Lamp cover 2. Control panel 3. Lens shift 4. Focus ring 5. Zoom ring 6. Front IR remote control sensor 7. Projection lens 8. Quick-release lever 9. Adjuster feet 10. Ventilation holes (air exhaust) 11. Security bar 12. -
Page 8: Controls And Functions
Controls and functions Projector & Remote control Power Turns the projector on and ooff. ON / Turns the projector on and off. 2. Arrow keys ( / / / When the On-Screen Display (OSD) menu is activated, these keys are used as directional arrows to select the desired menu items and to make adjustments. - Page 9 14. Blank Used to hide the screen picture. No function 15. Freeze 20. ECO Used to freeze/unfreeze the on- Displays the lamp mode selection bar screen picture. (Normal / ECO / Dynamic ECO). 16. HDMI 3 21. Volume No function Displays the volume adjustment bar.
-
Page 10: Installing The Batteries
Installing the Batteries 1. Press and open the battery cover, as illustrated. 2. Remove the old batteries (if applicable) and install two AAA batteries. Make sure that the positive and negative ends are positioned correctly, as illustrated. 3. Replace the battery cover until it clicks into place. -
Page 11: Remote Control Operation
Remote Control Operation Point the remote control at the infrared remote sensor and press a button. • Operating the projector from the front Note • Do not point the laser directly to the people's eyes (especially small children). There is a danger of injury to the eyes. -
Page 12: Positioning Your Projector
Positioning your projector Choosing a location Before choosing an installation location for your projector, take the following factors into consideration: • Size and position of your screen • Electrical outlet location • Location and distance between the projector and the rest of your equipment You can install your projector in the following ways. -
Page 13: Obtaining A Preferred Projected Image Size
Obtaining a preferred projected image size The distance from the projector lens to the screen, the zoom setting (if available), and the video format each factors in the projected image size. Projection dimensions 16:9 Screen diagonal Screen Center of lens Vertical Offset Projection distance •... -
Page 14: Shifting The Projection Lens
7620 3736 6641 7505 8634 9763 For example, if you are using a 120-inch screen, the recommended projection distance is 3454 mm. If your measured projection distance is 5000 mm, the closest match in the "Distance from screen (mm)" column is 4893 mm. Looking across this row shows that a 170'' (about 4.3 m) screen is required. -
Page 15: Adjusting The Projector Height
Adjusting the Projector Height Rear adjuster foot Rear adjuster foot Front adjuster foot The projector is equipped with 1 front adjuster foot and 2 rear adjuster feet. These adjusters change the image height and projection angle. 1. Pull the quick-release lever and lift the front of the projector. Once the image is positioned where you want it, release the quick-release lever to lock the foot in position. -
Page 16: Operation
Operation Installing the USB wireless dongle Follow the illustrations below to install the USB wireless dongle. Make sure that the cover is installed back after the USB wireless dongle is plugged. Do not turn the power on with the cover open. Powering On the Projector 1. -
Page 17: Home Screen
Home Screen Home Screen is the projector's operating system that allows you to choose HDMI input source, media player, AirReceiver, wireless linking, as well as language settings. When the projector is not projecting an image from a connected source it will display Home Screen by default. -
Page 18: Connection
Connection When connecting a signal source to the projector, be sure to: 1. Turn all equipment off before making any connections. 2. Use the correct signal cables for each source. 3. Ensure the cables are firmly inserted. 1. 12V Trigger for screen control 2. -
Page 19: Connecting To A Wi-Fi Network
Connecting to a Wi-Fi Network Before you can project wirelessly via the projector you must first connect the projector to a wireless network. 1. Install the USB wireless dongle before using (See page). 2. Power on the projector. See "Powering On the Projector" on page 3. -
Page 20: Screencasting With A Smartphone, Tablet, Or Pc
Screencasting with a Smartphone, Tablet, or PC Screencasting allows you to wirelessly cast content from smartphones, tablets, or PCs (using either the iOS, MacOS, Android, or Windows operating systems) that are connected to the same network as the projector by AirReceiver. Note •... - Page 21 4. Swipe up from the bottom of the device's screen to access the iOS control console. 5. Tap the Screen Mirroring button on the iOS control console. 6. In the Screen Mirroring menu select the device name "Vivitek". 7. Your iOS device's screen will be displayed on the projector.
- Page 22 4. Open the status menu at the top of the screen and then click the Screen Mirroring button. 5. In the Screen Mirroring menu select the device name "Vivitek". 6. Your MacOS device's screen will be displayed on the projector.
- Page 23 Check your device's user manual or call the device's support line to find out the name of your device's casting feature. 5. In the wireless casting menu select the device name "Vivitek". 6. Your Android device's screen will be displayed on the projector.
- Page 24 6. Select Cast... in the Chrome menu. 7. In the Cast tab menu select the device name "Vivitek". 8. Select either Cast tab cast the browser tab you are viewing, or Cast desktop to cast your PCs entire desktop. 9. Your Windows PC's screen will be displayed on the projector.
-
Page 25: Screencasting By Mirror Cast
3. Your device's screen will be displayed on the projector directly without Wi-Fi Network. Screencasting Problems Problem: Unable to find Vivitek in my device's casting list. 1. Ensure that both devices are in the same network and successfully connected 2. Restart AirReceiver on the projector several times (Check AirReceiver > Restart/ Close >... -
Page 26: Presenting From A Media Player
Presenting from a Media Player The USB port on the projector allows you to browse the image and document files stored on a USB flash drive connected to the projector. It can elimate the need for a computer source. Supported files formats Video format Audio format Photo format... -
Page 27: Using The Menus
Using the menus The projector has multilingual on-screen display (OSD) menus that allow you to make image adjustments and change a variety of settings. 1. Press on the projector or on the remote control to open the OSD menu. 2. When OSD is displayed, use to select any feature in the main menu. -
Page 28: Securing The Projector
Securing the projector Utilizing the password function Setting a password 1. Go to MANAGEMENT Menu > Password. Press OK. The password setting page appears. 2. Select Change Password and press OK. 3. The four arrow keys ( , , respectively represent 4 digits (1, 2, 3, 4). - Page 29 Entering the password recall procedure 1. Press and hold OK for 3 seconds. The projector will display a coded number on the screen. 2. Write down the number and turn off your projector. 3. Seek help from the local service center to decode the number.
-
Page 30: Upgrading Firmware
Upgrading firmware 1. Go to Vivitek website to download the latest firmware file. 2. Unzip the download file, find and save the file named "update_signed.zip" to the USB flash drive. (Suggest to use the USB flash drive with FAT32 format) 3. -
Page 31: Menu Operation
Menu operation Note • Please note that the on-screen display (OSD) menus vary according to the signal type selected and the projector model you are using. • The menu items are available when the projector detects at least one valid signal. If there is no equipment connected to the projector or no signal detected, limited menu items are accessible. - Page 32 Tint The higher the value, the more greenish the picture becomes. The lower the value, the more reddish the picture becomes. Sharpness The higher the value, the sharper the picture becomes. Gamma Selection Gamma refers to the relationship between input source and picture brightness.
- Page 33 Color Management This function provides six sets (RGBCMY) of colors to be adjusted. When you select each color, you can independently adjust its range and saturation according to your preference. • Primary Color: Selects a color from among R (Red), G (Green), B (Blue), C (Cyan), M (Magenta), or Y (Yellow).
- Page 34 ViviSettings • Color Enhancer: Allows you to fine-tune the saturation of colors with larger flexibility. It modulates complex color algorithms to flawlessly render saturated colors, fine gradients, intermediate hues and subtle pigments. • Flesh Tone: Provides a smart adjustment of hue only for calibrating people's skin color, not other colors in the image.
- Page 35 ALIGNMENT menu Conceals the poor picture quality in the four edges. The greater the value, the more portion of the picture is concealed Digital Zoom while the screen remains filled and geometrically accurate. Setting 0 means the picture is 100% displayed. This projector features a 3D function which enables you to enjoy the 3D movies, videos, and sporting events in a more realistic way by presenting the depth of the images.
- Page 36 There are several options to set the image's aspect ratio depending on your input signal source. • Auto: Scales an image proportionally to fit the projector's native resolution in its horizontal or vertical width. 16:9 picture • Fill: Projects an image as its original resolution and resizes it to fit within the display area.
- Page 37 SETTINGS menu The projector can be installed on a ceiling or behind a screen, or with one or more mirrors. Projection "Choosing a location" on page Language Sets the language for the On-Screen Display (OSD) menus. Splash Allows you to select which logo screen will be displayed during Screen projector start-up.
- Page 38 MANAGEMENT menu • Light Mode: Selects a suitable lamp power from among the provided modes. • Normal: Provides full lamp brightness. • ECO: Lowers brightness to extend the lamp life and decreases the fan noise. Light Settings • Dynamic ECO: Adjusts the lamp power automatically depending on the content brightness level while optimizing display quality.
- Page 39 Adjusts the image size and focus and check that the projected image is free from distortion. Test Pattern • HDMI EDID Switch HDMI EDID between HDMI 1.4 or HDMI 2.0 in order to solve compatibility issue with uncertain old players. HDMI EDID •...
- Page 40 INFORMATION menu • Model Name: Shows the current model name of your projector. • Source: Shows the current signal source. • Resolution: Shows the native resolution of the input signal. • Light Usage Time: Shows the number of hours the lamp has been used. •...
-
Page 41: Maintenance
Maintenance The projector needs proper maintenance. You should keep the lens clean as dust, dirt or spots will project on the screen and diminish image quality. If any other parts need replacing, contact your dealer or qualified service personnel. When cleaning any part of the projector, always switch off and unplug the projector first. -
Page 42: Replacing The Lamp
Replacing the Lamp As the projector operates over time, the brightness of the projector lamp gradually decreases and the lamp becomes more susceptible to breakage. We recommend replacing the lamp if a warning message is displayed. Do not attempt to replace the lamp yourself. - Page 43 1. Turn off the projector. 2. If the projector is installed in a ceiling mount, remove it 3. Unplug the power cord. 4. Use a screwdriver to remove the screw from the cover. (Illustration #1) Push up and remove the cover. (Illustration #2) 5.
-
Page 44: Specifications
Specifications • All specifications are subject to change without notice. Model HK2200 / HK1288 / UHK328 / UHK268 / VW268 / MH3000K Series Optical Resolution 3840 x 2160 with XPR, 1920 x 1080 without XPR Display system 1-CHIP DMD Lens F = 1.9 ~ 2.47, f = 12 ~ 15.6 mm Clear focus range 1.2m ~ 5.1m @ Wide, 1.3m ~ 4.9m @ Tele... -
Page 45: Dimensions
Dimensions 367.3 mm (W) x 254.0 mm (D) x 129.7 mm (H) Ceiling mount installation Ceiling mount screws: M4 x 8 (Max. L = 8mm) Unit: mm... -
Page 46: Appendix
Appendix LED Indicator Messages Light Status & Description System events System is in stand-by mode System is powering up System is under normal operation System is cooling down Downloading Colorwheel start fail Scaler reset fail Lamp life exhausted Lamp door is not closed Burn-In events Burn-in on Burn-in off... - Page 47 Compatibility Modes Supported timing for HDMI (HDCP) input • PC timings Vertical Horizontal Pixel Supported 3D format Resolution Mode Frequency Frequency Frequency Top Bottom Side by Side (Hz) (kHz) (MHz) VGA_60 59.940 31.469 25.175 VGA_72 72.809 37.861 31.500 640 x 480 VGA_75 75.000 37.500...
- Page 48 • Video timings Supported 3D format Horizontal Vertical Dot Clock Timing Resolution Frequency Frequency Frequency Frame Top Bottom Side by Side (kHz) (Hz) (MHz) Packing 480i 720 (1440) x 480 15.73 59.94 480p 720 x 480 31.47 59.94 576i 720 (1440) x 576 15.63 576p 720 x 576...
-
Page 49: Troubleshooting
Troubleshooting Refer to the symptoms and measures listed below before sending the projector for repairs. If the problem persists, contact your local reseller or service center. Please refer to "LED Indicator Messages" as well. Start-up problems If no lights turn on: •... -
Page 50: Rs-232 Protocol
RS-232 Protocol RS-232 Setting Baud rate: 9600 Parity check: None Data bit: Stop bit: Flow control: None Examples: Control items Input command row Projector return message Execute command reset.all[CR] RESET.ALL Query current brightness op bright ?[CR] OP BRIGHT =50 Set up brightness op bright =100[CR] OP BRIGHT =100 Brightness value + 1... - Page 51 Function Type Operation Support ASCII Write Power On op power.on<CR> Power Write Power off op power.off<CR> Read Power Status op standby.power ?<CR> Write HDMI 1 op input.sel =0<CR> Write HDMI 2 op input.sel =1<CR> Source Selection Write Media op input.sel =2<CR> Read Current source op input.sel ?<CR>...
- Page 52 Write Color Management - Magenta Gain op hsg.m.gain =100<CR> Write Color Management - Magenta/Hue op hsg.m.hue =100<CR> Write Color Management - Magenta/Saturation op hsg.m.sat =100<CR> Write Color Management - Yellow Gain op hsg.y.gain =100<CR> Write Color Management - Yellow/Hue op hsg.y.hue =100<CR> Write Color Management - Yellow/Saturation op hsg.y.sat =100<CR>...
- Page 53 Write Reset Audio Settings op audio.reset<CR> Write Normal mode op light.mode =0<CR> Write ECO mode op light.mode =1<CR> Write Dynamic ECO mode op light.mode =2<CR> Light Settings Read Light Mode Status op light.mode ?<CR> Write Light Timer Reset op light1.reset<CR> Read Light Timer op light1.hours ?<CR>...
Need help?
Do you have a question about the HK2200 Series and is the answer not in the manual?
Questions and answers