Advertisement
Available languages
Available languages
Advertisement
Table of Contents

Related Manuals for lamber F92-dy


Summary of Contents for lamber F92-dy
- Page 1 INSTRUCTIONS MANUAL F92-dy - F94-dy INSTRUCTIONS D’EMPLOI F92-dy - F94-dy...
- Page 3 The directive mentioned above, to which make reference for further details, provides for punitive actions in case of illegal disposal of such waste. Lamber guarantees a percentage of recovery at least of 90% in medium weight for each equipment. The 80% - always as regards the medium weight- of recovered material is recycled or reused.
-
Page 4: Table Of Contents
CONTENTS ENGLISH General notes pag. 07 Introduction and safety notes pag. 08 Learn to use the appliance pag. 10 First section - FOR THE USER pag. 11 Control panel pag. 12 Working and use pag. 13 Instructions before washing pag. 13 Washing pag. - Page 5 SOMMAIRE FRANÇAIS Remarques générales pag 07 Introduction et normes de sécurité pag. 09 Faites connaissance avec l'appareil pag. 10 Première partie - INSTRUCTIONS POUR L'UTILISATEUR pag. 11 Panneau de contrôle pag. 12 Fonctionnement et emploi, detersifs, entretien, inconvénients pag. 29 Avant le lavage pag.
- Page 7 GENERAL NORMS ENGLISH Tank You for purchasing our Dishwashing/Glasswashing Machine. Perfect washing-up results as far as hygiene concerns and a correct operation of the dishwashing machine can be assured only in case the instructions reported in the present manual are carefully followed. We hope the information reported in the present manual will be helpful to You.
- Page 8 INTRODUCTION ENGLISH AND SAFETY NORMS INTENDED USE The dishwasher/glasswasher may only be used for cleaning plates, cups, dishes, and similar restaurant ware and commercial catering. Any change in design or use of the dishwasher carried out without the written permission will lead to warranty nullification.
- Page 9 INTRODUCTION FRANÇAIS ET NORMES DE SECURITE' EMPLOI DE LA MACHINE Le lave-vaisselle/lave-verres peut être utilisé seulement pour le lavage des assiettes, tasses, et vaisselle similaire des restaurants et de la restauration collective. Tout changement dans design ou emploi de la lave-vaisselle fait sans l’autorisation écrite du constructeur va annuler la garantie.
-
Page 10: Learn To Use The Appliance
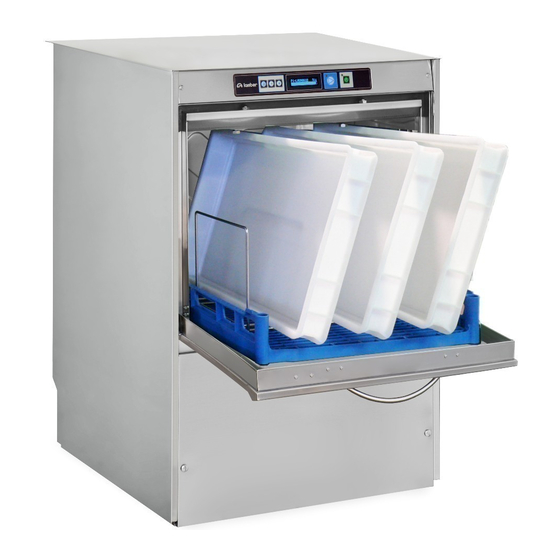
Learn to use the appliance Faites connaissance avec l'appareil F92-dy/F94-dy Stainless steel Upper rotating washing Lavage supérieur rotatif en acier inoxydable Control panel Panneau de contrôle Double skin Double paroi Stainless steel Tank filters Filtres cuve en acier inoxydable Stainless steel Upper rotating rinsing (90°) Rinçage supérieur rotatif en acier inoxydable (cône 90°) - Page 11 INSTRUCTIONS FOR THE USER INSTRUCTIONS POUR L'UTILISATEUR...
- Page 12 CONTROL PANEL EMPLOI CONTROLES Main switch Interrupteur général Cycle pushbutton Temperature data display Bouton cycle Affichage données de température Interactive display Affichage graphique Wash time selection pushbutton Bouton sélecteur temps de lavage Programming pushbutton Bouton programmation Pressure-gauge Manomètre pression Drain pump Pompe de vidange Dis.1 OPTIONAL...
-
Page 13: First Section - For The User
Regeneration and You will see the serial number of the machine a subsequent Resins’ Washing. followed by the logo Lamber. Attention: during tank filling don’t open the door Close the door of the dishwasher. -
Page 14: Washing
Attention! WASHING If during the loading phase, appears the message “BREAK TANK”, this means that you’re filling up Open the door of the machine and insert with water the rear Break Tank. the basket. . If after 5 minutes the data is still flashing in alternation with the inscription FILLING PHASE 1, N.b.The display informs you when the top of the you will see the word ALARM BEREAK TANK and... -
Page 15: Achievements
If you want to change the wash cycle, before closing the door, you will need to select the new cycle by pressing the time selection “D”. Temperature data display: to view temperature data during the wash cycle, it is necessary to press the push-button You will see the temperature data for 3”. - Page 16 “A” and then pressing it again to to turn off not operate the wash cycle while maintaining again the push button “A” The logo Lamber will reappear and will then be able to active heating functions. start the function SELF-WASHING holding down the The display shows the word “ECONOMY”.
- Page 17 The discharge stops automatically after about Then press the “E” button for 3 2’,20” minutes. seconds The discharge can be interrupted at any time by At the end of the descaling cycle (approx. 35 pressing the cycle-button “B” minutes) will appear on the LED the words After drainig, the machine will turn off “END OF THE DESCALING CYCLE”.
- Page 18 WATER CHANGE (Attention! In case of machines with drain pump, there is no Overflow ! ); It’s possible to program after how many cycles we want to change water completely. The data will disappear automatically after 10 A number (for ex. 1/5 according to what you have seconds after you close the door of the set in the parameter) is displayed during the dishwasher.
-
Page 19: List Alarms
On the contrary, Call the Technical Support List ALARMS! Service! BREAK TANK ALARM TANK HEATING CHECK RINSE This indicates a fault in the operating system: ATTENTION: if the dishwasher is in the washing lack of water mains, valve not functionning: Call phase (pump is functioning), the cycle will stop. - Page 20 12 deep plates, shown in the above picture as shown in the above picture G cod.CC00045 (2x) 3 4 5 6 7 8 9 Put the cutlery into the small baskets, handles down. Avoid overlapping it (see picture above). work/cdr/cestelli-posizionamento/Cestelli-F92-dy-ING-2017...
- Page 21 CLEANING PREVENTIVE DAILY MAINTENANCE MAINTENANCE Turn off the machine by pressing the PRECAUTION CLEANING switch “A” and drain the water from the INSTRUCTIONS tank by removing the overflow; (Attention! In case of machines with drain pump, IMPORTANT : Before carrying out the there is no Overflow ! );...
-
Page 22: Daily Cleaning Of The Interior Of The Dishwasher
DAILY CLEANING OF THE INTERIOR OF THE DISHWASHER Attention. Before carrying out cleaning the inside of the machine, make sure that there are no foreign objects that could damage the rusty steel inside the tank. The eventual rust particles could come from non- stainless steel dishes, from baskets or damaged water pipes not rust-proof. - Page 23 Remove the central support Remove the pump inlet filter Clean the pump inlet filter by means of a brush Clean the filter tank top Clean the washing arm for Clean the rinse arm any debris inside. Wipe with a cloth the tank Remove from the tank by Insert the tank filter in its and check for any debris on...
- Page 24 Insert the central support in Insert the overflow Insert the two tank filters in its place its place Replace the lower rinse arm Replace the lower washing Mount the upper washing arm ATTENTION! Daily Keeping with a hand the Check that the wash and assemble the upper rinse washing arm in place, screw rinse arms are free to rotate...
- Page 25 DETERGENT and RINSE-AID Attention. During the use of chemicals is advisable to wear appropriate clothing, such as gloves and protectives glasses. It’s therefore important to consider some factors. Firsf of all, it is necessary to use only strongly anti-foaming Alkali and Chlore Products specific for industrial dishwasher, manufactured by Companies recognized as seriousness.
- Page 26 PROBLEMS - CAUSES - SOLUTIONS PROBLEMS CAUSES SOLUTIONS The machine doesn't catch Main switch is switched off; Turn ON the main switch; Power plug is not inserted Insert the power plug The water doesn't go in Water cock closed; Open water cock; The Overflow is not in place;...
- Page 27 DESCALING When hard water is used you can find inside the machine and also on dishes calcareous sediments which must be removed both for hygienic and operating reasons by a descaling operation. Operating process and frequency of this intervention are suggested by your cleansing agent supplier who has suitable products, generally containing phosphoric acid.
- Page 28 USEFUL HINTS FOR STAINLESS STEEL MAINTENANCE Stainless steel is so called because it is not affected by oxidation; this dues its resistance to a thin molecular layer of oxide on the surface which protects againts further oxidation. There are, however, substances which can modify or destroy this layer, giving rise to corrosion: besides preventing the protective film of oxide from reforming, these substances corrode the stainless steel itself and can cause irreparable damage.
- Page 29 Il apparaîtra le numéro de série du programme de emplacements; la machine suivi par le logo Lamber. le Tourniquet de lavage soit libre de sorte Fermer la porte du lave-vaisselle. qu'il puisse tourner; le récipient de l'appareil doseur de produit Faites attention au mouvement de pour le rinçage et de détersif pour le lavage...
- Page 30 Dans le REMPLISSAGE PHASE 1 commence le Attention ! chargement de la cuve avec de l’eau du réseau; La machine est programmée en usine pour vous n.b. Si le Lave-vaisselle est doté d’adoucisseur, permettre de démarrer le programme de lavage après le remplissage de la cuve jusqu’au niveu demandé.
- Page 31 Répéter le cycle de DESINFECTION ! vaisselle. Ensuite enlever la vaisselle du panier, en veillant à ne pas toucher les parties internes En tout cas la pompe na va pas fonctionner pour ni les bords. plus de 15 minutes. Remettre vaisselle rayons hygiéniques.
- Page 32 “A” cycle de lavage tout en conservant les fonctions Le logo Lamber réapparaîtra et sera alors possible de actives de chauffage. démarrer la fonction AUTO-LAVAGE en maintenant L’écran affiche “ECONOMY”.
- Page 33 Ouvrir la porte du lave-vaisselle;; Pour effectuer le cycle, effectuer les opérations Ensuite , appuyer sur le bouton cycle “B” suivantes: Mettre la machine en OFF en appuyant pendant 3 secondes sur l’interrupteur général “A” (led éteint) Alternativement mots “VIDANGE” Appuyer sur le bouton “B”...
- Page 34 Attention!: Cette fonction peut être activée 5-THERMOCONTROL CUVE : uniquement par le technicien specialisé sur Cela indique que le demarrage de la pompe de demande. lavage aura lieu seulement quand la temperature de lavage configurée sera atteinte. Voir la section pertinente pour la programmation Ce message est accompagné...
- Page 35 11-FIN CYCLE VERIFIER LE NIVEAU EAU DESINFECTION COMPLETE Ce message indique que, pendant le cycle de DESINFECTION ECHOUEE: lavage et chaque fois que la machine charge Ces messages vont disparaître seulement à eau, un excessive réduction du niveau eau en cuve s’est produit.
- Page 36 G cod.CC00045 (2x) 3 4 5 6 7 8 9 - Les couverts doivent être placés dans les petits paniers spéciaux, les manches vers le bas en ayant soin de ne pas les superposer comme indiqué sur la photo ci-dessus. work/cdr/cestelli-posizionamento/Cestelli-F92-dy-FRA-2017...
- Page 37 ENTRETIEN JOURNALIER NETTOYAGE ENTRETIEN PREVENTIFS Mettre hors tension la machine en IMPORTANT: Avant d'effectuer toute poussant l'interrupteur "A" et faire écouler opération de nettoyage et d'entretien, débrancher l'eau de la cuve en enlevant le Trop- l'appareil du réseau électrique; plein; (Attention !.
- Page 38 NETTOYAGE QUOTIDIEN DE L’INTERIEUR DU LAVE-VAISSELLE Attention. Avant d’effectuer le nettoyage de l’intérieurde la machine, assurez-vous qu’il n y a pas de corps étrangers qui pourraient endommager l’acier inoxydable à l’intérieur de la cuve. Toute particule de rouille présente, pourrait venir de quelque assiette en acier non inoxydable, du panier ou des conduites d’eau endommagés qui ne sont pas anti-rouille.
- Page 39 Enlevez le support centrale Enlevez le filtre aspiration de Nettoyez le filtre d’aspiration de la pompe à l’aide d’un pompe. pinceau. Nettoyez les filtres de la cuve Nettoyez le tourniquet de Nettoyez le tourniquet de lavage. Vèrifiez la présence rinçage. de débris à...
- Page 40 Insérez le supporte filtres Insérez le trop-plein Insérez le filtres de la cuve dans son endroit centrale de la cuve Vissez le bras de rinçage Placez le bras de lavage Placez le bras de lavage inférieur inférieur supérieur ATTENTION! Agir sur le En tenant d’une main le bras Vèrifiez que le bras de lavage „grande“...
- Page 41 DETERGENT et PRODUIT DE RINCAGE Attention. Lors de l’utilisation de produits chimiques est conseillé de porter des vêtements appropriés, tells que des gants et des lunettes de protection. C’est donc important de tenir compte de certains facteurs. Tout d’abord, il est nécessaire d’utiliser seulement de Produits Anti-moussants fortement Alcalins et Chloreactifs, spécifiques pour Lave-vaisselle Industriel, fabriqué...
- Page 42 INCONVENIENTS POSSIBLES - CAUSES - REMEDES PROBLEMES CAUSES REMEDES La machine ne démarre Interrupteur général débranché; Insérer l'interrupteur Fiche d’alimentation pas insérée Insérer la fiche d’alimentation Robinet à l'eau fermé; Ouvrir le Robinet La machine ne charge pas l'eau Le Trop-plein n'est pas à sa Remettre le Trop-plein dans sa place ;...
- Page 43 DESINCRUSTATION A cause des eaux dures, il se forment à l'intérieur de la cuve, parfois aussi sur la vaisselle, des dépôts calcaires qui, pour des raisons d'hygiène et de fonctionnement, doivent être enlevés par désincrustation. Le procès et la fréquence de cette intervention sont conseillés par le fournisseur du détersif qui dispose de produits appropriés en général à...
- Page 44 CONSEILS UTILES POUR L'ENTRETIEN DE L'ACIER INOXYDABLE L'acier inoxydable est ainsi appelé parce qu'il ne subit pas l'action agressive de l'oxygène contenu dans l'air. Sa résistance est due à une mince couche moléculaire d'oxyde qui se forme à la surface et le protège contre l'oxydation.
- Page 45 INSTRUCTIONS FOR THE INSTALLER The following instructions are addressed to a qualified personnel, the only one authorised to carry out checks and repair, if any. The Manufacturer declines any responsibility in the case of interventions made by a non qualified personnel. INSTRUCTIONS POUR L'INSTALLATEUR Les instructions suivantes sont adressées à...
- Page 46 INSTALLATION - BRANCHEMENTS F92-dy / F94-dy UNDERCOUNTER DISHWASHER/GLASSWASHER LAVE-VAISSELLE/LAVE-VERRE SOUS TABLE 13,78 in (F92-dy) 16,90 in (F94-dy) 23,62 in 25,59 in Drain Pipe Tuyau vidange Cable Length: 59,00 in Longueur des cable/Tuyau: 14,96 in 10,24 in 7.9 in OPTION FREE STANDING/LAVE-VAISSELLE FRONTAL...
-
Page 47: Second Section - For The Installer
ENGLISH Second Section - FOR THE INSTALLER During installation carry out a good machine levelling, which is a prerequisite for a correct operation thereof. The Manufacturer cannot assume any responsability for any damage to persons or property deriving from the non-observance of the above specified norms. For a correct installation see the drawing on page 46 The dishwasher shall be installad in accordance with local codes, or in the absence of local codes, installed in accordance with the applicable requirements in the National Electrical Code, NFPA 70,... -
Page 48: Installation
It is also recommended to install a shock CONNECTIONS TO THE POWER absorber (not included with dishwashing SUPPLY machine) in the water supply line. This prevents damage to the machine from water line Before using the dishwashing machine, check “hammer” (hydraulic shock) in the water supply that all electrical protection systems are working line. - Page 49 Failure to comply with these guidelines will chemical dosage guidelines. render this guarantee invalid. Lamber When using chemical products you must wear disclaims any liability for consequential personnal protection equipment, gloves and damage on the product. protection glasses. Do not mix different detergents together.
- Page 50 The mean concentration of the liquid detergent If there is the detergent pump installed by should be 2-4 g/liter. In any case it is however Lamber, data are as follows: necessary that the detergent manufacturer Capacity: 1cc/SEC=3,6 Lit/H regulates in an appropriate dosage depending on Voltage: 230/50-60Hz the characteristics of the installation.
-
Page 51: Electrical Connections
DESCALING CYCLE : The suction tube of liquid detergent has to be passed through the opening spot on the bottom For programming, see section CONFIGURATION side of the machine (see next photo) USER TECHNICAL-PROGRAMMING The descaling cycle has a duration of about 35 minutes and takes place according to the steps listed below: 1. -
Page 52: List Alarms
The pressure switch advises about the water List ALARMS! lack. BREAK TANK ALARM Check if there is water inside the network or It indicates an anomaly: lack of water from the that the water feeding hose is not twisted or net, solenoid valve not functioning. -
Page 53: Vacuum Breaker Valve Connection
Vacuum Breaker Valve connection: The machine is supplied with an air gap comply with ANSI/ASSE 1001. Connect this valve by connecting it to the inlet hose of the dishwasher, as in the picture below , comply with ANSI/ASSE 1004. Vacuum Breakers 6”... - Page 54 KEYBOARD INTERACTIVE MEMBRANE REV16-2.47 Machine OFF ON/OFF push-button "A" for 1 second when the machine is ON (logo LAMBER appears) (with the machine empty the display will show off after 10" seconds) (just with machine full) Machine ON ON/OFF push-button "A" for 1 second when the machine is in OFF (Temperature displayed) with the machine empty the display will indicate "door open"...
- Page 55 USER TECHNICAL-CONFIGURATION PROGRAMMING "+" Push-button and push-button enter "D" for 5 second with the machine FF and hood open cod. PIN 1000 To view the Unit of measure °C temperatures during To confirm °F washing cycle press push-button Rinse After 3 seconds came back To modify (22÷90°C) standard...
- Page 56 Partial cycles (number of partial performed cycles) n°…… (not editable) To confirm (Only be reset with Reset FunctionPartial Cycles) Total Cycles (Number of Cycles performed) n°…… (not editable) To confirm Partial Cycles Reset n°…… yes/no To confirm ("yes" to reset value) Automatic Starting To confirm Time phase 2...
- Page 57 Aspirator To confirm With "NO" the aspirator time is enabled Time aspirator Aspirator To confirm (0÷60") Deter.pump with feeler To confirm If "YES" is activated, the adjustement of the detergent pump is excluded dos.Washing dos.washing To confirm Dosing time (0÷100%) dispenser of washing back back...
- Page 58 Cycle number Number of cycles To confirm Attention: this parameter regeneration (0÷15") With "0" is available only on models the regenerating is LP6/8-dy e LP31/38-dy enabled Economy thermostat To confirm Thermocontrol To confirm Attention! BOILER When "Tank Thermocontrol" is active the function "Rinse Thermocontrol"...
- Page 59 PCB-BOARD PRESET Please follow the instructions below for the PRESET (reset of the factory settings) of the PCB-board: When the machine is turned off, disconnect the wall switch. 2) Press at the same time the pushbuttons 1, as per picture on the side. PRESET DATI PRESET DATI COMPLETATO...
- Page 61 FRANÇAIS Deuxième partie - INSTRUCTIONS POUR L'INSTALLATEUR Positionner la machine près des attaches. Pendant l'installation, effectuer la mise à niveau de la machine et contrôler à l'aide d'un niveau que la machine soit parfaitement en équilibre. La Maison décline toute responsabilité pour les éventuels dommages dérivants du manque d'observation des normes citées.
- Page 62 1,38 +/- 0,34 bar - (138 +/- 38kPa) Connecter cordon d’alimentation réseau électrique du client (le câble peut être 20 +/-5 psi relié directement au réseau électrique du (Voir les données du manomètre pression sur le client ou une fiche peut être rajoutée à la panneau frontal) partie finale du cordon.
- Page 63 Les conditions de garantie ne s’appliquent pas en cas de non respect des instructions telles que décrites ci-dessus. Lamber décline toute ATTENTION! Remplacer chaque 6 mois par an responsabilité sur le produit dans le cas où vous le tube d’aspiration de la pompe ne vous conformeriez pas à...
- Page 64 S’il s’agît de la Pompe de détergent installée par fabricant du detergent réglemente le dosage Lamber, les données sont les suivantes: approprié en fonction des caractéristiques de Capacité: 1cc/SEC=3,6 Lit/H l’installation.
- Page 65 CYCLE ANTICALCAIRE: Le tuyau d’aspiration du détergent liquide va passer à travers place l’ouverture posterieure de la machine (voir photo ci-dessous) Pour la programmation voir la section CONFIGURATION TECHNIQUE- PROGRAMMATION UTILISATEUR Le Cycle anticalcaire a une durée d’environ 35 minutes et se déroule selon les phases suivantes: pompe rinçage et doseur anticalcaire jusqu’à...
- Page 66 Le pressostat signale manque d’eau. Liste ALARMES ! Vèrifier que l'eau ne manque pas dans le ALARME BREAK TANK réseau qu’il n’y pliures Il y a une anomalie: Il n’y a pas d’eau provenant étranglements sur le tuyau d’arrivée eau. du reseau, l’électrovanne ne fonctionne pas.
- Page 67 Connexion soupape antivide: La machine est livrée avec une soupape antivide conforme à la norme ANSI/ASSE 1001. Connecter cette soupape en la raccordant au tuyau entrée de la Lave-vaisselle, comme dessin ci-dessous conformements à la norme ANSI/ASSE 1004. Soupape antivide 6”...
- Page 68 CLAVIER A MEMBRANE INTERACTIVE work/doc/F92-ek-r16-display-vers.2.47.xls Machine OFF Bouton-poussoir ON/OFF "A" pour 1 sec en ON ( logo LAMBER apparaît) (à machine vide le display s'éteinte après 10" sec.) (seulement avec la machine remplie) Machine ON Bouton-poussoir ON/OFF "A" pour 1 sec en OFF (températures affichées)
- Page 69 CONFIGURATION TECHNIQUE-PROGRAMMATION UTILISATEUR "+" Bouton-poussoir et bouton-poussoir enter "D" pour 5 sec machine en OFF et Capot Ouvert cod. PIN 1000 Pour visualiser les Unité de mesure °C températures pendant Pour confirmer °F le cycle de lavage appuyer sur Rinçage Après 3 sec.
- Page 70 Total Cycles (Nombre de cycles effectués) n°…… (pas modifiable) Pour confirmer Reset Partiel Cycles n°…… oui / non Pour confirmer ("oui" pour faire le reset de la valeur) Mise en marche automatique Pour confirmer Durée Phase 2 Temps Pour confirmer Porte au niveau (10÷360") la cuve...
- Page 71 Dos. Lavage avec/SONDE Pour confirmer Si activé "NON" est disabilité le reglage du doseur de produit de lavage dos. Lavage dos.lavage Pour confirmer Temps dosage (0÷100%) doseur de lavage arrière arrière dos. Rinçage dos.Rinçage Pour confirmer Attention!: le paramètre n'est pas Temps dosage (0÷100%) visible pour les modeles...
- Page 72 Termocontrol P1-P2 Pour confirmer LAVAGE P3-P4 SERVICE Numero cycles Pour confirmer Numero cycles (0÷99999") Avec valeur "0" la fonction SERVICE est disactivée TWIN standard Per confermare Nom machine nom machine 1 nom machine 2 Bip boutons Pour confirmer N.B. A la fin des opérations de programmation Sortie la macchine s'éteint.
- Page 73 PRESET PLATINE ELECTRONIQUE Pour le PRESET (rétablissement des paramètres d’usine) de la platine électronique suivez les instructions ci-dessous: Avec la machine ETEINTE, débrancher l’interrupteur mural. 2) Presser en même temps les poussoirs 1 (voir image ici à côté). PRESET DATI PRESET DATI COMPLETATO COMPLETATO...
-
Page 74: Connection Scheme
CONNECTIONS SCHEME SC HEM A B R AN C HEM EN TS BOILER Elements Résistance SURCHAUFFEUR White - Blanc Blue - Bleu Staples - Ponts TANK Elements - Résistance CUVE Blue-Bleu White - Blanc COLLE-F92-UL-2017... -
Page 78: Components
COMPONENTS COMPOSANTS IOL1 CON2 CON1 ELECTRONIC PLATE FICHE ELECTRONIQUE CON3 IOL2 PCB2 PRS1 CONTROL BOARD- B OîTE DE CONTROLE cod.0300842 MEMBRANE KEYBOARD PANNEAU A TOUCHES SENSITIVES ETR2 ETR3 MTR1 SOL1 MTR2 BASE - SOCLE Cnp-F92-dy-UL-2017... -
Page 79: Specifications
BASKET SIZE DIMENSIONS CASIER 12÷18 PLATES PER BASKETS NUM.ASSIETTES POUR CASIER 14,57 inch WORK HEIGHT HAUTEUR DU PLAN DE TRAVAIL 12,60 (F92-dy) 15,75 (F94-dy) inch PLATES CLEARANCE OUVERTURE DE CHARGEMENT 208/240 V1ph 60Hz VOLTAGE TENSION D'ALIMENTATION ELECTRIC PUMP ELECTROPOMPE...
Need help?
Do you have a question about the F92-dy and is the answer not in the manual?
Questions and answers