Table of Contents
Advertisement
Available languages
Available languages
Quick Links
Advertisement
Table of Contents

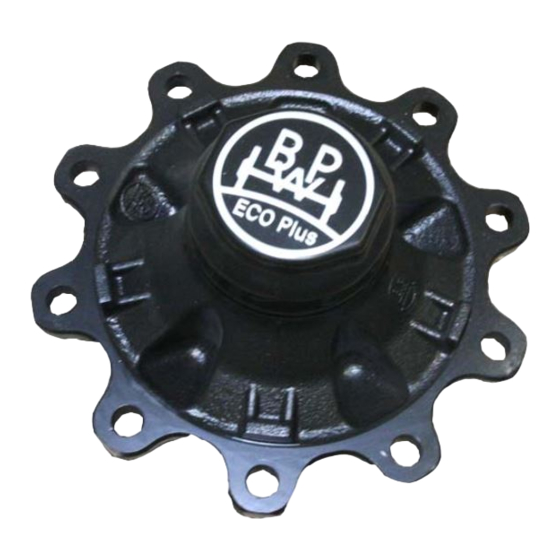
Related Manuals for BPW ECO Plus 2

Summary of Contents for BPW ECO Plus 2
- Page 1 ECO Plus 2 Digitaler ECOMETER · Bedienungs- und Montageanleitung Digital ECOMETER · Operating and Installation Instructions ECOMETER numérique · Instructions de service et de montage 04.001.21.25.0 BPW-EA-ECOMETER-EP2 37141401...
-
Page 2: Table Of Contents
04.001.21.25.0 V4 02.04.2014 Digitaler ECOMETER · Bedienungs- und Montageanleitung Digital ECOMETER · Operating and Installation Instructions ECOMETER numérique · Instructions de service et de montage BPW Bergische Achsen KG TÜV 07 ATEX 7486 X Typ EM02 -30°C <= Ta <= 80°C... - Page 3 04.001.21.25.0 V4 02.04.2014 Digitaler ECOMETER · Bedienungs- und Montageanleitung Digital ECOMETER · Operating and Installation Instructions ECOMETER numérique · Instructions de service et de montage Vor dem ersten Einbau muss der Digitale ECOMETER einmalig auf den Reifenum- fang eingestellt und aktiviert werden.
-
Page 4: Funktionsweise / Bitte Beachten
Ein wasser- und schmutzdicht eingebauter Mini-Computer zählt die Rad-Umdrehungen über Magnet und Reed-Kontakt. Der Digitale ECOMETER mit Bajonett-Anschluss mit dem speziellen Hakensprengring und integ- riertem Magneten ist lieferbar für alle ECO Plus 2-Achsen. Für alle ECO Plus - Achsen und alle ECO MAXX- Achsen bis 12 Tonnen gibt es den Digitalen ECOMETER mit Gewindeanschluss. -
Page 5: Inbetriebnahme
04.001.21.25.0 V4 02.04.2014 Digitaler ECOMETER · Bedienungs- und Montageanleitung Inbetriebnahme Nach der Auslieferung befi ndet sich der Digitale ECOMETER im Test-Modus. Durch eine Annähe- rung mit einem metallischen Gegenstand an den sensierten Bereich im Display erscheint „CONT“ und bei einer Aktivierung des Reed-Kontaktes durch den Magneten erscheint „REED“. Zunächst muss der ECOMETER auf den erforderlichen Reifenabrollumfang eingestellt werden. -
Page 6: Einstellung Des Reifen-Abrollumfanges
04.001.21.25.0 V4 02.04.2014 Digitaler ECOMETER · Bedienungs- und Montageanleitung Einstellung des Reifen-Abrollumfanges Der Wechsel in den Einstell-Modus erfolgt durch gleichzeitiges Berühren des Reed-Kontaktes in der Kapsel mit dem Magneten (am Hakensprengring) und durch Annäherung eines metallischen Gegenstandes an den sensierten Bereich außen am Display. Bei einer längeren Unterbrechung des Einstell-Vorganges erlischt die Anzeige. - Page 7 04.001.21.25.0 V4 02.04.2014 Digitaler ECOMETER · Bedienungs- und Montageanleitung 3. Der Einstell-Modus wird durch das Umstellen der ersten Ziff er von 9 auf 0 beendet: wenn die Neun blinkt, kann durch Aktivierung des sensierten Bereiches (durch metallischen Gegenstand) von Neun bis Null heruntergezählt werden. Damit ist der eingestellte Reifenumfang bestätigt. Achtung! Danach ist keine Veränderung des eingestellten Wertes für den Reifen-Abrollumfang mehr möglich!
-
Page 8: Einbau
04.001.21.25.0 V4 02.04.2014 Digitaler ECOMETER · Bedienungs- und Montageanleitung Einbau 1. Kapsel mit Schlüssel für Radkapseln SW120 lösen. Achtung: Bajonettverschluss! Keinen Schlagschrauber verwenden. Kapsel durch Drehen um ca. 30° gegen den Uhrzeigersinn von Position 1 auf Position 2 zurückdrehen. In dieser Stellung hebt sich die Kapsel deutlich von der ECO Unit ab und kann axial abgezogen werden. - Page 9 4. Nach der Einstellung auf den Reifenabrollumfang Achtung! (--> Seite 6) den ECOMETER im Bereich der O-Ring An- Bei Verlust des Keils kann sich im lagefl äche und des Bajonettverschlusses dünn mit BPW Extremfall die Achsschraube lösen Plus Spezial-Langzeitfett ECO-Li einstreichen.
-
Page 10: Ablesen / Batterie
Wenn die Laufl eistungsanzeige während des Ablesens im Display blinkt, ist die Spannung der Batterie zu niedrig und die Batterie sollte ausgetauscht werden. Batterie Der Betrieb des ECOMETERS ist nur mit original BPW-Batterien erlaubt. BPW-Sachnummer 02.0130.97.00 Montage und Demontage, sowie die Einstellung des ECOMETER dürfen nicht innerhalb von explosionsgefährdeten Bereichen durchgeführt werden. -
Page 11: Wechsel Der Batterie / Beschädigung / Entsorgung / Hinweis
Die Batterie aus dem ECOMETER entfernen. ECOMETER und Batterie nach den jeweiligen natio- nalen Vorschriften entsorgen. Hinweis Bei Umbau von digitalem ECOMETER auf mechanischen ECOMETER oder BPW Radkapsel ohne Kilometerzähler, ist der Hakensprengring mit Magnet zu entfernen und der Serien- Hakensprengring ohne Magnet (siehe Grafi k) einzubauen. -
Page 12: Function / Please Note
ECO MAXX axles up to 12 tonnes. There is a sensed area behind the display disc which is indicated by the two protruding BPW logos. The display is activated by bringing a metallic object (ferromagnetic) close to the area of the logo. -
Page 13: Taking Into Operation
04.001.21.25.0 V4 02.04.2014 Digital ECOMETER · Operating and Installation Instructions Taking into operation On delivery, the digital ECOMETER is in test mode. Bringing a metallic object close to the sensed area on the display causes „CONT“ to be displayed. „REED“ is displayed when the reed contact is activated by the magnet. -
Page 14: Setting The Tyre Rolling Circumference
04.001.21.25.0 V4 02.04.2014 Digital ECOMETER · Operating and Installation Instruction Setting the tyre rolling circumference The unit is changed to setting mode by touching the reed contact in the hub cap with the magnet (on the clasp locking ring) and at the same time bringing a metallic object close to the sensed area on the outside of the display. - Page 15 04.001.21.25.0 V4 02.04.2014 Digital ECOMETER · Operating and Installation Instructions 3. Setting mode is exited by changing the fi rst digit from 9 to 0: When the nine is fl ashing, it can be reduced from nine to zero by activating the sensed area (with a metallic object). This confi rms the set tyre circumference.
-
Page 16: Installation
04.001.21.25.0 V4 02.04.2014 Digital ECOMETER · Operating and Installation Instruction Installation 1. Unscrew the hub cap with a 120 mm hub cap spanner. Important: bayonet lock! Do not use an impact driver. Turn the hub cap back from position 1 to position 2 by turning anti-clockwise about 30°. - Page 17 Insert the new O-ring into the groove in the wheel hub. 4. After setting the tyre rolling circumference (--> page 14), Important! apply a thin coat of BPW special long-life grease ECO- The axle screw may come loose Plus to the ECOMETER in the area of the O-ring contact under extreme circumstances surface and the bayonet lock.
-
Page 18: Reading Out / Battery
The battery voltage is too low if the mileage display fl ashes during the readout. Fit a new battery. Battery The ECOMETER is only allowed to be operated with genuine BPW batteries. BPW-code number 02.0130.97.00 The ECOMETER is not allowed to be installed, removed or set in a potentially explosive atmosphere. -
Page 19: Fitting A New Battery / Damage / Disposal / Note
Note When converting from the digital ECOMETER to the mechanical ECOMETER or BPW hub cap without kilometre counter, remove the clasp locking ring with magnet and install the standard clasp locking ring without magnet (see illustration). -
Page 20: Fonctionnement / Attention
12 tonnes, l‘ECOMETER numérique existe en version à raccord fi leté. Derrière la vitre de l‘affi cheur se trouve une zone de capteurs repérée par les deux logos BPW. Il suffi t d‘approcher un objet métallique (ferromagnétique) de ces logos pour activer l‘affi chage. -
Page 21: Mise En Service
04.001.21.25.0 V4 02.04.2014 ECOMETER numérique · Instructions de service et de montage Mise en service A la livraison, l‘ECOMETER numérique se trouve en mode de test. Approcher un objet métallique de la zone de capteurs de l‘affi cheur pour faire apparaître „ CONT „ ; en activant le contact REED à... -
Page 22: Réglage De La Circonférence De Roulement Des Pneus
04.001.21.25.0 V4 02.04.2014 ECOMETER numérique · Instructions de service et de montage Réglage de la circonférence de roulement des pneus La commutation en mode de réglage s‘effectue par mise en contact de l‘aimant avec le contact REED dans le capuchon (sur le circlip) et approche simultanée d‘un objet métallique de la zone de capteurs de l‘affi... - Page 23 04.001.21.25.0 V4 02.04.2014 ECOMETER numérique · Instructions de service et de montage 3. Quitter le mode de réglage en faisant passer le chiff re de tête de 9 à 0 : lorsque le 9 clignote, il peut être abaissé à 0 en approchant un objet métallique de la zone de capteurs. La circonfé- rence entrée est ainsi confi...
-
Page 24: Montage
04.001.21.25.0 V4 02.04.2014 ECOMETER numérique · Instructions de service et de montage Montage 1. Desserrer le capuchon à l‘aide d‘une clé pour capuchons de moyeu SW120. Attention ! Ne pas utiliser de visseuse à percussion - fermeture à baïonnette ! Faire tourner le capuchon d‘environ 30°... - Page 25 Placer un nouveau joint torique dans la rainure du moyeu. 4. Après le paramétrage de la circonférence de Roulement Attention ! (--> page 22), appliquer une fine couche de graisse BPW En cas de perte de la goupille spéciale longue durée Eco-Li Plus à...
-
Page 26: Lecture / Pile
être remplacée. Pile L‘ECOMETER ne fonctionne qu‘avec des piles BPW d‘origine (référence 02.0130.97.00). Le montage et le démontage, ainsi que le réglage, de l‘ECOMETER ne doivent pas être effectués dans des atmosphères explosibles. -
Page 27: Remplacement De La Pile / Endommagement / Recyclage / Information
Information En cas de passage de l‘ECOMETRE numérique à l‘ECOMETRE mécanique ou au capuchon de moyeu BPW sans compteur de kilomètres, enlever le circlip avec aimant et le remplacer par le circlip de série sans aimant (voir graphique). -
Page 28: Abrollumfang
04.001.21.25.0 V4 02.04.2014 Digitaler ECOMETER · Bedienungs- und Montageanleitung Digital ECOMETER · Operating and Installation Instructions ECOMETER numérique · Instructions de service et de montage Die Angaben basieren auf Reifengröße Abrollumfang ± 2% ETRTO-Standardmaßen. Tyre size Rolling circumference Die Daten der verschiedenen Dimensions de pneumatique Circonférence de roulement Reifenhersteller können gering-... - Page 29 04.001.21.25.0 V4 02.04.2014...
- Page 30 Ihr Partner für den wirtschaftlichen Weg! BPW Bergische Achsen Kommanditgesellschaft Postfach 12 80 · 51656 Wiehl, Deutschland · Telefon +49 (0) 2262 78-0 info@bpw.de · www.bpw.de...
Need help?
Do you have a question about the ECO Plus 2 and is the answer not in the manual?
Questions and answers