
Related Manuals for Kärcher WT 5


Summary of Contents for Kärcher WT 5
- Page 1 WT 5 Deutsch..English ..17 Français ..29 Italiano ..41 Nederlands . . . 53 Español ..65 Português . . . 77 Ελληνικά...
-
Page 4: Table Of Contents
Contents General information ....Safety instructions ....Operation . -
Page 5: Safety Instructions
Warranty The warranty terms published by the relevant sales company are applicable in each country. We will repair potential failures of your appliance within the warranty period free of charge, provided that such failure is caused by faulty material or defects in manufacturing. -
Page 6: Operation
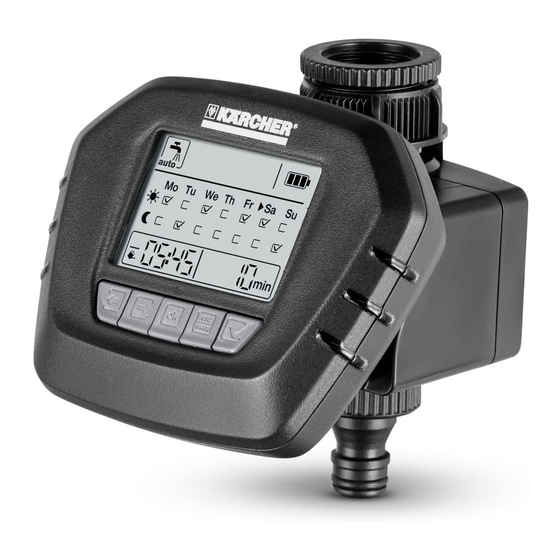
Operation Check the contents of the packaging for completeness and damages when unpack- ing. If you detect any damages please contact your dealer. Illustrations on fold-out page! Description of the Appliance Illustrations on Page 2 Reduction piece (G Water connection (G 1) with filter gasket Valve unit Hose connection Coupling element for hose connection... - Page 7 Function The device has 4 modes at disposal. Automatic irrigation – With this function watering periods can be set individually and the watering is automatically activated and deactivated. Manual irrigation – With this function the watering is manually switch on or off. Countdown function watering –...
- Page 8 Setting the time upon initial start-up Note: As soon as the battery is inserted, the time flashes automatically. Set the hours by means of the arrow keys. Confirm with the OK button. The minutes are flashing. Set the minutes by means of the arrow keys.
- Page 9 Setting automatic watering The display watering (activated) is flashing Note The factory setting for the watering time and duration is 5 minutes at 6 a.m. and 5 minutes at 9 p.m. You can navigate through the watering pro- gramme using the arrow keys. ...
- Page 10 Set the minutes by means of the arrow keys. Confirm with the OK button. The watering duration is flashing. Set the minutes by means of the arrow keys. Confirm with the OK button. The watering duration is set. ...
- Page 11 Setting of manual watering Switch into the settings mode using the esc/menu button. menu The symbol for manual watering is flashing. Confirm with the OK button. The watering symbol appears. The valve opens. Watering is active. ...
- Page 12 Setting of the countdown function watering Switch into the settings mode using the esc/menu button. menu Select the watering mode with the arrow keys. The symbol for the countdown function flash- Confirm with the OK button. The minutes are flashing. ...
- Page 13 Interruption watering Switch into the settings mode using the esc/menu button. menu Select the watering mode with the arrow keys. The symbol for the interruption of the watering is flashing. Confirm with the OK button. The irrigation settings are deactivated for 24 hours.
-
Page 14: Care And Maintenance
Care and maintenance Clean the filter gasket Regularly remove the filter gasket from the water connection and rinse under running water. Battery Battery status full Battery status almost empty Replace battery. Battery status empty Replace battery. Note In the automatic watering mode the valve is closed for safety purposes. -
Page 15: Troubleshooting
Troubleshooting Fault Cause Correction The irrigation Water tap is closed. Open tap. does not take Battery depleted. Insert a new 9V battery (type place in spite 6LR61). of the pro- Battery contacts oxidized. Clean the contacts. gramming. Filter gaskets blocked. Clean the filter gasket.
Need help?
Do you have a question about the WT 5 and is the answer not in the manual?
Questions and answers