Download Print this page
Toto TES4ADC-12 Installation Instructions Manual

Toto TES4ADC-12 Installation Instructions Manual

Soap dispenser
Hide thumbs Also See for TES4ADC-12:

Advertisement

Quick Links

03670 T1
Warranty Registration and Inquiry
For product warranty registration, TOTO U.S.A. Inc. recommends online Warranty Registration. Please visit our web site
http://www.totousa.com. If you have questions regarding warranty policy or coverage, please contact TOTO U.S.A. Inc., Customer
Service Department, 1155 Southern Road, Morrow, GA 30260 (888) 295-8134 or (678) 466-1300 when calling from outside of U.S.A.
For the best results, be sure to read the following installation instructions and use the product only as described in this manual.
● The following symbols are used to indicate important
safety instructions for the safe and proper use of the
product.
Do not use a loose or faulty electrical outlet or plug.
Doing so may cause fire or electrical shock.
Do not use direct current or power source with
improper voltage.
Doing so may cause fire.
This product should only be serviced, disassembled or
modified by a factory technician to prevent possible
malfunction or electric shock.
Please do not install in a bathing area or humid place.
Doing so could cause fire or electric shock.
Be sure to plug the AC adapter all the way into the wall socket
to avoid possible fire or electrical shock. TOTO recommends
that the AC adapter be connected to a GFCI-protected outlet.
Do not apply force or sudden impact to this product, as
this may cause malfunction or leakage.
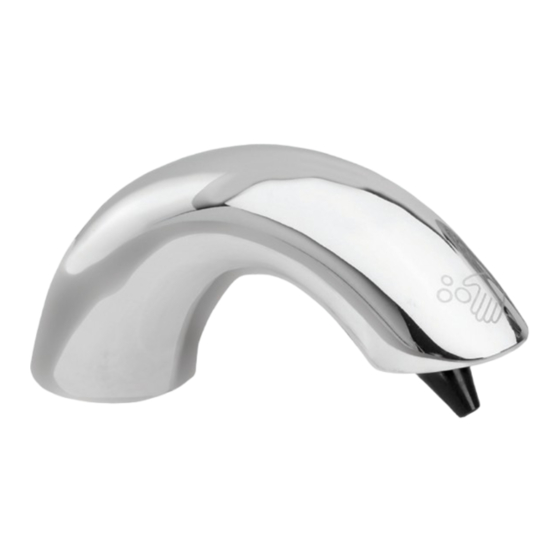
Automatic Soap Dispenser
TOTO SOAP DISPENSER
● Each symbol is defined as follows:
2009.04

Advertisement

loading
Need help?

Need help?

Do you have a question about the TES4ADC-12 and is the answer not in the manual?

Questions and answers

Subscribe to Our Youtube Channel

Summary of Contents for Toto TES4ADC-12

  • Page 1 TOTO SOAP DISPENSER Warranty Registration and Inquiry For product warranty registration, TOTO U.S.A. Inc. recommends online Warranty Registration. Please visit our web site http://www.totousa.com. If you have questions regarding warranty policy or coverage, please contact TOTO U.S.A. Inc., Customer Service Department, 1155 Southern Road, Morrow, GA 30260 (888) 295-8134 or (678) 466-1300 when calling from outside of U.S.A.
  • Page 2 Dispensed Amount of Soap 2mL (at factory setting) Tank Capacity Approximately 1 gallon (4L) (Usable Capacity) <Special> … with subtank and 39.4’ (12m) tube and cords Item TES3ADC-12 TES4ADC-12 TES5ADC-12 TES6ADC-12 Configuration Number of Dispenser Base Unit TES122M V100 TES123M V100...
  • Page 3 Before Installing Your TOTO Soap Dispenser 1. Wiring The voltage is AC 120V (60Hz). The energy consumption is as follows. Wiring should be installed in compliance with the following energy consumption levels. Single spout configuration : TES1ADC-05 Two spout configuration : TES2ADC-05...
  • Page 4: Parts Identification

    Parts Identification Please verify that the following parts are included. *Some models may have different component as illustrated below. Base Unit ( Models TES121 / 122 / 123M V100) *pictured TES121M V100 <Dispenser Portion> Soap intake Automatic Indicator Mark Soap pump Sensor portion Air pump Soap tank...
  • Page 5 Installation of the Dispenser and Tank Position of the Dispenser (1) Space between the dispenser and the water valve=more than 4Ó (100mm) Screw holes for installing the dispenser [ 1" ~ 1-1/8" (25 ~ 28mm) in diameter Water valve (2) The distance from the soap dispenser to the edge of the sink = within 3-1/8Ó...
  • Page 6 Diagram of Assembled Product *Some models may have different components as illustrated below. Model : TE1SADC-05 4-1/4" (110mm) Wall surface floor surface 11-1/8" 9-1/4" (282mm) (234mm)
  • Page 7: Installation Procedure

    Installation of the Sub-tank (Special) Caution Use of the TOTO Soap Dispenser in conjunction with other equipment that has an inverter or infrared lamps may cause the unit to malfunction. Make sure that the cords and tubes do not come into contact with the hot water...
  • Page 8 Pre-installation of the dispenser Insert the dispenser into the installation holes in Dispenser the counter (or the sink). Packing Loosely screw in the washers with the hex nuts. Caution Make sure that the cords and tubes do not Washer Hook for the get crimped.
  • Page 9 Connecting the tubes and cords (Connection to the Dispenser Side) Preparation before connecting the tubes and cords Be sure to connect one cord with one liquid soap tube (white). Before connecting the tubes and cords, pair one liquid soap tube (white) with one cord and tape them together.
  • Page 10 Connecting the tubes and cords (Connection to the Tank Side) Insert the liquid soap tubes into each of the cou- pling caps located on the side of the liquid soap pump and secure them with the clamps. Insert into the tube coupling Connect each of the liquid soap tubes and the caps and secure with the pair of cords with each of the cords on the tank...
  • Page 11 Inserting the AC Adapter Insert the AC Adapter into the wall outlet. Caution Do not install AC Adapter upside do The range detector is activated when the power is connected. oid placing objects in the sink bowl or co vering the sensor with your hand. (The range detector is set in appr xi- Lamp inside mately 10 seconds.)
  • Page 12 Lamp inside sensor (red) Securing the Dispenser Make sure not to cover the sensor light with your hand or place any objects inside the sink bowl, as this will cause the Lamp inside the sensor located at the front of the dispenser to flash off and on. If the light continues to flash even after removing any obstacles, adjust the position of the dispens- er until the light stops flashing.
  • Page 13: Trial Operation

    Trial Operation 1. Confirming that the dispenser functions properly after installation After installation is complete, confirm that the unit is working properly using the following method. Place your hands under the dispenser spout and hold them in place until soap is discharged. Caution The dispenser pump will operate intermittently.
  • Page 14 Installation of the Sub-Tank (Special) Fill the sub-tank with liquid soap from the sub-tank supply opening. Air deflation hose Elbow Coupling Cap Sub-tank supply Connection hose Tank Sub-Tank Connect the hose to the sub-tank. Connection hose * Use the connection hose for connecting the liquid Hose clamp soap tanks and cut to the desired length to fit be- tween the sub-tank and the tank.
  • Page 15 (5) Attach the elbow to the front end of the air deflation hose and attach it to the wall with the hose tie and wood screw. Hose tie *Do not block the elbow. It is the air bleed point for the system.
  • Page 16 Caution Hose length max 16.4’ (5m) Connection hose Connection hose Y-shaped nipple Be sure to provide the customer with the Owner's Manual, Instruction Label, and Allen wrenches that come with the TOTO Soap Dispenser.