Table of Contents
Advertisement
Bedienungsanleitung
Bitte genau durchlesen!
Instruction manual
Please read before use!
Hirschmann Laborgeräte GmbH & Co. KG
Hauptstraße 7-15 • 74246 Eberstadt Germany
Fon +49 7134 511-0 • Fax +49 7134 511-990
www.hirschmannlab.com · info@hirschmannlab.com
Digitales Titriergerät
Digital titration apparatus
X2120460000
1
Advertisement
Table of Contents

Subscribe to Our Youtube Channel
Related Manuals for Hirschmann solarus


Summary of Contents for Hirschmann solarus
- Page 1 Bedienungsanleitung Bitte genau durchlesen! Instruction manual Please read before use! Digitales Titriergerät Digital titration apparatus Hirschmann Laborgeräte GmbH & Co. KG Hauptstraße 7-15 • 74246 Eberstadt Germany Fon +49 7134 511-0 • Fax +49 7134 511-990 X2120460000 www.hirschmannlab.com · info@hirschmannlab.com...
-
Page 2: Table Of Contents
Inhalt Content Seite page Sicherheitsvorschriften ..............4 Warnings and safety instructions ..........4 Einzelteile ..................8 Individual components ..............8 Funktionsprinzip ................9 Principle of operation ..............9 Einsatzverbote ................10 Prohibited applications ..............10 Einsatzbeschränkungen ...............11 Restricted applications ..............11 Gerät vorbereiten .................12 Preparation of device ..............12 6.1 Einsetzen des Lichtschutzfensters ..........12 6.1 Using the light protection window ..........12 6.2 Befestigung Ansaugschlauch ............13... - Page 3 Inhalt Content Seite page 9.2 Disassembly .................. 33 9.2 Demontage ..................33 9.3 How to loosen the suction, discharge and 9.3 Ansaug-/Ausstoß- und Rückführventil lockern ......33 9.4 Sterilisation durchführen ............... 35 recirculation valve ................ 33 9.5 Kolben wieder einbauen ............... 35 9.4 How to perform a sterilization .............
-
Page 4: Sicherheitsvorschriften
1. Sicherheitsvorschriften 1. Warnings and safety instructions Achtung! Please note: Vor Gebrauch die Bedienungsanleitung und die Please read the user manual and safety instructions Sicherheitsvorschriften sorgfältig lesen und beach- carefully. Each person working in the laboratory ten. Jeder im Labor beschäftigten Person sind diese must be familiar with these safety instructions prior Sicherheitshinweise vor Benutzung bekannt zu to using the device. - Page 5 1. Sicherheitsvorschriften 1. Warnings and safety instructions - Beachten Sie die Hinweise und Vorschriften des - Instructions provided by the reagent manufacturer Reagenzherstellers. must be observed at any time. - Das Gerät darf nur zum Titrieren von Flüssigkeiten - This device is only intended for titrating fluids. eingesetzt werden, wobei definierte Einsatzverbote Certain applications are either prohibited or und Einsatzbeschränkungen unbedingt einzuhalten...
- Page 6 1. Sicherheitsvorschriften 1. Warnings and safety instructions - Achten Sie darauf, dass weder Sie selbst noch - Make sure that you do not endanger yourself or eine andere Person gefährdet werden. Nie in any other person. Never work towards another Richtung einer Person arbeiten;...
- Page 7 1. Sicherheitsvorschriften 1. Warnings and safety instructions - Bei Störungen, z. B. - In the event of errors, such as - schwergängiger oder festsitzender Kolben - slow moving or jammed piston - verklebtes oder undichtes Ansaug-/Ausstoß-/ - sticky or leaking suction/ Rückführventil discharge/recirculation valve - undichte Stellen...
-
Page 8: Einzelteile
- 8 - 2.Einzelteile 2. Einzelteile 1. Ausstoßeinheit komplett 1. Ausstoßeinheit komplett 2. Rückführventil 2. Rückführventil 3. Ansaugventil 3. Ansaugventil 4. Ausstoßventil 4. Ausstoßventil 5. 3-Weg-Hahn mit Griff, 5. 3-Weg-Hahn mit Griff, Mutter, Scheibe, O-Ring Mutter, Scheibe, O-Ring 6. Deckel 6. -
Page 9: Funktionsprinzip
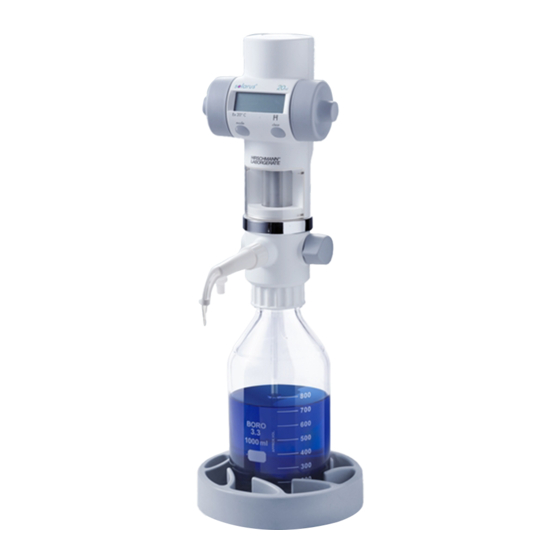
3. Funktionsprinzip 3. Principle of operation - Das Gerät ist ein manuell bedienbarer - The device is a manually operated bottle top burette Flaschenaufsatz-Titrierer mit Digitalanzeige zum with digital display for the titration of fluids. Titrieren von Flüssigkeiten. Das Grundgerät The basic unit has thread A45 built in. -
Page 10: Einsatzverbote
3. Funktionsprinzip 3. Principle of operation - Werden die Handräder nach dem Befüllen der - Once the burette has been filled, hold the hand Bürette auf den Körper zu gedreht, öffnet sich wheels with the thumbs and index fingers, move das Ausstoßventil und gibt Flüssigkeit aus dem your thumbs downward, turning the hand wheels Zylinder durch die Ausstoßeinheit ab. -
Page 11: Einsatzbeschränkungen
5. Einsatzbeschränkungen 5. Restricted applications - hochkonzentrierte Säuren, Laugen- und - highly concentrated acids, alcalines, salt solutions, Salzlösungen, HF. - die Digitalbürette ist für einen Arbeitstemperatur- - the burette is suitable for operating temperatures bereich von +4 °C bis +50 °C geeignet. between +4°C and +50°C. -
Page 12: Gerät Vorbereiten
6. Gerät vorbereiten 6. Preparation of the device Achtung, vor Montagebeginn beachten! Attention, please note prior to assembly! - Ein einwandfreier und sicherer Betrieb ist - Proper and safe operation is only warranted if nur bei Verwendung der beiliegenden Original- the enclosed original parts are used. -
Page 13: Befestigung Ansaugschlauch
verwenden. 6.1 Befestigung Ansaugschlauch 6.2 Befestigung Ansaugschlauch 6.1 How to Connect the Suction Tube 6.2 How to connect the suction tube - Ansaugschlauch neben Vorratsflasche - Ansaugschlauch neben Vorratsflasche Hold suction tube next to supply bottle - Hold suction tube next to supply bottle stellen, dabei zeigt das Schlauchende stellen, dabei zeigt das Schlauchende with the retainer ring pointing towards... -
Page 14: Befestigung Rückführschlauch
- 14 - 6.2 Befestigung 6.3 Befestigung Rückführschlauch 6.3 How to connect the recirculation tube Rückführschlauch 6.2 How to Connect the - 14 - Recirculation Tube - Rückführschlauch in Rückführöffnung - Firmly press recirculation tube in the 6.2 Befestigung - Rückführschlauch in Rückführöffnung des Ventilblocks fest einstecken. - Page 15 6.4 Befestigung Ausstoßeinheit 6.4 How to connect the discharge tube - Ausstoßeinheit bis zum Anschlag auf- - Ausstoßeinheit bis zum Anschlag auf- - Attach discharge tube securely. - Ausstoßeinheit bis zum Anschlag auf- - Attach discharge tube securely. stecken. stecken. - Attach discharge tube securely.
-
Page 16: Gerät Auf Flasche Aufschrauben
6.5 Gerät auf Flasche aufschrauben 6.5 Secure device on bottle - 16 - - Gerät mit oder gegebenenfalls ohne Screw device either with or without 6.4 Gerät auf Flasche aufschrauben 6.4 Secure Device on Bottle Gewindeadapter auf Vorratsflasche adapter onto reservoir bottle. aufschrauben. -
Page 17: Titrieren
7. Titrieren 7. Titrating 7. Titrieren 7. Titrating Achtung! Please note: Achtung! Please note: - Sicherheitsvorschriften (siehe Punkt 1) einhalten - Always follow safety instructions (refer to - Sicherheitsvorschriften (siehe Punkt 1) einhalten - Always follow safety instructions (refer to section - Einsatzverbote und Einsatzbeschränkungen section 1) as well as application prohibitions - Einsatzverbote und Einsatzbeschränkungen... -
Page 18: Gerät Entlüften
7.1 Verschlusskappe abnehmen 7.1 Remove closure cap - 18 - - 18 - - Verschlusskappe entsprechend der Ab- - Press closure cap back on as shown. - Verschlusskappe entsprechend der Ab- - Press closure cap back on as shown. - 18 - - Verschlusskappe entsprechend der Ab- - Press closure cap back on as shown. -
Page 19: Befüllen Der Digitalbürette
unteren Anschlagpunkt gebracht wird. times briefly in both directions. Make unteren Anschlagpunkt gebracht wird. times briefly in both directions. Make unteren Anschlagpunkt gebracht wird. times briefly in both directions. Make 7.2 Entlüften des Gerätes 7.2 How to prime the device Sind keine Luftblasen mehr im Schauglas sure that the piston is moved completely Sind keine Luftblasen mehr im Schauglas... -
Page 20: Titration
- 20 - 7.3 Befüllen der Digitalbürette 7.3 How to fill the digital burette befüllt. Dies kann entweder bis zum Gesamt- wheels away from the body. The burette may either Dies kann entweder bis zum Gesamtvolumen The burette may either be filled completely (10 ml, 20 ml volumen ( 20 ml bzw. -
Page 21: Modifikation Der Anzeige
7.4 Titration 7.4 Titration eigentlichen Titration einige Tropfen Medium in ein dispensing the first few drops of the titrant into a Abfallgefäß abzugeben und nach Zurücksetzen des waste container prior to the actual titration. To begin Anzeigewertes auf Null mit der Titration zu beginnen. the titration process reset the display value to zero. -
Page 22: Kundenspezifische Kalibrierung Quick-Cal
eigentlichen Titration einige Tropfen Medium in ein dispensing the first few drops of the titrant into a Abfallgefäß abzugeben und nach Zurücksetzen des waste container prior to the actual titration. To begin Anzeigewertes auf Null mit der Titration zu begin- the titration process reset the display value to zero. - Page 23 7.6 Kundenspezifische Kalibrierung Quick-Cal 7.6 Customer-specific calibration Quick-Cal Nach Auswaage vorzugsweise des Nominalvolumens und After calculating the actual volume of the dispensed fluid Errechnen des unter Anwenderbedingung tatsächlich (ideally use the maximum burette volume), the new factor ausgegebenen Volumens, kann dieses direkt als can be entered directly as the customerspecific calibration factor (higher factor means smaller volume output).
-
Page 24: Reinigung
8. Reinigung 8. Cleaning Um eine lange Lebensdauer Ihrer Digitalbürette zu To warrant the lifetime of your digital burette, the gewährleisten, muss das Gerät regelmäßig gereinigt device must be cleaned on a regular basis. werden. In folgenden Fällen ist das Gerät zwingend zu reinigen: The following situations require the device to be cleaned: - nach Titrieren von Reagenzien, deren Einsatz - After titration of reagents whose application is... -
Page 25: Wartung / Reinigung
8. Cleaning 8. Reinigung Please note: Achtung! Achtung! Please note: - Before the attempt is made to clean the device, - Vor Reinigungsbeginn Schutzkleidung, Schutzbrille - Vor Reinigungsbeginn Schutzkleidung, Schutzbrille - Before the attempt is made to clean the device, put put on protective clothing, glasses and gloves. - Page 26 - 26 - 8.1 Wartung / Reinigung 8.1 Maintenance / cleaning - Gerät mittels geeignetem Handschutz - Unscrew and remove device from - Gerät mittels geeignetem Handschutz Unscrew and remove device from von Vorratsflasche abschrauben und reservoir bottle wearing suitable hand von Vorratsflasche abschrauben und reservoir bottle wearing suitable hand herausnehmen (Ansaugschlauch ragt...
- Page 27 8.1 Wartung / Reinigung 8.1 Maintenance / cleaning - Durch mehrmaliges hin und her drehen - Completely empty the device by rota- - Durch mehrmaliges hin und her drehen - Completely empty the device by rotating der Handräder das Gerät vollständig ting the hand wheel back and forth der Handräder das Gerät vollständig the hand wheel back and forth...
- Page 28 8.1 Wartung / Reinigung 8.1 Maintenance / cleaning - 28 - - Nachfolgende Teile in eine geeignete - Remove the following parts from the - Nachfolgende Teile in eine geeignete - Remove the following parts from the Reinigungslösung legen und zuvor wie burette as described below and place Reinigungslösung legen und zuvor wie burette as described below and place...
-
Page 29: Intensivreinigung
8.2 Intensivreinigung 8.2 Thorough Cleaning 8.2 Intensivreinigung 8.2 Thorough cleaning - Zuerst Reinigung gemäß 8.1 durch- - First perform cleaning as described in section 8.1 - Zuerst Reinigung gemäß 8.1 durchführen. - First perform cleaning as described in section 8.1 führen. - Page 30 - 30 - 8.2 Intensivreinigung 8.2 Thorough cleaning Hinweis! Please note: Hinweis! Please note! Gegebenenfalls kann der Kolben durch If necessary, piston and toothed rack seitliches Schieben von der Zahnstange can be separated by sliding the piston Gegebenenfalls kann der Kolben durch If necessary, piston and toothed rack seitliches Schieben von der Zahnstange entfernt werden.
- Page 31 8.2 Intensivreinigung 8.2 Thorough cleaning - Geräteoberteil auf Ventilblock mit with the left edge of the marking on - Geräteoberteil auf Ventilblock mit Zylinder - Place upper section of the device onto the Zylinder aufstecken. Pfeil auf the chrome ring. Insert upper section aufstecken.
-
Page 32: Sterilisation
9. Sterilisation 9. Sterilization Die medienführenden Teile der Digitalbürette sind All parts of the digital burette which come in dampfsterilisierbeständig bis 121 °C/2 bar und contact with fluid can be steam-sterilized up to einer Einwirkzeit nach DIN te = 20 min. 121 °C/2 bar and sustain a sterilization time according to DIN te = 20 min. -
Page 33: Demontage
9.2 Demontage 9.2 Disassembly 9.2 Demontage 9.2 Disassembly - Neben den in Punkt 8.1 aufgeführten Teilen wer- - In addition to the parts listed under 8.1 all other - Neben den in Punkt 8.1 aufgeführten Teilen werden - In addition to the parts listed under 8.1 all other den die anderen medienführenden Teile der parts of the burette which come in contact with die anderen medienführenden Teile der Digital-... - Page 34 - 34 - 9.3 Ansaug-/Ausstoß-und Rückführventil lockern 9.3 How to loosen suction, discharge and recirculation valve - Ausstoßventil mit Montageschlüssel - Loosen discharge valve by turning it - Ausstoßventil mit Montageschlüssel - Loosen discharge valve by turning it durch halbe Drehung gegen den durch halbe Drehung gegen den 180 degrees counter-clockwise with 180 degrees counter-clockwise with...
-
Page 35: Sterilisation Durchführen
9.4 Sterilisation durchführen 9.4 How to perform a sterilization 9.4 Sterilisation durchführen 9.4 How to Perform a Sterilization Dampfsterilisation aller Medienführenden Perform steam-sterilization of all parts, Teile durchführen (bis 121 °C/2 bar, coming in contact with fluid (up to 121 °C/ Dampfsterilisation aller Medienführen- Perform steam-sterilization of all parts, Einwirkzeit nach DIN te = 20 min.). - Page 36 - 36 - 9.5 Kolben wieder einbauen 9.5 How to reassemble the piston Zum Einbau die Zahnstange so ausrichten, dass For assembly, align the toothed rack in such a Zum Einbau die Zahnstange so ausrichten, dass For assembly, align the toothed rack in such a die Verzahnung zum Sichtfenster zeigt und unter way, that the teeth face the view glass.
-
Page 37: Ansaug-/Ausstoß-/Rückführventil Festdrehen
9.5 Kolben wieder einbauen 9.5 How to reassemble the piston Achtung! Please note: Kolben vorsichtig in den Glaszylinder einstecken, Carefully insert piston into the glass cylinder so that da sonst die Dichtlippe beschädigt werden könnte. sealing lips will not be damaged. A damaged sealing Dies hätte eine Undichtigkeit des Systems zur Folge! lip will cause leakage problems! Achtung! -
Page 38: Gerät Zusammenbauen
9.6 Ansaug-/Ausstoß- und Rückführventil festdrehen 9.6 How to secure suction, discharge and recirculation valve - 38 - - Mutter auf der Ventilwelle im Uhrzeiger- - Secure nut on valve shaft clockwise by - Mutter auf der Ventilwelle im Uhrzeig- - Secure nut on valve shaft clockwise by sinn von Hand anziehen. -
Page 39: Ventile Auswechseln
Undichte oder beschädigte Ansaug-, Ausstoß- und Leaking or damaged suction, discharge and recircu 10. Ventile auswechseln 10. How to exchange valves Rückführventile sind sofort auszuwechseln (siehe lation valves must be exchanged immediately (refer Zubehör und Ersatzteile Punkt 15). to accessories and replacement parts in section 15). Undichte oder beschädigte Ansaug-, Ausstoß- und Leaking or damaged suction, discharge and recirculation Rückführventile sind sofort auszuwechseln (siehe... - Page 40 10.1 Ansaugventil auswechseln 10.1 How to exchange the suction valve - 40 - - Kugel einsetzen und neues Insert ball and install new suction - Kugel einsetzen und neues - Insert ball and install new suction Ansaugventil einschrauben und mit valve.
-
Page 41: Ausstoßventil Auswechseln
10.2 Ausstoßventil auswechseln 10.2 How to exchange discharge valve 10.2 Ausstoßventil auswechseln 10.2 How to Exchange Discharge Valve - Reinigung durchführen (siehe Punkt 8). - Clean burette (refer to section 8). - Reinigung durchführen (siehe Punkt 8). - Ausstoßeinheit abschrauben (siehe - Disconnect discharge tube (refer to - Ausstoßeinheit abschrauben (siehe - Clean burette (refer to section 8). -
Page 42: Rückführventil Auswechseln
10.3 Rückführventil auswechseln 10.3 How to exchange the recirculation valve - Rückführventil mit Montageschlüssel herausschrauben - Unscrew recirculation valve with wrench and remove. und entfernen. - Screw in new recirculation valve and tighten with - Neues Rückführventil einschrauben und mit wrench. - Page 43 11. Reparatur beim Hersteller 11. Repairs at the manufacturer - Ungereinigte Geräte gehen unrepariert an den - Without proper proof of decontamination, devices will Absender zurück. be considered contaminated. They may be serviced at higher costs or returned unserviced. - Aufgetretene Störung genau beschreiben. - The malfunctioning of the device should be described in detail.
-
Page 44: Volumenprüfung
12. Volumenprüfung 12. How to test the correct volume Die unter Punkt 14 angegebenen Parameter für The parameters listed under section 14 for accuracy Richtigkeit (R%) und Variationskoeffizient (CV%) (A%) and coefficient of variation (CV%) of a device eines Gerätes können wie folgt geprüft werden: can be tested as follows: 1. - Page 45 12. Volumenprüfung 12. How to test the correct volume 3. Berechnung von Richtigkeit und Variationskoeffizient 3. Computation of accuracy and coefficient of variation - Die Richtigkeit (R%) und der Variationskoeffizient - Accuracy (A%) and the coefficient of variation (CV%) des Gerätes sind nach den Formeln der (CV%) of the device must be computed according statistischen Qualitätskontrolle zu berechnen.
-
Page 46: Problemlösungen
13. Problemlösungen Problem Möglicher Grund Lösungen Aus Spalten zwischen An- - Ventile locker oder beschädigt - Ventile mit Montageschlüssel festziehen. Achtung: nach Sterilisation (s. Punkt 9) saug- bzw. Ausstoßventil und müssen Ansaug- und Anstoßventil mit Ventilblock tritt Flüssigkeit aus Montageschlüssel festgezogen werden. Zwischen Ausstoßventil und - Ausstoßeinheit locker oder - Original-Ausstoßeinheit richtig montieren... - Page 47 13. Problemlösungen Zwischen Rückführventil und - Ventilwelle locker - Mutter auf Ventilwelle festziehen Ventilblock (Deckel abge-nom- men) tritt Flüssigkeit aus Dosiervolumen fehlerhaft - Ausstoßeinheit locker oder - Original-Ausstoßeinheit richtig beschädigt montieren (siehe Punkt 6.4). Nur Original-Ausstoßeinheit - Ansaugschlauch locker oder - Ansaugschlauch festdrehen beschädigt (siehe Punkt 6.2).
-
Page 48: Trouble-Shooting
13. Trouble-shooting Symptom Possible cause Solution - Valve loose or damaged - Tighten valves with the wrench or Fluid leaks at the gap be- replace if necessary (see section 10) tween the valve block and the valves Note: After sterilization (see section 9), suction/discharge/recirculation valves need to be tightened. - Page 49 13. Trouble-shooting - Tighten recirculation valve with the Fluid leaks at the gap - Recirculation valve loose or wrench or replace if necessary between the valve damaged block and the recirculation (see section 10) valve Fluid leaks between - Stopcock shaft loose - Tighten nut on stopcock shaft stopcock shaft and valve block (only perceptible...
-
Page 50: Technische Daten / Materialien
14. Technical data / materials 14. Technische Daten / Materialien Digital burette Digitalbürette volume Volumen 10 ml * 0,3 * 0,1 10 ml * 0,3 * 0,1 20 ml * 0,2 * 0,1 20 ml * 0,2 * 0,1 50 ml * 0,2 * 0,1 50 ml... - Page 51 14. Technische Daten / Materialien 14. Technical data / materials Die Digitalbürette ist konformitätsbescheinigt nach The digital burette has a test certificate, which certifies the den Vorschriften der Eichordnung (Anlage 12). conformity with the German weights and measures regulations (attachment 12). Arbeitstemperaturbereich für Gerät und Ambient temperature range for proper operation of Flüssigkeit zwischen +4 °C und +50 °C.
- Page 52 Material Materials Kolben Zylinder Ventil- Ventil- Ventil- Ventil- Ventil- Schläuche Dichtungs- block gehäuse kugel sitz feder ringe piston cylinder valve valve valve valve valve tubes sealing block mantle ball seat spring rings Digital- PTFE Borosilikat- Halar Halar Borosilikat- Borosilikat- Hastelloy FEP PTFE bürette Compound...
-
Page 53: Zubehör- Und Ersatzteile
15. Zubehör- und Ersatzteile 15. Accessories - spare parts Braunglasflaschen* Amber glass bottles* Code-Nr. Volumen ml / Gewinde Code-No. Volume ml / thread 931 50 00 500 ml / A 32 931 50 00 500 ml / A 32 934 50 00 1 000 ml / A 45 934 50 00 1 000 ml / A45... - Page 54 Ausstoßeinheit komplett* Discharge tube unit, complete* Code-Nr. Code-No. 931 30 15 Spitz, FEP 931 30 15 pointed, FEP 931 30 27 Spiralförmig, flexibel 3 mm 931 30 27 spiral-shaped, flexible 3 mm Schläuche* Suction tube* Code-Nr. Code-No. 931 50 05 Ansaugschlauch 310 mm 931 50 05...
-
Page 55: Vordruck Der Unbedenklichkeitsbescheinigung
16. Vordruck der Unbedenklichkeitsbescheinigung für Gerät..........(Seriennummer) verwendetes Medium: ............. NEIN Wenn JA, bitte definieren Blut, Körperflüssigkeit, patholog. Proben: Andere biologische Gefahrenstoffe : Biologische abbaubare Materialien, die gefährlich werden können: Chemikalien mit gesundheitsgefährdenden Substanzen: ... -
Page 56: Clearance Certificate Form
16. Clearance certificate form for unit ..........(Serial number) Medium used: .............. Please define in case of Yes Blood, bodily fluids, patholog. samples: Other hazardous biologic substances: Biologically-degradable materials which can pose a risk: ...
Need help?
Do you have a question about the solarus and is the answer not in the manual?
Questions and answers