
Related Manuals for Molnar MF1705-93-OH-3T


Summary of Contents for Molnar MF1705-93-OH-3T
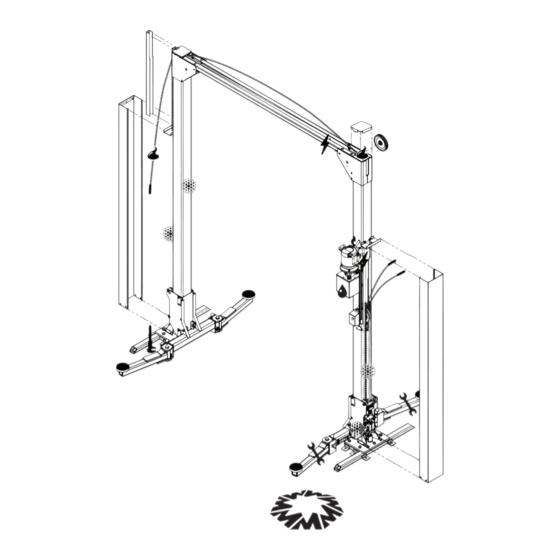
- Page 1 ALL ROUNDER Maintenance for the Molnar SERVICING Two Post Hoist (3 Tonne) MF1705-93-OH-3T BASE...
-
Page 2: Table Of Contents
Seal Replacement Procedure This is owner manual 3 of 4 As the policy of Molnar Hoists is one of continuous improvement, the manufacturer reserves the right to change specifications without notice. Information is correct and true at time of printing (July 2012) - Page 3 Replace wear pads ó Hydraulic oil and system ó Replace pick-up pads ó Electrical, controls and travel ó Wire rope & pulley removal limits and inspection ó Structural & general check ó Accessory conditions Molnar Hoists All Rounder Servicing Maintenance...
-
Page 4: This Is Owner Manual 3 Of
> Wurth HHS dry lube General lubricant > CRC Tac-2 ó > Wurth HHS Lube Wire Rope lube > Lanotec heavy duty liquid lanolin ó > 85-90 gear oil Hydraulic oil >5 litres AWH46 ó Pre Servicing Molnar Hoists All Rounder Servicing... -
Page 5: Safety Operation Test
“Base Bolt” and an “Anchor Bolt”. Please familiarise yourself with the respective bolt location before adjusting bolts. If safety mechanism does not operate properly, Base Bolts check linkages or mechanism for damage. Anchor Bolts Molnar Hoists All Rounder Servicing Safety Operation Test... -
Page 6: Wire Rope Failure Test
If safety toggles do not engage, toggles may need to be lubricated or springs may need to be replaced 3 Check the manual safety has automatically reset to the ON position on the control post carriage. Wire Rope and Failure Test Molnar Hoists All Rounder Servicing... -
Page 7: Check Carriage Rollers
Reinsert roller into carriage and insert the pin. Fasten the side bolt. 7 Use a pry bar to remove wedge. 8 Perform for all load rollers on both carriages. Molnar Hoists All Rounder Servicing Check Carriage rollers... -
Page 8: Wear Pads
1-2mm If there is excessive movement, replace Wear Pads. DO NOT try to shim or adjust as this may cause the carriage to jam. 3 Refit the cover bracket and re-secure with bolts. Wear Pads Molnar Hoists All Rounder Servicing... -
Page 9: Lift Arms, Pivot Pins & Pick-Up Pads
2 Remove circlip and retaining washer from new pad and screw into the lift arm. Replace washer and circlip. 3 Ensure that pad is secured and rotates freely. Molnar Hoists All Rounder Servicing Lift Arms, Pivot Pins & Load Pads... -
Page 10: Wire Rope Check
A rope has been physically damaged by crushing or deforming. d If there are any inconsistent areas. If inconsistency is found, it should be replaced or referred to a wire-rope specialist for inspection. Wire Ropes Molnar Hoists All Rounder Servicing... - Page 11 9 Repeat steps 2, 3 & 4 on the Wire Rope on the control-post, between the carriage and the bottom pulley. 10 Raise hoist and remove prop. Lower hoist to ground. 2 0 m Molnar Hoists All Rounder Servicing Wire ropes...
-
Page 12: Pulleys Lubrication
Push pulley to one side and lubricate the pin (spray lubricant with extension nozzle), push pulley to the opposite side and spray lubricate the other side. Rotate to work lube into bush. Pulley Lubrication Molnar Hoists All Rounder Servicing... -
Page 13: Hydraulic System (Oil & Filter Replacement)
10 Refill the oil tank with 5 litres of recommended hydraulic oil. 11 Refit the tank lid to the oil tank (reverse steps 7 & 6). 12 Refit the tank to the motor (reverse steps 5 to 1). Molnar Hoists All Rounder Servicing Hydraulic System... -
Page 14: Electrical, Controls & Travel Limits
Lubricate with spray lubricant. lowering handle 4 Ensure the LOWERING handle is not bent and is secured with split pin (at the pivot). control button box Electrical, controls & travel limits Molnar Hoists All Rounder Servicing... -
Page 15: Structural & General Check
See Operation Manual for more information 8 Refit covers to posts. 9 Check operating instructions are correctly positioned and clearly legible. 10 Complete Service/Inspection Report and owners Log Book. Molnar Hoists All Rounder Servicing Structural & General Check & Replace Pulley Bush... -
Page 16: Wire Rope & Pulley Removal
Wire Rope ends must be fed through the bracket and remove. The pulley is now locators in the post. free of the Wire Ropes - place to one side. Wire Rope & Pulley removal Molnar Hoists All Rounder Servicing... - Page 17 Slide the Wire Rope out of the carriage. c o ll a r le s p r in g lo n g c a b w ir e r o p a x le Molnar Hoists All Rounder Servicing Wire Rope & Pulley removal...
-
Page 18: Wire Rope & Pulley Re-Insertion
Wire Rope over the top of the hoist and down the outside of the non-control- post. Ensure the Wire Rope passes through the post cover mounting bracket. Wire Rope & Pulley Re-Insertion Molnar Hoists All Rounder Servicing... - Page 19 Wire Ropes sit into their grooves in the double pulley, when lowered inside the post. Lower down onto cylinder, ensuring Wire Ropes remain tight into their grooves. Molnar Hoists All Rounder Servicing Wire Rope & Pulley Re-Insertion...
- Page 20 Wire Rope within the pulley. Then retighten side bolts ensuring the bracket sits firmly against the stop. Check the pulley rotates freely. > Wire Rope & Pulley Re-Insertion Molnar Hoists All Rounder Servicing...
- Page 21 19 Readjust long cable ensure 25mm initial pre-stretch 20 Lubricate all cables 21 Re-lube posts and refit covers Readjustment of long Wire Rope required after six weeks of operation Molnar Hoists All Rounder Servicing Wire Rope & Pulley Re-Insertion...
-
Page 22: Hydraulic Cylinder Replacement
9 Remove top brace: remove the 6 x M10 bolts per side securing the brace to the post caps. Remove the brace and place to one side. pipe Hydraulic Cylinder Replacement Molnar Hoists All Rounder Servicing... -
Page 23: Seal Replacement Procedure
With the cylinder in place, post may be raised and secured. Re-attach cylinder retaining ring and follow steps in reverse order to reassemble. Cylinder Clip Seal Wear Piston Ring Assembly 7 Refit the internal circlip Molnar Hoists All Rounder Servicing Hydraulic Cylinder Replacement... - Page 24 For more information, please contact us or your local Molnar Representative 16-20 Coglin Street Brompton SA 5007 Australia T 08 7120 8700 F 08 8346 0097 E info@molnarhoists.com.au www.molnarhoists.com.au onwards & upwards...
Need help?
Do you have a question about the MF1705-93-OH-3T and is the answer not in the manual?
Questions and answers