Advertisement
Quick Links
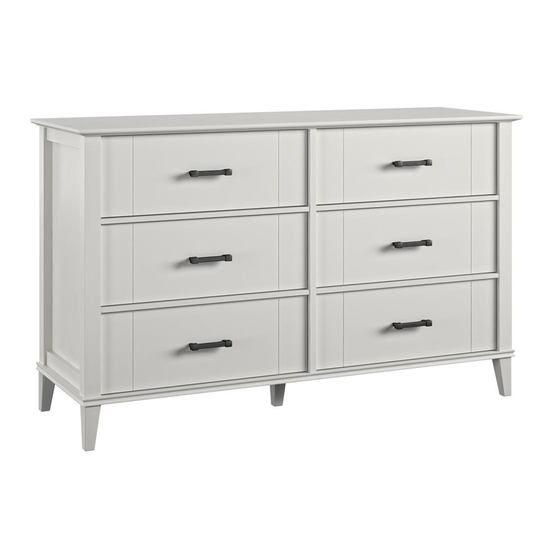
5745015COM
6 Drawer Dresser
Date of Purchase ___ / ___ / ___
Lot Number:
THIS INSTRUCTION BOOKLET CONTAINS IMPORTANT SAFETY INFORMATION. PLEASE READ AND KEEP FOR FUTURE REFERENCE.
Secure Your Furniture
Keep your home and family safe
with the wall anchor kit that is
included with the product.
Serious or fatal crushing injuries can
occur from tipping furniture.
WARNING: Manufacturer assumes no liability
for improper installation or excessive loads
placed on screws or bracket. This wall anchor
is not a substitute for proper adult supervision.
Do Not Return This Product!
Contact our customer service team for help first.
Call: 1-800-489-3351 (toll free)
Monday-Friday 9am - 5pm CST
Visit: www.ameriwoodhome.com
Easy
Assembly Difficulty Meter
Follow Ameriwood Home
B345745015COM0
Tough
You
Tube
Advertisement

Related Manuals for Novogratz 5745015COM


Summary of Contents for Novogratz 5745015COM
- Page 1 5745015COM 6 Drawer Dresser B345745015COM0 Date of Purchase ___ / ___ / ___ Lot Number: Do Not Return This Product! Contact our customer service team for help first. Call: 1-800-489-3351 (toll free) Monday-Friday 9am - 5pm CST Visit: www.ameriwoodhome.com THIS INSTRUCTION BOOKLET CONTAINS IMPORTANT SAFETY INFORMATION. PLEASE READ AND KEEP FOR FUTURE REFERENCE.
-
Page 2: Helpful Hints
Contact Us! Do NOT return this product! Contact our friendly customer service team first for help. Assembly Tips Call us! 1-800-489-3351 Monday-Friday 9am - 5pm CST Tube Visit ameriwoodhome.com to view the limited warranty valid in the U.S. and Canada. Helpful Hints PEOPLE NEEDED FOR ASSEMBLY: 1-2 ESTIMATED ASSEMBLY TIME: 2 HOUR... -
Page 3: Before You Start
Before You Start Read through each step carefully and follow the proper order Separate and count all your parts and hardware Give yourself enough room for the assembly process Have the following tools: Flat Head Screwdriver, #2 Phillips Head Screwdriver and Hammer Caution: If using a power drill or power screwdriver for screwing, please be aware to slow down and stop when screw is tight. -
Page 4: Board Identification
Board Identification Not actual size Left Panel Right Panel 35745015010 35745015030 35745015020 Right Front Leg Support Left Front Leg Bottom 35745015070 35745015050 35745015060 35745015040 Back Rail Drawer Front Drawer Bottom Side Rail 35745015080 35745015102 35745331120 35745015090 BACK SIDE Partition Drawer Side Drawer Back Back Panel 35745015150... - Page 5 Board Identification Not actual size This piece is paperboard construction. It is not made from wood, but is required for the assembly of your unit. SIDE BACK SIDE ameriwoodhome.com...
-
Page 6: Part List
Part List Actual Size (x14) (x6) (x11) (x6) (x14) #A22620 #A21660 #A22900 #A22910 #A22610 cam lock wood dowel connector connector bolt cam bolt (x60) (x24) (x48) (x11) #A11080 #A21970 #A12120 #A23030 #6 x 7/16" flat head drive fastener #8 x 7/16" pan head confirmat screw (x15) (x12) - Page 7 Part List Not Actual Size Left Cabinet Member Right Cabinet Member Left Drawer Member Right Drawer Member (x1) (x12) (x6) #A84050 #A54520 #A56770 safety bracket kit drawer bracket drawer slide pkg. (x6) (x5) #A51675 #A44375 handle ameriwoodhome.com...
- Page 8 STEP 1 (x2) (x2) (x3) (x1) #A22620 #A22900 #A22610 Quick #A21660 Assembly Proper orientation of CAM LOCK You will need to tap the connector (3) with a hammer to fully insert. Be sure the connector is positioned as shown before pushing into holes.
- Page 9 STEP 2 Tighten screws (10) until flush with board surface. (x4) (x2) #A12950 #A12940 Make sure Parts (I) are flush on this edge. ameriwoodhome.com...
- Page 10 STEP 3 (x6) #A22910 ameriwoodhome.com...
- Page 11 STEP 4 Turn the connector screw clockwise to lock in place. End View ameriwoodhome.com...
- Page 12 STEP 5 marked with a "L" Left Cabinet Member (x9) (x3) #A11080 #A56770 ameriwoodhome.com...
- Page 13 STEP 6 (x2) (x2) (x3) (x1) #A22620 #A22610 #A22900 #A21660 Quick Assembly Proper orientation of CAM LOCK You will need to tap the connector (3) with a hammer to fully insert. Be sure the connector is positioned as shown before pushing into holes.
- Page 14 STEP 7 Tighten screws (10) until flush with board surface. (x4) (x2) #A12950 #A12940 Make sure Parts (I) are flush on this edge. ameriwoodhome.com...
- Page 15 STEP 8 Turn the connector screw clockwise to lock in place. End View ameriwoodhome.com...
- Page 16 STEP 9 marked with a "R" Right Cabinet Member (x9) (x3) #A11080 #A56770 ameriwoodhome.com...
- Page 17 STEP 10 marked with a "L" Left Cabinet Member (x3) #A56770 (x2) (x1) (x9) #A22610 #A21660 #A11080 SIDE A ameriwoodhome.com...
- Page 18 STEP 11 marked with a "R" Right Cabinet Member (x3) #A56770 (x2) (x2) (x9) #A22620 #A22610 #A11080 Quick Assembly Proper orientation of CAM LOCK SIDE B ameriwoodhome.com...
- Page 19 STEP 12 Quick Assembly (x8) (x8) #A22620 #A21660 Proper orientation of CAM LOCK ameriwoodhome.com...
- Page 20 STEP 13 (x5) (x5) #A44375 (x15) #A23030 #A12420 Attach legs (18) to the bottom (D) with screws (8) as shown but do not fully tighten. Turn bottom (D) over and continue to attach legs (18) with screws 13). After screws (13) are fastened, tighten screws (8). Finished Surface Raw Surface ameriwoodhome.com...
- Page 21 STEP 14 (x2) #A23030 Finished Edge Finished Edge ameriwoodhome.com...
- Page 22 STEP 15 Finished Edge Finished Edge Finished Edge ameriwoodhome.com...
- Page 23 STEP 16 (x2) #A23030 ameriwoodhome.com...
- Page 24 STEP 17 (x2) #A23030 ameriwoodhome.com...
- Page 25 STEP 18 (x6) (x1) #A22610 #A84050 Do not fully tighten this screw. ameriwoodhome.com...
- Page 26 STEP 19 Use the packaging material to prop the cabinet up where the arrows are located to fit the Top (C) to the cabinet. ameriwoodhome.com...
- Page 27 STEP 20 2 people are required for this step. IMPORTANT! THE BACK PANEL IS A STRUCTURAL PART OF THIS UNIT AND MUST BE INSTALLED PROPERLY. (x51) #A21110 Attached the back panel as shown nailing straight into the raw edges. Assure that the unit is square. Distance from corner to corner must be equal as shown.
- Page 28 STEP 21 For Masonry, Concrete, or other wall materials: Consult your local hardware store for appropriate anchors to securely attach the safety bracket. (x1) #A84050 IMPORTANT: THIS UNIT MUST BE SECURE TO THE WALL TO HELP PREVENT TIPOVER. FOLLOW THESE INSTRUCTIONS TO INSTALL THE ANTI-TIPPING SAFETY BRACKET PROVIDED WITH THIS PRODUCT.
- Page 29 STEP 22 (x12) (x24) #A54520 #A12120 Using screws (9), attach a drawer bracket (17) to the drawer sides as shown. SIDE SIDE Finished Edge Finished Edge Bracket Orientation Bracket Orientation ameriwoodhome.com...
- Page 30 STEP 23 (x24) #A12120 Note: Be sure the groove in the drawer sides are centered with the groove in the drawer front. SIDE SIDE SIDE ameriwoodhome.com...
- Page 31 STEP 24 Finished Surface SIDE SIDE ameriwoodhome.com...
- Page 32 STEP 25 (x24) #A21970 drive fastener You will need to tap the drive fasteners (7) with a hammer to securely fasten. BACK SIDE SIDE ameriwoodhome.com...
- Page 33 STEP 26 Left Drawer Member Right Drawer Member (x24) (x12) (x6) #A17400 #A11080 #A56770 (x6) #A51675 BACK SIDE SIDE Attach the handles (19) after the slides are mounted to the drawer sides. ameriwoodhome.com...
- Page 34 STEP 27 Notice, the drawer bracket holes are slotted. Drawer fronts can be adjusted by loosening screws, making needed adjustments and retightening screws. roller cabinet member drawer runner roller ameriwoodhome.com...
- Page 35 Maximum Loads This unit has been designed to support the maximum loads shown. Exceeding these load limits could cause sagging, instability, product collapse, and/or serious injury. 75 lbs 34 kg 25 lbs 11.3 kg (each drawer) Warning: Risk of injury to persons - do not place a television on this furniture. This furniture is not approved for use with a television.
- Page 36 Register your product to receive the following: * New trend details - sneak peek on what's new * Surveys - have a voice within our community * Exclusive deals and discount codes * Quick and easy replacement part service To register your product, visit ameriwoodhome.com Visit your local retailer's website, rate your purchased product and leave us some feedback! We would like to extend a big "Thank You"...
- Page 37 Español Cubierta Delantera Este libro de instrucciones contiene información IMPORTANTE de seguridad. Por favor lea y manténgalo para referencia en el futuro. No Regrese este producto! Comuniquese con nuestro amistoso equipo de servicio al cliente para obtener ayuda. Llamenos al: 1-800-489-3351 (Gratis) Lunes - Viernes 9am - 5pm CST Visitar: www.ameriwoodhome.com PRECAUCION Este mueble puede volcarse y causar graves heridas y/o muerte.
- Page 38 Español Página 8 Quizá necesites golpear el conector (3) suavemente con un martillo para insertar conpletamente. Esté seguro que conectador está colocado como se muestra antes de empujar en los agujeros. Página 9 Apriete los tornillos (10) hasta que esté al ras con la superficie del tablero. Que las partes que (I) queden al ras de este borde.
- Page 39 Español Página 28 Para mampostería, concreto u otro tipo de paredes: Acude a tu ferretería local para obtener los anclajes adecuados para fijar de forma segura el soporte de seguridad. IMPORTANTE: ESTA UNIDAD DEBE ASEGURARSE A UNA PARED PARA EVITAR QUE SE VUELQUE. SIGUE ESTAS INSTRUCCIONES PARA INSTALAR EL SOPORTE DE SEGURIDAD ANTICAÍDA QUE SE PROPORCIONA JUNTO CON ESTE PRODUCTO.
- Page 40 Español Página 32 Deberá apretar los sujetadores de la unidad (7) con un martillo para sujetarlo firmemente. Página 33 Fije las manijas (19) después de que las correderas estén montadas en los lados del cajón. Página 34 Tenga en cuenta los agujeros de los soportes de cajón están ranurados. Frentes de los cajones pueden ajustarse aflojando los tornillos, hacen los ajustes necesarios y vuelva a apretar los tornillos.
- Page 41 Français Couverture Avant CE LIVRET D'INSTRUCTION CONTIENT DES INFORMATIONS IMPORTANTES SUR LA SÉCURITÉ. VEUILLEZ LIRE ET GARDER POUR UNE RÉFÉRENCE FUTURE Ne retournez pas ce produit! Contactez notre équipe de service à la clientèle amicale d'abord pour obtenir de l'aide. Appelez-nous: 1-800-489-3351 (sans frais) du Lundi au Vendredi de 9h à...
- Page 42 Français Page 8 Vous devrez taper légèrement sur le raccord (3) avec un matreau pourl'insérer complétement. Assuez-vous que le raccord est placé tel que montré avant de le pousser dans les trous. Page 9 Apriete los tornillos (10) hasta que esté al ras con la superficie del tablero. Que las partes que (I) queden al ras de este borde.
- Page 43 Français Page 28 Pour la maçonnerie, le béton ou d'autres matériaux de mur : Visiter votre quincaillerie locale pour obtenir des ancres appropriées qui permettront de fixer solidement le support de sécurité. IMPORTANT : CE MEUBLE DOIT ETRE SÉCURISÉ AU MUR POUR EVITER QU'IL NE BASCULE. SUIVRE CES INSTRUCTIONS POUR INSTALLER LE SUPPORT DE SÉCURITÉ...
- Page 44 Français Page 32 Vous aurez besoin de taper les attaches du lecteur (7) avec un marteau pour fixer solidement. Page 33 Fixez les poignées (19) une fois que les glissières sont montées sur les côtés du tiroir. Page 34 Remarquez, les trous de support tiroir sont fendus. Façades des tiroirs peuvent être ajustées en desserrant les vis, faire les ajustements nécessaires et resserrer les vis.
Need help?
Do you have a question about the 5745015COM and is the answer not in the manual?
Questions and answers