Table of Contents
Advertisement
Available languages
Available languages
709-3930
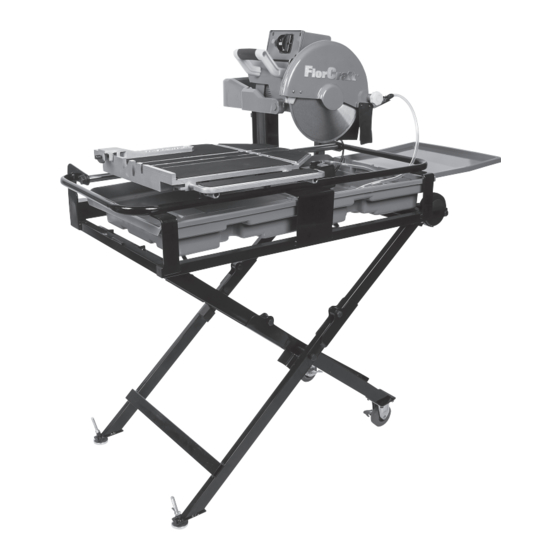
Professional 10 in. Wet Tile Saw
OWNER'S MANUAL
Sierra eléctrica professional de 250 mm
MANUAL DE OPER ACIÓN
READ AND FOLLOW
ALL SAFETY AND OPERATING INSTRUCTIONS
BEFORE USING THIS SAW.
TILE SAW
29FG
E200561
LEA Y SIGA TODAS LAS INSTRUCCIONES
DE FUNCIONAMIENTO Y SEGURIDAD ANTES DE USAR ESTA SIERRA.
Advertisement
Chapters
Table of Contents

Related Manuals for FlorCraft 709-3930


Summary of Contents for FlorCraft 709-3930
- Page 1 709-3930 Professional 10 in. Wet Tile Saw OWNER’S MANUAL Sierra eléctrica professional de 250 mm MANUAL DE OPER ACIÓN READ AND FOLLOW ALL SAFETY AND OPERATING INSTRUCTIONS BEFORE USING THIS SAW. TILE SAW 29FG E200561 LEA Y SIGA TODAS LAS INSTRUCCIONES...
- Page 2 English......page 1 FOR YOUR OWN SAFETY, READ INSTRUCTION MANUAL BEFORE OPERATING SAW. This owner’s manual contains information necessary to operate and maintain your 1.
-
Page 3: Table Of Contents
709-3930 Professional 10 in. Wet Tile Saw 1. KEEP GUARDS IN PLACE and in 18. CHECK DAMAGED PARTS. Before further TABLE OF CONTENTS working order. use of the tool, a guard or other part that Limited warranty ..... . . 1 2. -
Page 4: Warning
as those dust masks that are specifically 9. IF THE PLUG OR RECEPTACLE DOES GET designed to filter out microscopic particles. WET, DO NOT UNPLUG THE CORD. Discon- nect the fuse or circuit breaker that supplies ELECTRICAL power to the tool. Then unplug and examine for presence of water in the receptacle. -
Page 5: Specific Safety Instructions
Volts Total length of cord in feet Ampere rating 120 V~ 25 ft. 50 ft. 100 ft. 150 ft. More than No more than Not recommended TAbLE 1 Examine extension cord before using 4. Ensure that the blade-securing bolt is SPECIFICATIONS and replace if damaged. -
Page 6: Motor Assembly Installation
d. InStALLIng tHe Place the saw frame on the stand and tighten STEP 4: Replace the blade guard to its Cord CoLLeCtIng the stand knobs for safety (see FIGURE 4). original position and tighten knob. HAnger / tooL CAddY You may need to move or remove water tray STEP 5: To remove or change the blade, just to easily secure safety knobs to stand frame. -
Page 7: Extension Table Installations
CuttIng tILe And Stone STEP 1: Make sure that the red knob on the motor arm is tight. This is the key point of BEFORE PERFORMING alignment (FIGURE 17). ANY CUTS, CHECk AND ENSURE THAT THE LOWEST POINT OF THE BLADE IS NO MORE THAN 3/16 INCH (5 mm) BELOW THE TABLE TOP. -
Page 8: Straight Cuts
StrAIgHt CutS STEP 3: Loosen the slide tube locking knob (see FIGURE 21). STEP 1: Adjust the rip guide to 90°and STEP 4: Loosen the motor head adjustment position it the desired distance from the blade. lever on the spring support (see FIGURE 15), to release the cutting head. -
Page 9: Water Pump Maintenance
dIAMond BLAdeS • Keep ventilation slots of the motor clean to TROUBLESHOOTING prevent overheating. 1. Use only 10 in. wet continuous rim diamond blade with this saw. IF THE SAW IS OVERHEATING: • Always check the blade for cracks or signs 2. -
Page 10: Parts List
Motor frame locking knob 61024-05 Blade guard fixing knob Side extension table 61024-78 tube bushing (2) 61024-43 Cord collecting hanger 709-3930-06 Blade guard 61024-79 Side extension table tube (2) Cord collecting hanger 61024-07 Water brush (2) 61024-44 Hex socket cap... -
Page 11: Exploded Parts Diagram
EXPLODED PARTS DIAGRAM – 9 –... - Page 12 – 10 –...
-
Page 13: Garantia Limitada
709-3930 Sierra eléctrica professional de 150 mm dispondrá de ambas manos para manejar CONTENIDO INSTRUCCIONES la herramienta. GENERALES DE Garantia limitada..... . 11 12. -
Page 14: Poner La Sierra En Posición
22. LA MESA DE CORTE DEbE ESTAR EN movimiento, generalmente al finalizar hace este tipo de trabajo. Para reducir el su trayectoria. POSICIÓN DE INICIO antes de ajustar contacto con estas sustancias químicas: la cabeza de corte, para hacer un trabaje en lugares bien ventilados y con •... -
Page 15: Cables De Extensión (Alargadores)
enchufes de conexión a tierra de 3 puntas y pernos rigidos extendidos de el adaptador dará como resultado la pérdida de energía un toma corrientes de 3 polos que aceptan el de color verde deben de ser conectados a y el recalentamiento. La TABLA 1 muestra enchufe de la herramienta. -
Page 16: Características De La Sierra
FIGURA 3 B. InStALACIón deL 12. Deje que el disco de corte se detenga mientas (2) y perno para bloquear el enSAMBLAje deL Motor completamente antes de quitar cualquier marco del motor] material atascado que esté alrededor del PASO 1: Instale el marco del ensamblaje del •... -
Page 17: Instalación Del Disco De Corte Diamantado
d. InStALACIón PASO 5: Para remover o cambiar el disco de para refrescar su propio motor. Una bomba deL gAnCHo pArA corte, simplemente haga los pasos anteri- de agua seca podría dañarse o podría reCoLeCtAr eL ores de atrás hacia adelante. ser peligrosa. -
Page 18: Ajustable Para Cortes
PASO 2: Asegure las tres tuercas en la parte MANEJO DE LA SIERRA Palanca para superior del marco del motor (FIGURA 18). ajustar la altura de la cabeza NO AJUSTE LA del motor SIERRA SIN PRIMERO HABER APAGADO EL MOTOR. DE NO HACER ESO PODRíA CAUSAR UNA LESIóN GRAvE AL OPERADOR. -
Page 19: Corte Diagonal
PASO 6: Empuje la mesa de corte hasta la Perilla de bloqueo posición deseada, donde el disco de corte para el tubo de quede sobre la loseta, en el punto donde deslizamiento desea comenzar a cortar. PASO 7: Ajuste la perilla de bloqueo del tubo de deslizamiento para que la mesa que en una posición fija. -
Page 20: Limpieza De La Sierra
LIMpIeZA de LA SIerrA • No ExCEDA DEL MÁxIMo DE RpM dISCoS de Corte dIAMAntAdoS RECOMENDADAS por el fabricante del Para obtener una larga vida y el mejor disco de corte. 1. Con esta sierra, solamente utilice discos desempeño de la maquina: •... - Page 21 NOTAS ____________________________________________________________________________________________________________ _____________________________________________________________________________________________________________ _____________________________________________________________________________________________________________ ____________________________________________________________________________________________________________ _____________________________________________________________________________________________________________ _____________________________________________________________________________________________________________ _____________________________________________________________________________________________________________ ____________________________________________________________________________________________________________ _____________________________________________________________________________________________________________ _____________________________________________________________________________________________________________ _____________________________________________________________________________________________________________ _____________________________________________________________________________________________________________ _____________________________________________________________________________________________________________ _____________________________________________________________________________________________________________ _____________________________________________________________________________________________________________ _____________________________________________________________________________________________________________ _____________________________________________________________________________________________________________ _____________________________________________________________________________________________________________ _____________________________________________________________________________________________________________ _____________________________________________________________________________________________________________ _____________________________________________________________________________________________________________ _____________________________________________________________________________________________________________ _____________________________________________________________________________________________________________ _____________________________________________________________________________________________________________ _____________________________________________________________________________________________________________ _____________________________________________________________________________________________________________ _____________________________________________________________________________________________________________ _____________________________________________________________________________________________________________ _____________________________________________________________________________________________________________ _____________________________________________________________________________________________________________ _____________________________________________________________________________________________________________ _____________________________________________________________________________________________________________ _____________________________________________________________________________________________________________ _____________________________________________________________________________________________________________ _____________________________________________________________________________________________________________ _____________________________________________________________________________________________________________ _____________________________________________________________________________________________________________ _____________________________________________________________________________________________________________ _____________________________________________________________________________________________________________ _____________________________________________________________________________________________________________ _____________________________________________________________________________________________________________ –...
-
Page 22: Listado De Las Partes
Tubo para la mesa 61024-79 de extensión lateral (2) Gancho para 709-3930-06 Protector del disco de corte 61024-43 sostener el cable Tornillo con cabeza 61024-80 hueca hex M5x10 (2) 61024-07... -
Page 23: Despiezado De Las Partes
DESPIEZADO DE LAS PARTES – 21 –... - Page 24 Made in China Hecho en China O0413-8440...
Need help?
Do you have a question about the 709-3930 and is the answer not in the manual?
Questions and answers