Advertisement
Available languages
Available languages
Quick Links
FOLLOW US
facebook.com/NolanGroup
FOLLOW US
facebook.com/NolanGroup
Brands marked with
TM
are trademarks of SABIC
SAFETY AND
EN
INSTRUCTIONS FOR USE
SÉCURITÉ ET INSTRUCTIONS
FR
D'UTILISATION
SEGURIDAD
ES
E INSTRUCCIONES
Brands marked with
TM
are trademarks of SABIC
SAFETY AND
EN
INSTRUCTIONS FOR USE
SÉCURITÉ ET INSTRUCTIONS
FR
D'UTILISATION
SEGURIDAD
ES
E INSTRUCCIONES
TM
www.sabic-ip.com
•
TM
www.sabic-ip.com
•
Advertisement

Subscribe to Our Youtube Channel
Related Manuals for Nolan N91 EVO


Summary of Contents for Nolan N91 EVO
- Page 1 FOLLOW US facebook.com/NolanGroup Brands marked with are trademarks of SABIC www.sabic-ip.com • SAFETY AND INSTRUCTIONS FOR USE SÉCURITÉ ET INSTRUCTIONS D’UTILISATION SEGURIDAD E INSTRUCCIONES FOLLOW US facebook.com/NolanGroup Brands marked with are trademarks of SABIC www.sabic-ip.com • SAFETY AND INSTRUCTIONS FOR USE SÉCURITÉ...
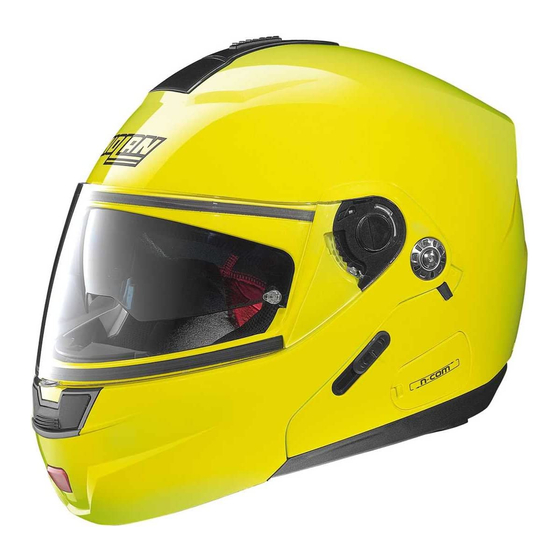
- Page 2 CONGRATULATIONS... for the purchase of your new helmet. This helmet has been designed and created to be a modern, high performing product, able to satisfy the most demanding requests as for safety and comfort. This is made possible by the helmet design, its ergonomic, comfort and aerodynamic properties as well as its practical and easy-to-use controls.
-
Page 3: Maintenance And Cleaning
Retention System: - The retention system (strap) is factory-adjusted at a standard length. Before use, check that it is correctly pre-adjusted. - Make sure the strap is properly fastened and tightened so as to keep the helmet firmly in place. Anyway, before riding, make sure that the strap is well fastened under the chin, as close as possible to the throat, but without being uncomfortable. - Page 4 INSTRUCTIONS FOR USE The N91EVO helmet can be used in two configurations (chin guard closed - P / chin guard open - J). The use of the helmet in configuration P (with chin guard and visor closed) obviously offers the highest degree of protection regarding configuration J (with chin guard and visor open).
- Page 5 Do not use the helmet without the chin guard. Do not use the helmet in case of chin guard malfunctioning. Immediately contact a Nolan authorized dealer. Do not remove nor tamper the fixing screws that connect the chin guard to the shell.
- Page 6 Do not use the helmet if the visor has not been assembled properly. If the visor opening/closing mechanisms are not working properly or if such mechanisms get damaged, please contact a Nolan authorized dealer. • (Available as standard or optional accessory) PINLOCK ®...
- Page 7 same from moving and scratching both surfaces. If the helmet visor fogs up and/or condensation forms between the visors, check both for system correct assembly and stretching. An excessive and early stretch of the inner visor may result in exces- sive adherence against visor surface and/or permanent deformations with subsequent inability to perform following adjustments correctly.
- Page 8 VPS operation The VPS mechanism allows activating the sunscreen by simply lowering it until it partially covers the visor field of vision. In this way, the desired light transmittance reduction is achieved. At any time, independent of the visor, the VPS can be deactivated with a simple movement and easily pulled up to restore the normal conditions of visibility and protection guaranteed by the approved helmet visor.
- Page 9 Make sure the VPS works correctly by moving the left side slider forward (Fig. 9 A) and back-ward (Fig. 9 B) so that you can hear the clicks meaning that it enters the relative positions. If necessary, repeat the above-mentioned steps. If the visor and/or VPS opening/closing mechanisms are damaged or malfunctioning, please contact a Nolan authorised dealer.
- Page 10 • WIND PROTECTOR This accessory allows improved helmet performance under certain conditions of use. The Wind Protector prevents unpleasant infiltrations of air under the chin. See Fig. 12 for the assembly and disassembly. WARNING!!! The Wind Protector is easily removable. You can check the correct assembly of this accessory by pulling it gently towards the inner part of the helmet with your thumb and forefinger.
- Page 11 2.3 Insert the left front flap of the liner into its seat on the support fixed to the polystyrene inner shell and push it downwards until it is completely locked. Follow the same steps for the central and right flap (Fig. 18). 2.4 Insert the right and left side flaps of the liner pushing them into the cavities between the inner polystyrene cheek pads and the outer shell (Fig.
- Page 12 FÉLICITATIONS... pour l’achat de votre nouveau casque. Le design, lʼergonomie, le confort, lʼaérodynamisme, les commandes simples et fonctionnelles, tout a été conçu et réalisé pour obte- nir un produit moderne avec le maximum de performances, capable de satisfaire les exigences les plus sévères en ce qui concerne la sécurité...
-
Page 13: Entretien Et Nettoyage
- le casque ne doit pas tourner, bouger librement sur la tête ou sʼenlever. En cas contraire, réglez la longueur de la jugulaire ou changez la taille du casque. Répétez à nouveau lʼessai. Système de fixation: - Le système de fixation (jugulaire) est réglé en série avec une longueur standard; avant de lʼutiliser veillez à ce que le pré-réglage soit correct. -
Page 14: Instructions D'utilisation
INSTRUCTIONS D’UTILISATION Le casque N91EVO peut être utilisé dans deux configurations (mentonnière fermée - P / mentonnière ouverte - J). L’emploi du casque dans la configuration P, (quand la mentonnière et l’écran sont fermés) offre le niveau de protection évidemment le plus élevé... -
Page 15: Montage
Ne pas utiliser le casque sans la mentonnière. Ne pas utiliser le casque en cas de dysfonctionnement de la mentonnière: s’adresser immédiatement à un reven- deur autorisé Nolan. Ne pas démonter ni altérer les vis de fixation de la mentonnière à la calotte. - Page 16 Utiliser le casque uniquement si l’écran a été monté correctement. Si les mécanismes d’ouverture et de fermeture de l’écran s’avèrent défectueux ou endommagés, s’adresser à un revendeur autorisé Nolan. • (Disponible de série ou comme accessoire en option) MONTAGE DU PETIT ÉCRAN INTERNE PINLOCK...
- Page 17 Si, pendant l’usage, l’écran du casque s’embue et/ou en cas d’apparition de condensation dans les zones comprises entre l’écran et le petit écran, vérifier le bon montage et ajustement du système. Un ajustement excessif ou limité du petit écran peut engendrer une adhérence excessive de celui-ci contre la surface de l’écran et/ou des déformations permanentes de l’écran.
- Page 18 Fonctionnement du VPS Le mécanisme du VPS permet, d’un simple mouvement, d’activer la visière pare-soleil en la baissant jusqu’à couvrir partielle- ment le champ visuel de l’écran, en réduisant la transmission de la lumière comme souhaité. À tout moment, toujours d’un sim- ple mouvement et indépendamment de l’écran, le VPS peut être désactivé...
- Page 19 (voir Fig. 9 B) jusqu’à entendre les déclics de rétention des positions correspondantes. Si les mécanismes d’ouverture et de fermeture de l’écran et/ou du VPS s’avèrent défectueux ou endommagés, s’adresser à un revendeur autorisé Nolan. Utiliser le casque uniquement si le VPS a été monté correctement.
- Page 20 • WIND PROTECTOR Cet accessoire permet d’améliorer les performances du casque dans des conditions d’utilisation particulières. La bavette anti-vent (Wind Protector) évite des infiltrations gênantes d’air par dessous le menton. Voir Fig. 12 pour le montage et le démontage. ATTENTION !!! La bavette anti-vent est facilement amovible.
- Page 21 2.3 Introduire la languette avant de gauche de la coiffe dans le logement correspondant, situé sur le support fixé sur la calotte interne en polystyrène. Pousser la languette vers le bas jusqu’à ce qu’elle s’accroche complètement. Répéter ensuite cette opération avec la languette centrale et avec la languette de droite (Fig. 18). 2.4 Introduire les languettes latérales gauche et droite de la coiffe en les poussant dans les interstices présents entre les mousses de joue internes en polystyrène et la calotte externe (voir Fig.
- Page 22 FELICIDADES... por la compra de tu nuevo casco. Diseño, ergonomía, confort, peso reducido, aerodinamismo, controles sencillos y funcionales, todo ideado y realizado para obtener un producto moderno con un elevado rendimiento, para satisfacer las más altas exigencias en cuanto a seguridad y confort. SEGURIDAD E INSTRUCCIONES •...
-
Page 23: Mantenimiento Y Limpieza
- el casco no tiene que girar, ni moverse sobre la cabeza o descalzarse. De lo contrario regula la longitud de la correa o elige un casco de talla diferente. Vuelve a repetir la prueba. Sistema de cierre: - el sistema de cierre (correa) ha sido regulado de serie con una longitud estándar. Antes de utilizarlo, comprueba que la regulación sea la correcta. -
Page 24: Instrucciones De Uso
INSTRUCCIONES DE USO El casco N91EVO puede ser utilizado en dos configuraciones (mentonera cerrada - P / mentonera abierta - J). Obviamente, el uso del casco en la configuración P (con la mentonera y la pantalla cerradas) garantiza un mayor nivel de protección respecto a la configuración J (con lamentonera y la pantalla abiertas). -
Page 25: Montaje
No utilice el casco sin la mentonera. No utilice el casco si la mentonera no funciona. Diríjase inmediatamente a un distribuidor autorizado Nolan. No desmonte y/o fuerce los tornillos de fijación de la mentonera a la calota. - Page 26 No utilice el casco si la pantalla no está montada correctamente. Si los mecanismos de apertura y cierre de la pantalla presentan funcionamientos anómalos o daños, diríjase a un distribuidor autorizado Nolan. • (Disponible de serie o como accesorio opcional) MONTAJE DE LA PANTALLITA INTERNA PINLOCK ®...
- Page 27 na sea la adecuada para evitar que se mueva y pueda causar rayas en ambas superficies. Si durante el uso se produjese empa- ñamiento de la pantalla del casco y/o formación devaho en zonas comprendidas entre la pantalla y la pantallita, compruebe que el montajey la tensión del sistema sean correctos.
- Page 28 Funcionamiento del VPS El mecanismo VPS permite activar la pantalla parasol con un simple movimiento, bajándolahasta ocupar parcialmente el campo visual de la pantalla, determinando la reducción deseada de la transmitancia de la luz. En cualquier momento, con un simple movimiento y deforma independiente a la pantalla, el VPS se puede desactivar y volver a elevar rápidamente hasta recuperar las condiciones normales de visibilidad y protección ofrecidas por la pantalla homologada del casco.
- Page 29 Si los mecanismos de apertura y cierre de la pantalla y/o del VPS presentan funcionamientos anómalos o daños, diríjase a un distribuidor autorizado Nolan. No utilice el casco si el VPS no está montado correctamente. El VPS no sustituye la protección brindada por la pantalla, por lo que siempre debe serutilizado sólo cuando la pantalla del casco esté...
- Page 30 • WIND PROTECTOR Este accesorio permite mejorar las prestaciones del casco en determinadas condiciones deuso. El deflector de barbilla (Wind Protector) evita las molestas infiltraciones de aire por debajo delmentón. Véase la véase Fig. 12 para el montaje y el desmontaje. ¡ATENCIÓN! El deflector de barbilla es fácilmente extraíble.
- Page 31 ción en la presilla correspondiente presente en el acolchado interior en la zona de las almohadillas laterales (véase Fig. 19A); repliegue luego la prolongación textil rectangular en el acolchado. Repita las operaciones anteriores en el lado derecho del casco. 2.3 Introduzca la lengüeta frontal izquierda del acolchado interior en el alojamiento correspondiente presente en el soporte fija- do a la calota interna de poliestireno y empújela hacia abajo hasta que quede completamente enganchada.
- Page 32 Fig. 1 Fig. 2 Fig. 3 Fig. 4 Fig. 5 Fig. 1 Fig. 2 Fig. 3 Fig. 4 Fig. 5...
- Page 33 Fig. A Fig. B Fig. 6 Fig. 7 Fig. 8 Fig. A Fig. B Fig. 6 Fig. 7 Fig. 8...
- Page 34 Fig. 9A Fig. 9B Fig. 13 Fig. 14 Fig. 15 Fig. 9A Fig. 9B Fig. 13 Fig. 14 Fig. 15...
- Page 35 Fig. 10 Fig. 11 Fig. 12 Fig. 16 Fig. 17 Fig. 18 Fig. 10 Fig. 11 Fig. 12 Fig. 16 Fig. 17 Fig. 18...
- Page 36 Fig. 19 A Fig. 19 B Fig. 19 A Fig. 19 B...
Need help?
Do you have a question about the N91 EVO and is the answer not in the manual?
Questions and answers