Table of Contents
Advertisement
��������
�
�
�
�
�
�
�����
�����
�����
�����
TM
�
�
���
���
�
�
������� ����
������� ����
�
�
���
���
�
�
�
�
�� �
�� �
��
��
�
�
��
��
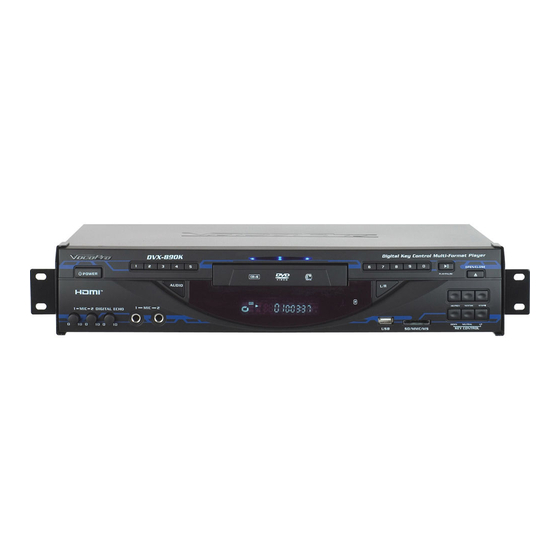
Multi-Format Digital Key Control Karaoke DVD/DivX® Player
o
w
n
�����
�����
����
�����
�������
���
�����
������
���
�
�
��������
�
�
�����
�
�
������
�
����
����
�����
������
�����
����
������
�����
���
����
����
���
�
����
����
����
�
������� ��� �������
��������
�
�
�
�
DVX-890K
e
r
'
s
�
�
�
������� ��� ������� ������������ ������
�
�
�
�
���
���
�
���
���
m
a
n
u
�
�
�
�
�
�
����������
����������
����������
����������
����
����
����
����
����
����
����
����
�������
�������
��
��
���������
���������
��� �������
��� �������
a
l
Advertisement
Table of Contents

Related Manuals for VocoPro DVX-890K


Summary of Contents for VocoPro DVX-890K
- Page 1 � � ��� ��� � � ���� ���� ������� ������� �� �� � � �� � �� � �� �� � � �� �� ��� ��� ��������� ��������� ��� ������� ��� ������� DVX-890K Multi-Format Digital Key Control Karaoke DVD/DivX® Player...
-
Page 3: Table Of Contents
Specifications and Features ..8 Mounting the DVX-890K ..9 Getting Connected ... . . 10 Audio Connections . -
Page 4: Safety Instructions
Safety Instructions 8. Ventilation - The appliance should be situated so its location does not interfere with its proper ventilation. CAUTION For example, the appliance should not be situated on a bed, sofa, rug, or similar surface that may block the RISK OF SHOCK ventilation slots. -
Page 5: Fcc Information
1. To ensure the finest performance, please read this requirements. Modifications not expressly approved by manual carefully. Keep it in a safe place for future Vocopro may void your authority, granted by the FCC, to reference. use this product. 2. Install your unit in a cool, dry, clean place - away from 2. -
Page 6: Welcome
And while you're there don't forget to check out our Club VocoPro for Karaoke news and events, chat rooms, club directories and even a KJ Service directory! We look forward to hearing you sound like a PRO, with VocoPro, the singer’s ultimate choice. FOR YOUR RECORDS Please record the model number and serial number below, for easy reference, in case of loss or theft. -
Page 7: Listening For A Lifetime
Now itʼs time to consider how you can maximize the fun and excitement your equipment offers. VocoPro and the Electronic Industries Associationʼs Consumer Electronics Group want you to get the most out of your equipment by playing it at a safe level. One that lets the sound come through loud and clear without annoying blaring or distortion and, most importantly, without affecting your sensitive hearing. -
Page 8: Specifications And Features
Specifications and Features Specifications Play mode: NTSC/PAL/AUTO Compatible formats: DVD, DIVX, CD+G, Mp3, VCD, SVCD, DVD-R/RW, DVD+R/RW, CD-R/RW, HDCD Resolution: > 500 lines Video S/N ratio: > 56dB Frequency response: fs 96KHz: 20Hz-02kHz: +/- 1dB Audio S/N ratio: > 90dB Dynamic Range: >... -
Page 9: Mounting The Dvx-890K
Mounting the DVX-890K Mounting Use the included mounting brackets to mount the DVX-890K into a 19” rack case. The DVX-890K re- quires 2 RUs of available rackspace. Installing the Mounting Brackets onto the DVX-890K Position the mounting brackets on the DVX-890K with... -
Page 10: Getting Connected
Getting Connected FR, FL, CENTER, SL, SR CONNECTION Audio Connections DVX-890K Mic + Music Mic + Music Receiver Pb/Cb Pb/Cb Pr/Cr Pr/Cr CENTER CENTER HDMI HDMI COAXIAL COAXIAL VIDEO VIDEO S-VIDEO S-VIDEO OPTICAL OPTICAL Mixed Out Mixed Out 5.1 CH Audio Output 5.1 CH Audio Output... -
Page 11: Audio Connections
Getting Connected DIGITAL/COAXIAL CONNECTION Audio Connections DVX-890K ��� � ����� ��� � ����� ��� ��� � � � � ����� ����� ����� ����� �� �� ������ ������ �� �� Dolby Digital AC-3 Receiver/Decoder � � �� �� �� �� ��... -
Page 12: Video Connections
Getting Connected RCA CONNECTION Video Connections LCD Monitor DVX-890K ��� � ����� ��� � ����� ��� ��� � � � � ����� ����� ����� ����� �� �� ������ ������ �� �� � � �� �� �� �� �� �� ����... -
Page 13: Microphone Connections
��� ������� ��� ������� Connect up to two microphones to the DVX-890K, by connecting a ¼” cable to the MIC 1 and 2 inputs on the DVX-890K. NOTE: Microphone vocals are only output from the MIC and MUSIC OUT on the rear panel of the DVX-890K. -
Page 14: Descriptions And Functions
Connect ¼” MIC cables (or line cables for wireless systems) here. NOTE: Microphone vocals are only output from the MIC and MUSIC OUT on the rear panel of the DVX-890K. You will not hear the vocals if you are not outputting from these outputs. -
Page 15: Rear Panel
TVs, VCRs etc.). Vocals and music are simultaneously output from these connections. NOTE: Microphone vocals are only output from the MIC and MUSIC OUT on the rear panel of the DVX-890K. You will not hear the vocals if you are not outputting from these outputs. -
Page 16: Remote Control
Descriptions and Functions REMOTE CONTROL 1. EJECT button - Press to OPEN and CLOSE the disc tray. 2. PROGRAM button - Press to access the PROGRAM selection window. 3. DISPLAY button - To access OSD playback display menu. The different OSD display modes available depend on the type of disc being played. - Page 17 Press this button once to PAUSE playback and enter AUTO STOP MODE. Press twice to completely STOP playback. While in AUTO STOP MODE, playback pauses and the VocoPro splash screen appears. Pressing PLAY will resume playback and exit AUTO STOP MODE. 19. STEP - Press this button to enter STEP mode playback.
-
Page 18: Basic Operations
• Make sure all components (TV, mixer, sound system etc.) are already connected. Turning on the Power Press the POWER button on the DVX-890K or on its remote control. Inserting a disc 1. Open the disc tray by pressing the OPEN/CLOSE button on the player or the EJECT button on the remote. - Page 19 Basic Operations Scanning Through Tracks on a Disc Scan forwards and backwards through tracks using the buttons on the remote control. - Rewinds through a track - Fast-forwards through a track Using the Direct Track Access feature Jump directly to tracks by using the number pad on the player or on the remote control. To jump to track 1 press “0”, “1”...
-
Page 20: Advanced Operations
Advanced Operations Jumping to a specific time in a track or chapter Press the TIME button on the remote twice to access the time menu. Use the number pad to enter the exact time to skip to. For example: To jump to :30 seconds in a track while it is playing 1. - Page 21 Advanced Operations Using the STEP feature The STEP feature lets you skip through frames, one frame at a time. Press the STEP button on your remote to advance frames. Press the (play) button on the remote to exit step mode. Looping portions of music or video using the A-B feature 1.
-
Page 22: Karaoke Operations
Karaoke Operations Digital Key Control Digital Key Control allows you to raise and lower the key of the music to fit any singer’s vocal range. Change the key by using the UP and DOWN buttons on the player or the “ ”, ( ) and “... -
Page 23: Dvd Operations
DVD Operations Accessing the DVD menu Press the MENU button on the remote while the DVD is playing. Use the arrow buttons on the remote to navigate through the menu and use the ENTER button to make selections. Turning on Subtitles Press the SUBTITLE button on the remote control to access subtitles on DVDs with subtitle available. -
Page 24: Mp3 Operations
Mp3 Operations The Mp3 Menu will appear when an Mp3 disc, USB flash drive or SD card is loaded into the DVX-890K. If there is more than one music source loaded, (ex: a disc, and an SD card), press the USB/SD button on the remote to toggle between the loaded sources. -
Page 25: Setting Up Preferences
Setting Up Preferences General TV Display: Normal/Ps-Normal/Lb-Wide Normal/PS: Select to view the standard 4:3 picture or the cut standard 4:3 picture. Normal/LB: Select to view 4:3 standard with letterbox for a full wide-screen mode. Wide: Select to view widescreen picture with a widescreen capable TV. Angle Mark: On-Off On: The angle mark will appear on screen when multiple angles are available for viewing (DVD Only). - Page 26 Setting Up Preferences Audio Speaker Setup: Downmix: lt/rt-stereo-5.1ch LT/RT: Select when connecting to a Dolby Digital amplifier. Stereo: Select when connecting to a 2-channel stereo amplifier/mixer. 5.1 CH: Select when using the 5.1 channel outputs on the rear panel. Front speaker: Large-Small Large/Small: Select the size that matches your front speakers.
- Page 27 Setting Up Preferences Audio continued 3d Processing: Pro Logic II: Pro logic II: off-on-auto Off: Select when NOT playing Pro-Logic II disc media. On: Select when playing Pro-Logic II disc media. Auto: Select to have the unit auto-detect and enable Pro-Logic II when disc media is Pro-Logic II encoded. Mode: music-movie-pro logic-auto Music: Select for use with music-based disc media.
- Page 28 Setting Up Preferences Video Setup Component: S-video-YUV-RGB Set to S-VIDEO if you will be connecting to a TV via the S-VIDEO output. Select either YUV or RGB if you will be connecting to a TV via the YPbPr (Component) outputs. See your TV user’s manual to determin which setting to use. Resolution: 480i—1080p Use this setting to change the resolution of the HDMI output.
- Page 29 Setting Up Preferences Preferences Tv type: ntsc-pal-auto This setting switches between NTSC, PAL and AUTO. Set to NTSC for the United States and Asia, and PAL for Europe. If you are uncertain what TV type you have, set to AUTO. Pbc: on-off Enables the playback control menu for VCDs.
-
Page 30: Troubleshooting
• Make sure all of the components (amp, mixer, TV, etc.) are set to the proper inputs. • Make sure the TV or monitor is working correctly. • Make sure the DVX-890K is set to the correct video output mode using the V-MODE button on the remote control. The disc does not play •... - Page 32 DVX-890K Owner’s Manual © VocoPro 2009 v1.0 www.vocopro.com...
Need help?
Do you have a question about the DVX-890K and is the answer not in the manual?
Questions and answers