Advertisement
Available languages
Available languages
Table of Contents
- 1 Safety Information
- 2 Product Overview
- 3 Specifications
- 4 Front Panel Features
- 5 Rear Panel Features
- 6 Installation Instructions
- 7 Unpacking Inspection
- 8 Installation
- 9 Turn the Inverter On/Off
- 10 Troubleshooting
- 11 Prezentarea Produsului
- 12 Remedierea Defecțiunilor
- 13 FelhasználóI Kézikönyv
- 14 Biztonsági Előírások
- 15 Beszerelési Útmutató
- 16 Általános Beállítások
- Download this manual
Advertisement
Table of Contents

Related Manuals for Well UPS-HEATST-COMMANDER300W-WL


Summary of Contents for Well UPS-HEATST-COMMANDER300W-WL
- Page 1 Operation Manual Pure Sine Wave Inverter Model UPS-HEATST-COMMANDER300W-WL UPS-HEATST-COMMANDER600W-WL This product benefits 2+1 years warranty. For more information please access site www.well.ro...
-
Page 2: Safety Information
WELL. Please read carefully the following instructions and keep them within reach 1. Safety Information CAUTION Non-qualified electricians are forbidden to open the case due to hazard of electrical shock. This equipment is not design to be used for below or similar applications: ... -
Page 3: Product Overview
2 Product Overview 2.1 Specifications MODEL 300W 600W 1000W 1600W 2500W 3500W DC Input (the inverter must be connected to batteries to work properly) Nominal input voltage DC input range 10 ~ 15V 20 ~ 30V AC Input Bypass input range 0 ~ 264Vac for 220Vac/230Vac/240Vac Mains input range 150 ~ 282Vac for 220Vac, 156 ~ 294Vac for 230Vac, 163 ~ 307Vac for 240Vac... - Page 4 Rectifier load Mains mode: 110% 120 s, 125% 60 s, 150% 10 s (switch to bypass) Overload capability Inverter mode: 110% 60s; 125% 10 s; 150% 0.7 s (shut down) Battery Default 10A Default 20A, regulating step 1A (< 10A) / 5A (> 10A) Charging current (selectable) Max.
-
Page 5: Front Panel Features
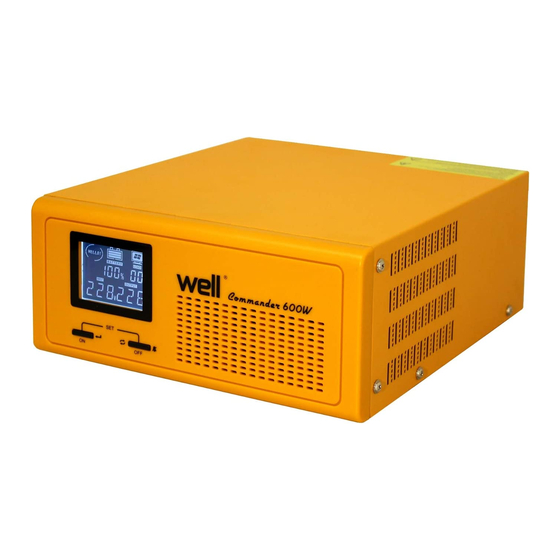
Charging features Three-stage: Charging CC (constant current) CV (constant voltage) Float (floating process charge) Process diagram Constant voltage charging time: 10 S 2.2 Front panel features 300W ~ 1600W front panel 2500W ~ 3500W front panel - 4 -... -
Page 6: Rear Panel Features
2.3 Rear panel features 300W ~ 1600W rear panel ① AC input socket ② Output sockets ③ Overcurrent protector ④ Buzzer for battery reverse ⑤ Battery wiring ⑥ Battery breaker ⑦ Fan 2500W ~ 3500W rear panel ① Input / output terminal block ②... -
Page 7: Installation
2500W ~ 3500W package contents 2500W ~ 3500W Inverter Operation manual 3.2 Installation CAUTION The inverter is designed for indoor use. Do not operate this UPS in direct sunlight, in contact with fluids, or where there is excessive dust or humidity. Place batteries in sound ventilation environment. -
Page 8: Turn The Inverter On/Off
(Note that the red cable is connected to the positive terminal, black cable is connected to the negative terminal) 1600W DC24V inverter battery connection diagram (Note that the red cable is connected to the positive terminal, black cable is connected to the negative terminal) 2500W / 3500W DC24V inverter battery connection diagram (Note that the red cable is connected to the positive terminal, black cable is connected to... - Page 9 4.2 Display interface Inverter mode Battery capacity Fan swing Load Inverter output voltage Inverter output frequency Mains power mode Input voltage Output voltage 4.3 Settings 4.3.1 Setting operation In normal mode, press and hold “ON” + “OFF” button at the same time for 3 seconds to go to Setup mode.
- Page 10 4.3.2 General settings Configure these settings at any time, using the display interface. Default Parameters Options LCD display Value 220V / 230V / OUT: Rated output voltage of the inverter 220V 240V HZ: Rated output frequency of the inverter 50HZ 50HZ / 60HZ B: Equalizing charge voltage 14.1V...
-
Page 11: Troubleshooting
DCAU: DC auto restart function Note: If select “Y”, check whether the Y / N configured time in “DC auto restart time” is correct or not, if not, change it. ACAU: AC self-starting function Y / N 10% ~ 120% INP: Input power matching of the generator 120% (based on rated... - Page 12 Output overload Check the load. Relay fault Contact the dealer or supplier from whom it was purchased. MOSFET over-current Contact the dealer or supplier from whom it was purchased. Decrease the operating load. Contact MOS overtemperature the dealer or supplier if the problem persists.
- Page 13 Battery voltage is too high Check the battery voltage. Battery over-discharge Check the battery voltage protection Fault self-locking Wait for auto clearance or manually shut down and restart the inverter Ecological information: Waste electrical and electronic equipment are a special waste category, collection , storage, transport , treatment and recycling are important because they can avoid environmental pollution and are harmful to health Submitting waste electrical and electronic equipment to special collection centers makes the waste...
- Page 14 Manual de Instrucțiuni Invertor Undă Sinusoidală Pură Model UPS-HEATST-COMMANDER300W-WL UPS-HEATST-COMMANDER600W-WL Acest produs beneficiază de garanție 2+1 ani. Pentru mai multe informații vă rugăm accesați siteul www.well.ro...
- Page 15 Vă mulțumim că ați ales acest produs WELL. Citiți cu atenție și păstrați aceste instrucțiuni la îndemână pe toata perioada utilizării aparatului. 1 Informații în privința siguranței AVERTIZARE Electricienilor necalificați li se interzice să deschidă carcasa din cauza pericolului de electrocutare.
-
Page 16: Prezentarea Produsului
2 Prezentarea Produsului 2.1 Specificații MODELUL 300W 600W 1000W 1600W 2500W 3500W Intrare DC (invertorul trebuie să fie conectat la baterii pentru a funcționa corect) Tensiune nominală intrare Rază intrare DC 10 ~ 15V 20 ~ 30V Intrare AC Tensiune intrare bypass 0 ~ 264Vac pentru 220Vac/230Vac/240Vac Tensiune intrare rețea 150 ~ 282Vac pentru 220Vac, 156 ~ 294Vac pentru 230Vac, 163 ~ 307Vac pentru 240Vac... - Page 17 Încărcare rectificator Modul rețea: 110% 120 s, 125% 60 s, 150% 10 s (comutare pe bypass) Capacitate supraîncărcare Modul invertor: 110% 60s; 125% 10 s; 150% 0.7 s (oprire) Bateria Implicit 10A Implicit 20A, pasul de reglementare 1A (< 10A) / 5A (> 10A) Curentul de încărcare (selectabil) Max.
- Page 18 Caracteristici în privința încărcării Trei niveluri: Procesul de CC (curent constant) CV (tensiune constantă) Float încărcare (încărcătură plutire) Diagrama procesului Tensiunea constantă timp de încărcare: 10 S 2.2 Caracteristici panou frontal 300W ~ 1600W panou frontal 2500W ~ 3500W panou frontal - 4 -...
- Page 19 2.3 Caracteristici panoul din spate 300W ~ 1600W panoul din spate ① Mufă intrare AC ② Mufe ieșire ③ Siguranță supra-curent ④ Buzzer polaritate inversă a bateriei ⑤ Cablaj baterie ⑥ Disjunctor baterie ⑦ Ventilator 2500W ~ 3500W panoul din spate ①...
- Page 20 2500W ~ 3500W conținut pachet 2500W ~ 3500W Invertor Manual cu instrucțiuni 3.2 Instalarea AVERTIZARE Invertorul este conceput pentru utilizare în interior. Nu operați acest UPS în lumina directă a soarelui, în contact cu fluide, sau în locuri unde este prezent praful sau umiditatea în exces.
- Page 21 3.2.2 Conectarea bateriei externe 300W / 600W / 1000W DC12V diagramă conexiune baterie invertor (Acordați atenție faptului că cablul roșu trebuie conectat la terminalul pozitiv, cablul negru la terminalul negativ). 1600W DC24V diagramă conexiune baterie invertor (Acordați atenție faptului că cablul roșu trebuie conectat la terminalul pozitiv, cablul negru la terminalul negativ).
- Page 22 4 Operațiuni AVERTIZARE Porniți invertorul prima dată pe modul baterie. Asigurați-vă de faptul că încărcarea nu are niciun fel de problemă (supraîncărcare, scurtcircuit, etc.) înainte de a-l conecta la electricitate. 4.1 Porniți/Opriți Invertorul Fără a-l conecta la electricitate, apăsați și țineți apăsat butonul ”PORNIT” (ON) timp de 3 secunde, eliberați-l până...
- Page 23 4.3 Setările 4.3.1 Setare funcționare În modul normal, apăsați și țineți apăsat butonul ”PORNIT” (ON) + ”OPRIT”(OFF) în același timp pentru 3 secunde pentru a merge la modul Setare. În modul Setare, apăsați și țineți apăsat butonul ”PORNIT” (ON) + ”OPRIT” (OFF) în același timp pentru 3 secunde pentru a ieși din modul setare, și setarea nu este salvată.
- Page 24 4.3.2 Setările generale Configurați aceste setări în orice moment, utilizând interfața afișajului. Valore Parametrii Opțiuni Afișaj LCD Implicită 220V / 230V / OUT: Tensiune nominală ieșire a invertorului 220V 240V HZ: Frecvență nominală ieșire a invertorului 50HZ 50HZ / 60HZ B: Tensiune încărcare egalizare 14.1V 13.6V ~ 15.0V...
-
Page 25: Remedierea Defecțiunilor
corectă sau nu, dacă nu, schimbați-o. DCAU: Funcție de restart automată DC Observație: În cazul în care alegeți ”Y”, verificați dacă timpul configurat în ”Timpul de Y / N repornire automată DC” este corect sau nu, dacă nu, schimbați-l. ACAU: Funcția de pornire automată AC Y / N 10% ~ 120% INP: Congruență... - Page 26 Tensiunea de ieșire AC este Contactați furnizorul sau comerciantul prea ridicată de la care a fost achiziționat. Tensiunea de ieșire AC este Contactați furnizorul sau comerciantul prea scăzută. de la care a fost achiziționat. Supraîncărcare ieșire. Verificați încărcarea. Eroare releu Contactați furnizorul sau comerciantul de la care a fost achiziționat.
- Page 27 Tensiunea BUS este prea Verificați tensiunea bateriei. Contactați ridicată (Bateria este comerciantul sau furnizorul dacă supraîncărcată) problema persistă. Contactați furnizorul sau comerciantul Supra-curent încărcare de la care a fost achiziționat. Tensiunea bateriei este prea Verificați tensiunea bateriei. ridicată Protecție împotriva Verificați tensiunea bateriei.
-
Page 28: Felhasználói Kézikönyv
Felhasználói kézikönyv Valós szinuszos inverter Model UPS-HEATST-COMMANDER300W-WL UPS-HEATST-COMMANDER600W-WL Ez a termék 2 +1 éves garanciával rendelkezik. Részletes információk megtalálhatók a www.well.ro web oldalon. -
Page 29: Biztonsági Előírások
Köszönjük hogy WELL terméket választott. Használat előtt kérjük olvassa el figyelmesen az alábbi utasításokat és tartsa kézügyben őket. 1 Biztonsági előírások FIGYELMEZTETÉS Nem szakavatott villanyszerelőnek tilos kinyitni a dobozt, mert áramütés veszélye áll fent. alkalmazásokhoz: Ez a berendezés nem alkalmazható az alábbi, vagy hasonló... - Page 30 2 A termék áttekintése 2.1 Tulajdonságok MODEL 300W 600W 1000W 1600W 2500W 3500W DC Bemenet (a megfelelő működéshez az invertert akumulátorhoz kell csatlakoztatni. ) Névleges bementi feszültség DC bemeneti tartomány 10 ~ 15V 20 ~ 30V AC Bemenet Bypass bemeneti tartomány 220Vac/230Vac/240Vac részére 0 ~ 264Vac 220Vac részére 150 ~ 282Vac, 230Vac részére 156 ~ 294Vac, 240Vac részére 163 ~ Hálózati bemeneti tartomány...
- Page 31 Induktív terhelés Igen Motor terhelés Igen Egyenirányító terhelés Igen Hálózati üzemmód: 110% 120 mp, 125% 60 mp, 150% 10 mp (bypass-ra vált) Túlterhelhetőség Inverter mód: 110% 60mp; 125% 10 mp; 150% 0.7 mp (lezár) Akkumulátor Alapértelemzett Alapértelemzett 20A, szabályozó lépés 1A (< 10A) / 5A (> 10A) Töltőáram (választható) Max.
- Page 32 A töltés jellemzői Háromfokozatú: A töltés CC (constant current- állandó áram) CV (constant voltage- állandó folyamata feszültség) Float (floating charge-túlterhelhetőség) A folyamat diagrammja Állandó feszültség töltési idő: 10 mp 2.2 Az előlap funkciói 300W ~ 1600W előlap 2500W ~ 3500W előlap - 4 -...
-
Page 33: Beszerelési Útmutató
2.3 Hátsó panel jellemzői 300W ~ 1600W hátsó panel ① AC bemeneti foglalat ② Kimeneti foglalatok ③ Túláram elleni védelem ④ Riasztó fordított elem polaritás ⑤ Akkumulátor bekötése ⑥ Akkumulátor megszakító ⑦ Ventilátor 2500W ~ 3500W hátsó panel ① Bemenet / kimenet terminál blokk ②... - Page 34 2500W ~ 3500W csomag tartalma 2500W ~ 3500W Inverter Használati kézikönyv 3.2 Beszerelés VIGYÁZAT Az invertert beltéri használatra tervezték. Ne használja jelen UPS-t közvetlen napfény közelében, vagy ahol sok a por vagy a nedvesség, ne érintkezzen folyadékokkal. Tárolja az elemeket jól szellőző környezetben. Ha beszereli vagy dolgozik az inverteren, az akkumulátorral vagy egyéb, az egységhez mellékelt berendezéseken, a rövidzárlat veszélyének csökkentése érdekében használjon szigetelt eszközöket.
- Page 35 3.2.2 Csatlakozás külső akkumulátorhoz 300W / 600W / 1000W DC12V inverter akkumulátor bekötési rajza (Vegye figyelembe, hogy a piros kábel a pozitív terminálhoz van csatlakoztatva, a fekete kábel a negatív terminálhoz van csatlakoztatva) 1600W DC24V inverter akkumulátor bekötési rajza (Vegye figyelembe, hogy a piros kábel a pozitív terminálhoz van csatlakoztatva, a fekete kábel a negatív terminálhoz van csatlakoztatva.) 2500W / 3500W DC24V akkumulátor bekötési rajza (Vegye figyelembe, hogy a piros kábel a pozitív terminálhoz van csatlakoztatva, a fekete...
- Page 36 4.1 Állitsa az invertert ON/ OFF, BE/KI pozícióba A hálózathoz való csatlakozás nélkül, nyomja meg a "ON/BE" gombot 3 másodpercig, engedje el, amíg a riasztó hangjelzést ad, az inverter elindul. Az inverter működési folyamata során nyomja meg az "OFF/KI" gombot 3 másodpercig, engedje el, amíg az a hangjelzést ad, az inverter kikapcsol.
-
Page 37: Általános Beállítások
A Beállítás módban az "OFF/KI" gombra kattintva lehet beállítani az aktuális beállításokat. A Beállítás módban nyomja meg az "ON/BE" gombot, hogy lapozzon a "Save & Exit/Ment &Kilép" felület oldalára, nyomja meg az "OFF/KI" gombot, és válassza ki a "Y", majd nyomja meg az "ON/BE" gombot, hogy mentse az adatokat és lépjen ki a Beállítás módból. - Page 38 10A (300W ) CUR: Töltőáram (600W 0 ~ 60A 3500W) IECO: Az inverter üresjárati ECO módja. Megjegyzés: Ha az "Y"-t választja, ellenőrizze, hogy a beállított terhelési Y / N ráta "Inverter-leállító terhelése" helyes-e vagy nem, ha nem, akkor változtassa meg. INLS: Az inverter üresjárati leállító...
- Page 39 SAVE: Ment és kilép Y / N 4.4 Hibaelhárítás Ez a rész azokat az állapotokat és riasztási üzeneteket listázza, amelyek az UPS-en jelenhetnek meg. A javasolt korrekciós intézkedés szerepel minden üzenetben a kijelzőn, hogy segítsen megoldani a problémákat. Üzenet Korrekciós intézkedések A probléma leírása megjelenítése Ellenőrizze hogy a terhelés...
- Page 40 Csökkentse az üzemi terhelést. Lépjen kapcsolatba a kereskedővel vagy a Transzformátor túlmelegedés forgalmazóval, ha a probléma továbbra is fennáll. Az inverter AC kimeneti Lépjen kapcsolatba a kereskedővel feszültsége túl magas vagy a forgalmazóval, akitől vásárolta. Az inverter AC kimeneti Lépjen kapcsolatba a kereskedővel feszültsége túl alacsony vagy a forgalmazóval, akitől vásárolta.
- Page 41 melyek artalmasak az emberi egeszsegre es testi epsegere. Ez okbal kifolyalag kerjuk a hasznalt elektromos es elektronikus keszulekeket, berendezeseket, leadni az erre a celra letrehozott specialis hulladek gyujto kozpontokba, ezalltal hozzajarulvan helyes ujrahasznositasi folyamathoz, oltalmazvan kornyezetunket es eroforrasainkat. Ne feledje! Minden egyes elektromos es elektronikus keszulek amely a hulladek lerakohoz, a foldre , vagy a viz partjara kerul szennyezi a kornyezetet!
- Page 43 P/N E.51.0000430-00...
Need help?
Do you have a question about the UPS-HEATST-COMMANDER300W-WL and is the answer not in the manual?
Questions and answers