
Related Manuals for AEG FSB31600Z


Summary of Contents for AEG FSB31600Z
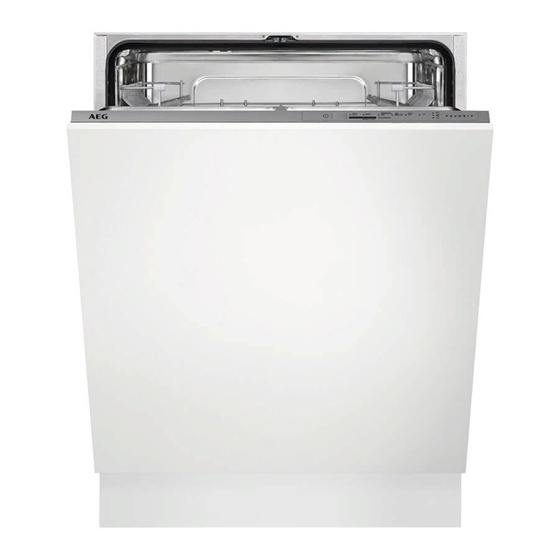
- Page 1 FSB31600Z User Manual Dishwasher Manual de instruções Máquina de lavar loiça USER MANUAL...
-
Page 2: Table Of Contents
12. TECHNICAL INFORMATION................. 19 FOR PERFECT RESULTS Thank you for choosing this AEG product. We have created it to give you impeccable performance for many years, with innovative technologies that help make life simpler features you might not find on ordinary appliances. Please spend a few minutes reading to get the very best from it. -
Page 3: Safety Information
ENGLISH SAFETY INFORMATION Before the installation and use of the appliance, carefully read the supplied instructions. The manufacturer is not responsible for any injuries or damages that are the result of incorrect installation or usage. Always keep the instructions in a safe and accessible location for future reference. -
Page 4: Safety Instructions
Put the cutlery in the cutlery basket with the sharp • ends pointing down or put them in the cutlery drawer in a horizontal position with the sharp edges down. Do not leave the appliance with the open door •... - Page 5 ENGLISH • Ensure that there are no visible water complete. Some detergent may leaks during and after the first use of remain on the dishes. the appliance. • The appliance can release hot steam • The water inlet hose has a safety valve if you open the door while a and a sheath with an inner mains programme operates.
-
Page 6: Product Description
3. PRODUCT DESCRIPTION Upper spray arm Rinse aid dispenser Lower spray arm Detergent dispenser Filters Cutlery basket Rating plate Lower basket Salt container Upper basket Air vent 4. CONTROL PANEL On/off button Programme button Programme indicators Delay button Indicators... -
Page 7: Programmes
ENGLISH 4.1 Indicators Indicator Description Running programme indicator. It comes on when the programme starts and goes off when the programme is completed. End indicator. Rinse aid indicator. It is always off while the programme operates. Salt indicator. It is always off while the programme operates. 5. -
Page 8: Settings
6. SETTINGS 6.1 Programme selection When you activate the appliance, usually it is in programme selection mode. mode and user mode However, if this does not happen, you can set the programme selection mode When the appliance is in programme... - Page 9 ENGLISH How to activate the acoustic Whether you use a standard detergent or multi-tabs (with or without salt), set signal for the end of the proper water hardness level to programme keep the salt refill indicator active. The appliance must be in programme Multi-tabs containing salt selection mode.
-
Page 10: Before First Use
CAUTION! Do not try to close the indicators appliance door within 2 minutes after automatic 2. Press the programme button twice. open. This can cause • The indicators damage to the appliance. are on. AirDry is automatically activated with all •... -
Page 11: Daily Use
ENGLISH 5. Turn the cap of the salt container clockwise to close the salt container. CAUTION! Water and salt can come out of the salt container when CAUTION! you fill it. After you fill the Only use rinse aid salt container, immediately specifically designed for start a programme to dishwashers. - Page 12 2. Press Delay to delay the start of the programme of 3 hours. • The indicator comes on. 3. Close the appliance door to start the countdown. When the countdown is completed, the programme starts. Opening the door while the...
-
Page 13: Hints And Tips
ENGLISH End of the programme mode. If you open the door before the activation of standby mode, the When the programme is completed the appliance is automatically deactivated. indicator is on. 2. Close the water tap. 1. Press the on/off button or wait for the appliance to switch to standby 9. -
Page 14: Care And Cleaning
• Make soft the remaining burned food • The spray arms are not clogged. on the items. • There is dishwasher salt and rinse aid • Put hollow items (cups, glasses and (unless you use multi- tablets). pans) with the opening down. - Page 15 ENGLISH 8. Put back the filter (B) in the flat filter (A). Turn it clockwise until it locks. 2. Remove the filter (C) out of filter (B). 3. Remove the flat filter (A). CAUTION! An incorrect position of the filters can cause bad washing results and damage 4.
-
Page 16: Troubleshooting
11. TROUBLESHOOTING If the appliance does not start or it stops With some problems the end indicator during operation, before you contact an flashes intermittently indicating a Authorised Service Centre, check if you malfunction. can solve the problem by yourself with The majority of problems that can the help of the information in the table. - Page 17 ENGLISH Problem and alarm code Possible cause and solution The appliance stops and starts more • It is normal. It provides optimal cleaning re- times during operation. sults and energy savings. The program lasts too long. • If the delayed start option is set, cancel the de- lay setting or wait for the end of the count- down.
- Page 18 Problem Possible cause and solution Poor drying results. • Tableware has been left for too long inside a closed appliance. • There is no rinse aid or the dosage of rinse aid is not enough. Set the rinse aid dispenser to a higher level.
-
Page 19: Technical Information
ENGLISH Problem Possible cause and solution Limescale deposits on the ta- • The level of salt is low, check the refill indicator. bleware, on the tub and on • The cap of the salt container is loose. • Your tap water is hard. Refer to "The water softener". the inside of the door. - Page 20 office.
- Page 21 11. RESOLUÇÃO DE PROBLEMAS................35 12. INFORMAÇÃO TÉCNICA..................39 PARA RESULTADOS PERFEITOS Obrigado por escolher este produto AEG. Criámo-lo para lhe oferecer um desempenho impecável durante muitos anos, com tecnologias inovadoras que tornam a sua vida mais fácil – funcionalidades que poderá não encontrar em aparelhos comuns.
-
Page 22: Informações De Segurança
INFORMAÇÕES DE SEGURANÇA Leia atentamente as instruções fornecidas antes de instalar e utilizar o aparelho. O fabricante não é responsável por quaisquer ferimentos ou danos resultantes de instalação ou utilização incorrectas. Guarde sempre as instruções em local seguro e acessível para consultar no futuro. -
Page 23: Instruções De Segurança
PORTUGUÊS Respeite o volume máximo de loiça de 13 pessoas. • Se o cabo de alimentação estiver danificado, deve ser • substituído pelo fabricante, por um agente de assistência autorizado ou por uma pessoa igualmente qualificada, para evitar perigos. Coloque os talheres no cesto de talheres com as •... - Page 24 2.4 Utilização Certifique-se de que a ficha fica acessível após a instalação. • Não se sente nem se apoie na porta • Não puxe o cabo de alimentação quando esta estiver aberta. para desligar o aparelho. Puxe • Os detergentes de máquina de lavar sempre a ficha de alimentação.
-
Page 25: Descrição Do Produto
PORTUGUÊS 3. DESCRIÇÃO DO PRODUTO Braço aspersor superior Distribuidor de abrilhantador Braço aspersor inferior Distribuidor de detergente Filtros Cesto de talheres Placa de características Cesto inferior Depósito de sal Cesto superior Ranhura de ventilação 4. PAINEL DE COMANDOS Botão On/Off Botão de programa Indicadores de programa Botão Delay... -
Page 26: Programas
4.1 Indicadores Indicador Descrição Indicador de programa em funcionamento. Acende-se quando um pro- grama inicia e apaga-se quando um programa termina. Indicador de fim. Indicador de falta de abrilhantador. Está apagado durante o funciona- mento dos programas. Indicador de falta de sal. Está apagado durante o funcionamento dos pro- gramas. -
Page 27: Programações
PORTUGUÊS 5.1 Informação para testes info.test@dishwasher-production.com Anote o número do produto (PNC) Para obter a informação necessária para indicado na placa de características. testes de desempenho, por favor envie um e-mail para: 6. PROGRAMAÇÕES 6.1 Modo de selecção de Normalmente, o aparelho fica no modo de selecção de programa quando é... - Page 28 Graus alemães Graus franceses mmol/l Graus Clar- Nível do descalcifi- (°dH) (°fH) cador da água 4 - 10 7 - 18 0,7 - 1,8 5 - 12 <4 <7 <0,7 < 5 1) Definição de fábrica. 2) Não utilize sal neste nível.
-
Page 29: Antes Da Primeira Utilização
PORTUGUÊS Como desactivar a opção AirDry É necessário que o aparelho esteja no modo de selecção de programa. 1. Para entrar no modo de utilizador, mantenha o botão de programa premido até que o indicador fique intermitente e os indicadores fiquem acesos. - Page 30 7.1 Depósito de sal 7.2 Como encher o distribuidor de abrilhantador CUIDADO! Utilize apenas sal específico para máquinas de lavar loiça. O sal é utilizado para recarregar a resina do amaciador da água e para garantir bons resultados de lavagem no quotidiano.
-
Page 31: Utilização Diária
PORTUGUÊS 8. UTILIZAÇÃO DIÁRIA 1. Abra a torneira da água. 4. Feche a tampa. Certifique-se de que 2. Prima o botão On/Off (ligar/desligar) o botão de libertação fica trancado para activar o aparelho. na posição correcta. Certifique-se de que o aparelho está no 8.2 Utilizar pastilhas modo de selecção de programa. -
Page 32: Sugestões E Dicas
Abrir a porta do aparelho Cancelar o início diferido durante o funcionamento Prima o botão de programa e mantenha- o premido até que o aparelho entre no Se abrir a porta durante o modo de selecção de programa. funcionamento de um programa, o Quando cancelar o início diferido, terá... - Page 33 PORTUGUÊS • Para as áreas com água dura ou muito • Não coloque itens que possam dura, recomendamos a utilização de absorver água na máquina (esponjas, detergente de máquina de lavar loiça panos domésticos). simples (pó, gel ou pastilhas sem •...
-
Page 34: Manutenção E Limpeza
10. MANUTENÇÃO E LIMPEZA AVISO! Antes de qualquer acção de manutenção, desactive o aparelho e desligue a ficha da tomada eléctrica. Se os filtros estiverem sujos e os braços aspersores estiverem obstruídos, os 2. Retire o filtro (C) do filtro (B). -
Page 35: Resolução De Problemas
PORTUGUÊS 10.2 Limpar os braços aspersores Não retire os braços aspersores. Se os orifícios dos braços aspersores ficarem obstruídos, retire a sujidade com um objecto fino e afiado. 10.3 Limpeza externa • Limpe o aparelho com um pano macio e húmido. •... - Page 36 Problema e código de alarme Possível causa e solução Não consegue activar o aparelho. • Certifique-se de que a ficha está ligada na to- mada eléctrica. • Certifique-se de que não há um disjuntor des- ligado no quadro eléctrico.
- Page 37 PORTUGUÊS Problema e código de alarme Possível causa e solução É difícil fechar a porta do aparelho. • O aparelho não está nivelado. Desaperte ou aperte os pés ajustáveis (se aplicável). • Existe loiça saliente dos cestos. Ouve-se ruído de pancadas no interi- •...
- Page 38 Problema Possível causa e solução Secagem insatisfatória. • A loiça esteve demasiado tempo dentro do aparelho fechado. • Não existe abrilhantador ou a dosagem de abrilhanta- dor não é suficiente. Regule o distribuidor de abri- lhantador para um nível superior.
-
Page 39: Informação Técnica
PORTUGUÊS Problema Possível causa e solução O distribuidor do detergente • A pastilha de detergente ficou colada ao distribuidor fica com resíduos de deter- e não foi totalmente dissolvida pela água. gente no fim do programa. • A água não consegue tirar o detergente do distribui- dor. - Page 40 Fornecimento de água máx. 60 °C Água fria ou água quente Capacidade Requisitos do local de insta- lação Consumo de energia Modo On (ligado) (W) Consumo de energia Modo Off (desligado) (W) 0.50 1) Consulte todos os valores na placa de características.
- Page 41 PORTUGUÊS...
- Page 42 www.aeg.com...
- Page 43 PORTUGUÊS...
- Page 44 www.aeg.com/shop...
Need help?
Do you have a question about the FSB31600Z and is the answer not in the manual?
Questions and answers