Table of Contents
Advertisement
Advertisement
Table of Contents

Related Manuals for Briot 4000


Summary of Contents for Briot 4000
- Page 1 DGER U ser M anual Référence : FC 00 234 A BUCHMANN PRODUCT...
- Page 2 To ensure that your Briot unit is continually operating at peak efficiency, it may be beneficial to have your unit periodically inspected by an authorized service representative.
- Page 3 Table of Contents Edition: May 1995 Reference: FC - 00 - 234...
-
Page 4: Table Of Contents
4000 Edger Table of Contents 1 Installation/Preparation Unpacking Unit ....................... 1-3 Safety Precautions......................1-4 Edger Installation......................1-5 Edger Level Adjustment....................1-6 Edger On/Off Switching ....................1-7 2 Unit Introduction Edger..........................2-3 Standard Accessories ..................... 2-6 Diamond Wheels: Types/Sets..................2-8 3 Lens Edging Process The Edging Sequence .................... -
Page 5: Installation/Preparation
1 Installation/Preparation... -
Page 6: Unpacking Unit
4000 Edger Unpacking Unit Caution If you proceed to install the unit yourself, please, do not discard the box or its packing contents. Procedure Follow the steps below to unpack your edger unit. Step Action Open the cardboard carton. Remove from the cardboard carton: •... -
Page 7: Safety Precautions
- Unplug the power cord from the wall outlet - Have the unit checked by a qualified Briot technician before switching the unit on. • If the unit is not going to be used for a long period of time you should unplug the power cord from the wall outlet. -
Page 8: Edger Installation
4000 Edger Edger Installation Procedure Follow the steps below to install the 4000 edger unit. Step Action Place the edger: • on a sturdy and leveled work bench • plan ahead the position of your water supply and drain holes with reference to the edger's rubber feet •... -
Page 9: Edger Level Adjustment
4000 Edger Edger Level Adjustment Introduction You must adjust the edger level position whenever: • you are installing the unit for the first time • you have relocated the edger to a new position. Procedure Follow the steps below to find the proper edger level. -
Page 10: Edger On/Off Switching
4000 Edger Edger On/Off Switching Switching On Procedures Prior to turning unit on, follow the following steps: • Make sure that your power source corresponds to the voltage indicated in the edger's nameplate (see nameplate diagram in Safety Precautions section). -
Page 11: Unit Introduction
2 Unit Introduction... -
Page 12: Edger
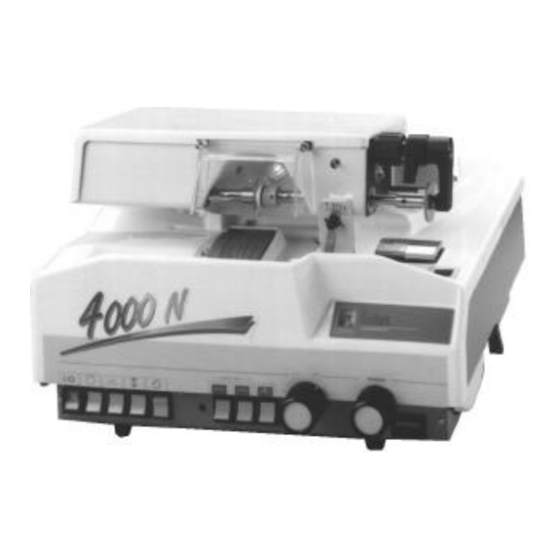
4000 Edger Edger Main Controls and Components Former Holder Device Carriage Visor Base Curve Program Lens Size Scale Water Flow Lever Control Size Adjustment Wheel Panel Lens Counter Finishing Program Knob Roughing Program Knob Lens Counter You can know at any time the number of edged lenses by seeing the lens counter, located on the right front view of the edger. - Page 13 4000 Edger Edger (continued) Control Panel • ‚ Serigraphy Control Knobs Knob Position Description Switching on of the edger. Bottom Switching off of the edger. Activation of the push/pull lens motion mode. Bottom Deactivation of the push/pull lens motion mode.
- Page 14 4000 Edger Edger (continued) Control Panel (continued) Knob Position Description Photocell Indicator Light. Fugitive on Bottom Beginning the glass (mineral) edging program. Fugitive on Bottom Beginning the plastic (organic) edging program, when activating simultaneously with the key. Fugitive on Bottom Activating of the retouch cycle.
-
Page 15: Standard Accessories
Articulate Left Side Clamping Adaptor 01 10 399 Allen Key Set 08 00 064 Replacement Bulb 12 01 057 Full Size Suction Cup (Briot) 11 17 046 1/2 Eye Suction Cup (Briot) 11 17 047 Leap II Rubber Chuck (Briot) 11 17 045... - Page 16 4000 Edger Standard Accessories (continued) List (continued) If your edger unit is supplied to be used with 110 Volts, you will receive the following accessories. Accessory Briot's Reference Quantity Power Cord 22 33 034 Fuse 1 A - 5 x 20 (quick-blow)
-
Page 17: Diamond Wheels: Types/Sets
Free Floating Bevel Wheel Free Floating + Rimless Bevel Wheel + Guided Bevel Rimless + Controlled + Facet Bevel Wheel Wheel Sets Here is available wheel sets for the range of products 4000. BiPV BiVG 2 - 8 Unit Introduction... -
Page 18: Lens Edging Process
3 Lens Edging Process... -
Page 19: The Edging Sequence
Lens Size and Axis Adjustment. Lens Retouch (if necessary). Additional Functions In addition to edging standard lenses, you can also edge with 4000 N: • 1/2 Eye Lenses • Lenticular Lenses with Facets. See the section at the end of this chapter. -
Page 20: Former Placement
4000 Edger Former Placement Procedure Follow the steps below to place the former. Step Action Illustration Unscrew (counterclockwise) former holder device's barrel to release pressure. Lift-up former holder locking lever. Position former on its support with proper side orientation according to job requirement. -
Page 21: Lens Placement
4000 Edger Lens Placement Prerequisites Before clamping the lens in the edger, you must: • make sure the lens is clean and dry • make sure the lens has been neutralized and marked with a lens meter • make sure the lens has been centered and blocked on the convex side with a centering device. -
Page 22: Roughing Program Selection
4000 Edger Roughing Program Selection Procedure Use this table to select roughing program. To edge... Turn Roughing Knob... Illustration Mineral a mineral lens (glass) counterclockwise facing 'Mineral Lens' Lens symbol. Symbol an organic lens clockwise facing 'Organic Lens' Organic (plastic) symbol. -
Page 23: Finishing Program Selection
4000 Edger Finishing Program Selection Location The finishing program knob is located on the extreme right side of the edger. Introduction Illustration The selection of three different types of bevel is obtained with PROGRAM the operation of this knob. The program selection can be observed through the display program window above the knob. -
Page 24: Lens Size Adjustment
- in black for positive values (Europe) - in red for negative values (Europe) - in black for all values (USA). Procedure Follow the step below to select the lens size with 4000 N. Step Action Illustration Turn the sizing wheel until the desired size graduation is placed under the indexing needle. -
Page 25: Lens Curve Adjustment
4000 Edger Lens Curve Adjustment Introduction For proper lens curve selection, you must measure the lens with a lens clock whenever you want to edge in the controlled bevel mode. Note: The base curve device might have to be adjusted to 2 when edging rimless lenses. -
Page 26: Water Flow Adjustment
4000 Edger Water Flow Adjustment Procedure Follow the steps below to adjust the water flow. Step Action • Verify the house water valve is turned on, if using direct water supply • Verify if the recirculating system is plugged-in into the edger's outlet. -
Page 27: Edging The First Lens
4000 Edger Edging the First Lens Bevel Selection Using the Program Knob select one of the following: • Free Floating Bevel (Automatic) • Rimless Edging • Bevel Control. Free Floating Bevel Follow the steps below to edge a free floating bevel lens. - Page 28 4000 Edger Edging the First Lens (continued) Free Floating Bevel (continued) Step Action Hold the edged lens while activating the clamping switch to the left, to open the left side shaft. Remove the lens from the right side adaptor, making sure not to remove the block (suction cup or leap II block) as some re-edging might be necessary for proper sizing of lens into optical frame.
- Page 29 Continue with second lens. See Edging the Second Lens below. Controlled Bevel Follow the steps below to edge a controlled bevel lens with 4000 N. Step Action Make sure you have done the following steps: 1.
- Page 30 4000 Edger Edging the First Lens (continued) Controlled Bevel (continued) Step Action Lower the carriage visor. Activate knob towards the bottom to activate the roughing cycle only. Start the cycle by: IF you edge... THEN activate... a mineral lens (glass) knob towards the bottom.
- Page 31 4000 Edger Edging the First Lens (continued) Controlled Bevel (continued) Step Action Reduce the size gradually by using the sizing wheel, until the lens touches the diamond wheel groove. Result: The bevel path is traced on the lens edge. Activate knob towards the top to re-activate the automatic lens rotation mode.
-
Page 32: Edging The Second Lens
4000 Edger Edging the Second Lens Procedure Follow the steps below to edge the second lens. Step Action Place the former in the proper orientation. See Former Placement Paragraph. Follow the respective edging program. See Lens Placement Paragraph. While edging the second lens, verify the first lens' size and axis placement. -
Page 33: Lens Size And Axis Adjustment
4000 Edger Lens Size and Axis Adjustment First Lens Inspection Follow the steps below to adjust the size and axis of the first lens. Step Action Place the blocked lens on the centering device. Result: IF the marks are... THEN the lens axis is... - Page 34 4000 Edger Lens Size and Axis Adjustment (continued) Second Lens Inspection Follow the steps below to adjust the size and axis of symmetrical lenses. Step Action Place the two symmetrical lenses in the frame. Compare the two symmetrical lenses axes with the frame.
-
Page 35: Lens Retouch
4000 Edger Lens Retouch Prerequisites Before retouching a lens, make sure of the following. • The suction cup or lens block hasn't been removed from its original placement. • The finishing edging program hasn't been altered. • The former is clamped in place with the correct orientation. - Page 36 4000 Edger Lens Retouch (continued) Cycle Interruption The edging cycle can always be interrupted at any time by following the steps below. IF you edge... THEN activate... a mineral lens (glass) knob towards the bottom. an organic lens (plastic) knobs towards the bottom.
-
Page 37: Edging A 1/2 Eye Lens
4000 Edger Edging a 1/2 Eye Lens Prerequisites Before edging a 1/2 eye lens, you should: 1. Make sure that the left side clamping shaft is open. 2. Turn the edger off. 3. Wait till the diamond wheels are at a complete stop. - Page 38 4000 Edger Edging a 1/2 Eye Lens (continued) Procedure using Leap II/Adhesive Blocks Follow the steps below to edge a 1/2 eye lens by using Leap II or adhesive blocks. Step Action Follow the prerequisite steps from the previous page.
-
Page 39: Edging A Lenticular Lens With A Facet (Undercut)
4000 Edger Edging a Lenticular Lens with a Facet (Undercut) Introduction A lenticular facet can be edged using the bevel control program after using the automatic bevel or the rimless program. Sizing Keep in mind that you will have to decrease the size, whether you are on size formers or sizing larger than pattern, you must lower your size requirement. - Page 40 4000 Edger Edging a Lenticular Lens with a Facet (Undercut) (continued) Procedure (continued) Step Action Turn the program knob clockwise again so as to move the lens to the right, pass the outer edge of the diamond wheel. Position the lens according to the facet width desired.
-
Page 41: Edger Cleaning And Wheel Maintenance
4 Edger Cleaning and Wheel Maintenance... -
Page 42: Cleaning The Edger
4000 Edger Cleaning the Edger Introduction In order for your new edger to retain its new appearance, simple care must be taken on a routine basis. • Clean the edger daily after use. • Follow the directions mentioned in this manual. -
Page 43: Speeding-Up Roughing Cycle For Mineral Lenses (Glass)
• Make sure you have an ample flow of water over the diamond wheels prior to using the dressing sticks. • Use only recommended dressing sticks (orange) by Briot or wheel manufacturer. • Apply dressing stick to roughing wheel only when considerable slowing down of the cycle time occurs. -
Page 44: Speeding-Up The Finishing Cycle
• Do not apply the stick in sections, one side or the other. Result: Since your Briot wheels are manufactured in two pieces to obtain a much better bevel position, uneven application of dressing stick will alter the bevel position on the lens. -
Page 45: Maintenance
5 Maintenance... -
Page 46: Solving Edging Problems
Before you call for service, review this list. It may save you time and expense. The list includes common occurrences that are not the result of defective workmanship or materials in this unit. Otherwise, call Briot's after-sales service department. Troubleshooting... - Page 47 4000 Edger Solving Edging Problems (continued) Troubleshooting (continued) Problem Possible Cause How to fix it Water does not shut-off. Some dirt or debris have See Cleaning the Water lodged itself inside the solenoid (Solenoid) Valve below. valve. Edging time is gradually The wheels are loading up.
- Page 48 4000 Edger Solving Edging Problems (continued) Troubleshooting (continued) Problem Possible Cause How to fix it Edging chamber light Light bulb burned out. See Edging Chamber Bulb does not work. Replacement below. Sizing wheel light does Light bulb burned out. See Sizing Wheel Bulb not work.
-
Page 49: Cleaning The Water (Solenoid) Valve
4000 Edger Cleaning the Water (Solenoid) Valve Procedure Follow the steps below to clean the water (solenoid) valve. Step Action Illustration Unplug the edger from electrical outlet. Remove the two front screws of the edger skirt. Skirt Unlock the two fixings of the edger skirt. - Page 50 4000 Edger Cleaning the Water (Solenoid) Valve (continued) Procedure (continued) Step Action Illustration Inspect and clean: Rubber Washer • Rubber washer at end of valved piston Valved Seat • Valved Seat • Remove any debris or foreign matter. Re-assembled the solenoid components: •...
-
Page 51: Edging Chamber Bulb Replacement (Upper Carriage)
4000 Edger Edging Chamber Bulb Replacement (Upper Carriage) Procedure Follow the steps below to replace the edging chamber bulb (upper carriage). Step Action Unplug the edger from electrical outlet. Remove the upper carriage plastic cover by: • removing the two screws on the left side •... -
Page 52: Sizing Wheel Bulb Replacement
4000 Edger Sizing Wheel Bulb Replacement Procedure Follow the steps below to replace sizing wheel bulb on the mechanical sizing wheel. Step Action Illustration Unplug the edger. Remove the two front screws of the edger skirt. Skirt Unlock the two fixings of the edger skirt. -
Page 53: Fuse Replacement
4000 Edger Fuse Replacement Procedure Follow the steps below to replace a fuse on the edger. Step Action Illustration Unplug the edger from electrical outlet. Remove the two front screws of the edger skirt. Skirt Unlock the two fixings of the edger skirt. -
Page 54: Roughing Wheel Differential Adjustment
4000 Edger Roughing Wheel Differential Adjustment Introduction The glass roughing wheel wears out sooner than the other diamond wheels. The outside diameter of the roughing wheel decreases as more lenses are being edged. As the diamond wheel diameter decreases the larger the roughed size of the lens gets before going into the finishing cycle. -
Page 55: Diamond Wheel Replacement
4000 Edger Diamond Wheel Replacement Procedure Follow the steps below to replace a diamond wheel. Step Action Unplug the edger from electrical outlet. Insert a block of wood or foam under the left side of the carriage to lift it up for working clearance. - Page 56 4000 Edger Diamond Wheel Replacement (continued) Procedure (continued) Step Action Assemble in the following order: • Mineral (glass) roughing wheel • Organic (plastic) roughing wheel • Free floating (automatic) bevel wheel (groove on the right side) • Controlled bevel wheel (groove on the right side).
-
Page 57: Finished Size Adjustment
As the finishing wheels begin to wear out, the lens final size is not exact anymore. In order to correct for this wear, the sizing wheel needs to be calibrated. Procedure Follow the steps below to calibrate sizing wheel on a 4000 N. Step Action Adjust size scale to 0 (European) or to 36-1/2 (USA) using sizing wheel. - Page 58 Appendix Installing a Recirculating System...
-
Page 59: Appendix A Installing A Recirculating System
4000 Edger Installing a Recirculating System Procedure Follow the steps below to install recirculating system. Step Action Place system assembly under work bench. Feed the following through the pre-drilled holes on the work bench top: • Supply Water Hose (reference: 21 92 014) •... -
Page 60: Cleaning The Recirculating Tank
4000 Edger Cleaning the Recirculating Tank Introduction The recirculating tank should be cleaned periodically, with more frequency at the workload increases. Procedure Follow the steps below to clean the recirculating tank. Step Action Disconnect the recirculating system electrical plug from the rear of the edger. - Page 61 Appendix Specifications...
-
Page 62: Appendix B Specifications
4000 Edger Specifications List The table below lists specifications of your edger. Specification Description • Width = 530 mm (20.8 in) Dimensions • Depth = 390 mm (15.3 in) • Height = 350 mm (13.7 in) Weight 38.0 Kg (84.0 lb) •... - Page 63 4000 Edger Specifications (continued) List (continued) Specification Description • Mechanical Adjustments and Displays • Size • Sweeping of Roughing Wheel • Sweeping of Rimless Finishing Wheel • Roughing Cycle Program • Finishing Cycle Program • Lens Counter • Free Floating (Automatic) Bevel Edging Programs •...
-
Page 64: Index
Index... - Page 65 4000 Edger Index Free Floating Bevel 3-11 Rimless Bevel 3-12 Second Lens 3-16 1/2 Eye Lens Sequence 3-3 Edging 3-21 Finished Size Adjustment 5-14 Adjustment Finishing Program Selection 3-7 Edger Level 1-6 Flat Edging 3-7 Finished Size 5-14 Former Lens Axis 3-17...
- Page 66 4000 Edger Index (continued) Sets 2-8 Types 2-8 Recirculating System Installing A-3 Recirculating Tank Cleaning A-4 Replacement Bulb on the Sizing Wheel 5-9 Diamond Wheel 5-12 Edging Chamber Bulb 5-8 Fuse 5-10 Sizing Wheel Bulb 5-9 Retouch Lens 3-19 Rimless Bevel 3-12...
- Page 67 NOTES ...
- Page 68 NOTES ...
Need help?
Do you have a question about the 4000 and is the answer not in the manual?
Questions and answers