Table of Contents

Subscribe to Our Youtube Channel
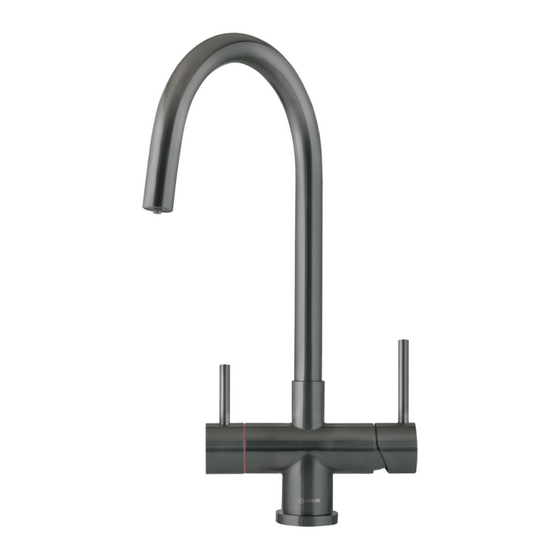
Related Manuals for Caple VAP2/3IN1/BS

Summary of Contents for Caple VAP2/3IN1/BS
- Page 1 S t e a m i n g W a t e r Ta p I n s t r u c t i o n M a n u a l VAP2/3IN1/BS, VAP2/3IN1/SS, VAP2/3IN1/GM, VAP2/3IN1/GD,VAP2/3IN1/CO, VAPQ2/3IN1/SS, JOY3IN1/SS, JOY3IN1/GD, JOY3IN1/CO Contact Caple on 0117 938 7420 for spare parts or www.caple.co.uk...
-
Page 2: Table Of Contents
Accessories Supplied Installing the Vapos 3IN1 Vapos 3in1 Installation Installing the Joya 3IN1 Joya 3in1 Installation Operation Tap Dimensions Boiler Dimensions Care and Maintenance Troubleshooting Caple Contact Details Instruction manual VAP2/3IN1, VAPQ2/3IN1, JOY3IN1 Please keep this instruction manual for future reference... -
Page 3: Safety Instructions
To avoid all risk, if the plug or power cable is damaged, it must only be replaced by a Caple appointed engineer. Do not wash children, hair or any pets in a sink within reach of this steaming water tap. Although there are safety features in place, the steaming water could cause scalding by release of near boiling water. - Page 4 Do not use any accessories or attachments not recommended by Caple as this may result in fire, electric shock or injury. Instruction manual VAP2/3IN1, VAPQ2/3IN1, JOY3IN1...
- Page 5 Unplug directly from the plug only. Never pull the power cable as you could damage it. If the appliance is faulty, do not attempt to repair it. Unplug from the mains electric socket and contact Caple Service either by phone 0117 938 7420 or email service@caple.co.uk.
- Page 6 I M P O R T A N T Caple cannot be held responsible for injuries or losses caused by incorrect use or installation of this product. Please note that Caple reserve the right to invalidate the guarantee supplied with this product following incorrect installation or misuse of the appliance.
-
Page 7: Environmental Protection
E N V I R O N M E N TA L P R OT E C T I O N Waste electrical products should not be disposed of with household waste. Please recycle where facilities exist. Check with your Local Authority or retailer for recycling advice. This appliance is marked according to the European directive on Waste Electrical and Electronic Equipment (WEEE). -
Page 8: Accessories Supplied
A C C E S S O R I E S S U P P L I E D You will receive 3 separate boxes for this product: » Tap » BOILER2 – boiler tank » PURITI7 – Filter and fixings The contents of the boxes should be as follows: 1 x Tap and relevant fixings (including all flexi tails for hot, cold and boiling water connections) Boiler... -
Page 9: Installing The Vapos 3In1
3. When installing the dispenser, you should allow 10 to 15cm of space around it for ventilation. 4. You must never use a spare part which is not recommended by Caple. 5. The temperature adjustment controls the water temperature, not the water flow. -
Page 10: Vapos 3In1 Installation
V A P O S 3 I N 1 I N S T A L L A T I O N » The power outlet must be correctly earthed and also be able to be isolated by a switch. » Use a separate circuit for the boiler, which is also correctly earthed. »... - Page 11 2. Screw the 3 flexible hoses into the base of the tap. The red hose connects to the hot water, the blue hose connects to the cold water, and the longer plain steel hose (1 meter) connects to the boiling water. Normal Cold Water 98˚...
- Page 12 7. The clear silicone hose connects to the steam release valve on the side of the boiler, and can then be attached to the existing plumbing using the threaded metal connector. Threaded Metal Connector Plumbing Clear Tube 8. Once all of the connections have been made, turn on the standard cold/hot water supply by using the right hand lever on the tap to test the cold water (blue colour indicator) and hot water (red colour indicator).
- Page 13 To fix the boiler to the cabinet, remove the hanging plate from the packaging: » Mark the fixing location of the hanging bracket on the inside of the cabinet and install the bracket fixing screws into the cabinet. » Using the nut and thread on the top of the boiler, fit the bracket. »...
-
Page 14: Installing The Joya 3In1
3. When installing the dispenser, you should allow 10 to 15cm of space around it for ventilation. 4. You must never use a spare part which is not recommended by Caple. 5. The temperature adjustment controls the water temperature, not the water flow. -
Page 15: Joya 3In1 Installation
J O YA 3 I N 1 I N S T A L L A T I O N » The power outlet must be correctly earthed and also be able to be isolated by a switch. » Use a separate circuit for the boiler, which is also correctly earthed. »... - Page 16 2. Screw the Hot & Cold flexi hoses into the base of the hot & cold handle. The red hose connects to the hot water, the blue hose connects to the cold water. The boiling water flexible hose connects to the base of the boiling water handle. Each handle then needs to be connected to the spout via the additional flexi hoses, as shown in the diagram here: 98°...
- Page 17 6. Attach the Boiler inlet flexi tail onto the valve on the side of the boiler, and finally, using the remainder of the blue tube, connect this to the filter head outlet and then to the end of the Boiler inlet flexi tail using the push fit to threaded adaptor. Threaded Metal Connector Plumbing Clear Tube...
- Page 18 10. Check all connections to ensure that no tubes are stretched or twisted and there are no leakages, then fix the boiler in the final location using the brackets supplied. The boiler must be installed upright. To fix the boiler to the cabinet, remove the hanging plate from the packaging: »...
-
Page 19: Operation
O P E R A T I O N °C HEATING Turn on the boiler press the button. To adjust the water READY temperature, press the arrows on the control panel to increase and decrease the temperature. The temperature can be adjusted from approximately 25°C to 98°C. Once the required temperature has been selected, ‘HEATING’... - Page 20 In order to guarantee the performance and quality of your steaming water tap, do not stretch the tubes after installation, take extreme care not to touch any of the tubes or fixings. If the flow reduces this may be due to the filter needing replacement. The water filter must be replaced at least once every 6 months, failure to do this may invalidate the guarantee.
-
Page 21: Tap Dimensions
T A P D I M E N S I O N S VA P 2 / 3 I N 1 / S S 195mm 405mm Ø25mm 256mm 70mm Ø45 mm Ø50mm VA P Q 2 / 3 I N 1 / S S 220mm Ø25mm 328mm... - Page 22 D I M E N S I O N S J OYA / 3 I N 1 / S S 203mm 340mm 205mm Ø44.5mm Ø44.5mm Ø49.5mm 110mm 110mm Wo rkto p cut- out s 35mm r equir ed Instruction manual VAP2/3IN1, VAPQ2/3IN1, JOY3IN1 Please keep this instruction manual for future reference...
-
Page 23: Boiler Dimensions
B O I L E R D I M E N S I O N S B O I L E R 2 232mm 15mm 347mm 22mm 248mm Instruction manual VAP2/3IN1, VAPQ2/3IN1, JOY3IN1 Please keep this instruction manual for future reference... -
Page 24: Care And Maintenance
C A R E A N D M A I N T E N A N C E IMPORTANT you must not perform any care or maintenance on this product without first switching off the power supply and disconnecting the boiler from the mains. CLEANING This product can be cleaned by simply using warm water with a small amount of mild detergent added. - Page 25 3. Remove the new filter cartridge from its packaging and check for any damage. 4. Insert the filter cartridge into the filter head and turn the cartridge clockwise until it stops and end position is reached. The flow in the filter head is reopened and the system vented and flushed via the flush/ pressure release valve.
-
Page 26: Troubleshooting
If you have a problem which cannot be resolved by using the troubleshooting table please contact Caple Service, by telephone on 0117 938 7420 or by email at service@caple.co.uk Instruction manual VAP2/3IN1, VAPQ2/3IN1, JOY3IN1 Please keep this instruction manual for future reference... - Page 27 N OT E S : Instruction manual VAP2/3IN1, VAPQ2/3IN1, JOY3IN1 Please keep this instruction manual for future reference...
-
Page 28: Caple Contact Details
Caple Service Fourth Way Avonmouth T: 0117 938 1900 Bristol E: service@caple.co.uk BS11 8DW www.caple.co.uk...
Need help?
Do you have a question about the VAP2/3IN1/BS and is the answer not in the manual?
Questions and answers