Table of Contents
Advertisement
Quick Links
Advertisement
Table of Contents

Related Manuals for KYORITSU KEW 2060BT


Summary of Contents for KYORITSU KEW 2060BT
- Page 1 Instruction Manual CLAMP POWER METER KEW 2060BT...
-
Page 2: Table Of Contents
4.2 Battery level check ..................12 LCD indication/ Battery level indicator .............. 13 How to install batteries: ..................13 4.3 Test leads connection (to KEW 2060BT) ............14 4.4 Connection to the measured object ............... 14 Chapter 5 Settings ....................16 Item selection (Switch the displayed items) ............ - Page 3 KEW 2060BT Contents Chapter 7 Other functions ..................37 [Data hold function] ................... 37 [Auto-backlight-off] .................... 37 [Auto-power-off] ....................37 [Auto-ranging – current] ..................37 Chapter 8 Bluetooth communication............... 38 8.1 KEW Power*(asterisk) features ..............39 Chapter 9 Specifications ..................40 9.1 Safety specifications ..................
-
Page 4: Unpacking
It is essential that the above instructions are adhered to. Failure to follow the above instructions may cause injury, instrument damage and/or damage to equipment under test. Kyoritsu assumes no responsibility for damage and injury caused by misuse or not following the instructions in the manual. - Page 5 KEW 2060BT Safety precautions Meaning of symbols on the instrument: User must refer to the explanations in the instruction manual. Instrument with double or reinforced insulation This instrument can clamp a bare conductor where the voltage to be measured is lower than the circuit – voltage against earth values specified by the marked measurement category.
- Page 6 Safety precautions KEW 2060BT DANGER ● The instrument is to be used only in its intended applications or conditions. Otherwise, safety functions equipped with the instrument will not work, and instrument damage or serious personal injury may occur. Verify proper operation on a known source before taking action as a result of the indication of the instrument.
- Page 7 ● Verify proper operation on a known source before use or taking action as a result of indication of the instrument ● Do not install substitute parts or make any modification to the instrument. Return the instrument to your local KYORITSU distributor for repair or re-calibration in case of suspected faulty operation. CAUTION ●...
-
Page 8: Chapter 1 Functional Overview
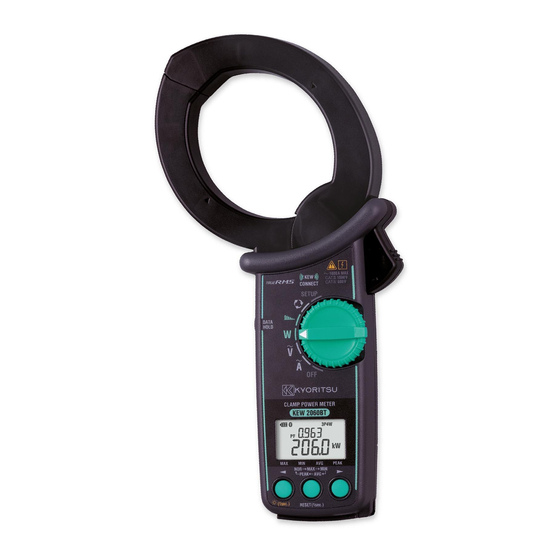
KEW 2060BT Chapter 1 Functional overview KEW 2060BT is an advanced clamp power meter that is able to analyze the harmonics for power quality check and verify phase sequences of power sources in various wiring systems: of course, it can perform voltage/ current (in RMS) and power measurements. -
Page 9: Chapter 2 Kew 2060Bt Features
KEW 2060BT Chapter 2 KEW 2060BT features Chapter 2 KEW 2060BT features ① Current sensor ② Trigger (to open/ close the jaws) ⑫ ③ Barrier Provides protection against electrical shock and ③ ① ensuring the minimum required clearance and creepage distances. Always keep your fingers behind the barrier. -
Page 10: Chapter 3 Basic Operation
Chapter 3 Basic operation KEW 2060BT Chapter 3 Basic operation 3.1 Function switch Function Description Changes and confirms the settings for wiring, VT/ CT ratio, buzzer on/ off, backlight on/ off, nominal frequency 50/ 60Hz. To SETUP Settings restore all the settings to the default conditions, perform system reset. - Page 11 KEW 2060BT 3.2 Buttons and switches Buttons and Function Details switches A short press toggles display: <-> active power, power factor Item switching <-> active power, voltage-current phase differences <-> button [◄►] active and apparent power <-> active and reactive power Power <->...
-
Page 12: Symbols Displayed In Lcd
3.3 Symbols displayed in LCD KEW 2060BT Buttons and Function Details switches A short press toggles display: <-> Inst value <-> MAX <-> MIN <-> AVG <-> |PEAK| (peak value*). A long press resets measurements of MAX, MIN, AVG, and |PEAK| values and resume a measurement. -
Page 13: Unit Of Measured Value
Even though the instrument doesn’t wake up, the installed batteries may be totally exhausted. Please replace the batteries with new ones and try again. When setting the function switch to any position other than “OFF”, KEW 2060BT gets started and all the LCD segments are displayed for 1 sec. Confirm that there’re no chips of segments. -
Page 14: Lcd Indication/ Battery Level Indicator
LCD indication/ Battery level indicator KEW 2060BT CAUTION ● Brand and type of the batteries should be harmonized. ● Never mix new and old batteries. ● Install batteries in correct polarity as marked inside the battery compartment area. LCD indication/ Battery level indicator... -
Page 15: Test Leads Connection (To Kew 2060Bt)
● Confirm that the instrument is powered off, and then connect the test leads. ● Connect to the instrument first, firmly into the corresponding terminal. Connect the test leads per the following procedures. 1 Ensure that KEW 2060BT is turned off. Connect the test lead to AC voltage input terminal on the instrument.* * The number of test leads to be connected depends on the wiring configuration. - Page 16 4.4 Connection to the measured object KEW 2060BT DANGER ● Care should be taken so as not to short-circuit the power line with the metal ends of the test lead at connection. In addition, do not touch the metal tips.
-
Page 17: Chapter 5 Settings
KEW 2060BT Chapter 5 Settings Chapter 5 Settings Before starting a measurement, adjust the following settings. * Wiring configuration, frequency of the voltage to be measured, and VT/ CT ratio, if necessary. Set the functin switch to “ ” to adjust settings. -
Page 18: Wiring Systems
Select the appropriate one out of five wiring configurations according to the wiring system to be tested. * For Single-phase 3-wire(1P3W), please select “1P2W” (Single-phase 2-wire) and perform power measurement on each phase (L1/ L2) individually. KEW 2060BT cannot show the total power of 1P3W. Item switching button [◄►]: toggle the available wiring configurations... -
Page 19: Measurement Using Vt/ Ct Ratio
CAUTION ● When using a VT or CT, the declared measurement accuracy is not guaranteed. If using either or both of them, please take the accuracies of KEW 2060BT, VT and CT, and also phase characteristics into consideration. If voltage or current values of the measurement line exceed the max measuring range of KEW 2060BT, the primary side value of the line can be obtained by measuring the secondary side using proper VT or CT for the specific line’s voltage or current. -
Page 20: Buzzer On/ Off
Buzzer ON/ OFF KEW 2060BT Buzzer ON/ OFF Keypad sounds, and phase detection buzzer can be muted. This setting doesn’t affect the low battery warning buzzer and the buzzer indicating auto-power-off is activated. Select “Buzzer” and press the mode button. Then “ON(on)”/ “OFF(oF) starts blinking. Now it is ready to change the setting. -
Page 21: System Reset
KEW 2060BT System reset System reset Restore all the settings to default*. *See P.16 Item selection part. Select “System reset” and press the mode button. Then “n: Cancel” starts blinking; that means it is ready to change the setting. Item switching button [◄►]: .n: Cancel... -
Page 22: Chapter 6 Display Items By Measurement Function
6.1 RMS/ Frequency measurement While viewing “Waveform” on your Smartphone or tablet device using our app via Bluetooth, KEW 2060BT’s LCD will be like the illustration shown to the right and won’t show the measured values. To check the measured values on the instrument, switch the item on your Bluetooth device using the app from “Waveform”... -
Page 23: Rms Voltage, Frequency
KEW 2060BT RMS voltage, frequency RMS voltage, frequency Set the function switch to “ “. A shot press of Mode button: switches display modes between Inst, MAX, MIN, AVG, and |PEAK|. * Each of above values is determined after pressing the mode button and measurements get started. -
Page 24: Single/ Three-Phase (Balance) Power Measurement
6.2 Single/ Three-phase (balance) Power measurement KEW 2060BT 6.2 Single/ Three-phase (balance) Power measurement Note ● KEW 2060BT cannot measure Three-phase 4-wire with different capacitors (V/ ∆- connection). To measure such a system, please test phases individually. Set the function switch to “ ”. -
Page 25: Connection Diagram For Balance Three-Phase 3-Wire (3P3W)
KEW 2060BT Connection diagram for balance Three-phase 3-wire (3P3W) Connection diagram for balance Three-phase 3-wire (3P3W) Connection diagram for balance Three -phase 4-wire (3P4W) KEW 2060BT ̶ 24 ̶... -
Page 26: Switching Display
Switching display KEW 2060BT Switching display Item switching button [◄►]: Short press: switches measured values to be displayed in the LCD. Active power, power factor/ Active power, voltage-current phase difference/ Active, apparent powers/ Active, reactive powers/ RMS current, voltage values... -
Page 27: Three-Phase (Unbalance) Power Measurement
6.3 Three-phase (unbalance) power measurement 6.3 Three-phase (unbalance) power measurement Note ● KEW 2060BT cannot measure Three-phase 4-wire with different capacitors (V/ ∆- connection). To measure such a system, please test phases individually. Set the function switch to “ ” . - Page 28 Three-phase 3-wire (3P3W) unbalance KEW 2060BT Clamp onto R(L1) phase While the LCD is showing the settings for the first measurement, make connection as the following figure shows. Press the item switching button [►] after making connection, the LCD shows active power of R(L1) phase.
- Page 29 KEW 2060BT Three-phase 3-wire (3P3W) unbalance Result display Item switching button [◄►]: Short press: switches measured values to be displayed in the LCD. Total active power Active power of R(L1) Active power of T (L2) ◀▶ ◀▶ ◀▶ A long press of mode button clears measured results and the screen returns to the initial screen.
-
Page 30: Three-Phase 4-Wire (3P4W) Unbalance
Three-phase 4-wire (3P4W) unbalance KEW 2060BT Three-phase 4-wire (3P4W) unbalance Measurement procedures Clamp onto R(L1) phase Clamp onto S(L2) phase Clamp onto T(L3) phase ▶ ▶ ▶ ▶ ▶ ▶ Mode button Mode button Mode button Result display ◀▶ KEW 2060BT... - Page 31 KEW 2060BT Three-phase 4-wire (3P4W) unbalance Clamp onto R(L1) phase While the LCD is showing the 1st time measurement screen, make connection as the following figure shows. Press the item switching button [►] after making connection, the LCD shows active power of R(L1) phase.
- Page 32 Three-phase 4-wire (3P4W) unbalance KEW 2060BT Clamp onto T(L3) phase While the LCD is showing the 3rd time measurement screen, move the current sensor and red test lead to T(L3) as shown to the right. Press the item switching button [►] after making connection, the LCD shows active power of T(L3) phase.
-
Page 33: Harmonics Measurement
KEW 2060BT 6.4 Harmonics measurement 6.4 Harmonics measurement Set the function switch to ” ”. The LCD screen will be as the right figure shows during Bluetooth communication: no measured values are displayed. The measured values can be checked by using the application on your smartphone or tablet device, or by disconnecting the Bluetooth. -
Page 34: Voltage Harmonics Distortion Factor, Content Rate, Rms Value
Voltage harmonics distortion factor, content rate, RMS value KEW 2060BT [ Mode button ] A short press switches display mode between Inst, MAX, MIN, and AVG. Each of above values is determined after pressing the mode button and measurements get started. - Page 35 KEW 2060BT Voltage harmonics distortion factor, content rate, RMS value [ Item switching button [◄►] ] A short press toggles the displayed measured values: RMS/ Harmonics distortion factor THD-F, RMS/ Harmonics distortion factor THD-R, Fundamental wave RMS/ content rate to 30th harmonics RMS/ content rate...
-
Page 36: Harmonics Distortion Factor Thd-R/ Thd-F
Harmonics distortion factor THD-R/ THD-F KEW 2060BT Harmonics distortion factor THD-R/ THD-F There are two typical definitions used when dealing with Total Harmonic Distortion (THD). The two types of Total Harmonic Distortion are THD-F and THD-R. THD-F uses fundamental wave forms and THD-R uses total RMS values as a reference. -
Page 37: Phase Detection
6.5 Phase detection 6.5 Phase detection Note ● KEW 2060BT cannot measure Three-phase 4-wire with different capacitors (V/ ∆- connection). ● When setting the buzzer to “OFF”, buzzer doesn’t sound at the end of detection process. If buzzer indication is required for phase detection judgement, set the buzzer to “ON”. -
Page 38: Chapter 7 Other Functions
Chapter 7 Other functions KEW 2060BT Chapter 7 Other functions [Data hold function] The LCD shows “ ” in the upper left corner by pressing data hold button and hold the currently displayed reading. In this state, the instrument is performing measurements; however, the reading isn’t updated. -
Page 39: Chapter 8 Bluetooth Communication
If you still cannot confirm the connection, there may be some problem with the instrument unit. Please contact your local KYORITSU distributor. ● The Bluetooth word mark and logos are owned by Bluetooth SIG, Inc. and we, KYORITSU, are licensed by them for use. -
Page 40: Kew Power*(Asterisk) Features
KEW 2060BT 8.1 KEW Power*(asterisk) features KEW Power*(asterisk) for KEW 2060BT The special application “KEW Power*” is available on download site for free. (An Internet access is required: Android tablets, via Google Play Store and iOS devices, via App Store). Please note that communication charge is incurred separately for downloading applications and using special features of them. -
Page 41: Chapter 9 Specifications
KEW 2060BT Chapter. 9 Specifications Chapter. 9 Specifications 9.1 Safety specifications Location for use : Altitude 2000 m or less, in-door use Accuracy guaranteed Temp. & Hum. range : 23°C±5°C, Relative humidity 85% or less (no condensation) Operating Temp. &: : -10°C to +50°C, 85 % or less (no condensation) humidity range Storage Temp. -
Page 42: Measurement Specifications
9.3 Measurement specifications KEW 2060BT 9.3 Measurement specifications AC current function RMS AC current value (ACA) [Arms], Peak value (Absolute value) peak Range 40.00 A/ 400.0 A/ 1000 A Auto-ranging, range won’t be fixed. A range shifts to one upper range when the input exceeds 110% or 300% peak (absolute value) of the currently selected range and shifts to one lower range when the input drops 90% rms. -
Page 43: Ac Voltage Function
AC Voltage function V KEW 2060BT AC Voltage function RMS AC voltage value (ACV) [Vrms], Peak value (Absolute value) peak Range 1000V Display digit 4-digit Sampling period One cycle/ 500 ms Sampling frequency 32.8 kHz (every 30.5ɥs) PEAK value: moving average is 9 points between 40.0Hz and 70.0Hz only. -
Page 44: Power Function
Power function KEW 2060BT Power function Active power (P) [W] 40.00kW/400.0 kW/1000 kW Range * Switched according to the selected current range. 4-digit Display digit (The LCD shows ”----” if the reading is out of the guaranteed accuracy range.) Sampling period... - Page 45 Apparent power (S) [VA] Range Same as the active power Display digit Same as the active power KEW 2060BT Apparent power (S) [VA] Effective input range Same as the active power Accuracy ±1dgt to the result determined by each measured value Apparent power (S) [VA] * Sum: add errors of each channel, 3P3W: ±2dgt, 3P4W: ±3dgt...
-
Page 46: Voltage Current Phase Difference (Θ) [Deg]
Power factor (PF) KEW 2060BT Power factor (PF) Effective input range Same as the active power Display range -1.000 to 0.000 to 1.000 ±1dgt to the result determined by each measured value Accuracy * ±2dgt when measuring balance 3P3W, ±3dgt when measuring balance 3P4W PF= �... -
Page 47: Harmonics Function
KEW 2060BT Harmonics function Harmonics function Measurement Frequency fixed sampling method Perform sampling 256 times per input cycle (50/ 60 Hz) and do FFT calculation. Sampling frequency changes depending on the preset nominal frequency. 50Hz…12.8ksps(every 78μs), 60Hz…15.4ksps(every 65μs) Connect to L=V... - Page 48 Harmonics function KEW 2060BT Harmonics RMS current (Ak: 1 fundamental wave to 30 harmonics) [Arms] Range, Display digit, effective input range Same as the RMS current Display range Same as the RMS current *Content rate 0.0% to 100.0% against fundamental wave...
-
Page 49: Phase Detection Function
KEW 2060BT Phase detection function Total harmonics voltage distortion factor (V THD-R) [%] Display digit 4-digit Display range 0.0% to 100.0% Accuracy ±1 against the calculated results of each measured value. � ∑ ( Vk ) Formula ×100 V : Harmonics voltage �... - Page 50 Distributor Kyoritsu reserves the rights to change specifications or designs described in this manual without notice and without obligations. 11-19 11-19 92-2373A 92-2373...
Need help?
Do you have a question about the KEW 2060BT and is the answer not in the manual?
Questions and answers