
Related Manuals for TPC Laguna 2000


Summary of Contents for TPC Laguna 2000
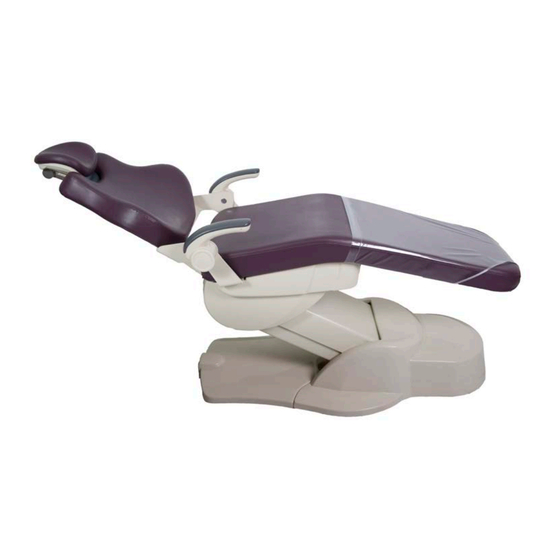
- Page 1 Laguna!2000! Electromechanical! Patient!Chair! Installation,!Operation!&!User!Manual!! TPC! 851 S. Lawson St. City Of Industry, CA 91748 P626-810-4337 Fax 626-810-4245 www.tpcdental.com! www.tpcdental.com!
- Page 2 Table!on!Contents:!!! ! Page! GENERAL'INFORMATION''' ' Installation!and!coordination!! Motion!Limit!Controls! Operation!instructions! ! Overview!of!controls!! Main!PCB!Board!! ! CLEANING'&'DISINFECTING'GUIDE' ' Warranty'' ' TROUBLE'SHOOTING'GUIDE' www.tpcdental.com! www.tpcdental.com!
- Page 3 GENERAL!INFORMATION! The'dental'chair'is'marked' with'a'product'identification' label'including'manufacture,' serial'number'and'date'of' manufacture.'This'label'is' located'on'the'front'lower'left' cover'under'the'seat'cushion.'' !!!!!!!!!!!!!! The'dental'chair'is'marked'with'a' Risk'Class'symbol.'This'label'is' located'on'the'front'of'the'dental' chair'base'next'to'the'main' power'switch.'' The'dental'chair'is'marked'with'a' main'electrical'grounding'point' symbol.'This'label'is'located'on' the'front''left'side'of'the'dental' chair'steel'base'frame,'under'the' plastic'cover.'' www.tpcdental.com! www.tpcdental.com!
- Page 4 The'dental'chair'is'marked'with'a' main'electrical'grounding'point' symbol.'This'label'is'located'on' the'front''left'side'of'the'dental' chair'steel'base'frame,'under'the' plastic'cover.'' The'dental'chair'is'marked'with'a' fuse'label'symbol.'This'label'is' located'under'the'pump'cover'on' The!fuse!is!a!6!amp!time!lag,!Fuse,!3AG,!1! the'front'left'side'of'the'chair' 1/4"!L!x!1/4"!Dia.!(31.8mm!x!6.4mm)! frame.'' Transportation!/!Storage!Information! • Do!not!store!the!dental!chair!in!temperatures!exceeding!130!degrees.!! • Do!not!store!the!dental!chair!on!its!side.!Always!store!upright!on!pallet.! • Do!not!stack!more!than!5!packaged!chairs!at!a!time!on!top!of!each!other.!! • Use!approved!pallet!jack!or!forklift!to!move!the!dental!chair.!! • Do!not!attempt!to!move!stacked!dental!chairs.!! • Only!store!the!dental!chair!in!dry!cool!place.!! www.tpcdental.com! www.tpcdental.com!
- Page 5 Laguna!2000!Installation!Instructions! 1. Connect!the!backrest!support!arm!to!the!backrest!bracket.!Use! the!three!supplied!Allen!screws.!! 2. Install!chair!backrest!as!shown!in!the!images!below.!Using!the! 8!Allen!screws,!secure!the!backrest!frame!in!place.!! 3. Remove!the!side!cover!where!chair!bracket!is!to!be!installed.! You!will!also!need!to!remove!the!lower!front!panel!shown.!! www.tpcdental.com! www.tpcdental.com!
- Page 6 4. Install!the!chair!bracket!as!shown,!use!the!included!4!Allen! screws.!! 5. Re!install!the!chair!side!cover!once!the!bracket!is!installed.!! 6. Mount!the!Cup!to!the!chair!bracket.!! !!!!!!!!!!! www.tpcdental.com! www.tpcdental.com!
- Page 7 7. Install!the!backrest!cushion!onto!the!frame.!Make!sure!you! align!the!mounting!points!before!sliding!into!place.!! !!!! !!!! 8. Install!the!seat!cushion!onto!the!seat!frame.!Make!sure!you! align!the!mounting!points!before!sliding!into!place.!! www.tpcdental.com! www.tpcdental.com!
- Page 8 9. Once!you!have!confirmed!the!seat!cushion!is!in!place!slide!it! toward!the!backrest!to!lock!it!in!place.!!Secure!the!seat!cushion! in!place!using!the!two!supplied!Allen!screws.!! !!!! Insert!the!headrest!stem!as!shown.!! www.tpcdental.com! www.tpcdental.com!
- Page 9 Install!the!Pump!cover!and!rear!base!covers.!Use!the! supplied!screws!to!secure!the!covers!in!place.!! www.tpcdental.com! www.tpcdental.com!
- Page 10 Adjusting!the!chair!limits! 1. To!adjust!the!seat!height!limit,!loosen!nut!as!shown.!Once!the! nut!is!not!secured,!you!can!adjust!the!switches!position!to! activate!at!a!different!height.!Once!adjusted,!secure!the! adjusting!nut.!! Emergency'Stop'Button' The!dental!chair!possesses!an!emergency!stop!button.!In!the!event! that!you!need!to!stop!the!chair!movement!push!in!the!stop!switch.! To!disengage,!turn!clockwise.! www.tpcdental.com!
- Page 11 Laguna!2000! Electromechanical!Patient!Chair! Operating!instructions! www.tpcdental.com!
- Page 12 Overview!of!Foot!controls!! Overview!of!foot!control!operations!! 1. Seat Height Adjustments To!raise,!press!down!on!upper!area!of!the!foot!control!disc.! To!lower,!press!down!on!the!lower!area!of!the!foot!control!disc.! 2. Backrest Adjustments To!raise,!press!down!on!right!side!of!the!foot!control!disc.! To!recline,!press!down!on!left!side!of!foot!control!disc.! 3. Preset Operation Momentarily!press!pre!set!switch!(#1,!or!#2)!on!the!foot!control.! 4. Automatic Return Momentarily press 0 switch on foot control to activate chair to return to normal position. 5. LP Program To program a preset, move chair to desired position. Press LP, then Press the memory position 1 or 2.
- Page 13 Safety'Plate! Safety plate is provided in the backrest cover to stop motion of chair when object is accidentally caught underneath. 7.''Armrest'Rotation! Either armrest can be rotated upward by grasping the end portion of armrest, pulling upward. 8.''Headrest'Adjustments' Height!of!headrest!can!be!adjusted!simply!by!pulling!headrest!up!or!down!due!to!friction!mount! incorporated!in!backrest.!!Angle!of!articulating!headrest!can!be!changed!by!releasing!slide!bar!on! headrest!stem' www.tpcdental.com!
- Page 14 www.tpcdental.com!
- Page 15 www.tpcdental.com!
- Page 16 www.tpcdental.com!
- Page 17 www.tpcdental.com!
- Page 18 Laguna 2000 Patient Chair – Care and Maintenance No maintenance is required except normal care and cleaning. Clean vinyl upholstery and plastic components with mild soap and water. Barrier covers should be used on chairs for asepsis. Surface disinfecting chemical will eventually cause some discoloring of upholstery.
- Page 19 1 year from date of purchase, unless otherwise stated. TPC will repair or replace any defective part at no charge. TPC will not be responsible for labor charges or shipping charges to / from the TPC facility. This guarantee does not cover normal wear or stains on surface finish. The guarantee does not cover damage resulting from improper installation, misuse or accidents incurred in shipping and handling.
- Page 20 Laguna 2000 Chair Troubleshooting Problem Cause Solution Dental Chair does not move No power Check power source up or down. Chair makes no Blown fuse Check fuse sound. Power switch off Check power switch Blown transformer Check transformer voltage 12vac...
- Page 21 Laguna 2000 Chair Limitations • Don’t exceed the maximum weight capacity of 600 lbs or damage may occur. • Don’t let more than one patient sit in the chair at one time. • Don’t stand anywhere on the dental chair.
- Page 24 Mirage Dental Delivery Unit Model 2000 / 2015 Installation Instructions 851 S. Lawson St. City Of Industry, CA 91748 P626-810-4337 Fax 626-810-4245 www.tpcdental.com...
-
Page 25: Table Of Contents
Table on Contents: Page GENERAL INFORMATION Unpacking and Inventory Installation and coordination Optional Cuspidor Installation Cuspidor Plumbing Connections Junction Box Connections Post Mount Utility Center Adjustments Pressure Adjustments / Tension Screws Delivery Head / Tilt Adjustments Tubing / Connections www.tpcdental.com... -
Page 26: Unpacking And Inventory
• Bowl rinse spout • Cuspidor bowl strainer • 2 fastening screws • If at any time you have questions regarding your installation please don t hesitate to contact TPC toll free @ 800-560-8222 or via E- mail @ service@tpcdental.com www.tpcdental.com... -
Page 27: Installation And Coordination
Installation Instructions. 1. Locate the four mounting bolts that were included with your dental chair. These bolts are attached to all model 4000 dental chairs. See image below for the location. 2. Remove the mounting bolts and mount the bracket as shown in the image below. 3. - Page 28 4. Loosen the 8 leveling set screws, and then place the PMU (Post mount utility center) in the cup of the chair bracket. Figure1 Shown in the image below. Center the mounting post in the cup. Also verify if the PMU is aligned straight with dental chair armrest. Then proceed to tighten the set screws.
- Page 29 6. Place the assistant's suction arm on the PMU as shown in the image below. If the arm is not level use the leveling screw shown below (right) to adjust its angle. Turning this screw clockwise will raise the angle of the arm. Turning counter clockwise will lower the angle of the arm.
- Page 30 8. If you are installing a post mounted light insert it as shown in the images below. Make sure you place the cosmetic ring over the light post before inserting. Tighten the set screw to secure the light post in place. 9.
- Page 31 10. You may now remove the plastic from the bundle of tubing s that you fed through in the previous step. Take the touch pad wire shown below and feed it through the chair bracket as shown. 11. Route the touch pad cable along the chair bracket channel. Then feed it through the "cut out"...
- Page 32 12. Take the delivery systems foot control and feed it through the bottom of the PMU. Make the following connections from your foot control to the tubing within the PMU side box. 13. Tubing connections • Grey female from foot control to Black supply to the flex arm. •...
-
Page 33: Optional Cuspidor Installation
Optional Cuspidor Installation If you are installing the optional 2000-C cuspidor, remove the Cuspidor housing cover as shown. To install the cuspidor, slide the cuspidor into the cuspidor bushing housing. Make sure the cuspidor is completely seated in the bushing. 15. -
Page 34: Cuspidor Plumbing Connections
Cuspidor Plumbing Connections 16. Connect the drain line. Remove the blue locking tab to separate the quick connect from the junction. Insert the removed end into the drain line tubing. Connect the two ends together and replace the locking clip. 17. -
Page 35: Junction Box Connections
Junction Box Connections 19. Before making any connections in the junction box, be sure to clear the supply lines. If there is any debri in the air line it will collect on the micron filter. Verify the line is clear. 20. -
Page 36: Post Mount Utility Center Adjustments
Post mount utility center adjustments (PMU) 1. There are two main adjustments that can be made in the PMU. • Assistant's side syringe block adjustments Turning the screw counter clockwise will increase the air / water pressure. Turning the screw clockwise will decrease the air / water pressure. •... -
Page 37: Delivery Head / Tilt Adjustments
delivery head leveling and tilt adjustments 4. If you need to level the unit head or adjust the tilt use the following adjustments. • Loosen the 4 Allen screws that attach the unit head to the short control arm. See image. -
Page 38: Tubing / Connections
Tubing and connections Junction Box 1. Yellow 6 X 4 Air Supply line 2. Blue 6 X 4 Water Supply line 3. Grey Master Switch Supply 4. Yellow Master switch return 5. Purple Air brake supply 6. Red Spare Post mount utility center (from umbilical to delivery unit arm) 1.
Need help?
Do you have a question about the Laguna 2000 and is the answer not in the manual?
Questions and answers