Advertisement
Table of Contents
- 1 DC Voltage Measurement
- 2 Ac Voltage Measurement
- 3 DC Current Measurement
- 4 Ac Current Measurement
- 5 Resistance Measurement
- 6 Continuity Check
- 7 Diode Test
- 8 Capacitance Measurements
- 9 Frequency Measurement
- 10 Audible Continuity
- 11 Maintenance
- 12 Specifications
- 13 Box Contents
- 14 Warranty
- Download this manual
Advertisement
Table of Contents

Related Manuals for protech QM1549


Summary of Contents for protech QM1549
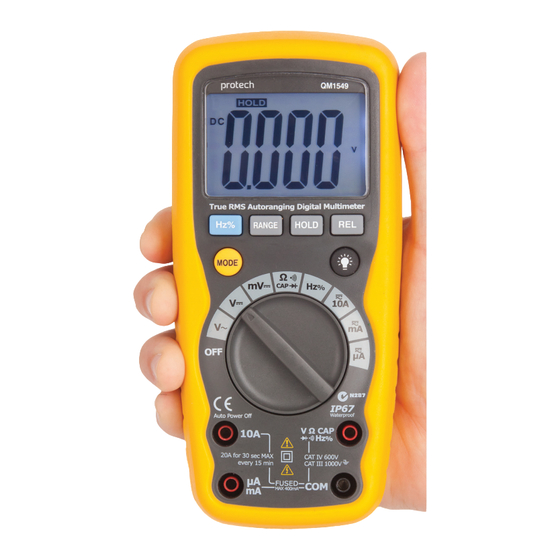
- Page 1 Autoranging SPECIALIST True RMS IP67 Digital Multimeter LIFETIME WARRANTY 4000 CAT IV DISPLAY 600V COUNT RELATIVE DATA MODE HOLD...
- Page 2 QM1549 Autoranging True RMS IP67 Digital Multimeter User Manual Thank you for purchasing this Autoranging True RMS IP67 Digital Multimeter. This true RMS multimeter will provide accurate readings, regardless of load type or current wave shape. The default autoranging setting makes measurements easy by automatically selecting the best range.
- Page 3 FUNCTIONS FUNCTIONS Max. Display 4000 Count Continuity Basic Accuracy 0.5% Data Hold DC Voltage Range 400mV - 1000V Relative Measurement AC Voltage Range 400mV - 1000V Diode Test DC Current Range 4mA -10A Duty Cycle AC Current Range 4mA - 10A Autoranging Resistance 400Ω...
- Page 4 FUNCTIONS Autoranging/ The meter’s default setting is autoranging. This Manual automatically selects the best range for the selected test/measurement. • To set the meter to manual, press the “RANGE” button. The AUTO icon on the screen will turn off. • Press the “RANGE” button to move through the available ranges until you see the range you want.
- Page 5 Hz/%Duty • Press the button to choose frequency or duty cycle Button in the range of frequency. • Press the button to measure frequency or duty cycle while measuring voltage or current. Refer to the table on page 14 for suggested frequency ranges. •...
-
Page 6: Dc Voltage Measurement
SYMBOL DESCRIPTION Continuity Diode Test Low Battery Alternating Current / Voltage AUTO Autoranging Direct Current / Voltage HOLD Display Hold DC VOLTAGE MEASUREMENT CAUTION: Do not measure DC voltages if a motor on the circuit is being switched ON or OFF. Large voltage surges may occur that can damage the meter. -
Page 7: Dc Current Measurement
1) Set the function switch to the VAC position. 2) Insert the black test lead banana plug into the negative (COM) jack. 3) Insert red test lead banana plug into the positive (VΩCAP) jack. 4) Touch the test probe tips to the circuit under test. 5) Read the voltage in the display. -
Page 8: Resistance Measurement
• 4000µA AC - set the function switch to the µA position and insert the red test lead banana plug into the (µA) jack. • 400mA AC - set the function switch to the mA range and insert the red test lead banana plug into the (mA) jack. -
Page 9: Diode Test
DIODE TEST WARNING: To avoid electric shock, do not test any diode that has voltage on it. 1) Set the function switch to position. 2) Press the button until the symbol appears in the display. 3) Insert the black test lead banana plug into the negative (-) jack (COM). 4) Insert the red test lead banana plug into the positive (+) jack (VΩCAP). - Page 10 MEASUREMENT SPECIFICATIONS The following guide is based on an environmental temperature of 18- 28°C and humidity <70%. DC VOLTAGE RANGE RESOLUTION ACCURACY 400mV 0.1mV ±(0.5% reading + 2 digits) 10mV ±(1.2% reading + 2 digits) 400V 100mV 1000V ±(1.5% reading + 2 digits) Input Impedance: 7.8MΩ...
- Page 11 DC CURRENT RANGE RESOLUTION ACCURACY 400µA 0.1µA ±(1.0% reading + 3 digits) 4000µA 1µA 40mA 10µA (1.5% reading + 3 digits) 400mA 100µA 10mA ±(2.5% reading + 5 digits) Overload Protection: 0.5A/1000V and 10A/1000V fuse Maximum Inputs: 400mA DC RMS on µA/mA ranges, 10A DC RMS on 10A range.
- Page 12 RESISTANCE RANGE RESOLUTION ACCURACY 400Ω 0.1Ω ±(1.2% reading + 4 digits) 4kΩ 1Ω ±(1.0% reading + 2 digits) 40kΩ 10Ω 400kΩ 100Ω ± (1.2% reading + 2 digits) 4MΩ 1kΩ 40MΩ 10kΩ ± (2.0% reading + 3 digits) Input Protection: 600VDC or 600VAC RMS CAPACITANCE RANGE RESOLUTION...
-
Page 13: Audible Continuity
DIODE TEST TEST CURRENT RESOLUTION ACCURACY 0.3mA typical ±(10% reading + 5 digits) Open Circuit Voltage: 1.5V DC typical Overload Protection: 600VDC or 600VAC RMS FREQUENCY RANGE RESOLUTION ACCURACY 9.999Hz 0.001Hz ±(1.5% reading + 5 digits) 99.99Hz 0.01Hz 999.9Hz 0.1Hz 9.999kHz ±(1.2% reading + 3 digits) 99.99kHz... -
Page 14: Maintenance
HZ% DUTY BUTTON RANGES RANGE RESOLUTION ACCURACY ≥1.5Vrms 5Hz~10kHz 40V, 400V ≥10V rms 5Hz~20kHz ≥20V rms 5Hz~200kHz 1000V/1000V ≥420V rms 50Hz~1kHz 400mA ≥45mA rms 5Hz~5kHz ≥4A rms 4Hz~1kHz MAINTENANCE BATTERY INSTALLATION To avoid the false readings, replace the battery as soon as the low battery power indicator appears. -
Page 15: Specifications
SPECIFICATIONS Enclosure: Double-molded Display: 4,000 count LCD display Over Range Indication: “OL” is displayed Auto Power: 15 min (approx) Polarity: Automatic, minus (-) sign for negative Low Battery Indication: BAT is displayed if battery voltage drops below operating voltage Battery: 1 x 9V Operating Temperature: 0°C to 50°C Storage Temperature:... -
Page 16: Warranty
WARRANTY This product is protected by a lifetime warranty (from the date of purchase) covering all product manufacturing defects/faults that may occur within this timeframe. This warranty does not cover damage caused by neglect, misuse, contamination, alteration, accident or abnormal conditions of operation or handling, including failures caused by use outside of the product’s specifications, or the normal wear and tear of mechanical components.
Need help?
Do you have a question about the QM1549 and is the answer not in the manual?
Questions and answers