Table of Contents
Advertisement
Quick Links
Introduction
Model 69X-06-XX
Specifications
INSTALLATION & SERVICE INSTRUCTIONS
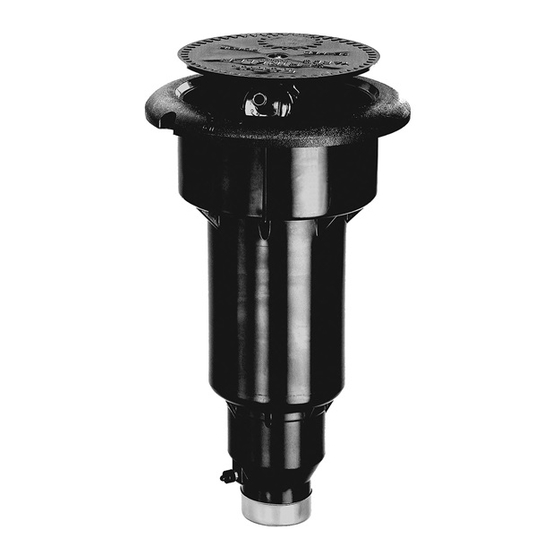
690 Series Rotary Sprinkler
Model 69X-01-XX
Features
Positive Spring Retraction
Three Nozzle Sizes
Long Life Gear Drive -
Valve-In-Head Models
Sprinkler Operating Mode
Built-in Check Valve
Two-Speed / 60°-120° Models
Two-Speed / 180° Models
Serviceability
Model 69X-02-XX
Advertisement
Table of Contents

Subscribe to Our Youtube Channel
Summary of Contents for Toro 69X-01-XX
- Page 1 INSTALLATION & SERVICE INSTRUCTIONS 690 Series Rotary Sprinkler Introduction Model 69X-06-XX Specifications Model 69X-01-XX Features Positive Spring Retraction Three Nozzle Sizes Long Life Gear Drive - Valve-In-Head Models Sprinkler Operating Mode Built-in Check Valve Two-Speed / 60°-120° Models Two-Speed / 180° Models...
-
Page 2: Model Number Code
MODEL NUMBER CODE 69X-XX-XX Cover Performance Chart Base Nozzle Set Pressure Size 3/8 in. Rad. Installation Procedure Construct Swing Joints Use PVC or ABS pipe nipple for sprinkler connection. Note: On sites where the possibility of heavy equipment rolling over a sprinkler exists, the swing joint will flex preventing damage to the lateral or main lines. -
Page 3: System Start-Up
Connecting Electric Control Wires CAUTION All wires must be waterproofed to prevent short circuit to ground and subsequent controller damage. Connecting Hydraulic Control Tubing Note: Leave an 18 inch service loop of tubing at each sprinkler to facilitate movement of sprinkler and service operations. - Page 4 Two-Speed Sprinkler Alignment - Models 696 and 698 Figure 2 - Back Nozzle Alignment Pilot Valve Operation System Troubleshooting Pilot Valve Sprinkler will not turn on Sprinkler will not shut off Figure 3 - PARALLEL...
- Page 5 System Troubleshooting (continued) Sprinklers Sprinkler won't rotate Head sticks up Poor distribution pattern Valve won't close (Hydraulic 69X-01-XX) Valve won't open (Hydraulic 69X-01-XX) Valve won't close (Electric 69X-06-XX) Valve won't open (Electric 69X-06-XX) Valve leaks Several valves on different stations fail to close...
-
Page 6: Servicing Procedures
Servicing Procedures Introduction TO PREVENT POSSIBLE INJURY DURING SPRINKLER SERVICING PROCEDURES, CONFIRM THE FOLLOWING CONDITIONS EXIST PRIOR TO STARTING. A. WATER SUPPLY TO SPRINKLER IS SHUT OFF AT SOURCE. B. SYSTEM PRESSURE IS BLED FROM SYSTEM, INCLUDING CONTROL TUBES. C. A.C. POWER IS DISCONNECTED AT SOURCE Servicing Sprinkler Mechanism and Valve Assembly Note: Due to O-ring seal compression between drive assembly and body, considerable resistance may be felt when removing sprinkler mechanism. - Page 7 NOTE: It is possible to install the snap ring backwards (upside down). See inset in Figure 6 to insure that snap ring is installed in the correct manner. Figure 4 Figure 5 Figure 6...
- Page 8 Servicing Pilot Valve Assembly Note: Assure water supply to sprinkler is positively shut off and all residual pressure has been bled. If sprinkler is pressurized, main valve will open when the pilot valve control tube is disconnected. Unless pilot valve has been previously removed, control tubing length will be sufficient for re-connection. Selector retains plunger in body.
- Page 9 Figure 7 Pilot Valve, Current Item No. Part No. Nomenclature Quantity Per Assy. SERVICE PARTS AND ASSEMBLIES...
-
Page 10: Model Number Information
Figure 8 690 Series Model Number Information 6 9 X - X X - X X X Body Nozzle Pressure Regulation *... - Page 11 Item No. Part No. Nomenclature Quantity Per Assy. SERVICE PARTS AND ASSEMBLIES...


Need help?
Do you have a question about the 69X-01-XX and is the answer not in the manual?
Questions and answers