Advertisement
Quick Links
Download this manual
See also:
User Manual
Manuale installatore - Installer guide
Manuel installateur - Technisches Handbuch
Instrucciones instalador - Manual do instalador
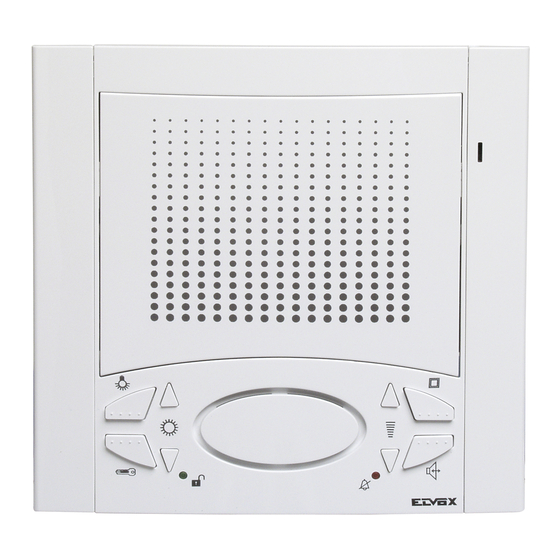
Art. 6600/AU - 660A/AU - 6700/AU
Citofono vivavoce Sound System (da incasso parete / da tavolo / da esterno parete)
Sound System speakerphone interphone (flush-mounted / desk-top version / surface wall-mounting)
Poste mains libres Sound System (pour montage à encastrer / version de table / pour montage mural en saillie)
Freisprech-Haustelefon Sound System (für UP-Montage / als Tischgerät / für AP-Montage)
Portero aut. manos libres Sound System (de empotrar / de sobremesa / de superficie)
Telefone alta-voz Sound System (para montagen de embeber / versão de mesa / para montagem saliente)
6600
Advertisement

Related Manuals for Vimar 6600/AU


Summary of Contents for Vimar 6600/AU
- Page 1 Manuel installateur - Technisches Handbuch Instrucciones instalador - Manual do instalador Art. 6600/AU - 660A/AU - 6700/AU Citofono vivavoce Sound System (da incasso parete / da tavolo / da esterno parete) Sound System speakerphone interphone (flush-mounted / desk-top version / surface wall-mounting) Poste mains libres Sound System (pour montage à...
- Page 2 “A”) 13: Alimentazione LED verde (ingresso positivo alimentazione max. 18Vc.c.) N.B. Il citofono Art. 6600/AU (6700/AU) dispone sul retro di un microinter- ruttore per la commutazione della funzione “ausiliaria (posizione A)/autoin- serimento (posizione B)” del tasto Il citofono Art. 660A/AU dispone sul fondo della base di un microinterruttore per la commutazione della funzione “ausiliaria”...
-
Page 3: Regole Di Installazione
- Praticare un foro nella parete in cartongesso di 120x120mm circa. - Fissare la piastra di aggancio del citofono ad una altezza di 1,40m dal - Fissare le staffe Art. R660 al citofono 6600/AU. pavimento al bordo inferiore - Fissare le staffe al citofono come indicato in figura, tenendo i cursori - Eseguire i collegamenti della morsettiera allineati ai fianchi del citofono. - Page 4 (or selfconnection with switch in “A” position) 13: Green LED supply voltage (18V D.C. (max) positive voltage imput) NOTE: Interphone type 6600/AU dispose on the rear of a microswitch for the switching of the “auxiliary (position A)/selfconnection (position B)” func- tion of push-button Monitor type Art.
- Page 5 - Make a 120x120mm (nearly) hole in the plasterboard wall - Fix the phone fixing plate at 1,40m. from the ground level to the lower - Fix the brackets type R660 to the phone 6600/AU border. - Fix the bracket to the phone as indicated in figure, keeping the cursors - Connect the terminal block.
- Page 6 (ou auto-enclenchement avec commutateur en position “A”) 13: Alimentation LED verte (entrée “positif” alimentation max. 18V c.c.) N.B. Le poste art. 6600/AU dispose à l’arrière d’un microinterrupteur pour la commutation de la fonction “auxiliaire (position “A”)/auto-enclenchement (position “B”) du bouton-poussoir Le poste art.
-
Page 7: Règles D'installation
- Effectuer un trou dans la paroi en placo plâtre d’environ 120mm x 120mm sol au bord inférieur. - Fixer les étriers Art. R660 au poste Art. 6600/AU. - Fixer les étriers au poste comme indiqué dans la figure en tenant les - Effectuer les raccordements du bornier. - Page 8 6600 Die Bedienungsanleitung ist auf der Website www.vimar.com zum Download verfügbar Zweite Zusatzfunktion oder Selbsteinschaltung (ihr Betrieb ist vom auf der Rückseite befindlichen Umschalter gesteuert) Ruf vom Klingeltableau Türöffnertaste Etagenruf Taste für die Audio-Aktivierung (oder Selbsteinschaltung mit Schalter in “A” Stellung) Stromversorgung für grüne LED (max +18V D.C.) “positive Linie”...
- Page 9 6600 INSTALLATION DES ART. 6600/AU MIT HALTERUNGEN ART. R660. INSTALLATION DES ART. 6700/AU - Ein 120 x 120 mm (zirca) Loch in die Gipspappe-Wand durchführen. - Die Befestigungsplatte des Haustelefon 1,40 m. in Höhe vom Boden bis - Die Halterungen Art. R660 an den Haustelefon befestigen.
- Page 10 V: Para instalaciones con cable coaxial, entrada para la conexión del cable vídeo de 75 Ohm. M: Masa correspondiente a los bornes V. N.B. El monitor Art. 6600/AU (6700/AU) dispone en la parte posterior de un microinterruptor para la conmutación de la función “auxiliar (posición “A”)/ autoinserción posición “B”)” del pulsador El monitor Art.
-
Page 11: Normas De Instalación
- Efectuar un orificio en la pared en cartón piedra de cerca 120x120mm - Fijar la placa de enganche del teléfono a una altura de 1,40m desde el - Fijar los soportes Art. R660 al teléfono Art. 6600/AU. piso al borde inferior. - Page 12 V: Para instalações com cabo coaxial, entrada para a ligação do cabo vídeo a 75 Ohm. M: Massa referente aos bornes V N.B. O monitor art. 6600/AU (6700/AU) dospõe na parte posterior dum microinterruptor para a comutação da função “auxiliar (posição “A”)/autoin- serção (posição “B”)” do botão El monitor Art.
- Page 13 - Efectuar as ligações da régua de bornes. - Fixar o suporte Art. R660 ao telefone 6600/AU. - Inserir o telefone seguindo o sentido das setas 1 e 2. Fixar os suportes ao telefone como indica a figura, tendo os cursores - Para retirar o telefone da placa de encaixe, aplicar uma chave de parafu- alinhados aos lados do telefone.
- Page 14 6600 Legenda per schemi di collegamento - Legenda for wiring diagram - Légende pour schémas de raccordement Beschriftung für Schalpläne - Leyenda para esquemas de conexionado - Legenda para esquemas de conexionado Plaque de rue pour portier vidéo Targa per videocitofono Video entrance panel Série 1200, 1300, 8000, 8100, PATAVIUM, Serie 1200, 1300, 8000, 8100, PATAVIUM,...
- Page 15 Farbmonitor Monitor a colores Citofono Monitor cores Interphone Art. 6341 Poste Art. 6351 Freisprechstelle Teléfono Telefone Monitor colori Art. 6600/AU Colour monitor Art. 660A/AU Moniteur couleurs Art. 6700/AU Farbmonitor Monitor a colores Monitor cores RETE-MAINS Art. 6620 RÉSEAU-NETZ Art. 662A...
- Page 16 Módulo LED para botoneira (10 LED max.) 30 LED con/with Art. M832 Citofono - Phone 40 LED con/with Art. 0832/030 Poste - Freisprechstelle Teléfono - Telefone Art. 6600/AU Art. 660A/AU Art. 6700/AU Citofono - Phone Poste - Freisprechstelle Teléfono - Telefone Art. 8875 N.B.
- Page 17 12 come illustrato nello schema. Teléfono Telefone It is possible to activate the system from the interphone, using the push-button with the Art. 6600/AU Art. 660A/AU symbol “ ”, by connecting it to terminal 12 as shown in the diagram.
- Page 18 Le schéma représente le raccordement de la signalisation de gâche ouverte (LED verte) avec poste Contatto NO serratura Art. 6600/AU ou 6700/AU ou Art. 660A/AU (raccordement à la borne 13). Si on raccorde jusqu’à 5 N.O. contact lock postes, il n’est pas nécessaire d’utiliser l’alimentation Art. 6582, mais il est suffisant d’utiliser la borne Contact NO gâche...
- Page 19 Teléfono Telefone 15/AS Auf dem Plan ist der Anschluss der Anzeige „Tür offen” Art. 6600/AU (grüne LED) an Freisprechgerät (Anschluss an Klemme 13) dargestellt. Art. 660A/AU Um die Anzeige „Tür offen” nicht zu verwenden die Klemme Nr. 13 nicht Art. 6700/AU S/S1 anschließen.
- Page 20 Vimar SpA: Viale Vicenza, 14 36063 Marostica VI - Italy Tel. +39 0424 488 600 - Fax (Italia) 0424 488 188 S6I.660.0AU 08 1404 Fax (Export) 0424 488 709 VIMAR - Marostica - Italy www.vimar.com...
Need help?
Do you have a question about the 6600/AU and is the answer not in the manual?
Questions and answers