Table of Contents
Advertisement
Quick Links
Advertisement
Table of Contents

Subscribe to Our Youtube Channel
Related Manuals for Aspire Maui


Summary of Contents for Aspire Maui
- Page 1 ELECTRIC LIFT & RECLINE CHAIRS USER MANUAL Maui Verona Raphael Porto Montana...
- Page 2 ASPIRE ELECTRIC LIFT & RECLINE CHAIRS The symbols below are used throughout this owner’s manual and on the product to identify warnings and important information. It is very important for you to read them and understand them completely. WARNING! Indicates a potentially hazardous condition/situation. Failure to follow designated procedures can cause either personal injury, component damage or malfunction.
-
Page 3: Label Information
Degree of protection against actuator motors and wiring. Contact electric shock. your authorised Aspire Dealer for more information. Do not place objects under the lift chair. Make sure the area is clear This product has been tested and of obstructions, including pets and complies to IEC 60601-1-2. -
Page 4: Table Of Contents
TABLE OF CONTENTS Lift Recline Series Assembly/Disassembly • Lift chair set-up • Lift chair placement Label Information • Battery installation • Lift chair disassembly Introduction Operation • Safety • Purchaser’s agreement • Space Saver hand control operation • Information exchange •... -
Page 5: Introduction
Aspire to enhance or preserve the safe use of this product. -
Page 6: General Guidelines
MODIFICATIONS Aspire chairs are designed and engineered to provide maximum comfort and utility. However, to prevent personal injury and/or damage to your lift chair, you should not modify, add, remove or disable any feature, part or function of your lift chair. -
Page 7: Storage And Operation Temperatures
Before using your lift chair, make sure your delivery is complete as some components may be packaged individually. If you do not receive a complete delivery, please contact your authorised Aspire Dealer immediately. Where damage has occurred during transport, either to the packaging or content, please contact the delivery company responsible. -
Page 8: Your Lift Chair
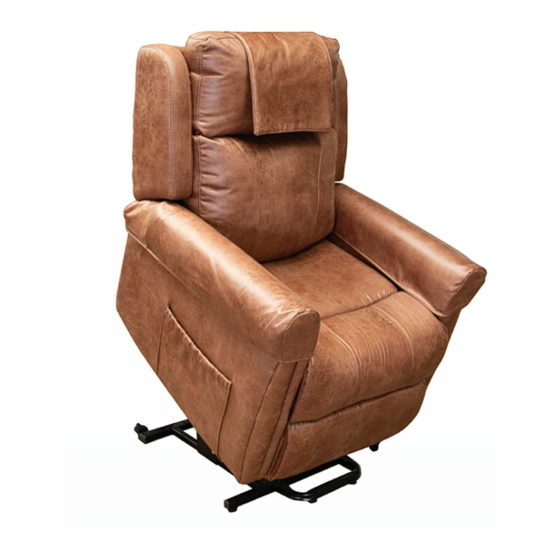
3. YOUR LIFT CHAIR BODY COMPONENTS This section describes the features of your lift chair. Carefully review the function and location of each item described, and note that the illustrations and option locations shown in this manual may not reflect the type of lift chair that you own. Figure 3.1 Lift Chair Main Components Lift Mechanism: Responds to the hand control commands to position the chair in the sit, recline and stand positions. - Page 9 Figure 3.2 Leg Levellers Leg Levellers: Manually rotate up or down in order to stabilise the chair before use. Rotate the leg levellers to raise or lower the chair NOTE: Applicable to Montana chair only. Figure 3.3 Scissor Mechanism Scissor Mechanisms: Extend or retract to take the chair through the various stages of recline.
-
Page 10: Electrical Components
ELECTRICAL COMPONENTS Your Aspire Lift Chair is equipped with a low voltage DC motor system that reduces the standard household alternating current of 90V AC - 264V AC to direct current (24/39V DC). The electrical components include the external transformer, batteries and hand control. Keep these areas free from moisture at all times. -
Page 11: Assembly/Disassembly
4. ASSEMBLY/DISASSEMBLY Your lift chair may require some assembly before initial use. It may also require disassembly to make servicing the chair more convenient. If your lift chair is a Knock-Down (KD) model, follow the instructions in “Lift Chair Set-up.” If your lift chair is not a KD model, proceed to “Lift Chair Placement.” LIFT CHAIR SET-UP KD models will arrive in the knock-down position (Fig. - Page 12 NOTE: Depending on chair width, you may need to slide on one side of the chair-back at a time. If this is the case, level the chair back before pressing down to lock into position. ‘CLICK’ 4.1.3 Push firmly on the top of the chair- 4.1.4 Attach the chair-back to the hook and back to lock into position.
-
Page 13: Lift Chair Placement
NOTE: If you discover a problem at any point during the set-up and positioning of your lift chair, stop and contact your authorised Aspire Dealer immediately. To avoid personal injury and/or product damage, do not plug the unit into the electrical outlet until the problem is corrected and do not attempt to fix electrical problems by yourself. -
Page 14: Lift Chair Disassembly
LIFT CHAIR DISASSEMBLY The back rest of Aspire Lift Chairs can be removed to make service and transport of the chair more convenient. Follow these steps to disassemble the lift chair: 4.3.1 Remove the bottom of the back 4.3.2 Using a large flat-head screwdriver,... -
Page 15: Operation
5. OPERATION SAFE OPERATING PRECAUTIONS There are certain precautions that should be taken during the operation of your lift chair. Read and follow these precautions carefully in order to ensure safe lift chair operation and to prevent injury and/or product damage. •... -
Page 16: Dual Action Hand Control Operation
SINGLE ACTION HAND CONTROL OPERATION Follow these steps to sit in your lift chair: 1. Engage and hold the up/down switch in the UP position to raise your lift chair to the standing position. 2. Back into the lift chair and sit in the centre of the seat, using the armrests for support if needed. -
Page 17: Multifunctional Hand Control Operation
NOTE: The hand control on your lift chair may be equipped with an LED that indicates power to the hand control. If this LED is present and not lit when the hand control is in use, contact your authorised Aspire Dealer. -
Page 18: Troubleshooting
6. TROUBLESHOOTING Your Aspire Lift Chair is a state-of-the-art product designed to enhance your mobility. Your lift chair should bring you years of trouble-free service, however, it may require occasional troubleshooting. The following troubleshooting tips and FAQs should summarise what you need to know about your lift chair. -
Page 19: Care And Maintenance
• Inspect all wiring harnesses to make sure they are not damaged or frayed • If damage is present, unplug the lift chair and contact your authorised Aspire Dealer for service • Keep all electronics free from moisture and temperature extremes •... -
Page 20: Warranty
NOTE: Aidacare reserves the right to replace only the part of the steel lift mechanism that may be defective. Aidacare provides parts only under warranty. Your Aspire Dealer is responsible for labour and service. Please contact your Aspire Dealer for information about these services and for any applicable charges. -
Page 21: Specifications
150mm 150kg Recliner (Fawn) CHP227100 Aspire Verona 480mm 500mm 560mm 630mm 1080mm 800mm 820mm 100mm 130kg Recliner (Mushroom) CHP227110 Aspire Maui 480mm 500mm 560mm 630mm 1080mm 800mm 820mm 550mm 130kg Recliner (Mocha) CHP227400 Aspire Montana 510mm 530mm 630mm 660mm 1080mm... -
Page 22: Appendix A
Aspire Verona Recliner 130kg Aspire Maui Recliner 130kg Aspire Porto Recliner 150kg Aspire Raphael Recliner 130kg Aspire Montana Recliner 220kg MANDATORY! Stay within the specified weight capacity of your lift chair. Exceeding the weight capacity voids Aspire Lift Chair warranty. - Page 23 NOTES...
- Page 24 AIDACARE PTY LTD Building 3A, 1 Moorebank Avenue, Moorebank NSW 2170 1300 133 120 www.aidacare.com.au MADE IN CHINA ASUM39.8 0606...
Need help?
Do you have a question about the Maui and is the answer not in the manual?
Questions and answers