Advertisement
Quick Links
Model/Modelo/Modèle
65880LF-▲LHP
65880LF-▲LHP-ECO
Series/Series/Seria
Siderna
®
Write purchased model number here.
Escriba aquí el número del modelo comprado.
Inscrivez le numéro de modèle ici.
You may need / Usted puede necesitar / Articles dont vous pouvez avoir besoin:
For easy installation of your
Brizo
faucet you will need:
®
• To READ ALL the instructions completely
before beginning.
• To READ ALL warnings, care, and maintenance
information.
• To purchase the correct water supply hook-up.
Para instalación fácil de su llave
Brizo
®
usted necesitará:
• LEER TODAS las instrucciones completamente
antes de empezar.
• LEER TODOS los avisos, cuidados, e
información de mantenimiento.
• Comprar las conexiones correctas para el
suministro de agua.
Pour installer votre robinet
Brizo
facilement, vous devez:
®
• LIRE TOUTES les instructions avant
de débuter;
• LIRE TOUS les avertissements ainsi que toutes
les instructions de nettoyage et d'entretien;
• Acheter le bon nécessaire de raccordement.
www.brizo.com
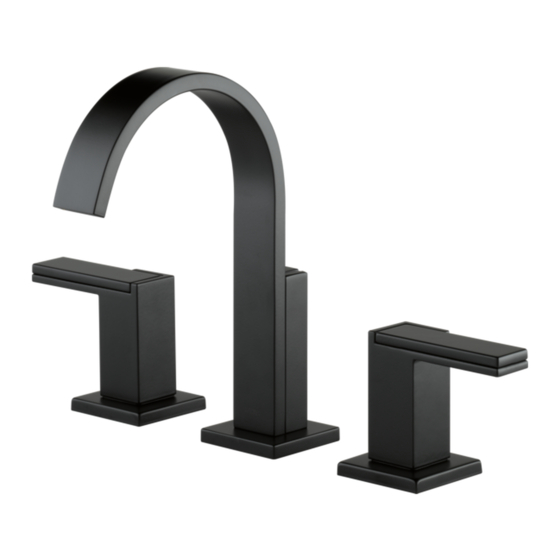
TWO HANDLE WALL MOUNTED LAVATORY FAUCETS -
94056
LESS HANDLES
LLAVES DE AGUA PARA LAVABOS DE DOS MANIJAS
PARA INSTALACIÓN EN LA PARED – SIN MANIJAS
ROBINET MURAL À DEUX MANETTES POUR LAVABO -
SANS LES MANETTES
Note: Drain sold separately. / Nota: El desagüe se vende por separado /
Note : Renvoi vendu séparément.
94056
1
Note: Handle kits must be
ordered separately.
Nota: Los juegos de manijas
se venden por separado.
Note : Manettes en kit
vendues séparément.
03/01/2018
Rev. C
Advertisement

Related Manuals for Brizo Siderna Series


Summary of Contents for Brizo Siderna Series
- Page 1 Note: Drain sold separately. / Nota: El desagüe se vende por separado / Note : Renvoi vendu séparément. You may need / Usted puede necesitar / Articles dont vous pouvez avoir besoin: For easy installation of your Brizo faucet you will need: ® • To READ ALL the instructions completely before beginning.
-
Page 2: Cleaning And Care
No se garantizan las pilas. Company para todos los reclamos a menos que el comprador haya registrado el producto con Delta Faucet Company. Esta garantía le aplica sólo a las llaves de agua de Brizo fabricadas Delta Faucet Company reemplazará, SIN CARGO, durante el período de garantía aplicable, cual- ®... - Page 3 Plasterguard Protector de yeso Gabarit de plâtrage RP76563 RP76563-1.2 Flow Regulator Regulador de flujo RP63794▲ Régulateur de débit Spout Flange and Gasket Reborde del Surtidor y Empaque Collerette du bec et joint RP13938 O-Rings Anillos “O” Joints Toriques RP61828 O-Ring Anillo “O”...
- Page 4 MAINTENANCE – SPOUT SHUT OFF WATER SUPPLIES BEFORE SERVICING SPOUT ASSEMBLY If your faucet leaks at base of spout, replace o-rings (12) on spout adapter (13). A. Loosen set screw (14) on bottom side of spout and pull straight out on spout to remove it from adapter. B.
-
Page 5: Faucet Installation
Min.11 1/2" Min.11 1/2 po Min.3" Min.3 po 2 3/4"±1/2" 2 3/4 po±1/2 po FAUCET INSTALLATION WATER LINE CONNECTIONS Install 1⁄2” hot and cold supply piping (1) to the valve body. Construct a suitable stud brace for mounting of the valve body. Refer to the roughing-in Temporarily pull plaster guards (2) from valve body. - Page 6 4"(100 mm) 1/2" (12.7 mm) PIS 1 5/8" (41.2 mm) Square 1 3/4" (47.6 mm) Diameter COMPLETE FINISH WALL Complete finish wall with 1 5/8” square holes for handles and 1 3/4” diameter hole for spout shank. Space hole centers 4” (100 mm) apart. Ensure plasterguards are in place durning wall installation.
- Page 7 HANDLE INSTALLATION HANDLE BASE INSTALLATION NOTE: HANDLE KITS SOLD SEPARATELY. Slide handle base (1) and gasket (2) over trim sleeve (3). Secure base against Place glide ring (1) into the groove in the bottom of handle (2). Make wall with set screw (4). Install button (5). Repeat for other end valve.Option: If sure valve cartridge is in the off position.
- Page 8 FLUSH YOUR SYSTEM Turn both faucet valves to full open position. Flush water lines for one minute. Important: This flushes away any debris that could cause damage to internal parts or disrupt water flow from your faucet. HAGA FLUIR EL AGUA POR SU SISTEMA Abra las dos vàlvulas dev la llaves de agua a la posición totalmente abierta.
Need help?
Do you have a question about the Siderna Series and is the answer not in the manual?
Questions and answers