Table of Contents
Advertisement
Quick Links
HSC 171
HSC 271
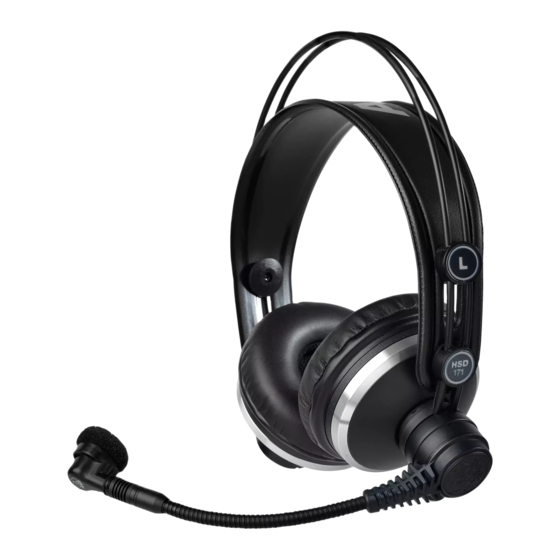
HSD 171
HSD 271
BEDIENUNGSANLEITUNG.................................. 2
Bitte vor Inbetriebnahme des Gerätes lesen!
USER INSTRUCTIONS ..................................... 18
Please read the manual before using the equipement!
MODE D'EMPLOI............................................ 34
Veuillez lire cette notice avant d'utiliser le système!
ISTRUZIONI PER L'USO .................................. 50
Prima di utilizzare l'apparecchio, leggere il manuale!
MODO DE EMPLEO......................................... 66
¡Sirvase leer el manual antes de utilizar el equipo!
INSTRUÇÕES DE USO ..................................... 82
Favor leia este manual antes de usar o equipamento!
Fehler! Kein Text mit angegebener Formatvorlage im Dokument.
Advertisement
Table of Contents

Related Manuals for Harman AKG HSC 171


Summary of Contents for Harman AKG HSC 171
- Page 1 HSC 171 HSC 271 HSD 171 HSD 271 BEDIENUNGSANLEITUNG........2 Bitte vor Inbetriebnahme des Gerätes lesen! USER INSTRUCTIONS ........18 Please read the manual before using the equipement! MODE D’EMPLOI..........34 Veuillez lire cette notice avant d’utiliser le système! ISTRUZIONI PER L’USO ........50 Prima di utilizzare l’apparecchio, leggere il manuale! MODO DE EMPLEO.........
-
Page 2: Table Of Contents
Table of Contents Table of Contents Safety and Environment ..............19 Safety ....................19 Environment ..................19 Description ..................20 Introduction ..................20 Unpacking..................20 Optional accessories................21 General Description ................22 Differences between Models ............... 22 Setting up ..................23 Plugging in the Connecting Cable ............ -
Page 3: Safety And Environment
Safety and Environment 1 Safety and Environment Safety Please make sure that the piece of equipment your headset will be connected to fulfills the safety regulations in force in your country and is fitted with a ground lead. ATTENTION Environment ... -
Page 4: Description
Description 2 Description Introduction Thank you for purchasing an AKG product. This Manual contains important instructions for setting up and operating your equipment. Please take a few minutes to read the instructions below carefully before operating the equipment. Please keep the Manual for future reference. Have fun and impress your audience! Unpacking HSC 171... -
Page 5: Optional Accessories
Description Optional accessories Select the appropriate lead set for your headset as needed: MK HS XLR 5D (article no.: 2955 H 00460) MK HS XLR 4D (article no.: 2955 H 00470) MK HS PC (article no.: 2955 H 00480) ... -
Page 6: General Description
Description General Description Each of the professional headsets HSC 171, HSC 271, HSD 171 and HSD 271 combines a pair of AKG Studio line headphones with a high quality dynamic or condenser microphone mounted on a flexible microphone arm. The frequency response of each microphone has been designed specifically for speech reproduction and ensures excellent audio quality. -
Page 7: Setting Up
Setting up 3 Setting up Plugging in the Connecting Cable Insert the 6-pin mini XLR connector (1) on the connecting cable into the matching socket (2) on the headset and push home to the point that the connector will lock with an audible click. Risk of injury! Excessive volume can cause hearing loss! Before connecting the headset to the mixing desk, ensure that the volume is set... -
Page 8: Connecting To Audio Equipment
Setting up Connecting to Audio HSC 171, HSC 271 Equipment 1/4" jack XLR connector on phantom 6-pin mini XLR connector plug power adapter (balanced) shield, shield, audio ground audio ground audio inphase, phantom audio inphase voltage audio return, phantom mute signal voltage shield, shaft... -
Page 9: Putting The Headset On
Setting up Putting the Headset on The microphone arm swivels through an arc of 270 degrees, allowing you to put the headset on with the microphone sitting in front of either the left or right corner of your mouth as required by the job at hand or dictated by available space. -
Page 10: Switching Headphones On/Off (Hsc 271, Hsd 271)
Setting up To mute the microphone, move the microphone arm up into its detented center position. The microphone will be muted as the microphone arm reaches a position higher than horizontal. Switching Headphones The headphones on models HSC 271 and HSD 271 will switch ON ON/OFF automatically as you put the headset on. -
Page 11: Operating Notes
Operating Notes 4 Operating Notes Windscreens If you use the headset in the open or need to place the microphone extremely W 44 (HSC 171/271), close to your mouth, we recommend using the supplied foam windscreen. W HSD (HSD 171/271) Slide the windscreen onto the microphone capsule. -
Page 12: Bass Cut Filter (Hsc 171, Hsc 271)
Operating Notes To prevent the microphone from picking up unwanted signals or causing Unwanted Noise, feedback (models HSC 171 and HSD 171 provide no headphone muting Feedback function), be sure to move the microphone arm into its vertical center position every time before taking the headset off. -
Page 13: Deactivating The Microphone Muting Function
Operating Notes Bass cut filter ON Bass cut filter OFF Jumper in position 1 Jumper removed Jumper in position 2 Push the pcb into the shell, replace and tighten the fixing screw (1), and screw the cable bushing (2) onto the blue strain relief (5). Deactivating the Disconnect the phantom power adapter from the mixer input. -
Page 14: Cleaning
Cleaning 5 Cleaning Cleaning Headphones, Disconnect the headphone and microphone cables from the mixer. Microphone, Connecting Use a cloth moistened (not wet!) with water to clean the surfaces of the equipment. Cable Never use caustic or scouring cleaners or cleaning agents containing alcohol or solvents since these may damage the enamel or plastic parts NOTE Remove the windscreen from the microphone. -
Page 15: Specifications
Specifications 6 Specifications HSC 171 HSC 271 Microphone Type: prepolarized condenser microphone Polar pattern: cardioid Frequency range: 20 Hz to 20 kHz Sensitivity: 25 mV/Pa Max.SPL for 1% THD: 126 dB Equivalent noise level: 22 dB(A) Signal/noise ratio (A-weighted): 72 dB Electrical impedance: 200 ohms Recommended load impedance:... - Page 16 Specifications HSD 171 HSD 271 Microphone Type: dynamic Polar pattern: hypercardioid Frequency range: 60 Hz to 17 kHz Sensitivity: 1 mV/Pa (-60 dBV) Max. SPL for 1%/3% THD: 124/128 dB Equivalent noise level: 15 dB(A) Electrical impedance: 00 ohms Recommended load impedance: 2.000 ohms Headphones Type:...
-
Page 17: Spare Parts List
Specifications Spare Parts List Spare parts are available from AKG Acoustics GmbH, Serviceabteilung, Lemböckgasse 21-25, A-1230 Wien, Austria. When ordering, be sure to state the appropriate item number for each item. Item Description Item number ECV 171 171 velour ear pad 2955Z2501 ECV 271 271 velour ear pad... - Page 18 Mikrofone · Kopfhörer · Drahtlosmikrofone · Drahtloskopfhörer · Kopfsprechgarnituren · Akustische Komponenten Microphones · Headphones · Wireless Microphones · Wireless Headphones · Headsets · Electroacoustical Components Microphones · Casques HiFi · Microphones sans fil · Casques sans fil · Micros-casques · Composants acoustiques Microfoni ·...
Need help?
Do you have a question about the AKG HSC 171 and is the answer not in the manual?
Questions and answers