Table of Contents
Advertisement
Available languages
Available languages
Quick Links
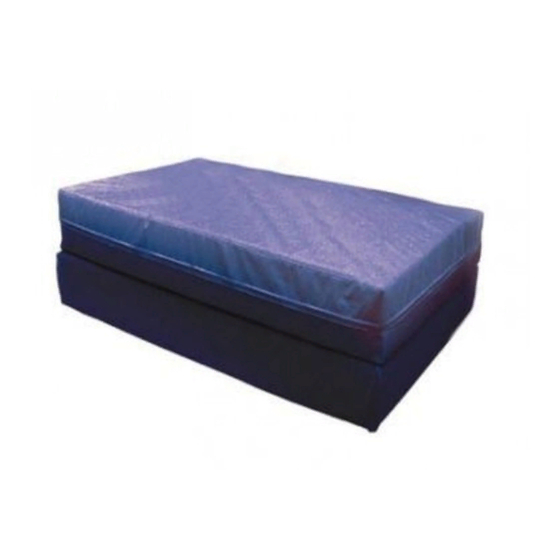
1. Product Name
Musical Water Bed by ROMPA®
2. Product Code
20192 - Double
20193 - Queen
3. Colour
Available in a range of colours. The colour of the foam wall may vary (it is likely to be
grey or white)
4. Brief Description
Fine vibrations of rhythm, tone and beat can be produced through your music system,
which connects to the bed. These are picked up through the skin as tactile stimulations.
The bed adapts to the body shape giving warmth, comfort and muffled noise.
Advertisement
Table of Contents

Subscribe to Our Youtube Channel
Related Manuals for Rompa 20192


Summary of Contents for Rompa 20192
- Page 1 1. Product Name Musical Water Bed by ROMPA® 2. Product Code 20192 - Double 20193 - Queen 3. Colour Available in a range of colours. The colour of the foam wall may vary (it is likely to be grey or white) 4.
- Page 2 5. Contents 1 x Left Hand Base complete with Speaker Grills 1 x Right Hand Base complete with Speaker Grills 1 x Amplifier 1 x Speaker to amplifier lead 1 x Radio Lead (a single plug on one end and split at the other so there are two plugs) 1 x Mains Lead 1 x Microphone 1 x Water Mattress comprising:...
-
Page 3: Detailed Description
7. Best Use Play music with high bass sounds through the Musical Water Bed for maximum vibrations. Adjust the volume as required. 8. Compatible ROMPA® Products 21986 - Hi-Fi Audio System 21850 - Portable CD player with USB Port and Audio input 12413 - Water Mattress Conditioner (4 fluid oz.) -
Page 4: Technical Specification
12. Technical Specification Double : Dimensions: 140 x 200 x 45cm Capacity: holds 450 litres Queen : Dimensions: 160 x 200 x 45cm Capacity: holds 500 litres 13. Installation Assembly – Musical components Fit the left hand base into the right hand base. Place the ‘hooks’ over the ‘cut- outs’. - Page 5 Place the bases in the required position. Fit the two Speaker to Amplifier Leads by fitting the plugs (A) to the two jack socket plates (B) in the bases of the Water Mattress. Position the amplifier adjacent to the side of the bases ...
- Page 6 The connection will look like this: Connect the Radio Lead (the connection cable with one jack plug at one end and two smaller phono plugs at the other, red and white). Insert the large jack plug into your music system headphone socket (shown in a music system below) ...
- Page 7 Please note: your music system must have a minimum capacity of 100W between both speakers in order to obtain vibration. This is a typical capacity of many music systems. Plug in the amplifier and switch on. A red LED at the front will illuminate. ...
- Page 8 Assembly - Water Mattress Components Place the PVC cover C on the floor with the reinforced sections underneath and ® the ROMPA logo on top. Unzip the cover, pull back the top section and leave open. If the bed is positioned next to a wall attach a cord (e.g.
- Page 9 reinforced section but one is provided near to each side to give you plenty of options when deciding where to place your Water Mattress. Place the base boards into the bottom of the cover C with the cable slots to the centre and the speaker grills to the top.
- Page 10 Please note The heater pad must lie within the marked area on the base of the cover. The heater pad gets very hot and nothing more than the liner must come into contact with it. Make sure the lead is not pulled over/under the pad.
- Page 11 Place the water bag on top of the liner and ensure the Mattress is in the selected final position. Note: Once filled the Mattress cannot be re-positioned. Consider access to the filler neck – you may want this to be as near as possible to the zip opening.
- Page 12 Fit cap and stopper into bag. This is essential. Push the filler neck downwards. Place top of cover A over the frame and bag and zip up completely. Useful tip: Tie a cord or piece of ribbon through the eyelet of the zip pull. This way, when the zip pull is inaccessible when the mattress is against the wall, it is possible to reach the zip pull by pulling the cord/ribbon.
-
Page 13: Care And Maintenance
It is recommended that the Musical Water Mattress is switched on at all times A bottle of conditioner (e.g. ROMPA’s 12413) should be added every six months to keep the water fresh. If this is done, there is no need to change the water inside the mattress. - Page 14 Vinyl will crack, tear and rub off if subjected to sharp objects or continual rubbing by hard objects. Remove shoes, and avoid buckles, zips or sharp/hard/pointed objects coming into contact with the surface. Check seams regularly to ensure that these are not worn or split and the interior cannot be accessed.
-
Page 15: Troubleshooting
Drainage instructions are printed on the mattress itself: DRAINAGE INSTRUCTIONS Please read these instructions before draining your mattress ALWAYS UNPLUG YOUR HEATER BEFORE DRAINING THE MATTRESS Pull up the valve, unscrew the cap and remove the plug. You have two options if you are draining the mattress yourself: a. - Page 16 The hole/tear is large and the repair kit does not effectively stop any leaks Further copies of these instructions can be downloaded at www.rompa.com We hope you find our instructions invaluable. If you have any suggestions for improving them further your comments will be greatly received –...
- Page 17 1. Nome do Produto Cama de Água Musical ROMPA® 2. Código do Produto 20192 - Casal 20193 - E xtra-grande 3. Cor Disponível em várias cores 4. Breve Descrição Fina vibrações de ritmo, tom e batida podem ser produzidas pelo a cama. Estas vibrações são depois captadas pelo corpo como estimulações tácteis.
- Page 18 5. Conteúdo 1 x Base com grelhas dos altifalantes Esquerda 1 x Base com grelhas dos altifalantes Direita 1 x Amplificador Capa exterior em PVC Resistência e termostato Paredes de espuma (2 compridas e duas curtas – cada par está unido por um lençol) Parafusos Lençol protetor Cabos...
- Page 19 8. Compatibilidade com Produtos Rompa® 21986 – Sistema de música 12413 – Condicionador para camas de água 9. Começar É aconselhável que a montagem da cama de água musical seja feita por duas pessoas. Desocupe e limpe um espaço adequado, para que a base possa ser posicionada perto de uma tomada eléctrica.
-
Page 20: Especificações Técnicas
12. Especificações Técnicas Casal : Extra-grande : Dimensões: 140 x 200 x 45cm Dimensões: 160 x 200 x 45cm Capacidade: 450 litros Capacidade: 500 litros 13. Instalação Pontos a considerar: É aconselhável ter duas pessoas para montar a cama de água. ... - Page 21 recortes Coloque os cabos do amplificador nas duas entradas que se encontram nas bases do colchão de água III. Recomendamos que sejam utilizados os cabos com ponta angular preta A nas ligações existentes na base B...
- Page 24 Ligue a ficha de chumbo diretamente no alto-falante ao amplificador liderança na tomada de LSA no amplificador. Conecte o segundo chumbo à tomada LSB no amplificador. Ligar a extremidade isolada do cabo de conta-gotas para o amplificador (menor de chumbo a partir da caixa * para o amplificador (AUX 1 ou 2); maior vantagem para AUX IN R na parte de trás do sistema de som).
- Page 25 INSTRUÇÕES DE MONTAGEM (componentes do colchão de água) Ponha a cobertura exterior C no chão com a secção reforçada para baixo e o logótipo ROMPA® no cimo. Abra a capa, puxe para trás a secção superior e deixe-a aberta. Se a cama for posicionada perto de uma parede prenda um cordel (ex: fita colorida) ao fecho para facilitar a abertura e o fecho quando esta tiver cheia.
- Page 26 uma é fornecida perto de cada lado, para lhe oferecer várias opções quando decidir onde colocar a sua cama de água. Coloque as pranchas de base no fundo da cobertura com as ranhuras dos cabos para o centro e as grelhas para altifalantes viradas para cima. Centre as pranchas dentro da cobertura deixando uma ranhura de 20mm entre as elas Coloque a prancha de base no fundo da cobertura C com as ranhuras dos cabos para o centro e as grelhas dos altifalantes viradas para cima.
- Page 27 NOTA: As espumas mais curtas podem ser ligeiramente mais pequenas do que a base. Essa pequena diferença vai ajudar a fechar o colchão, especialmente quando tiver a cama encostada na parede. VIII. Coloque a resistência J no centro da cama com a face metálica virada para cima, por cima dos lençóis.
- Page 28 Ponha o colchão de água em cima do lençol de protecção, na posição final em que este irá ficar. Nota: Depois de cheio, o colchão não pode ser reposicionado. Tenha em conta a posição do gargalo do colchão – É mais fácil se estiver mais perto da abertura da capa.
- Page 29 XII. Quando estiver meio cheio feche a torneira, adicione o líquido de tratamento e recomece o enchimento. O colchão estará cheio quando a água que se encontra no interior está nivelada com o cimo da estrutura. XIII. Aperte a bomba de extracção de ar à abertura do colchão de água e bombeie o ar em excesso, tendo sempre cuidado para também não puxar a água para fora.
- Page 30 XV. Empurre o gargalo de enchimento para baixo. XVI. Coloque o cimo da cobertura C sobre o colchão e feche completamente. DICA: Prenda uma corda no fecho. Assim, quando este estiver inacessível junto à parede, é mais fácil de abrir. Deixar o fecho num lado acessível pode encorajar os utilizadores a tentar abrir a cama.
- Page 31 NOTA: NÃO EXCEDA ESTA TEMPERATURA. Uma temperatura mais elevada tornará a cama de água desconfortavelmente quente para os utilizadores (o PVC encoraja a transpiração), e também aumenta a possibilidade de danificar a cama de água. As luzes acender-se-ão indicando que está ligado e quando a temperatura desejada é alcançada. Não se preocupe se as luzes apagarem –...
-
Page 32: Cuidados E Manutenção
14. Cuidados e Manutenção É recomendado manter a cama de água musical sempre ligada. Deve ser adicionado um frasco de condicionados a cada 6 meses para manter a água fresca. Se fizer isto, não tem necessidade de mudar a água dentro do colchão. Depois de adicionar o condicionador, deve extrair todo o ar (utilize a bomba de ar). -
Page 33: Resolução De Problemas
Se a fuga for numa costura, especialmente numa zona onde haja pressão Se o rasgue for muito grande e o remendo não conseguir parar a fuga eficazmente. CAMA DE ÁGUA MUSICAL 20192, 20193, March 2017 Copyright ROMPA® Ltd...
Need help?
Do you have a question about the 20192 and is the answer not in the manual?
Questions and answers