
Related Manuals for Giorik Steambox Evolution SEHE Series


Summary of Contents for Giorik Steambox Evolution SEHE Series
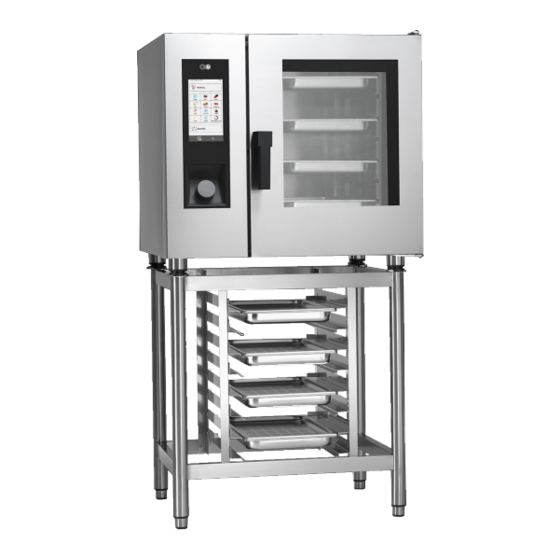
- Page 1 Steambox Evolution MOD. SEHE..- SETE..- SEHG..- SETG..ENGLISH: Installation, Operation and Maintenace Manual 10/2016...
-
Page 3: Table Of Contents
Indice 1. INSTALLATION 1.1 General and safety warnings �����������������������������������������������5 1.2 Positioning ��������������������������������������������������������������������������9 1.3 Water connection ��������������������������������������������������������������11 1.4 Connection to the drain �����������������������������������������������������11 1.5 Connection to detergent and rinse ������������������������������������12 1.6 Electric connection ������������������������������������������������������������12 1.7 Connecting the gas (gas ovens only) ��������������������������������14 1.8 Smoke exhaust ������������������������������������������������������������������15 1.9 Gas oven operating values (for gas versions only) ��������������16 1.10 Adjusting the hinges and the closing pin on the door �������������17... - Page 4 2.17b Cooking recommendations: vacuum cooking and pasteurisation ��45 2.17c Cooking recommendations: hydration of the steam �������45 3. FUNCTIONS MENU 3.1 WASHING �������������������������������������������������������������������������46 3.2 COOLING ��������������������������������������������������������������������������48 3.3 SERVICE ���������������������������������������������������������������������������48 3.3.1 CONFIGURATION ������������������������������������������������������������49 3.3.1a Date and Time ���������������������������������������������������������������49 3.3.1b Info System ������������������������������������������������������������������49 3.3.1c Language ����������������������������������������������������������������������49 3.3.1d Shower Block/Unblock��������������������������������������������������49 3.3.1e Lighting ������������������������������������������������������������������������50...
-
Page 5: Installation
1. INSTALLATION 1.1 General and safety warnings • Read this manual thoroughly or animals and disposed before installation and use of correctly in compliance of the oven, since it gives with local regulations� important instructions • Before installing regarding its safe installation, equipment, check that the use and maintenance�... - Page 6 closed environments • Children must be supervised and must be used only for to ensure they neither play this function� Any different with or use the appliance� use must therefore be • During operation, avoided as it is considered attention to the hot areas improper and dangerous�...
- Page 7 manual, will make • Failure to comply with the warranty null and void� previous warnings compromise both your • Do not place other heat safety and the safety of the sources, such as fryers equipment� or cooking plates, near to the oven�...
- Page 8 ovens conform to the Gas Directive 2009/142/EEC and have therefore been issued with a CE certificate by a notified body. • The equipment complies with essential requirements Machinery Directive 2006/42/EC� • The equipment complies with essential requirements E l e c t r o m a g n e t i c Compatibility Directive 2014/30/EC�...
-
Page 9: Positioning
1.2 Positioning The appliances have been designed to be installed indoors� They cannot be used outdoors and cannot be exposed to atmospheric agents� The place designated for the installation of the oven must have a rigid, level and horizontal surface, which must be able to safely support the weight of the device/support assembly and the load at maximum capacity�... - Page 10 If it is deemed necessary, the ovens with a wheeled structure can be fixed to the floor using the brackets supplied with the oven. Remove the two screws that fix the rear foot to the frame, position the blocking bracket as per Fig. 3 and use the screws that have just been removed to fix it to the frame Place the bracket on the floor as per Fig. 4� Trace the position of the holes on the floor and block the bracket using Fig.
-
Page 11: Water Connection
1.3 Water connection The maximum water pressure must be (600 kPa) 6 bars� If the water pressure of the mains water should be over this value, a pressure reducer must be installed upstream from the oven� The minimum water pressure for correct operation of the oven must be above 1,5 bars�... -
Page 12: Connection To Detergent And Rinse
Connection to detergent and rinse For proper startup of washing steps you need to connect the oven to the tanks of detergent and rinse aid� To connect you must insert the two pipes, white one for detergent and red one for the rinse agent in the respective canisters�... - Page 13 Gas Model SEHG061 SETG061 SEHG062 SETG062 SEHG101 SETG101 SEHG102 SETG102 SEHG201 SETG201 SEHG202 SETG202 Weight Voltage 1N 230V 1N 230V 1N 230V 1N 230V 1N 230V 1N 230V 1N 230V 1N 230V 1N 230V 1N 230V 1N 230V 1N 230V Frequency (Hz) Absorbed power (kW)
-
Page 14: Connecting The Gas (Gas Ovens Only)
1.7 Connecting the gas (gas ovens only) Nota bene: The oven is calibrated originally for operation with the type of gas specified on placing the order. The type of gas for which the oven is adjusted is given on the technical plate positioned on the appliance (Fig. -
Page 15: Smoke Exhaust
Checks to perform before installation Check on the technical plate on the left-hand side of the oven that the appliance has been tested and approved for the type of gas that the user's premises (Fig. 12, ref. A)� Check, using the data on the technical plate (Fig. 12), to make sure that the pressure reducer capacity is sufficient for the appliance supply. Do not install section reducers between the reducer and the appliance�... -
Page 16: Gas Oven Operating Values (For Gas Versions Only)
the values prescribed� When the appliance is installed under the extraction hood, check that the following indications are respected: the volume extracted must be higher than that of the flue gases generated (see current regulation); the material with which the hood filter is made must resist the temperature of the flue gases which, on exiting the conveyor, can reach 300° C;... -
Page 17: Adjusting The Hinges And The Closing Pin On The Door
Gas pressure COUNTRY G2�350 G25�1 IT - ES - IE II2H3+ P mbar 28-30 PT - GB - CH DK - FI - EE - NO II2H3B/P P mbar LV - CZ - SI - SE FR - BE II2E+3+ P mbar 28-30 II2H3+... -
Page 18: Oven Commissioning And Testing
The closing pin on the door can be adjusted in depth to eliminate any steam leakage during cooking� The pressure exerted by the door on the gasket can be adjusted by tightening the pin to increase it or loosening the pin to decrease it (Fig.16)�... - Page 19 Rif� 1 ON / OFF Venerdì 11 marzo 2016 16:20 Rif� A Manual Steamed Grilled Roasted Rif� 2 Rif� B Fried Braised Au Gratin HOME Screen Baked Low Temp� Smoked Eggs Control Rack Regenerated Rif� C Recipes Rif� 4 Rif� 3 CHAMBER LIGHTS FUNCTION button Rif�...
-
Page 20: Cooking
2. COOKING 2.1 Pictograms key Start screen MANUAL STEAMED GRILLED ROASTED FRIED and BRAISED AU GRATIN SAUTÉED BAKED (bread LOW TEMP� SMOKED and pastry EGGS RACK CONTROL RIGENERATION RECIPES FUNCIONS CHAMBER LIGHTS Recipe screen by product type Pasta and Rice Poultry Meat Fish and seafood... - Page 21 Vegetables Dessert Bread Extra Manual cooking screen Humidity discharge valve: Cooking mode: convection closed Humidity discharge valve: Cooking mode: mixed open Cooking mode: steamed Relative humidity percentage SteamTuner adjusting Mode: maintenance (steam hydration) Automatic cooling� Unlock button: allows one to Present only from phase 2.
-
Page 22: Home Screen
2.2 Home Screen Switch the oven on by pressing the "ON/OFF" key (ref.1 Fig.17), the “HOME” page will appear on the display (Fig.17)� It is possible to select whether to Friday, 30 October 2015 16:20 perform “Manual Cooking” (ref� A) or use one of the pre-set programs in the MANUAL “Cooking type”... -
Page 23: Manual Cooking Mode
2.4 Manual cooking mode From the “Home” page, by pressing on “Manual” access is given to the cooking parameters setting screen� Friday, 30 October 2015 16:20 In “Manual” mode, the oven can be set for individual cooking with one or more phases and/or a cooking program can be set and saved in the “Cooking type”... -
Page 24: Cooking Modes: Convection, Mixed And Steam
2.4a Cooking modes: convection, mixed and steam Setting the cooking temperature The cooking chamber temperature can be set by pressing button � The temperature that can be set varies depending on the selected cooking method� Setting the timer/probe/Delta-T After having selected the "Cooking Friday, 30 October 2015 16:20 Mode", it is possible to cook in a "timed"... - Page 25 Setting the relative vapour percentage Only in "Mixed" mode is it possible to set the percentage of humi- dity that the oven will maintain during cooking� With the MeteoSy- stem patented humidity control, the oven can measure the relative humidity in the cooking chamber and then add or remove humidity according to that set by the operator�...
-
Page 26: Hold Mode
2.4b HOLD Mode Friday, 30 October 2015 16:20 hold mode purpose maintaining the products at a hygienically safe temperature (> 65°C) without product core cooking undergoing changes� It is used at the end of night time cooking to maintain 70° the products cooked until the operator returns�... -
Page 27: Messagge Mode
during smoking� It is recommended to keep the latter closed so that smoke does not escape from the chamber� Smoking can be performed both hot and cold, depending on the type of product and the desired result� In the first case, set a temperature between 10°C and 30°C. The minimum temperature in the oven chamber will be similar to room temperature�... -
Page 28: Starting And Stopping Cooking
2.4e Starting and stopping cooking After having set the cooking parameters as desired, press the START button (ref. 10) to start cooking� The oven will start in pre-heat mode if this has been previously selected, or otherwise directly in cooking mode� New Phase START Pressing... -
Page 29: Creating A Cooking Program
because the first phase has no end. The hold phase is an exception, which can be set on "INFINITY" and then have one or more successive phases, which must however be started manually� E�g� in the night time cooking of roast dishes, it is preferred to brown the dish on return of the operator to the kitchen, therefore after the hold phase�... -
Page 30: Saving A Cooking Program
Stetting a cooling phase between two phases The temperature inside the oven chamber may have to be cooled between one phase and another� For example, when roasting the chamber must be cooled between the browning phase (at high temperature) and the cooking phase (at low temperature)�... - Page 31 New Phase START Delete Phase Friday, 30 October 2015 16:20 Save Programme Washing Friday, 30 October 2015 16:20 SAVE PROGRAMME SELECT GROUPS IN WHICH TO SAVE COOKING METHODS Friday, 30 October 2015 16:20 STEAMED GRILLED Save FRIED ROASTED BRAISED AU GRATIN Copy BAKED LOW TEMP�...
-
Page 32: Modifying A Cooking Program
2.8 Modifying a cooking program On delivery, the oven will already contain cooking programs� Both the pre-loaded cooking programs and the new ones created can be customised� 60° 35° To modify a program, first select the desired program from one of the 20°... -
Page 33: Selecting A Program From The Menu
Select the base program, open it and modify it by clicking on Advanced Customisation� Make the desired modifications and using the Functions menu (ref. 21) select Save and then Copy� New Phase START Select the group where to save it and Delete Phase then enter the name and press Enter to confirm. -
Page 34: The Recipetuner Interfaces
They can be viewed both from the main Friday, 30 October 2015 16:20 menu, which divides them by cooking type, and from the Recipe menu, which MANUAL divides them by product type� Cooking methods The cooking modes are displayed on STEAMED ROASTED GRILLED... -
Page 35: Rack Control Service Mode
Function of the interfaces Friday, 30 October 2015 16:20 Roast beef Cooking: allows modification of the Roasted cooking of a product� Starting from COOKING BROWNING average cooking at 60°C starting from the left the following types of cooking will be obtained: “rare”, “medium-rare”, “medium”, “medium-well done”... -
Page 36: Using The Rack Control Function
Once the Rack Control icon (ref� 22) Friday, 30 October 2015 16:20 has been clicked, access the list of pre- set programs, as for example: Breakfast, MANUAL Lunch, Multibaker, Mixed steam� Each of these programs will contain a series of dishes regarding the program�... - Page 37 be added to the previously selected box� Friday, 30 October 2015 16:20 The dish must be placed inside the oven Lunch before it is selected� Continue by adding A-La-Carte the rest of the servings that are to be Baking pan cooked�...
- Page 38 is not cooking� In this, the levels selected will not activate� Only after having pressed START (and having waited until the end of pre-heating if present), can they be activated one by one, by clicking on the time box on the right� Modifying the time or the temperature of the dish probe The cooking time or the core probe set of a dish can be modified by prolonged pressing of the same�...
-
Page 39: Creating A New Rackcontrol Program
can be introduced into the RackControl Friday, 30 October 2015 16:20 simultaneously� Lunch A-La-Carte Modifying a RackControl program If a RackControl program is to be modified, once open, operate on the sets shown in the left hand column (ref. 29)� The cooking mode, temperature, fan (excluding steam mode) and butterfly 250°... -
Page 40: Using The Easyservice Function In Rackcontrol
Using the RackControl in “Manual” mode If the program set is to be saved, RackControl can be used in manual mode� However, in this mode specific plates cannot be memorised by the generic name “Tray” is displayed for all levels� 2.13 Using the EasyService function in RackControl RackControl is designed to cook the dishes separately on distinct levels� The servings can be introduced at the same time or different times as the times expire, the oven informs which level it has reached at the end of cooking�... -
Page 41: The Scheduled Departure
all of the dishes will be cooked exactly at Friday, 30 October 2015 16:20 the same time� Lunch A-La-Carte Using RackControl simultaneously Salmon to SyncoExit Milanese During the use of EasyService, other Sautéed vegetables plates can be added in RackControl Tomato au gratin mode, which... -
Page 42: Regeneration Programs
Accessing the Regeneration function Friday, 30 October 2015 16:20 Click on the Regeneration pictogram (ref. 34) on the HOME page� MANUAL The regeneration programs list will be entered� Select the desired program from the list or press on manual to create a customised program�... -
Page 43: The Core Probe And Cooking In
icon (ref. 40) and save the program in the oven memory as explained in chapter 2�7 of this instruction manual� Modifying a program If a program that is already saved is to be modified, select it from the programs list of the regeneration menu� Make the modifications desired. At this point, use the START button to start the program or save the modifications by accessing the functions menu (ref. -
Page 44: Recommendations For Cooking: Roasting, Grilling And Frying
Cooking temperatures at the core Food Cooking T° core Red meat rare 50°C medium 60°C well done 70°C Veal, pork and white meat in general well done 70°C Chicken well done 80-90° C Boiled and braised meat well done 80-90°C Fish well done 67-72°C... -
Page 45: Cooking Recommendations: Vacuum Cooking And Pasteurisation
The uniformity of cooking could be modified according to the type of product introduced� In this case, it is recommended to try and lower the temperature and operate (increasing or decreasing) the fan rotation speed� Using correct trays increases the general cooking uniformity of the oven� Always select the tray with the minimum depth possible for the product to be cooked�... -
Page 46: Functions Menu
Pastry such as: steamed sponge cake, muffins, 120°C VERY DRY crème caramel� 75°C Fish and shellfish in general 80°C STANDARD Steamed chicken meat 95°C MOIST Red meat and boiled meats in general VERY 115°C Vegetables whole and in pieces, pasta and rice MOIST 3. FUNCTIONS Menu The FUNCTIONS menu, accessible from the "HOME" screen allows access to the main routine maintenance functions and oven use settings�... - Page 47 The “rinse only” mode has variable Friday, 30 October 2015 16:20 duration depending on the use or not of WASH rinse aid: SELECT PARAMETERS duration of approx. 10 mins without Wash Types rinse aid, HARD WASH duration of approx. 20 minutes with rinse aid.
-
Page 48: Cooling
Washing interruption You can stop the wash cycle by holding down the knob and entering the password 222. If the detergent has already been loaded, the rinse phase followed by the drying phase start up; if, instead, it has not yet been loaded, the cycle shuts down immediately�... -
Page 49: Configuration
3.3.1 CONFIGURATION Friday, 30 October 2015 16:20 A series of parameter configurations can be performed from this menu: Configuration Clean Boiler 3.3.1a Date and Time The Date and Time function allows Display LOG these parameters set, updating them to the current date and Advanced services time in order to use the oven�... -
Page 50: Lighting
3.3.1e Lighting The Lighting function allows the brightness of the display to the adjusted� Select this function, adjust the brightness using the knob on the control panel and press "Save"� 3.3.2 BOILER CLEANING Friday, 30 October 2015 16:20 The boiler is descaled automatically CLEAN BOILER during washing�... -
Page 51: Advanced Services
3.3.4 ADVANCED SERVICES This function is protected by password and allows access to the configuration, setting and inspection functions reserved for the qualified technical staff. 3.3.5 DATE IMPORT / EXPORT connecting Friday 30 October 2015 16:20 USB, under IMPORT/EXPORT the control panel ( f i g . 1 9 ) , a n d Export entering the screen Export recipes book... -
Page 52: Humidity Discharge
Wait until the cooking chamber is cold� Remove the tray-trolley stops � Remove the removable residue manually and put the detachable parts in the dishwasher� You should use warm soapy water to clean the cooking chamber� All the surfaces must be thoroughly rinsed afterwards, ensuring that there is no detergent residue�... -
Page 53: Checks That Can Only Be Performed By An Authorized Technician
at least once a year or even more frequently whenever the oven operates in environments in which there is a high concentration of flours or similar substances. In all cases, the filter must be replaced when it is consumed or damaged; it must be requested from the supplier as a spare part� 5. CHECKS THAT CAN ONLY BE PERFORMED BY AN AUTHORIZED TECHNICIAN Cut off the power supply before proceeding with any adjustment or intervention. -
Page 54: Spare Parts Management
5.5 SPARE PARTS MANAGEMENT The parts should be replaced exclusively by an authorized service centre� To identify the codes of spare parts, contact a service representative� Once the parts required have been identified, the after-sales service will send a written order to the manufacturer, specifying clearly the model of the device, its serial number, the voltage and frequency of power supply, and also the code and a description of the parts concerned. - Page 55 Name Description Actions SOLUTION E06 - Chamber thermal breaker Cooking cycle If the problem persists, contact Chamber block; automatic the support centre� safety reset� switch E07 - PWM board error Cooking cycle Contact the support centre� (communication timeout block� or problems on fan speed) E08 - Second PWM board error Cooking cycle...
-
Page 56: Disposal Of The Appliance
7. DISPOSAL OF THE APPLIANCE At the end of its life span, the appliance must be dispo- sed of in accordance with legal obligations� The symbol in Fig. 24 specifies that, at the end of its life span, the appliance must be disposed of according to the indications of the European Parliament Directive 2012/19/EU dated 04/06/2012�... - Page 60 THE MANUFACTURER SHALL NOT BE HELD LIABLE FOR ANY DAMAGES DUE TO IMPROPER INSTALLATION, TAMPERING WITH THE APPLIANCE, MISUSE, IMPROPER MAINTENANCE, FAILURE TO COMPLY WITH APPLICABLE STANDARDS AND INTENDED USE� THE MANUFACTURER RESERVES THE RIGHT TO MAKE CHANGES TO THE PRODUCT AT ANY TIME IT DEEMS NECESSARY OR USEFUL�...
Need help?
Do you have a question about the Steambox Evolution SEHE Series and is the answer not in the manual?
Questions and answers