
Subscribe to Our Youtube Channel
Related Manuals for Healthstream HS1.0EL


Summary of Contents for Healthstream HS1.0EL
- Page 1 If you have any questions , please contact The Fitness Generation, +61 (03) 9765 9999. Free call number 1300 796 636 www. healthstreamfitness.com.au...
- Page 2 SAFETY HINTS WARNING - Read all instructions before using this appliance. Do not operate machine on deeply padded, plush or shag carpet. Damage to both carpet and machine may result. machine Keep children away from the machine. There are obvious pinch points and other machine caution areas that can cause harm.
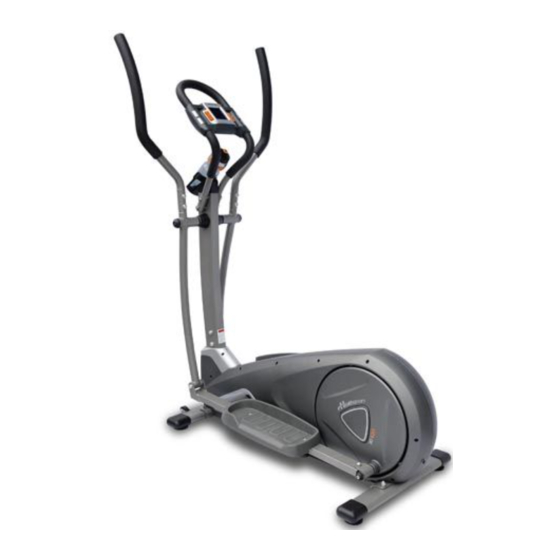
- Page 3 COMPUTER HANDLE BAR WATER BOTTLE CENTRAL TUBE REAR STABILIZER PEDAL KNOB FRONT STABILIZER If you have any questions , please contact The Fitness Generation, +61 (03) 9765 9999. Free call number 1300 796 636 www. healthstreamfitness.com.au...
- Page 4 ASSEMBLY PACK CHECK LIST FIGURE 1 N1 SCREW N2 NUT N3 WASHER N4 SPRING FIGURE 3 N1 SCREW N2 NUT N3 WASHER N4 SPRING FIGURE 4 N3 WASHER N4 SPRING N5 WASHER N7 SHAFT FIGURE 5 N6 SCREW N8 SCREW N10 KNOB N12 WASHER FIGURE 7...
- Page 5 FIGURE_1 ASSEMBLY FOR REAR STABILIZER Step1.Secure the rear stabilizer(C) to the main frame(A), using two screw(N1), two spring washer(N4),washer(N3) and two nut(N2). HOW TO KEEP THE MACHINE STABLE ** After you finish assembly (Figure 1 & Figure 3), if the machine can't be stand stable, you can use adjusted-end(C1) to adjust the machine.
- Page 6 FIGURE_3 ASSEMBLY FOR FRONT STABILIZER Step1.Secure the front stabilizer(B) to the main frame(A) using two screw(N1),two spring washer(N4), washer(N3) and two nut(N2). FIGURE_4 ASSEMBLY CONNECTING TUBE AND PEDAL TUBE Step1.Fix the connecting tube(A5) and pedal tube(A7) with screw(N5) ,spring washer(N4), washer(N3) and screw(N7). Step2.The right assembly is same as the left side.
- Page 7 FIGURE_5 ASSEMBLY FOR PEDAL Step1.Assemble the pedal(H1) by screw(N8),washer(N12),spring washer(N6) and star knob nut(N10). there are 3 sections adjusting for the moving track. Step2. The right assembly is same as the left side. FIGURE_6 ASSEMBLY FOR COMPUTER AND HANDLE BAR Step1.
- Page 8 FIGURE_7 ASSEMBLY FOR WATER BOTTLE HOUSING AND WATER BOTTLE Step 1. Assemble the water bottle housing(J) with central supporting tube(D) and use screw(N11) to fix. Put the water bottle(M) on the water bottle housing(J). FIGURE_8 ASSEMBLY FOR HANDLE BAR Step 1 Unfix the screw(A11),spring washer(A10) and washer(A9) of handle bar(A6). Step 2.
- Page 9 N4 N3 A4-1 A58-1 A55 A56 A2-1 If you have any questions , please contact The Fitness Generation, +61 (03) 9765 9999. Free call number 1300 796 636 www. healthstreamfitness.com.au...
- Page 10 DESCRIPTION Q’TY DESCRIPTION Q’TY MAIN FRAME WASHER SENSOR WIRE SPRING SENSOR WIRE WASHER A2-1 MOTOR SCREW WASHER SCREW WHEEL AXLE SPRING WASHER A4-1 SWING TUBE(L) DRIVING BELT DRIVING WHEEL SWING TUBE(R) MAGNETIC PEDAL TUBE(L) BEARING PEDAL TUBE(R) WASHER FLYWHEEL SPRING WASHER TENSION CABLE SCREW SPRING...
- Page 11 DESCRIPTION Q’TY DESCRIPTION Q’TY END CAP AXLE SUPPORT SCREW PEDAL(L) REAR STABILIZER PEDAL(R) KNOB WATER BOTTLE HOUSING(L) END CAP WATER BOTTLE HOUSING(R) CENTRAL SUPPORT TUBE BUSHING SCREW SMALL HANDLEBAR BRACKET BUSHING COVER WATER BOTTLE SIDE HANDLEBAR(L) SCREW SIDE HANDLEBAR(R) FOAM GRIP END CAP WASHER SPRING WASHER...
- Page 12 FIGURE_9 HOW TO MOVE THE MACHINE The frone stabilizer has built-in transport wheels. To move the machine, stand at the front and lift it up until the weight of the machine is transferred to the transport wheels. You can now easily move the machine to a new location. If you have any questions , please contact The Fitness Generation, +61 (03) 9765 9999.
- Page 13 BUTTON FUNCTION: MODE/ENTER In stop mode, the mode is to confirm all exercise data setting, and enter into program. RESET In stop mode, press the button back to main menu. START/STOP To start or stop exercise. RECOVERY To test hear rate recovery status. To select training mode and adjust function value up.
- Page 14 3. In main menu, first exercise program MANUAL will flash, user may press UP and DOWN button to select MANUAL PROGRAM (12 profiles) USER PROGRAM HRC WATT. (Drawing H~K) 4. Quick Start and Manual : Before exercise in Manual mode, user my set up TIME, DISTANCE, CALORIES and PULSE target. After power on, user may press START/STOP button to start exercise in MANUAL immediately without any setting.
Need help?
Do you have a question about the HS1.0EL and is the answer not in the manual?
Questions and answers