Table of Contents
Advertisement
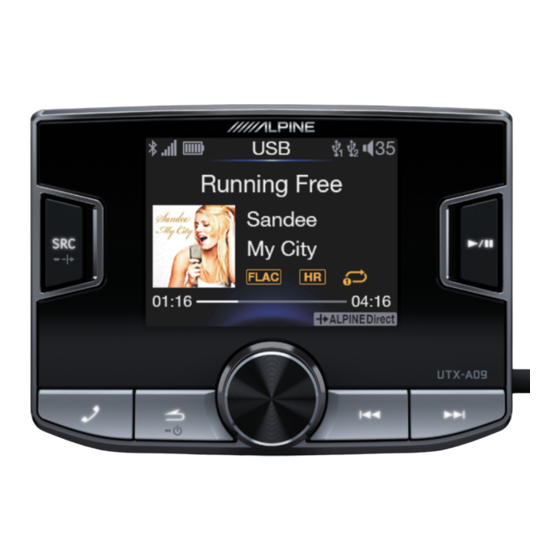
High-end Sound Quality Upgraded Audio Media Player
ALPINE ELECTRONICS MARKETING, INC.
1-7, Yukigaya-Otsukamachi, Ota-ku,
Tokyo 145-0067, JAPAN
Phone: 03-5499-4531
ALPINE ELECTRONICS OF AMERICA, INC.
19145 Gramercy Place, Torrance,
California 90501, U.S.A.
Phone 1-800-ALPINE-1 (1-800-257-4631)
ALPINE ELECTRONICS OF AUSTRALIA PTY.
LTD.
161-165 Princes Highway, Hallam
Victoria 3803, Australia
Phone 03-8787-1200
UTX-A09
Please read before using this equipment.
ALPINE ELECTRONICS GmbH
Wilhelm-Wagenfeld-Str. 1-3, 80807 München, Germany
Phone 089-32 42 640
ALPINE ELECTRONICS OF U.K. LTD.
Fletchamstead Highway, Coventry CV4 9TW, U.K.
www.alpine.co.uk
ALPINE ELECTRONICS FRANCE S.A.R.L.
184 allée des Erables
CS 52016 - Villepinte
95 945 Roissy Charles CDG Cedex
Phone: + 33(0)1 48 63 89 89
Alpine House
France
ALPINE ITALIA S.p.A.
Viale Cristoforo Colombo 8,
20090 Trezzano Sul Naviglio (MI), Italy
Phone +39 02 484781
ALPINE ELECTRONICS DE ESPAÑA, S.A.
Portal de Gamarra 36, Pabellón, 32
01013 Vitoria (Alava)-APDO 133, Spain
Phone 945-283588
ALPINE ELECTRONICS (China) Co., Ltd.
R2-4F, CHINA MERCHANTS TOWER
NO. 116, JIANGUO STREET,
CHAOYANG DISTRICT
BEIJING 100022, CHINA
Advertisement
Table of Contents

Related Manuals for Alpine UTX-A09


Summary of Contents for Alpine UTX-A09
- Page 1 Tokyo 145-0067, JAPAN Phone 089-32 42 640 20090 Trezzano Sul Naviglio (MI), Italy Phone: 03-5499-4531 Phone +39 02 484781 ALPINE ELECTRONICS OF AMERICA, INC. ALPINE ELECTRONICS OF U.K. LTD. ALPINE ELECTRONICS DE ESPAÑA, S.A. 19145 Gramercy Place, Torrance, Alpine House Portal de Gamarra 36, Pabellón, 32...
- Page 2 This symbol means important instructions. Failure to heed them can result in injury or material property damage. HALT USE IMMEDIATELY IF A PROBLEM APPEARS. Failure to do so may cause personal injury or damage to the product. Return it to your authorized Alpine dealer or the nearest Alpine Service Centre for repairing.
-
Page 3: Product Cleaning
Be sure the temperature inside the vehicle is between +60°C and -10°C before turning your unit on. Maintenance If you have problems, do not attempt to repair the unit yourself. Return it to your Alpine dealer or the nearest Alpine Service Center for servicing. Installation Location Make sure this unit will not be installed in a location subjected to: •... -
Page 4: Getting Started
• The BLUETOOTH word mark and logos are registered trademarks owned by the Bluetooth SIG, Inc. and any use of such marks by Alpine Electronics, Inc. is under license. • The products with High-Resolution nark comply with the benchmark defined by Japan Audio Society. The use of High-Resolution mark has been authorized by Japan Audio Society. -
Page 5: Turning Power On And Off
Setting AUX Mix Mode High-quality audio processing chip has been present in this unit. You may choose ALPINE Direct Mode to appreciate the high-quality signal source of this unit or choose AUX Mix Mode to listen to the voice of original vehicle equipment (e.g. navigator) while appreciating the signal source of this unit. -
Page 6: Adjusting Volume
Aim the controller transmitter at the remote sensor. Connect it to the controller connector You may control the unit by using the steering wheel controls through the optional Alpine steering wheel controller connector. For details, please contact your authorized Alpine dealer. -
Page 7: Presetting Stations Manually
Presetting Stations Manually Press the Rotary encoder in FM or AM mode. Turn the Rotary encoder to select any preset number (1-12 or 1-6) in the memory list. Press and hold the Rotary encoder for at least 2 seconds. The current radio station is stored into the preset button selected by you. Note •... -
Page 8: Repeat Play
Connecting USB Memory / MTP (Optional) If you connect a USB memory / MTP device to the unit, it can play MP3/WMA/AAC/WAV/FLAC/APE files. Playback Press to select USB mode. Touch to select the desired track (file). Pressing and holding will fast backward/fast forward track continuously. To pause playback, press Pressing again will resume playback. - Page 9 Turn the Rotary encoder to select a desired song, artist or album, and press the Rotary encoder. If searching by song is chosen at this step, it will directly play the selected song. You do not need to perform the next step. If two USB memories are connected at the same time, the system will automatically merge the song categories in both USB memories.
- Page 10 raw AAC files (using the “.aac” extension). There are many different versions of the AAC format. Confirm that the software being used conforms to the acceptable formats listed above. It’s possible that the format is unplayable even though the extension is valid. Playback of AAC files encoded by iTunes is supported.
-
Page 11: Sound Setting
* The folder No./Folder Name will not be displayed if the folder is empty or has no valid file. Terminology Bit rate This is the “sound” compression rate specified for encoding. The higher the bit rate, the higher the sound quality, but also the larger the files. Sampling rate This value shows how many times per second the data is sampled (recorded). -
Page 12: Audio Setup
*5 Adjustment cannot be performed when the Crossover Setup is set as active 3-way mode. For more information, refer to “About the Crossover”. *6 Adjustment cannot be performed when the unit is set as ALPINE Direct mode. For more information, refer to “Setting AUX Mix Mode”. - Page 13 Adjusting the Band Setting contents: Band 1/Band 2/Band 3/Band 4/Band 5/Band 6/Band 7/Band 8/Band 9 Adjusting the Frequency Adjustable frequency bands: 20 Hz to 20 kHz Band 1: 20 Hz ~ 100 Hz (63 Hz) Band 2: 63 Hz ~ 315 Hz (125 Hz) Band 3: 125 Hz ~ 500 Hz (250 Hz) Band 4:...
- Page 14 Setting the Subwoofer Level When the subwoofer is on, you can adjust the subwoofer output level. Setting item: SUBW LEVEL Setting contents: 0~+15 (Initial setting: 0) Adjusting the Speaker Output Balance between Left and Right Setting item: LEFT/RIGHT BALANCE Setting contents: L15~0~R15 (Initial setting: 0) Adjusting the Speaker Output Balance between Front and Rear Setting item: FRONT/REAR BALANCE Setting contents: F15~0~R15 (Initial setting: 0)
- Page 15 Active 3-way mode MID LOW MID HIGH HIGH *1 Adjustment cannot be performed when the SUBWOOFER mode is off. Turn the Rotary encoder to select the desired setting item, and then press the Rotary encoder. Setting the Cut-off Frequency Active 2-way mode Setting contents: 20 / 25 / 31.5 / 40 / 50 / 63 / 80 (Initial setting) / 100 / 125 /160 / 200 (Hz) Active 3-way mode...
-
Page 16: About Time Correction
Storing and Recalling Sound Setting Parameters Storing Sound Setting Parameters After this unit is purchased from and installed by an authorized Alpine dealer, the technical professionals will debug and store relevant sound setting parameters in Dealer Setup. In addition to Dealer Setup, if you have your own preferences, you can select Customized Setup after setting the sound parameters such as EQ PRESETS, BASS, TREBLE, and CROSSOVER SETUP. - Page 17 Example 1: Front Left Seat Adjust the time correction level of the front left speaker to a high value and the rear right to zero or a low value. The sound is not balanced because the distance between the listening position and the various speakers is different. The difference in distance between the front left speaker and the rear right speaker is 1.75 m (68-7/8").
- Page 18 23.8 27.2 10.7 30.6 12.1 34.0 13.4 37.4 14.7 40.8 16.1 44.2 17.4 47.6 18.8 51.0 20.1 54.4 21.4 57.8 22.8 61.2 24.1 64.6 25.5 68.0 26.8 71.4 28.1 74.8 29.5 78.2 30.8 81.6 32.2 85.0 33.5 88.4 34.8 91.8 36.2 95.2 37.5...
- Page 19 Delay Number Time Difference (ms) Distance (cm) Distance (inch) 129.2 50.9 132.6 52.3 136.0 53.6 139.4 54.9 142.8 56.3 146.2 57.6 149.6 59.0 153.0 60.3 156.4 61.6 159.8 63.0 163.2 64.3 166.6 65.7 170.0 67.0 173.4 68.3 176.8 69.7 180.2 71.0 183.6 72.4...
-
Page 20: About The Crossover
Adjustments should be made according to the reproduction characteristics of the speakers. Depending on the speakers, a passive network may not be necessary. If you are unsure about this point, please consult your authorized Alpine dealer. Active 2-way mode... - Page 21 Adjustment should be made according to the recommended crossover frequency of the connected speakers. Determine the recommended crossover frequency of the speakers. Adjusting to a frequency range outside that recommended may cause damage to the speakers. For the recommended crossover frequencies of Alpine speakers, refer to the respective Owner’s Manual.
-
Page 22: Crossover Setup
We are not responsible for damage or malfunction of speakers caused by using the crossover outside the recommended value. Crossover Setup In the Normal mode, press and hold successively for at least 2 seconds. Turn the Rotary encoder to select active 3-way mode or active 2-way mode. Press to determine the selected content by following the screen prompts. -
Page 23: Applying Alpine Tuneit App
This unit’s sound tuning is programmable from a connected Smartphone. It is also possible to download specific parameters for certain vehicles from Alpine TuneIt database stored in the Cloud. Using the Alpine TuneIt App, customized parameters can also be uploaded for others to use. -
Page 24: Normal Setting
Setting contents: Level 1 (Initial setting) / Level 2 / Level 3 Alpine TuneIt Connecting Device Set TuneIt Connecting Device to USB when an iPhone is connected, or set it to Bluetooth when an Android smart phone is paired. Setting item: TuneIt Connecting Device... -
Page 25: Bt Hands Free Calling
When an iPhone is connected the rear USB terminal of UTX-A09, use Alpine TuneIt App to adjust the unit’s sound tuning parameters. Bluetooth: Set this item when an Android smart phone is paired with the unit through Bluetooth. Then, you can use Alpine TuneIt App to adjust the unit’s sound tuning parameters. -
Page 26: Before Using Bluetooth Function
Depending on the connected Bluetooth compatible device(s), the function may differ. Also refer to the Owner’s Manual of the connected device(s). • When you search for this unit using the Bluetooth compatible phone, the unit name is displayed as “UTX-A09”. Before Using Bluetooth Function Before using the Bluetooth function, the following settings need to be made. -
Page 27: Setting The Bluetooth Connection
*1 The items are not displayed during a phone call. *2 The items are not displayed when the Bluetooth Setup is set to OFF. Refer to “Setting the Bluetooth Connection”. Turn the Rotary encoder to change the settings. Press to disable the Setup mode. Note •... -
Page 28: Hands-Free Phone Control
All features, functionality, and other product specifications, as well as the information contained in the Owner’s Manual are based upon the latest available information and are believed to be accurate at the time of printing. Alpine reserves the right to change or modify any information or specifications without notice. Answering a Call Incoming calls are announced by the received call ring tone and a displayed message. -
Page 29: Hanging Up The Telephone
The call starts. Note • While calling, the source sound on the unit is muted. After calling, playback will resume. Hanging up the Telephone Press The call finishes. Calling Call History is recorded for the last dialed/received/missed calls (20 records for each). There are various ways of making calls based on the “Calling”. -
Page 30: Bluetooth Audio Operation
Up to 1,000 names (at most 4 telephone numbers for each name) are downloadable from a mobile phone. Dial a call by selecting a person from the phone book list. Setting item: Phone Book Note • Before using the above-mentioned functions, be sure to enable the Phone Book Synchronization function. •... -
Page 31: Selecting The Desired Song
Selecting the Desired Song Press Return the beginning of the song being played back. Press and hold to skip backward. Press Skip forward to the next song. Press and hold to skip forward. Note • This operation may differ depending on the connected device. •... -
Page 32: Connecting An Ipod/Iphone
iPod/iPhone (optional) Connecting an iPod/iPhone An iPod/iPhone can be connected to the rear USB terminal of this unit by using the Interface cable for iPod (supplied with iPod/iPhone). Notes • Only the rear USB terminal supports iPod/iPhone connection. Do not connect an iPod/iPhone to the front USB terminal of this unit. •... -
Page 33: In Case Of Difficulty
If you encounter a problem, please turn the power off, then on again. If the unit is still not functioning normally, please review the items in the following checklist. This guide will help you isolate the problem if the unit is at fault. Otherwise, make sure the rest of your system is properly connected or consult your authorized Alpine dealer. - Page 34 Basic No function or display. • Vehicle’s ignition is off. – If connected following instructions, the unit will not operate with the vehicle’s ignition off. • Improper power lead (Red) and battery lead (Yellow) connections. – Check power lead and battery lead connections. •...
- Page 35 Over-current • The USB device encounters abnormal current. – You can solve the problem by turning ACC off/on. Unsupported • A USB device not supported by this unit is connected. – Connect a USB device supported by this unit. • An iPod/iPhone not supported by this unit is connected to any USB terminal. –...
-
Page 36: Indication For Ipod Mode
– You can only play back non-copy-protected files. Indication for iPod Mode No iPod • The iPod/iPhone is not connected. – Make sure the iPod/iPhone is correctly connected (refer to “Connections”). Make sure the cable is not bent excessively. No Song •... -
Page 37: Specifications
No Song • There are no songs in the Bluetooth device. – Download songs to the Bluetooth device. Specifications FM TUNER SECTION Tuning Range 87.5~108.0 MHz Mono Usable Sensitivity 15.8 dBf (1.7 µV/75 ohms S/N: 30 dB) Signal-to-Noise Ratio 60 dB AM TUNER SECTION Tuning Range 531~1602 kHz... -
Page 38: Installation And Connections
Installation and Connections Before installing or connecting this unit, please read the instructions below and refer to “Operating Instructions” to guarantee correct use. WARNING MAKE THE CORRECT CONNECTIONS. Failure to make the proper connections may result in fire or product damage. USE ONLY IN CARS WITH A 12 VOLT NEGATIVE GROUND. - Page 39 PRECAUTIONS • Be sure to disconnect the cable from the (-) battery post before installing your UTX-A09. This will reduce any chance of damage to the unit in case of a short circuit. • Be sure to connect the color coded leads according to the diagram. Incorrect connections may result in malfunction of the unit or damage to the vehicle's electrical system.
-
Page 40: Installation
Do not block the radiation device of the unit to avoid influencing the ventilation. Doing so may cause heat to build up inside and may result in fire. For details about the unit installation, please consult your authorized Alpine dealer. Installing the Controller Preparation Check the accessories. - Page 41 Used for bracket (reverse mold) installation or direct installation on the dashboard. ⑤ Light shield (used for installation with bracket) Precautions concerning the Controller Installation Adjust the direction of controller cable. As shown in the above diagram, there are 3 directions optional for backside controller cable. Select a proper cable direction to fit your vehicle.
- Page 42 Using the Controller Bracket for Installation Set the installation location. • Check whether the supplied cable is long enough. Install this unit at a location free from water. Do not install the unit or wiring at the locations that hinder driving or airbag. •...
-
Page 43: Ipod/Iphone Connection (Sold Separately)
Using the Tray for Reverse Mold Installation About reverse mold installation, consult your authorized Alpine dealer. Here, only how to install the controller onto the tray is introduced. Affix the Adhesive tape ④ onto the inner surface of the controller tray. Be careful to align the holes on the Adhesive tape with the location pillars on the tray. -
Page 44: Mounting The Microphone
• Confirm whether the connected iPod/iPhone is supported by the unit if there is no sound output from it or the iPod/iPhone is not recognized after connection. • Do not leave an iPod/iPhone inside the vehicle for a prolonged period. Heat and moisture may damage the iPod/iPhone, so that it may not be able to play. - Page 45 Note • Press the button for prolonged time to select AUX Mix mode if you do not want to miss the vehicle’s navigation prompts while enjoying the music played by this unit. For details, refer to “Setting the AUX Mix Mode”.
- Page 46 Connections...
- Page 47 ⑰ Front Left (+) Speaker Output Lead (White) ⑱ Controller Connection Terminal ⑲ Steering Remote Control Interface Connector To steering remote control interface box. For details, contact your Alpine dealer. ⑳ MIC Input Connector To Microphone. ㉑ Rear USB Terminal...
- Page 48 • Connect the ground lead securely to a bare metal spot (remove any paint, dirt or grease if necessary) of the car chassis. • If you add an optional noise suppressor, connect it as far away from the unit as possible. Your Alpine dealer carries various noise suppressors, contact them for further information.
Need help?
Do you have a question about the UTX-A09 and is the answer not in the manual?
Questions and answers