Table of Contents
Advertisement
INDEX
CHAPTER 1- SUMMARY OF USER'S COMMANDS ....................................... 3
CHAPTER 2 - ABOUT THE KEYPAD .............................................................. 5
RP208KCL (LCD K
CHAPTER 3 - SYSTEM FUNCTION AND OPERATION ................................. 9
-
/
CHAPTER 4 SYSTEM INSTALL EXPLAIN .................................................... 22
4.1
PREPARATION BEFORE INSTALLATION
4.2 FQA
OF INSTALLATION AND SOLUTION
4.3 M
AIN BROAD LAYOUT AND PORT FUNCTION DESCRIPTION
4.5 C
ONNECT THE
4.6 C
ONNECT THE
`RP248CN User's and Installer's Manual
)
-
(
)
T
L
ELEPHONE
INE
S
B
TANDBY
ATTERY
:
........................ 5
.............................. 5
........................... 9
.................................. 9
............... 9
..................... 10
............. 10
............................. 14
......................... 14
............................ 14
......................... 15
.............................. 16
................. 16
........................ 16
......................... 18
................................. 18
.................... 18
........................ 18
........................... 19
.................... 19
................ 22
................ 22
..... 23
...................... 24
...................... 26
Advertisement
Table of Contents

Related Manuals for Roiscok RP208KCL


Summary of Contents for Roiscok RP208KCL
-
Page 1: Table Of Contents
INDEX CHAPTER 1- SUMMARY OF USER’S COMMANDS ........3 CHAPTER 2 – ABOUT THE KEYPAD .............. 5 RP208KCL (LCD K ......5 EYPAD ......5 EYS AND INDICATORS CHAPTER 3 – SYSTEM FUNCTION AND OPERATION ......... 9 3.1 D ......9... - Page 2 6.5.7 Report Code ..49 6.5.8 Add Keypad and Module . . 50 6.6 C ......50 OMMUNICATION ROTOCOLS 6.7 RP248CN C ID R ... 51 ONTROL ANEL ONTACT EPORTING ODES ROISCOK’S WARRANT ................. 53 `RP248CN User’s and Installer’s Manual...
-
Page 3: Chapter 1- Summary Of User's Commands
CHAPTER 1- SUMMARY of USER’S COMMANDS The Summary of User’s Commands offers installers and users a quick and convenient way to operate control panel. All can be done under the status of disarm and so it doesn’t need to entry programming statue. - Page 4 Trouble List LCD Display Trouble MAIN:LOW BATT Battery Power low MAIN:AC TROUBLE AC lost MAIN:BELL LOOP Siren trouble FLASE CODE P=1 Code error KITCHEN:FIR Fire Loop in trouble KP=03 COMM TRBL The bus in trouble, such as No.3 keypad is in trouble SYSTEM CLCOK Clock not set PS= 1 LOW BAT...
-
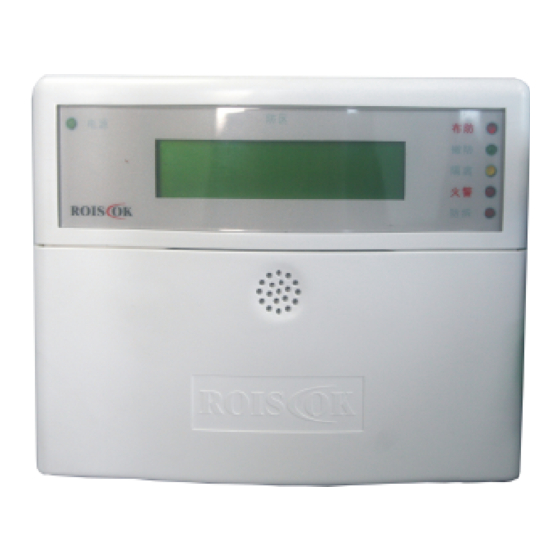
Page 5: Chapter 2 - About The Keypad
The keypads display system status by its LED indicators and LCD display. Through its keys, can arm and disarm the system, bypass intrusion zones, report emergencies, stop the siren, stop calling follow-me number, checking the trouble, program the system etc. Fig.1 Layout of the RP208KCL Keys Instruction 1:Power LED 7:Tamper LED... - Page 6 Key [STAY] is for quick stay arming and code stay arming. Any zone or zones can be set as interior zone(s) or external zone(s). When arming by [STAY], the external zone(s) will be armed while leaves the interior zone(s) disarmed. Under the disarmed status, depress [*] to entry user’s function mode for setting code, clock, on/off the buzzer and so on.
- Page 7 5. BYPASS LED When BYPASS LED on, one or more zone(s) has/have been bypassed or under stay statue. 6. FIRE LED The LED flicker rapidly when fired. 7. TEMPER LED When the detector(s), the keypad or the Expansion Module is /are tempered or destroyed, a Tamper Code report will be sent and the LED will be flicker.
- Page 8 13. Confirm Key [#] The Key [#] used for confirm and save input data. Moving Key [←][→] Key [←] is used to choice the anterior command, or moving the cursor to left. Key [→] is used to choice the next command, or moving the cursor to right. 15.
-
Page 9: Chapter 3 - System Function And Operation
CHAPTER 3 – SYSTEM FUNCTION AND OPERATION 3.1 Depress Keys Audible When depress any keys, keypad will emit a brief deep. After any successful operation the keypad will emit a long beep to confirm. And after error operation, the keypad will emit three brief beep warn. ... -
Page 10: Digit Keys And Functions Keys
Program as the following: The Key [←] and [→] are used move the cursor to the left or to the right. Key in the character as the above form, such as depress [1] twice to entry the “A” and depress [2] four times to entry the “P”. - Page 11 Bypass zone(s). Operation and testing. Setting the follow-me numbers Turn on the buzzer. Turn off the buzzer. Check the system. Display memory. Display troubles. Setting the system clock time and date. ...
- Page 12 Depress [*][5] into access function Mode, then depress [*] to find the menu ” ACCESS CODE ” by [←][→], depress [#] to confirm and into the menu. Key in the master code (default: 1234 ), then depress [#] to confirm. To choice a menu by [←][→].
- Page 13 Modifying/Setting the master Code step Operation In disarm status, depress[*][5][#] to entry into function status Input 4 digit master code then depress [#] to confirm, such as [1][2][3][4][#] Input new 4 digit code then depress [#] to confirm, such as [5][6][7][8][#] If successful, the keypad will emit a confirming tone “Beep:”.
-
Page 14: Set Date And Time
3.6 Set date and time Set date: [*]+[6]+[1]+[MASTER CODE]+[MM][DD][YY] Month, Date and Year should be two digits. Set time: [*]+[6]+[2]+[MASTER CODE]+[HH][MM] Use a 24-Hour format. Hour and Minute should be two digits. For example, if you want to entry 16:28, August 18, 2006, operate as: [*]+[6]+[1]+[MASTER CODE]+[08][18][06] [*]+[6]+[2]+[MASTER CODE]+[16] [28] 3.7 Set follow-me numbers... -
Page 15: Disarm And Disarm Sound
Steps Description Check the disarm LED indicator. If on, the system can be armed; if off, system can’t be armed, check whether every partition is ready or there is any trouble. Quick arm: Quick arm: depress [ARM] Quick stay arm: depress [STAY] If operate incorrectly, the keypad will emit three short beeps, try it again please When arming, the keypad will beep until the end of exit delay time. -
Page 16: Duress Code Disarm
On/Off Audible Kiss-off It is defaulted that RP248CN will give a long beep to remind disarm successfully. To on/off the buzzer, press [*] + [4] + [master code] + [7] or [8]. 3.10 Duress code disarm If you are ever coerced to disarm your system, you can comply with the intruder’s wishes while sending a silent, duress alarm, to the Central Station. - Page 17 In normal, input [*][3][4] and user/master code and depress [#] to confirm. LCD will display as follows, the character of second line means zone number, zone description and zone status: ZONE STATUS:0:01: 01) FRONT DOOR:G → For armed system: G-means zone is in good arm status, B-means zone is in bypass status; For disarmed system: R-means zone is in ready status, B-means zone is in bypass status, N- means zone is in unready status Key [←] [→] are used to check each zone status.
-
Page 18: Exit A Error Operation
When operate incorrectly, depress [*] to cancel and then operate again. 3.14 Keypad alarm RP208CN Keypad (RP208KCL) provides 3 groups emergency keys, which can be pushed at anytime, and the police, fire department, or medical assistance is required. Emergency Alarm is defaulted as silence alarm. -
Page 19: Zones Characters
MAIN:AC TROUBLE AC lost MAIN:BELL LOOP Siren trouble FLASE CODE P=1 Code error KITCHEN:FIR Fire Loop in trouble KP=03 COMM TRBL The bus in trouble, such as No.3 keypad is in trouble SYSTEM CLCOK Clock not set PS= 1 LOW BAT Power Module Battery low. - Page 20 code. Master code can be use through any one of the keypads. Public zone This zone can divide to one or more partitions at the same time, disarm or/and arm public zone: 1. Disarm public zone: any partition is disarmed, public zone will be disarmed; 2.
Need help?
Do you have a question about the RP208KCL and is the answer not in the manual?
Questions and answers