
Subscribe to Our Youtube Channel
Related Manuals for Ravas RCS Hy-Q-52


Summary of Contents for Ravas RCS Hy-Q-52
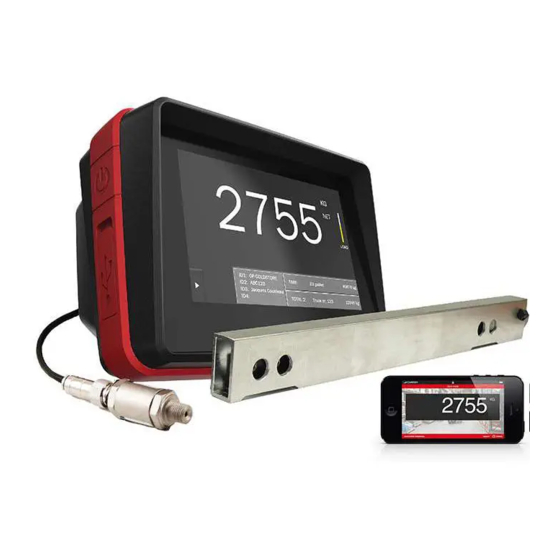
- Page 1 USER MANUAL RCS Hy-Q-52 Rev. 20191023 Printing/Typographical errors and model changes reserved. USER MANUAL – RCS Hy-Q-52...
- Page 2 We would like to inform you about the fact that this RAVAS product is 100% recyclable on the bases that the parts are processed and disposed off in the right manner.
-
Page 3: Table Of Contents
Table of Contents 1. Introduction 2. Warning & Safety measures 3. Use of the RCS Hy-Q-52 3.1 Use (accurate weighing) 3.2 Operating key functions of indicator 3.3 Display Functions 3.4 Start-up: set zero first 3.4.1 Check zero 3.4.2 Set zero: manually 3.5 Perform a weighing cycle... -
Page 4: Introduction
Always do things in the correct order. This manual should be kept in a safe and dry place. In case of damage or loss the user may request a new copy of the manual from RAVAS. 2. Warning & Safety measures When using the RCS HY-Q-52, please carefully observe the instructions and guidelines contained in this manual. -
Page 5: Use Of The Rcs Hy
3. Use of the RCS Hy-Q-52 3.1 Use (accurate weighing) To get accurate weight readings always pay attention to the following! min -10°C max 40°C 15°F 105°F USER MANUAL – RCS Hy-Q-52... -
Page 6: Operating Key Functions Of Indicator
Operate the forks with a more constant speed Zero out of range Make sure the truck is unloaded while setting a new zero Out of level Make sure the mast is vertical Bad calibration No calibration has been saved USER MANUAL – RCS Hy-Q-52... -
Page 7: Start-Up: Set Zero First
3. The yellow arrow guides you in operating the 4. Lift empty forks with a constant speed until truck to complete a correct weighing. the blinking yellow arrow at the display shows you to lower the forks. Go up Go down USER MANUAL – RCS Hy-Q-52... - Page 8 7. The indicator shows the weight after 8. If the weight is red, the weighing was not completing your zero check. correct. If the indicator does not show zero, a new zero must be set manually. See: 3.4.2 USER MANUAL – RCS Hy-Q-52...
-
Page 9: Set Zero: Manually
If the measuring. arrow turns in the opposite direction lower the forks until the weight appears in the display. For detailed explanation see: 3.4.1 step 3-6 USER MANUAL – RCS Hy-Q-52... -
Page 10: Error Messages
Move forks slower through weighing trajectory. 3. Error: Try constant speed 4. Error: Out of level Try to move the forks faster with a constant - Level switch is optional: speed through weighing trajectory. make sure the mast is vertical. USER MANUAL – RCS Hy-Q-52... - Page 11 The zero offset is too high to perform a zero The truck has been overloaded according to its correction. Check if the forks are empty. load diagram. 9. Bad calibration. There is no calibration saved. USER MANUAL – RCS Hy-Q-52...
-
Page 12: Load Indication Bar
Yellow = safe Orange = approaching the maximum capacity of the truck Red = overload Warning! This bar is only an indication of the load. This indicates a safe loading. This indicates approaching overload. This indicates overload. USER MANUAL – RCS Hy-Q-52... -
Page 13: Net / Tare / Gross Weight
4. The system is now ready to perform a weighing cycle. The ‘NET’ sign shows that the tare weight is activated. Pick up the load and perform a weighing cycle. See: 3.5 Perform a weighing cycle ‘Tare:860kg’ shows the tare weight. 1000 USER MANUAL – RCS Hy-Q-52... -
Page 14: Net Weighing: Manual Tare (Preset Tare)
2. A pop-up screen appears. Select the desired Preset Tare field. 3. If the preset tare you select is empty you have 4. Name your Preset Tare value. to enter the tare value. Confirm with ‘Enter’. USER MANUAL – RCS Hy-Q-52... - Page 15 6. Perform a weighing cycle. activated. ‘Tare: Container wood 240kg’ shows the tare weight. See: 3.5 Perform a weighing cycle. 1000 7. The indicator now shows the NET weight. NOTE: To reset the tare see: 4.3 Reset tare. USER MANUAL – RCS Hy-Q-52...
-
Page 16: Net Weighing: Reset Tare
3. The indicator will switch back to the weighing mode and is ready for the next weighing. NET sign is gone. In the tare field ‘None’ is active. 4.3.2 option 2 1. Press the preset tare button. 2. Select > none. USER MANUAL – RCS Hy-Q-52... -
Page 17: Id Entry
5. ID entry 5.1 Activate and edit ID code The RCS Hy-Q-52 allows you to enter up to 4 ID codes which will be visible on the printout or when used with data communication. 1. Press the ID field. 2. On the left side of the button you can activate the ID fields (only the active ID fields will be visible on the printout). - Page 18 6. Press the back button to return to the weighing preferred ID and press the back button. mode. 7. Your active ID codes will now be showed on the print out, or when transferrring data. USER MANUAL – RCS Hy-Q-52...
-
Page 19: Adding, Print & Clear Memory
3. The weight has been added to the selected total memory. 6.2 Change active total memory 1. If preferred you can select a total memory, 2. Select your preferred total memory. press the total field. USER MANUAL – RCS Hy-Q-52... -
Page 20: Print Single Weight
4. The weight is printed and the indicator is ready for the next weighing. 6.4 Send WiFi 1. First a new weight must be on the display. 2. The indicator is sending. Press the WiFi button. USER MANUAL – RCS Hy-Q-52... -
Page 21: Edit, Clear And Print Total Registers
2. Select the total memory you want to print or clear and press the settings symbol. 3. Press Print Total to get a total print out of the 4. The indicator is printing your receipt. selected total register. USER MANUAL – RCS Hy-Q-52... - Page 22 8. Change the name of the selected total register. information in this total register. Or go back if you don’t wish to change the register. 9. You can edit the name, press ‘Enter’ if you are finished. USER MANUAL – RCS Hy-Q-52...
-
Page 23: Data Storage On Usb Stick
USB stick is green, data are being transferred. Once the image is white again, the transfer has finished. When the USB stick is connected to your PC, the data file is displayed. USER MANUAL – RCS Hy-Q-52... -
Page 24: Alibi Memory
UID Code / Alibi number > this is a 10 digit number which is generated by the indicator itself. On/ Off switch Switch on the indicator by pressing the On/Off button. Press the arrow down 2 times to scroll through the buttons. USER MANUAL – RCS Hy-Q-52... - Page 25 Press the settings symbol. Now press ‘User Menu’. Press ‘Service Help’. Press ‘Alibi’. The information of the last weighing is shown on the display. By pressing ‘Prev’ you switch to weighings performed prior to the last weighing. USER MANUAL – RCS Hy-Q-52...
-
Page 26: User Settings
1. Press arrow down. 2. Press on the arrow up/down. 3. Press the user settings symbol. 4. Select ‘User menu’. 5. Select the parameter you wish to change. 6. For this example we change the time. USER MANUAL – RCS Hy-Q-52... -
Page 27: Changing The Accuracy Mode
Weighing mode on ‘easy’. Note: This may cause the system to be slightly less accurate. If a higher accuracy is needed you can set it to ‘Accurate’. 2. Select ‘Accurate’ and press ‘Enter’. 1. Press ‘Weighing mode’. USER MANUAL – RCS Hy-Q-52... -
Page 28: Changing The Operation Language
7.3 Changing the operation language 1. Select ‘Display settings’. 2. Select ‘Language’. 3. Select the preferred language and press ‘Enter’. USER MANUAL – RCS Hy-Q-52... -
Page 29: Changing Button Functions & Positions
3. Select Function. 4. Check the boxes of the actions you want to happen after pressing the ‘Printer’ button. 5. When you are finished, press ‘Enter’. The changes will be saved. USER MANUAL – RCS Hy-Q-52... -
Page 30: Changing Button Position
4. Select the row and button position on which the printer is installed after delivery. The default the printer button should be located. Save location is None. changes by pressing ‘Enter’. 5. The printer button is now present on button row 1. USER MANUAL – RCS Hy-Q-52... -
Page 31: Show/Hide Buttons On Startup
4. Uncheck the box to hide the buttons on meaning the buttons are always present. start-up. Press ‘Enter’ to save the changes. 5. The weight will be displayed bigger without the buttons active. If you need the buttons, press ‘>’. USER MANUAL – RCS Hy-Q-52... -
Page 32: Ravas Weightsapp
Date and time are automatically generated. If your Android device has an integrated barcode scanner, you can use it to enter product IDs. The RAVAS WeightsApp can be downloaded for free from Google Play and the Apple Store. For instructions for the use of the RAVAS WeightsApp see www.ravas.com.
Need help?
Do you have a question about the RCS Hy-Q-52 and is the answer not in the manual?
Questions and answers