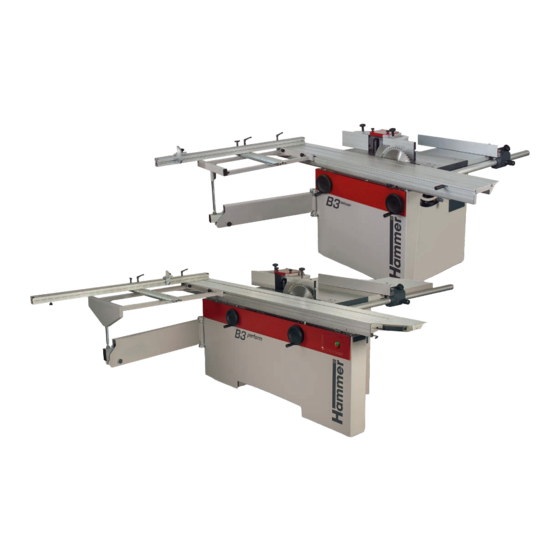

Related Manuals for Hammer B3


Summary of Contents for Hammer B3
- Page 1 User Manual Translation Saw-Spindle Moulder B3 / B3 e-classic Keep this manual handy and in good condition for continual reference!
- Page 2 Saw-Spindle Moulder B3 / B3 e-classic Note: Year of construction The machine number of this machine will be printed on this operating manual The final two digits of the machine number show the year of construction of this machine e.g. XXX.XX.XXX.17 -> Year of manufacture 2017 Attention! The machine must be inspected immediately upon arrival.
-
Page 3: Table Of Contents
Saw-Spindle Moulder B3 / B3 e-classic Table of Contents Table of Contents 1 General ........................7 2 Safety ........................10 3 Declaration of Conformity ..................14 4 Specifications ......................15 5 Setting up the machine ....................22 6 Transport, packaging and storage ................30... - Page 4 Saw-Spindle Moulder B3 / B3 e-classic Table of Contents 7 Setup and installation ....................33 8 Making adjustments and preparations Saw unit ............38 9 Making adjustments and preparations Spindle moulder unit ........54...
- Page 5 Saw-Spindle Moulder B3 / B3 e-classic Table of Contents 10 Operation Saw unit ....................67 11 Operation - Spindle moulder unit ................76 12 Maintenance ......................83...
- Page 6 Saw-Spindle Moulder B3 / B3 e-classic Table of Contents 13 Faults ........................90...
-
Page 7: General
Saw-Spindle Moulder B3 / B3 e-classic General 1 General 1.1 Legend Warning: Risk of injury or death! Warning: Danger – electric current! Attention: Risk of material damage! Attention: 1.2 Information about the manual... -
Page 8: Liability And Warranty
Saw-Spindle Moulder B3 / B3 e-classic General 1.3 Liability and warranty 1.4 Copyright 1.5 Warranty notice 1.6 Spare parts Attention: Non genuine, counterfeit or faulty spare parts may result in damage, cause malfunction or com- plete breakdown of the machine. - Page 9 Saw-Spindle Moulder B3 / B3 e-classic General 1.7 Disposal Attention: Used electrical materials, electronic components, lubricants and other auxiliary substances must be treated as hazardous waste and may only be disposed of by specialised, licensed firms.
-
Page 10: Safety
Saw-Spindle Moulder B3 / B3 e-classic Safety 2 Safety 2.1 Intended use Attention: Any use outside the machine‘s intended purpose shall be considered improper and is therefore not permitted. All claims regarding damage resulting from improper use that are made against the manufacturer and its authorized representatives shall be rejected. - Page 11 Saw-Spindle Moulder B3 / B3 e-classic Safety 2.4 Responsibilities of the owner operator 2.5 What is required of personnel 2.6 Work safety...
-
Page 12: Personal Safety
Saw-Spindle Moulder B3 / B3 e-classic Safety 2.7 Personal safety Persons with long hair who are not wearing a hairnet are not permitted to work on or with the machine. It is prohibited to wear gloves while working on or with the machine. -
Page 13: Other Risks
Saw-Spindle Moulder B3 / B3 e-classic Safety 2.9 Other risks Warning: Even if the safety measures are followed, there are still certain residual risks that must be consid- ered when working on the machine: General safety rules: depending on the equipment: •... -
Page 14: Declaration Of Conformity
Saw-Spindle Moulder B3 / B3 e-classic Declaration of Conformity 3 Declaration of Conformity FELDER KG KR-FELDER-STR.1 A-6060 Hall in Tirol Kreissäge-Fräsmaschine Saw-Spindle Moulder Hammer B3 basic/winner/perform/e-classic 2006/42/EG 2006/95/EG 2004/108/EG EN 940 DGUV Test Prüf- und Zertifizierungsstelle Holz Fachbereich Holz und Metall Vollmoellerstraße 11... -
Page 15: Specifications
Saw-Spindle Moulder B3 / B3 e-classic Specifications 4 Specifications 4.1 Dimensions and weight 4.1.1 B3 basic/B3 e-classic Fig. 4-1: Dimensions B3 basic/e-classic Machine Standard Option A1 + B + A2 Machine including packaging The transport width measures under 800 mm. This makes it possible to transport the machine through doorways. - Page 16 Saw-Spindle Moulder B3 / B3 e-classic Specifications 4.1.2 B3 winner (comfort) Fig. 4-2: Dimensions B3 Winner (Comfort) Standard Option Standard Option B3 winner B3 winner B3 winner B3 winner Machine comfort comfort A1 + B + A2 Machine including packaging...
- Page 17 Saw-Spindle Moulder B3 / B3 e-classic Specifications 4.1.3 B3 Perform Fig. 4-3: Dimensions B3 Perform Standard Option B3 perform B3 perform Machine A1 + B + A2 Machine including packaging...
- Page 18 Saw-Spindle Moulder B3 / B3 e-classic Specifications 4.2 Operation and storage conditions 4.3 Electrical connection 4.4 Drive motor Circular saw drive / Spindle moulder unit Alternating-current motor Three-phase current motor B3 Perform B3 Winner/Winner comfort B3 e-classic Antriebsmotor Vorritzeinheit (Option)
-
Page 19: Noise Emission
Saw-Spindle Moulder B3 / B3 e-classic Specifications 4.5 Particle emission 4.6 Noise emission Note: To keep the noise emission as low as possible, always use sharpened tools and operate the machine at the correct speed. Ear protection must always be worn; however, such protection cannot be considered a substitute for properly sharpened tools. - Page 20 4.7.1 Saw unit Ø 58 ± 0,1mm Ø 8,5 ±0,3 mm Note: We recommend that only original Hammer tools are used (Hammer catalogue). Ø 30 mm The maximum cutting height is directly related to the following factors: Sketches: Saw blade Bore with lug Ø...
- Page 21 Saw-Spindle Moulder B3 / B3 e-classic Specifications 4.7.2 Spindle moulder unit Spindle moulder unit 4.8 Chip extraction Saw unit aggregate Saw guard Standard = / Option = Spindle moulder unit Spindle moulder fence Slotting guard Standard = / Option =...
-
Page 22: Setting Up The Machine
Saw-Spindle Moulder B3 / B3 e-classic Setting up the machine 5 Setting up the machine 5.1 Overview & " Fig. 5-1: Overview basic/winner " Fig. 5-2: Overview perform " &... - Page 23 Saw-Spindle Moulder B3 / B3 e-classic Setting up the machine 5.2 Accessories Table extension 400 mm Fig. 5-3: Table extension Table extension with support leg Fig. 5-4: Table extension with foot support Outrigger 1100 Fig. 5-5: Outrigger...
- Page 24 Saw-Spindle Moulder B3 / B3 e-classic Setting up the machine Extension with workpiece roller for the outrigger Fig. 5-6: Extension with workpiece roller for the outrigger Clamp set Fig. 5-7: Clamp set Eccentric clamp Fig. 5-8: Eccentric clamp...
- Page 25 Saw-Spindle Moulder B3 / B3 e-classic Setting up the machine Rolling carriage with lifting bar " " Fig. 5-9: Rolling carriage with 4 rollers Tenoning cover Fig. 5-10: Tenoning cover Safety bar guides Fig. 5-11: Safety bar guides...
- Page 26 Saw-Spindle Moulder B3 / B3 e-classic Setting up the machine Digital clock System handwheel " " Fig. 5-12: Digital clock EURO Curve moulding guard (ring guard) Fig. 5-13: EURO Curve moulding guard (ring guard) Workpiece feed guide for the EURO Curve moulding guard...
-
Page 27: Data Plate
Saw-Spindle Moulder B3 / B3 e-classic Setting up the machine 5.3 Data plate KR-FELDER-STR.1 A - 6060 HALL in Tirol AUSTRIA Tel.: 0043 (0)5223 / 45 0 90 Tax.: 0043 (0)5223 / 45 0 99 info@hammer.at / www.hammer.at TYPE : Baujahr / year of constr. - Page 28 Saw-Spindle Moulder B3 / B3 e-classic Setting up the machine 5.4.2 Spindle moulder guard attachment " " Fig. 5-17: Spindle moulder guard attachment 5.4.3 Circular saw guard Fig. 5-18: Circular saw guard Warning! Risk of injury! When working with the circular saw blade, the machine‘s saw blade should be...
- Page 29 Saw-Spindle Moulder B3 / B3 e-classic Setting up the machine 5.5 Operation and display elements " & Fig. 5-19: Operation and display elements " &...
-
Page 30: Transport, Packaging And Storage
Saw-Spindle Moulder B3 / B3 e-classic Transport, packaging and storage 6 Transport, packaging and storage 6.1 Safety instructions Warning! There is a risk of injury due to falling parts while transporting, loading or unloading the machine. Attention! Risk of material damage: The machine can be damaged or destroyed if it is subjected to improper handling during transport. - Page 31 Saw-Spindle Moulder B3 / B3 e-classic Transport, packaging and storage 6.2.1 Transport with a pallet jack Attention! Heavy dead weights can easily cause an injury Depending on the equipment, two or three additional helpers may be necessary when unloading. "...
-
Page 32: Transport Inspection
Saw-Spindle Moulder B3 / B3 e-classic Transport, packaging and storage 6.3 Transport inspection 6.4 Packaging Attention! Dispose of the packaging materials in an environmentally friendly way and always in accordance with local waste disposal regulations. If applicable, contract a recycling firm to dispose of the packaging materials. -
Page 33: Setup And Installation
Saw-Spindle Moulder B3 / B3 e-classic Setup and installation 7 Setup and installation 7.1 Safety instructions Warning! Risk of injury: Improper assembly and installation can lead to serious bodily injury or equipment damage. For this reason this work may only be carried out by authorised, trained personnel who are familiar with the operation of the machine and in strict observance of all safety instructions. - Page 34 Saw-Spindle Moulder B3 / B3 e-classic Setup and installation 7.3 Positioning and levelling the machine " " Fig. 7-2: Positioning the machine Fig. 7-3: Floor mounting Fig. 7-4: Transport locking device Sliding table...
- Page 35 Saw-Spindle Moulder B3 / B3 e-classic Setup and installation 7.4 Assembly 7.4.1 Sliding table Attention: Due to transport reasons, the sliding table, depending on its length, may be packaged separately. Two to three additional helpers, depending on the cutting length, are required to install the machine.
- Page 36 Saw-Spindle Moulder B3 / B3 e-classic Setup and installation 7.4.4 Circular saw guard ! " § & Fig. 7-7: Circular saw guard " § & 7.5 Chip extraction Warning! Risk of injury! Vacuum hose must be flame-resistant and must conduct electricity! Be sure to use only genuine Hammer vacuum hoses! Note: As a rule, all units must be vacuumed during use.
- Page 37 (for a three-phase alternating current motor, CEE). Note: Do not open the machine‘s switch box unless you have the express consent of the Hammer service de- partment Violating this stipulation shall render the right to make claims under the warranty null and void.
-
Page 38: Making Adjustments And Preparations Saw Unit
Saw-Spindle Moulder B3 / B3 e-classic Making adjustments and preparations 8 Making adjustments and preparations Saw unit 8.1 Safety instructions Warning! Risk of injury: Improper adjustment and working setup can lead to serious bodily injury or material damage. For this reason this work may only be carried out by authorised, trained personnel who are familiar with the operation of the machine and in strict observance of all safety instructions. - Page 39 Saw-Spindle Moulder B3 / B3 e-classic Making adjustments and preparations 8.3 Crosscut fence on the sliding table ! " & " Fig. 8-2: Assembling the crosscut fence & Adjusting: ! " # " Fig. 8-3: Adjusting the end stop 8.4 Crosscut fence on the outrigger "...
- Page 40 Saw-Spindle Moulder B3 / B3 e-classic Making adjustments and preparations Pivoting: & " & Fig. 8-5: Adjusting the crosscut fence " & 90°-Position: 8.5 Cross stop " " Fig. 8-6: Cross stop...
- Page 41 8.7.1 Sliding B3 e-classic: " Fig. 8-8: Parallel cutting fence B3 e-classic " Attention! When using a table extension, the distance between the upper edge of the track and the upper edge of the table has to measure 17 mm exactly so that the position of the table extension is level with that...
- Page 42 Saw-Spindle Moulder B3 / B3 e-classic Making adjustments and preparations B3 winner: ! " Fig. 8-9: Parallel cutting fence B3 winner " 8.7.2 Fine adjustment K3 e-classic (Option): " " Fig. 8-10: Parallel cutting fence K3 basic/K3 e-classic Attention: Always carry out the adjustment towards the circular saw to be able to compensate for the thread clearance.
- Page 43 B3 / B3 e-classic Making adjustments and preparations 8.7.3 Modifying the guide " " Fig. 8-12: Parallel cutting fence 8.7.4 Removal B3 e-classic: " " Fig. 8-13: Parallel cutting fence B3 e-classic B3 winner: " " Fig. 8-14: Parallel cutting fence B3 winner...
- Page 44 Saw-Spindle Moulder B3 / B3 e-classic Making adjustments and preparations 8.7.5 Swinging out Attention: Swinging out is only possible with the K3 winner circular saw. " " Fig. 8-15: Parallel cutting fence 8.8 Setting the height/angle of cut The cutting height is set with the handwheel: "...
- Page 45 Saw-Spindle Moulder B3 / B3 e-classic Making adjustments and preparations 8.9 Tool change 8.9.1 Preparing to change tooling " " Fig. 8-17: Preparing to change tooling 8.9.2 Preparing the machine to operate " " Fig. 8-18: Prepare the machine to operate...
- Page 46 Be wary of sharp edges to avoid cutting yourself, in particular when changing the tooling. Note: We recommend that only original Hammer tools are used (Hammer catalogue). For precision cutting, we recommend you to use the smallest saw blade possible.
- Page 47 Saw-Spindle Moulder B3 / B3 e-classic Making adjustments and preparations 8.10.1 Loosening/adjusting the splitter Warning! Risk of injury! The splitter has to be adapted to the thickness of the saw blade. The thickness of the splitter has to have a value between that of the saw blade body and the width of the sawtooth.
- Page 48 Saw-Spindle Moulder B3 / B3 e-classic Making adjustments and preparations 8.10.3 Removing the splitter Attention! A splitter is required when working with circular saw blades! Operation without the splitter is only allowed if dado tooling is used! " " Fig. 8-22: Removing the splitter 8.10.4 Circular saw guard...
- Page 49 Be wary of sharp edges to avoid cutting yourself, in particular when changing the tooling. Note: We recommend that only original Hammer tools are used (Hammer catalogue). For authorised grooving tools see the Technical data section. Attention! Risk of material damage! Do not adjust the 90°...
- Page 50 Saw-Spindle Moulder B3 / B3 e-classic Making adjustments and preparations 8.11.2 Chucking the grooving tools Attention! A spacer ring has to be placed onto the saw blade arbor if using grooving tools with a width measuring less than 10 mm! Fig.
- Page 51 Saw-Spindle Moulder B3 / B3 e-classic Making adjustments and preparations 8.11.3 Unchucking the grooving tools – Retool to a saw blade operation " Fig. 8-29: Wooden loading board & & Fig. 8-30: Remove grooving tooling " Fig. 8-31: Rear flange/Loading board...
- Page 52 Be wary of sharp edges to avoid cutting yourself, in particular when changing the tooling. Note: We recommend that only original Hammer tools are used (Hammer catalogue). For authorised scoring tools see the Technical data section. 8.12.1 Assembling the scoring blade Assembling the scoring blade &...
- Page 53 Saw-Spindle Moulder B3 / B3 e-classic Making adjustments and preparations 8.12.2 Adjusting the scoring unit Warning! Risk of injury! Adjustments to the machine or tool replacement may only be conducted once the machine has stopped. " " Fig. 8-33: Adjusting the scoring blade "...
-
Page 54: Making Adjustments And Preparations Spindle Moulder Unit
Saw-Spindle Moulder B3 / B3 e-classic Making adjustments and preparations 9 Making adjustments and preparations Spindle moulder unit 9.1 Safety instructions Warning! Risk of injury! Improper adjustment and setup work can lead to serious physical injury or material damage. For this reason, this work may only be carried out by authorised, trained personnel who are familiar with how to operate the machine and in strict observance of all safety instructions. - Page 55 Saw-Spindle Moulder B3 / B3 e-classic Making adjustments and preparations 9.3 Adjusting the moulding height/moulding angle Warning! Risk of injury! Adjustments to the machine or tool replacement may only be conducted once the machine has stopped. Note: Important accessories - Digital clock...
- Page 56 Saw-Spindle Moulder B3 / B3 e-classic Making adjustments and preparations 9.4 Spindle moulder fence 9.4.1 Spindle moulder fence „220“ (Standard) (2) (3) " " " Fig. 9-3: Spindle moulder fence 9.4.2 Multi-adjustment system for the moulder fence (Option) " "...
- Page 57 Saw-Spindle Moulder B3 / B3 e-classic Making adjustments and preparations " Fig. 9-5: Fine adjustment for outer tool diameter " 9.4.3 Spindle moulder guard attachment " " Fig. 9-6: Spindle moulder guard...
- Page 58 Saw-Spindle Moulder B3 / B3 e-classic Making adjustments and preparations 9.4.4 Safety bar guides Note: It is recommended to use safety bar guides (Accessories) when moulding profiles. An end-to-end work- piece support (increased safety) and better results are achieved. Assembly/Disassembling: Sliding: "...
- Page 59 Saw-Spindle Moulder B3 / B3 e-classic Making adjustments and preparations 9.6 Spindle shaft quick change system (Option - Only possible as initial equipment) Warning! Risk of injury! / Risk of material damage! The spindle shaft quick change system is a safety machine component!
- Page 60 Saw-Spindle Moulder B3 / B3 e-classic Making adjustments and preparations 9.7 Change the tool 9.7.1 Prepare to change tooling Warning! Risk of injury! Adjustments to the machine or tool replacement may only be conducted once the machine has stopped. Switch the machine off at the main switch.
- Page 61 Saw-Spindle Moulder B3 / B3 e-classic Making adjustments and preparations 9.7.2 Mounting/removing/changing the spindle moulder tool Warning! Risk of injury! The spindle moulder tooling is razor sharp. Handle the spindle moulder tooling care- fully. especially when turning the spindle moulder tooling manually.
- Page 62 Saw-Spindle Moulder B3 / B3 e-classic Making adjustments and preparations 9.7.3 Prepare the machine to operate Note: The moulding tool only operates if the break switch, inside the machine frame, is not actuated! The sliding cover and spindle door are closed and the safety system is in the centre position "...
- Page 63 Saw-Spindle Moulder B3 / B3 e-classic Making adjustments and preparations 9.8 Establishing/setting the speed/Set 9.8.1 Establishing/setting the speed Warning! Risk of injury! / Risk of material damage! Do not exceed the limit value obtained from the diagram! " v [m/s] v<40 m/s...
-
Page 64: Making Adjustments And Preparations
Saw-Spindle Moulder B3 / B3 e-classic Making adjustments and preparations 9.8.2 Maximum spindle resiliance (rotation limit) ø 30 / 35 mm ø 25 / 25,4 mm ø 31,75 mm ø mm ø mm ø 40 mm ø 50 mm ø mm ø... - Page 65 Saw-Spindle Moulder B3 / B3 e-classic Making adjustments and preparations 9.8.3 Adjusting the moulder spindle rotation Warning! Risk of injury! The machine has to be switched off when carrying out any work on the machine! Switch the machine off at the main switch.
- Page 66 Saw-Spindle Moulder B3 / B3 e-classic Making adjustments and preparations 9.8.4 Sink the spindle moulder Attention! Risk of material damage! Ensure that the tool turns freely. Ø 170 ø 170 ø 100 max 65 mm Fig. 9-22: Moulding height Ø 100 ø...
-
Page 67: Operation Saw Unit
Saw-Spindle Moulder B3 / B3 e-classic Operation 10 Operation Saw unit 10.1 Safety instructions Warning: Risk of injury: Improper operation may lead to severe bodily injury or material damage. For this reason this work may only be carried out by authorised, trained personnel who are familiar with the operati- on of the machine and in strict observance of all safety instructions. - Page 68 Saw-Spindle Moulder B3 / B3 e-classic Operation 10.2 Switching on the machine / Switching off the machine / Emergency-stop Warning! Risk of injury due to insufficient preparation! It is only permitted to switch on the machine if, for the work at hand, the required preconditions are fulfilled and any preliminary work is completed.
- Page 69 Saw-Spindle Moulder B3 / B3 e-classic Operation 10.3 Moving the sliding table Fig. 10-4: Moving the sliding table 10.4 Working techniques 10.4.1 Work stations Warning! Risk of injury! Danger from ejected tools or workpiece parts AP1: AP2: AP3: Fig. 10-5: Work stations/Work positions...
- Page 70 Saw-Spindle Moulder B3 / B3 e-classic Operation 10.5 Working techniques 10.5.1 Permitted working techniques Only the following working techniques are allowed with Only the following work techniques are allowed using the circular saw: the circular saw without a scoring unit: 10.5.2 Prohibited working techniques...
- Page 71 Saw-Spindle Moulder B3 / B3 e-classic Operation 10.5.4 Longitudinal cut Fig. 10-6: Longitudinal cut 10.5.5 Trimming " § Fig. 10-7: Trimming shoe " §...
- Page 72 Saw-Spindle Moulder B3 / B3 e-classic Operation 10.5.6 Cutting wedges Fig. 10-8: Cutting wedges...
- Page 73 Saw-Spindle Moulder B3 / B3 e-classic Operation 10.5.7 Cutting with an outrigger Warning! Risk of injury: An outrigger with an outrigger table is required when working with heavy work- pieces and especially when working with large panels! Rough cut: Fig. 10-9: Cutting with an outrigger Precise cut: Fig.
- Page 74 Saw-Spindle Moulder B3 / B3 e-classic Operation 10.5.9 Groove cuts Warning: Risk of injury! Fig. 10-12: Groove cuts Fig. 10-13: Groove cuts Note: Tenoning hood and moulding guard „Sawboy“ see: Tools and Accessories catalogue " " Fig. 10-14: Auxiliary fence...
- Page 75 Saw-Spindle Moulder B3 / B3 e-classic Operation 10.5.10 Working with grooving tools Warning: Risk of injury! Fig. 10-15: Working with grooving tools Fig. 10-16: Working with grooving tools Note: Tenoning hood and moulding guard „Sawboy“ see: Tools and Accessories catalogue "...
-
Page 76: Operation - Spindle Moulder Unit
Saw-Spindle Moulder B3 / B3 e-classic Operation 11 Operation - Spindle moulder unit 11.1 Safety instructions Warning! Risk of injury! Improper operation may lead to severe physical injury or material damage. For this reason, this work may only be carried out by authorised, trained personnel who are familiar with how to operate the machine and in strict observance of all safety instructions. - Page 77 Saw-Spindle Moulder B3 / B3 e-classic Operation 11.2 Switching on the machine / Switching off the machine / Emergency-stop Warning! Risk of injury due to insufficient preparation! It is only permitted to switch on the machine if, for the work at hand, the required preconditions are fulfilled and any preliminary work is completed.
- Page 78 Saw-Spindle Moulder B3 / B3 e-classic Operation 11.3 Working techniques 11.3.1 Work stations Warning! Risk of injury! Danger from ejected tools or workpiece parts Fig. 11-4: Work stations/Work positions 11.3.2 Authorised working techniques The following working techniques are allowed with the moulder unit: 11.3.3 Prohibited working techniques...
- Page 79 Saw-Spindle Moulder B3 / B3 e-classic Operation 11.3.4 General procedures for authorised working techniques 11.3.5 Moulding long sides and profiles Warning! Risk of injury! Only mould profiles if using safety guides! Use a push stick or push block at the end of the workpiece.
- Page 80 Saw-Spindle Moulder B3 / B3 e-classic Operation 11.3.6 Slot and tenon moulding Note: A ply-wood board has to be placed behind the workpiece so that it does not tear when slotting " Fig. 11-7: Slot moulding " 11.3.7 Insert moulding Note: This step is necessary if the whole length of the workpiece is not machined.
- Page 81 Saw-Spindle Moulder B3 / B3 e-classic Operation 11.3.8 Curve moulding Note: This operation (curved moulding or also known as curved shaping) is used to mould curved workpieces. " & Fig. 11-9: Curve moulding " & " Fig. 11-10: Template with the clamping levers...
- Page 82 Saw-Spindle Moulder B3 / B3 e-classic Operation 11.3.9 Moulding with a power feeder Fig. 11-11: Moulding with a power feeder 11.3.10 Moulding with a high velocity spindle Fig. 11-12: High velocity spindle Note: The high velocity spindle is especially designed for dovetail or duplicate mouldings. Only use original...
-
Page 83: Maintenance
Warning! Danger – electric current: Work on electrical fittings may only be carried out by qualified personnel and in strict observance of the safety instructions. 12.2 Maintenance schedule Interval Component Task to accomplish Attention: Cleaning and care products are available as accessories (HAMMER-catalogue). - Page 84 Saw-Spindle Moulder B3 / B3 e-classic Maintenance 12.3 Cleaning the bearing tracks Fig. 12-1: Cleaning the bearing tracks 12.4 Lubricating the height and tilting spindles " Lubricating the height spindle: Lubricating the tilting spindle: Fig. 12-2: Height spindle/Tilting spindle "...
- Page 85 Saw-Spindle Moulder B3 / B3 e-classic Maintenance 12.5 Tightening/replacing the drive belt 12.5.1 Retensioning the drive belt ! " & " Fig. 12-3: Retensioning the drive belt & Attention! Risk of material damage! Do not over-tension the drive belt. Turn the belt-tensioning screw only until the drive belt is sufficiently tensioned to transmit power effectively.
- Page 86 Saw-Spindle Moulder B3 / B3 e-classic Maintenance 12.6 Checking the scoring belt Fig. 12-5: Scoring belt 12.7 Cleaning/changing the dust brush of the outrigger arm " " Fig. 12-6: Dust brush (outrigger arm)
- Page 87 Saw-Spindle Moulder B3 / B3 e-classic Maintenance 12.8 Renewing the sliding table scraper blade (ball cage) " " Fig. 12-7: Scraper 12.9 Disassembling the sliding table " " & & Fig. 12-8: Base ) BL Fig. 12-9: Sliding table...
- Page 88 Saw-Spindle Moulder B3 / B3 e-classic Maintenance " " Fig. 12-10: Base/Sliding table 12.10 Assembling the sliding table ca 50 % " Fig. 12-11: Ball cage " Attention: The number of ball cages and the length of the cage plate depend on the dismantled sliding...
- Page 89 Saw-Spindle Moulder B3 / B3 e-classic Maintenance On the base: & & Fig. 12-12: Base On the opposite side on the sliding table: BN BO Fig. 12-13: Sliding table 12.11 Lubricating the spindle moulder socket and tilting segments " "...
-
Page 90: Faults
Saw-Spindle Moulder B3 / B3 e-classic Faults 13 Faults 13.1 Safety instructions Warning! Risk of injury: Repairing faults incorrectly can result in personal injury or damage the machine. For this reason this work may only be carried out by authorised, trained personnel who are familiar with the ope- ration of the machine and in strict observance of all safety instructions. - Page 91 Saw-Spindle Moulder B3 / B3 e-classic Faults 13.4 Faults, causes and repairs Fault Cause Repair 13.5 Adjusting the parallel cutting fence guide height Rip fence winner ! " " Fig. 13-1: Adjusting the parallel cutting fence guide height...
- Page 92 Saw-Spindle Moulder B3 / B3 e-classic Faults 13.6 Adjusting/correcting the parallel cutting fence angle only possible with: B3 winner " Fig. 13-2: Check the parallel cutting fence guide angle " " Fig. 13-3: Readjust the parallel cutting fence guide angle 13.7 Aligning the sliding table ball cage...
- Page 93 Saw-Spindle Moulder B3 / B3 e-classic Faults 13.8 Adjusting the locking force of the parallel cutting fence Attention! Risk of material damage! Only adjust if the clamping force of the parallel cutting fence is not sufficient. If the clamping force is too great, it will damage the parallel cutting fence and the fence housing.
- Page 94 Saw-Spindle Moulder B3 / B3 e-classic Faults 13.9.2 Adjusting the rip fence fine adjustment " Fig. 13-6: Fine adjustment " 13.9.3 Adjusting the locking force of the parallel cutting fence " Fig. 13-7: Rip fence - Standard " " "...
- Page 95 Kreissäge-Fräsmaschine Saw-Spindle Moulder B3 / B3 e-classic B3 / B3 e-classic...
Need help?
Do you have a question about the B3 and is the answer not in the manual?
Questions and answers