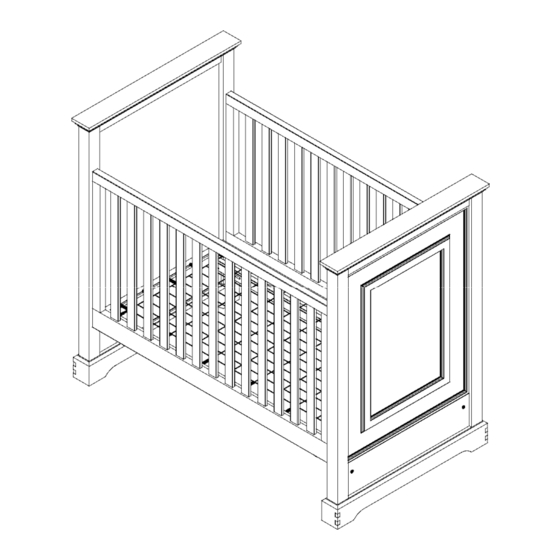
Summary of Contents for Restoration Hardware Baby&Child Marlowe Series
- Page 1 All Restoration Hardware cribs are designed to meet the highest safety standards and comply with all U.S. and Canadian cribs and cradles regulations. Page 1 of 11...
- Page 2 Assembly Instructions For Crib Model No: 5773−A614 Restoration Hardware Baby & Child ˆMarlowe Collection˜ 2900 North Macarthur Drive Model No: 5973−A614 Tracy, California 95376 ˆMarlowe Collection˜ Distributed in the U.S.A. by: restorationhardware.com Restoration Hardware Baby & Child Made in Vietnam...
- Page 3 IMPORTANT SAFETY INFORMATION FOR CRIBS WARNING: Infants can suffocate on soft bedding. Never add a pillow, comforter or padding. WARNING: Failure to follow these warnings and the assembly instructions could result in serious injury or death. To reduce the risk of SIDS, pediatricians recommend healthy infants be placed on their backs to sleep, unless otherwise advised by your physician.
- Page 4 IMPORTANT SAFETY INFORMATION FOR CRIBS CAUTION: ANY MATTRESS USED IN THIS CRIB MUST BE AT LEAST 27−1/4 INCHES BY 51−5/8 INCHES WITH A THICKNESS NOT EXCEEDING 6 INCHES. WARNING Do not use this crib if the enclosed or attached instructions cannot be strictly adhered to.
- Page 5 IMPORTANT SAFETY INFORMATION FOR TODDLER & DAY BEDS WARNING: ENTRAPMENT/STRANGULATION HAZARD Infants have died in toddler beds from entrapment and strangulation. Failure to follow these warnings and the assembly instructions could result in serious injury or death. NEVER use bed with children under 15 months. NEVER place bed near windows where cords from blinds or drapes may strangle a child.
- Page 6 Item Identification For ease of identification, all parts are labeled to correspond to the Step number in which the part is used. Step #4 Stationary side assembly (Page 10 of 11) Step #5 Toddler rail assembly (Page 11 of 11) Step #2 Mattress support height adjustment (Page 8 of 11)
- Page 7 Hardware needed for Step #1: STEP #1 (AA) K.D. Barrel Nuts (x 4 pieces) SIDE FRAME & (BB) 3-1/4 in. Bolts (x 4 pieces) STRETCHER BAR ASSEMBLY (CC) Dowel Pin (x 4 pieces) (DD) Allen Wrench (1 piece) Side Frame (x 2) Stretcher Bar (x 2) Insert barrel nuts into holes in stretcher bar...
- Page 8 Hardware needed for Step #2: STEP #2 (EE) Mattress nut (x 4 pieces) MATTRESS SUPPORT (FF) 1-3/8 in. Mattress bolt (x 4 pieces) HEIGHT ADJUSTAMENT (GG) Mattress washer (x 4 pieces) (HH) 3/8 in. lock washer (x 4 pieces) Mattress support (x 1) (DD) Allen Wrench (1 piece) (OO) Multi Wrench (1 piece) Note: Do not fully...
- Page 9 Hardware needed for Step #3: STEP #3 (EE) Mattress nut (x 4 pieces) MATTRESS SUPPORT (FF) 1-3/8 in. Mattress bolt (x 4 pieces) ATTACHMENT TO (GG) Mattress washer (x 4 pieces) STRETCHER BARS (HH) 3/8 in. lock washer (x 4 pieces) (DD) Allen Wrench (1 piece) Mattress support (x 1) (OO) Multi Wrench (1 piece)
- Page 10 Hardware needed for Step #4: STEP #4 (II) 2-1/4 in. Bolt (x 8 pieces) STATIONARY SIDE (DD) Allen Wrench (1 piece) ASSEMBLY WARNING: After crib is completely Stationary Side (x 2) assembled, return to each bolt and tighten to snug fit. DO NOT over tighten. Stationary Side Detail A (II)
- Page 11 Hardware needed for Step #5: STEP #5 (JJ) 1/2 in. Bolt (x 4 pieces) TODDLER RAIL ASSEMBLY (DD) Allen Wrench (1 piece) Toddler Rail (x 2) Detail B (DD) If mattress support is not in the lowest position, unscrew (JJ) mattress support bolts and (JJ) move it to the lowest position.


Need help?
Do you have a question about the Baby&Child Marlowe Series and is the answer not in the manual?
Questions and answers