Sony TA-ZH1ES Operating Instructions Manual
Hide thumbs
Also See for TA-ZH1ES:
- Operating instructions manual (100 pages) ,
- Service manual (108 pages)

Subscribe to Our Youtube Channel
Related Manuals for Sony TA-ZH1ES


Summary of Contents for Sony TA-ZH1ES
- Page 1 Headphone Amplifier Operating Instructions Manuel d’instructions TA-ZH1ES...
-
Page 2: Supplied Accessories
About manuals supplied The two following manuals are included. Operating instructions (this manual) Provides you with instructions on how to use. Precautions/Specifications (separate manual) Provides you with precautions and product specifications. Supplied Accessories Headphone amplifier Remote control AC power cord (mains lead) R03 (size AAA) batteries Operating instructions (this manual) -
Page 3: Table Of Contents
Table of Contents Supplied Accessories ..............2 Guide to Parts and Controls ............4 Connection: Connection 1: Connecting the Input Equipment ......10 WALKMAN® ................. 10 Smartphone ................10 AV Equipment ................11 Computer ..................13 Connection 2: Connecting the Headphones ........ 14 Connecting with the Balanced Connection ........ -
Page 4: Guide To Parts And Controls
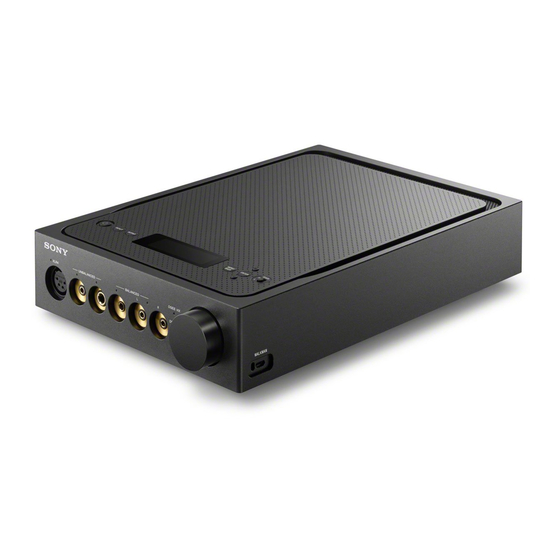
Guide to Parts and Controls Front Panel Volume knob Adjusts the volume level. DSEE HX indicator Lights while the DSEE HX function works (page 28). While an unsupported input signal is input, this indicator lights and turns off immediately when the DSEE HX function is turned on. -
Page 5: Connection
While selecting the headphone jack, the indicator on the selected headphone jack lights. Headphone jack of the amplifier Plug and shape of the headphones 3-pole mini headphone jack (balanced L– G or OPEN connection, 3.5 mm in diameter) × 2 L side R side R–... - Page 6 Right Side Panel WALKMAN port (for WALKMAN®/ Xperia™ connection) (page 10) Rear Panel PRE OUT L/R jacks (page 17) COAX (coaxial) IN jack (page 11) LINE IN L/R jacks (page 11) OPT (optical) IN jack (page 12) USB-B port (page 13) ...
- Page 7 Top Panel (power) button MENU/BACK button Turns the amplifier on/off. The indicator Displays the menu in the display lights when the amplifier turns on. window. When pressing this button while the menu is displayed, the display INPUT button returns to the playback display.
- Page 8 Remote Control DIMMER button Adjusts the brightness of the display window. Each time you press the button, the brightness of the display window changes as follows: Bright Dark Off Bright ... When the display window is turned off, the indicators on the front panel of the amplifier are turned off.
- Page 9 DSEE HX function works. For details about the DSEE HX function, see “Menu Item List” (page 28). To insert batteries Notes Do not leave the remote control in an extremely • hot or humid place. Do not use a new battery and an old one •...
-
Page 10: Connection 1: Connecting The Input Equipment
Connection 1: Connecting the Input Equipment WALKMAN® Connect the digital output supported WALKMAN® to the WALKMAN port (for WALKMAN®/ Xperia connection) of the amplifier. Digital cable for WALKMAN® (supplied) You can charge the WALKMAN® while playing if it supports the digital cable for WALKMAN® (supplied). Smartphone Connect the smartphone (Xperia) to the WALKMAN port (for WALKMAN®/Xperia connection) of the amplifier. -
Page 11: Av Equipment
AV Equipment Select the connecting method for the output jack of your equipment. Equipment with analog audio (LINE) output jacks Connect equipment with analog audio (LINE) output jacks such as a record player (PS-HX500) to the LINE IN L/R jacks of the amplifier. To the analog audio (LINE) output (L/R) jacks... - Page 12 Equipment with a digital optical output jack Connect equipment with a digital optical output jack such as a CD player to the OPT IN jack of the amplifier. To the digital optical output jack Digital optical cable (not supplied)
-
Page 13: Computer
Computer Connect the USB-B port of the amplifier to your computer. USB cable (USB-A/USB-B) (supplied) To listen to the music of your computer, you need to install the driver for the USB port and “Hi-Res Audio Player” to the computer. For details, see “To install the driver for the USB port” (page 21) and “To install the “Hi-Res Audio Player”... -
Page 14: Connection 2: Connecting The Headphones
Connection 2: Connecting the Headphones Connecting with the Balanced Connection Select the headphone jack for your headphones. Headphones with balanced standard plug (4.4 mm in diameter) Headphones with 3-pole mini plug (3.5 mm in diameter) (x 2) - Page 15 Headphones with XLR4 plug (balanced 4-pin)
-
Page 16: Connecting With The Unbalanced Connection
Connecting with the Unbalanced Connection Select the headphone jack for your headphones. Headphones with standard plug (6.3 mm in diameter) Headphones with stereo mini plug (3.5 mm in diameter) -
Page 17: Connecting The Audio Output Jacks (Pre Out) Without Using The Headphone Jack
Connecting the Audio Output Jacks (PRE OUT) without Using the Headphone Jack When connecting equipment such as an integrated amplifier, active speaker, etc. to the PRE OUT L/R jacks of the amplifier, you can enjoy the sound by outputting sound from the speakers. -
Page 18: Connection 3: Connecting The Ac Power Cord (Mains Lead)
Connection 3: Connecting the AC Power Cord (Mains Lead) Connect the AC IN jack of the amplifier to a wall outlet (wall socket) with the AC power cord (mains lead) (supplied). AC power cord (mains lead) (supplied) Press (power) to turn the amplifier on. -
Page 19: Listening To The Music Source Of Your Walkman®, Smartphone, Or Av Equipment
Listening to the Music Source of Your WALKMAN®, Smartphone, or AV Equipment For details about the supported format, see “Specifications” of “Precautions/Specifications” (separate manual). WALKMAN port (for WALKMAN®/ Xperia connection) Volume knob Make the connection for playback (pages 10 to 18). Press OUTPUT repeatedly to select the headphone jack for output. - Page 20 Check that the indicator on the selected headphone jack lights up. When selecting the PRE OUT L/R jacks, all the indicators on the headphone jacks turn off. Press INPUT repeatedly to display the input name of the equipment of the music source in the display window. Equipment and input name WALKMAN®/Smartphone: [WALKMAN] Equipment with analog audio (LINE) output jacks: [ANALOG (LINE)]...
-
Page 21: Listening To The Music Source Of Your Computer
The driver for the USB port is installed automatically when the amplifier is detected by the computer. Windows Vista Visit the website from the URL below. In the website, input “TA-ZH1ES” in the search window, download drivers for the USB port, then install it. For customers in Europe: http://support.sony-europe.com/ For customers in the U.S.A. - Page 22 If the driver is not installed for Windows 7/Windows 8/Windows 8.1/Windows 10, visit the website from the URL below. In the website, input “TA-ZH1ES” in the search window, download drivers for the USB port, then install it. For customers in Europe: http://support.sony-europe.com/ For customers in the U.S.A.
- Page 23 Features of Hi-Res Audio Player “Hi-Res Audio Player” is player software that allows you to play back high-quality audio files with simple operation. Easy playback of high-resolution audio files • You can play back high-resolution audio files, such as DSD files, purchased in music distribution sites, etc., by connecting the device to your computer, and making simple software settings.
-
Page 24: Playing The Music Source Of The Computer
Playing the Music Source of the Computer Play the music source with the “Hi-Res Audio Player” software that is installed on the computer. Volume knob Press OUTPUT repeatedly to select the headphone jack for output. The selected output name appears in the display window. [XLR4] [BALANCED-2] [BALANCED-1]... - Page 25 Press INPUT repeatedly to select [PC (USB-B)]. [PC (USB-B)] appears in the display window. Start “Hi-Res Audio Player” and play the music source. For details about “Hi-Res Audio Player,” see page 23. Turn the volume knob to adjust the volume level. Depending on the headphones, the volume may remain low.
-
Page 26: Changing The Display Window
Changing the Display Window You can change the displayed items in the Normal playback display [NORMAL] display window by pressing DISPLAY on the remote control or operating the menu. Input name Volume level Format of the input signal Input/output signal display [FORMAT] ... -
Page 27: Operating The Menu
Operating the Menu You can make various settings on the menu Press / to select the setting that is displayed in the display window. value, then press ENTER. The selected value is reflected and the display returns to the playback display (page 26). - Page 28 Menu Item List You can set the following items on the menu. The default settings are underlined. Setting items Setting value [DSEE HX] [OFF]: Off • Upscales compressed or CD quality sound [STANDARD]: Standard mode • source to near hi-resolution sound quality. [FEMALE VOCAL]: Suitable mode for female •...
- Page 29 Setting items Setting value [AUTO VOLUME DOWN] [OFF]: Off • Turns down the volume level of the amplifier [ON]: On • automatically when changing the output, Note inserting/removing the headphone plug, This function is available for the headphones level changing the GAIN select switch setting, or only.
-
Page 30: Troubleshooting
Remove the AC power cord (mains lead) from the amplifier, then turn the amplifier on again. • Should any problem persist, consult your nearest Sony dealer. AUTO STANDBY function does not work. When connecting the digital cable for WALKMAN® (supplied), the AUTO STANDBY function does •... - Page 31 If multiple playback software are started, the sound may not be output. In this case, start only the • playback software that you want to play. Check that the playback device on your computer is set to “Sony Headphone Amplifier Driver.” If it • is not, change the OS setting of the computer.
- Page 32 When the connected computer is Windows, check that the dedicated driver is installed on the • computer (page 21). Check that the playback device on your computer is set to “Sony Headphone Amplifier Driver.” If it • is not, change the OS setting of the computer.
-
Page 33: Index
Index Precautions/Specifications ....... 2 PRE OUT ..........17, 29 PROTECTOR ..........30 Active speaker ......... 17 ANALOG IN FORMAT ....... 29 Record player ........... 11 Audio output jacks ........17 Remote control ......... 8 AUTO STANDBY ........29 AUTO VOLUME DOWN ......29 AV equipment .......... - Page 34 ©2016 Sony Corporation Printed in Malaysia 4-598-254-12(1)
- Page 35 Headphone Amplifier Precautions/ Specifications Précautions/ Caractéristiques Sicherheitsmaßnahmen/ Technische Daten Precauciones/ Especificaciones Precauzioni/ Caratteristiche tecniche Voorzorgsmaatregelen/ Technische gegevens Środki ostrożności/ Dane techniczne Меры предосторожности/ Технические характеристики ข อ ควรระวั ง /ข อ มู ล จำเพาะ TA-ZH1ES...
- Page 36 Owner’s Record The serial number is located on the bottom. Record the serial number in the space provided below. Refer to them whenever you call upon your Sony dealer regarding this product. Model No. TA-ZH1ES Serial No. WARNING To reduce the risk of fire or electric shock, do not...
- Page 37 If you have any questions about this product, you the apparatus. may call: Sony Customer Information Center 1-800-222- 11) Only use attachments/accessories specified by SONY (7669) or http://www.sony.com/. the manufacturer. The number below is for the FCC related matters 12) Use only with the cart, stand, tripod, bracket, or only.
- Page 38 This product has been manufactured by or on connection with an incorporated battery, this behalf of Sony Corporation, 1-7-1 Konan Minato-ku battery should be replaced by qualified service Tokyo, 108-0075 Japan. Inquiries related to product staff only.
- Page 39 For the customers in the UK, Ireland, Malta, Cyprus, Singapore, and Malaysia: Use the AC power cord (A). For safety reasons, the AC power cord (B) is not intended for the above countries/regions and shall therefore not be used there. For the customers in other countries/ regions: Use the AC power cord (B).
- Page 40 (mains lead), grasp the plug itself; never pull the cord. WALKMAN® and WALKMAN® logo are The AC power cord (mains lead) must be registered trademarks of Sony changed only at a qualified service shop. Corporation. “Xperia” and “Xperia Tablet” are...
- Page 41 Input impedance Specifications 50 kΩ Pre-out section Section for headphone amplifier PRE OUT L/R section PHONES (headphones) section Output voltage Rated power output 2 Vrms (Fixed) BALANCED: 1,200 mW + 1,200 mW (32 Ω, Output impedance THD 1%) 100 Ω Frequency characteristics BALANCED: 4 Hz - 80 kHz (-3 dB, D.C.PHASE General...
- Page 42 Practically every Hi-Res file format has met its match with support up to DSD™ 22.4 MHz / PCM 32 bit 768 kHz. Whatever the acronym – from PCM to DSD and beyond – the Sony TA-ZH1ES is prepared to play it flawlessly.
- Page 43 Capturing every note and nuance with DSEE HX™. Take the concert feeling home and experience your music as the artist intended, in near High-Resolution Audio quality. Our new DSEE HX upscaling technology features four additional modes to the standard: female vocal, male vocal, percussions and strings, for optimal sound reproduction. Optimized performance for a wide variety of headphones A two –position gain switch offers both high and low impedance headphones the higher or lower amount of power they need to deliver higher audio levels.
- Page 44 R03 (size AAA) Batteries © 2016 Sony Electronics Inc. All rights reserved. Reproduction in whole or in part without written permission is prohibited. Sony, DSEE HX, DSD and the Sony logo are trademarks or registered trademarks of Sony Corporation. All other trademarks are trademarks of their respective owners. Features and specifications are subject to change without notice.
Need help?
Do you have a question about the TA-ZH1ES and is the answer not in the manual?
Questions and answers