Table of Contents
Advertisement
Available languages
Available languages
Quick Links
Bedienungsanleitung
User Manual
Note d'utilisation
Manual de instrucciones
Istruzioni per l'uso
Handleiding
Mikro-Audio-System mit Amazon Alexa
Micro Audio System with Amazon Alexa
Micro chaîne audio avec Amazon Alexa
Microsistema de sonido con Amazon Alexa
Sistema micro audio con Amazon Alexa
Micro-audiosysteem met Amazon Alexa
MEDION
LIFE
®
®
P64007 (MD 44007)
Advertisement
Chapters
Table of Contents

Related Manuals for Medion LIFE P64007


Summary of Contents for Medion LIFE P64007
- Page 1 Handleiding Mikro-Audio-System mit Amazon Alexa Micro Audio System with Amazon Alexa Micro chaîne audio avec Amazon Alexa Microsistema de sonido con Amazon Alexa Sistema micro audio con Amazon Alexa Micro-audiosysteem met Amazon Alexa MEDION LIFE ® ® P64007 (MD 44007)
-
Page 2: Table Of Contents
Inhaltsverzeichnis Informationen zu dieser Bedienungsanleitung ........5 1.1. Zeichenerklärung ....................5 Bestimmungsgemäßer Gebrauch .............. 6 EU - Konformitätsinformation ..............7 3.1. Informationen zu Markenzeichen ..............7 Sicherheitshinweise ..................8 4.1. Eingeschränkter Personenkreis ................ 8 4.2. Betriebssicherheit ....................9 4.3. Stromversorgung ....................10 4.4. - Page 3 10.5. CDs und USB-Speicher wiedergeben ............29 10.6. Disk einlegen/auswerfen ..................30 10.7. USB-Gerät einstecken ..................30 10.8. Wiedergabe starten/anhalten/stoppen ............30 10.9. Titelwahl, schneller Rück-/Vorlauf ..............30 10.10. Wiederholung / Zufallswiedergabe ..............30 10.11. Abspielreihenfolge programmieren ............31 10.12. Titelinformationen (ID3) ...................31 10.13. Bluetooth-Modus ....................31 10.14. Externes Wiedergabegerät anschließen .............32 10.15.
-
Page 4: Informationen Zu Dieser Bedienungsanleitung
1. Informationen zu dieser Bedienungsanleitung Vielen Dank, dass Sie sich für unser Produkt entschieden haben. Wir wünschen Ihnen viel Freude mit dem Gerät. Lesen Sie vor Inbetriebnahme die Sicherheitshinweise und die gesamte Anleitung aufmerksam durch. Beachten Sie die Warnungen auf dem Ge- rät und in der Bedienungsanleitung. -
Page 5: Bestimmungsgemäßer Gebrauch
WARNUNG! Warnung vor Gefahr durch elektrischen Schlag! Aufzählungspunkt / Information über Ereignisse während der Bedie- • nung Auszuführende Handlungsanweisung 2. Bestimmungsgemäßer Gebrauch Ihr Gerät bietet Ihnen vielfältige Möglichkeiten der Nutzung: Das Gerät dient zum Abspielen von Tonmedien (CDs, MP3-Da- tenträger, über USB, über Bluetooth), zum analogen und digita- len Radioempfang und bietet die Sprachsteuerung mit Amazon Alexa®. -
Page 6: Eu - Konformitätsinformation
– extrem hohe oder tiefe Temperaturen, – direkte Sonneneinstrahlung, – offenes Feuer. 3. EU - Konformitätsinformation Hiermit erklärt die MEDION AG, dass sich dieses Gerät in Übereinstimmung mit den grundlegenden Anforderungen und den übrigen einschlägigen Bestimmungen be- findet: • RE- Richtline 2014/53/EU •... -
Page 7: Sicherheitshinweise
4. Sicherheitshinweise 4.1. Eingeschränkter Personenkreis • Das Gerät ist nicht dafür bestimmt, durch Personen (ein- schließlich Kinder) mit eingeschränkten physischen, senso- rischen oder geistigen Fähigkeiten oder mangels Erfahrung und/oder mangels Wissen benutzt zu werden, es sei denn, sie werden durch eine für ihre Sicherheit zuständige Person be- aufsichtigt oder erhielten von ihr Anweisungen, wie das Gerät zu benutzen ist. -
Page 8: Betriebssicherheit
4.2. Betriebssicherheit Überprüfen Sie das Gerät vor der Benutzung auf Beschädi- gungen. Ein defektes oder beschädigtes Gerät darf nicht ver- wendet werden. GEFAHR! Stromschlaggefahr! Verletzungsgefahr durch Stromschlag durch stromfüh- rende Teile. Bei diesen besteht durch unabsichtlichen Kurzschluss die Gefahr eines elektrischen Schlages oder eines Brandes. -
Page 9: Stromversorgung
4.3. Stromversorgung GEFAHR! Stromschlaggefahr! Verletzungsgefahr durch Stromschlag durch stromfüh- rende Teile. Schließen Sie das Gerät nur an eine gut erreichbare, ordnungsgemäß installierte Schutzkontaktsteckdose (230 V ~ 50 Hz) an, die sich in der Nähe des Aufstell- ortes befindet. Lassen Sie die Steckdose unbedingt jederzeit frei zugänglich, damit das Steckernetzsteil ungehindert abgezogen werden kann. -
Page 10: Aufstellungsort / Umgebung
4.4. Aufstellungsort / Umgebung GEFAHR! Stromschlaggefahr! Bei großen Temperatur- oder Feuchtigkeitsschwankun- gen kann es durch Kondensation zur Feuchtigkeitsbil- dung inner halb des Gerätes kommen, die einen elektri- schen Kurzschluss verursachen kann. Warten Sie nach einem Transport des Gerätes solan- ge mit der Inbetriebnahme, bis es die Umgebungs- temperatur angenommen hat. -
Page 11: Reparatur
– keine offenen Brandquellen (z. B. brennende Kerzen) in der Nähe des Geräts stehen; – das Anschlusskabel nicht unter Zugspannung steht und nicht geknickt wird. 4.5. Reparatur GEFAHR! Stromschlaggefahr! Es besteht die Gefahr eines elektrischen Schlags durch stromführende Teile. Vor dem ersten Gebrauch und nach jeder Benutzung das Gerät sowie das Anschlusskabel auf Beschädi- gungen überprüfen. -
Page 12: Laufwerke Und Anschlüsse
4.7. Laufwerke und Anschlüsse • Führen Sie keinerlei Fremdkörper in die Öffnungen des CD- Players ein. Das Gerät kann dadurch beschädigt werden. • Legen Sie CDs immer mit der beschrifteten Seite nach vorn in das Diskfach. Wenden Sie niemals große Kraft an, wenn Sie eine Disk einlegen, oder ein externes Gerät anschließen. - Page 13 • Legen Sie grundsätzlich nur neue Batterien gleichen Typs ein. Benutzen Sie nie alte und neue Batterien zusammen. • Achten Sie beim Einlegen der Batterien auf die Polarität (+/–). • Bei unsachgemäßem Auswechseln der Batterien besteht Ex- plosionsgefahr! Ersetzen Sie die Batterien nur durch densel- ben oder einen gleichwertigen Typ.
-
Page 14: Gerät Reinigen
4.9. Gerät reinigen GEFAHR! Stromschlaggefahr! Verletzungsgefahr durch Stromschlag durch stromfüh- rende Teile. Vor der Reinigung ziehen Sie den Netzstecker aus der Steckdose. HINWEIS! Mögliche Sachschäden Falsche Behandlung der empfindlichen Oberflächen kann das Gerät beschädigen. Für die Reinigung verwenden Sie ein trockenes, wei- ches Tuch. -
Page 15: Geräteübersicht
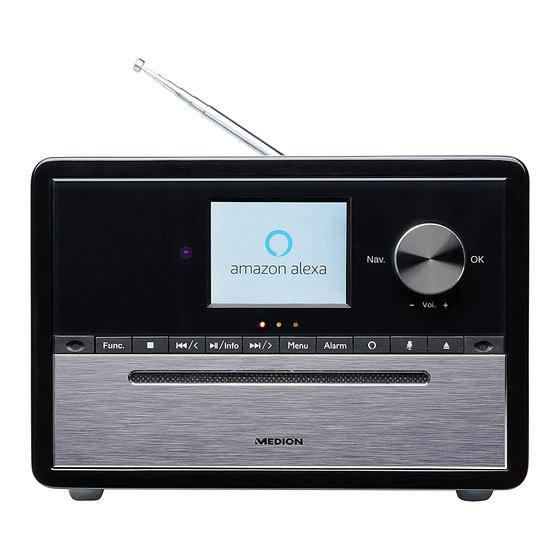
6. Geräteübersicht 6.1. Vorderseite Nav. / Info Func. V O L + – Lautstärkeregler O K – Auswahl im Menü bestätigen N A V – Im Menü navigieren – CD auswerfen CD-Fach – Mikrofon für Alexa deaktivieren – Alexa aktivieren A L A R M –... -
Page 16: Oberseite
blau blinkend: Verarbeitung eines Sprachbefehls blau pulsierend: Sprachausgabe aktiv grün-gelb-gelb: Keine Verbindung zum WLAN-Router Display Infrarotsensor für die Fernbedienung 6.2. Oberseite Sleep 1 , 2 , 3 , 4 + – Speicherplätze für Radiosender S L E E P – Sleepmodus einstellen S N O O Z E –... -
Page 17: Rückseite
6.3. Rückseite 1.5A 25 24 Teleskopantenne Position des Typenschildes 1 A – Anschlussbuchse für USB-Speichermedium – Anschlussbuchse für Kopfhörer A U X I N – Anschlussbuchse für externes Gerät D C I N 1 5 V 1 . 5 A – Anschlussbuchse für Steckernetzteil... -
Page 18: Fernbedienung
6.4. Fernbedienung FUNC. – CD auswerfen Snooze SLEEP – Sleepmodus einstellen Dimmer Sleep Alarm A L A R M – Alarm 1/2 einstellen – Stummschaltung M E N U – Menü öffnen MODE MENU S C A N – Radiosender scannen P R E S E T –... -
Page 19: Batterie In Die Fernbedienung Einlegen/Wechseln
7. Batterie in die Fernbedienung einlegen/ wechseln Legen Sie zwei 1,5 V-Batterien R03/LR03/AAA/Micro in die Fernbedienung ein. WARNUNG! Explosionsgefahr! Explosionsgefahr bei unsachgemäßem Auswechseln der Batterie. Ersatz nur durch denselben oder einen gleichwerti- gen Typ. Öffnen Sie den Batteriefachdeckel. ... -
Page 20: Antennenempfang
8.2. Antennenempfang Auf der Rückseite des Gerätes befindet sich eine Teleskopantenne. Ziehen Sie diese ganz heraus und justieren Sie diese für den optimalen Empfang. 8.3. Externe Geräte anschließen 1.5A 8.3.1. Kopfhörer anschließen Auf der Rückseite des Gerätes befindet sich ein 3,5 mm Kopfhöreranschluss. ... -
Page 21: Gerät Bedienen
8.3.2. USB-Gerät anschließen Am USB-Anschluss können Sie USB-Speichersticks anschließen. Damit können Mu- sikstücke von einem USB-Speicherstick wiedergegeben werden. Der USB-Anschluss unterstützt keine Video-Wiedergabe. Außerdem wird das Aufladen von z. B. einem Smartphone unterstützt. Schließen Sie ein USB-Gerät am USB-Anschluss U S B 5 V 1 A an. -
Page 22: Einschalten/In Den Standby-Modus Schalten
9.1. Einschalten/in den Standby-Modus schalten Sobald das Gerät an der Stromversorgung angeschlossen ist, werden im Display das Datum und die Uhrzeit angezeigt. Das Gerät befindet sich im Standby-Modus. Alexa-Sprachbefehle sind auch im Standby-Modus möglich. Drücken Sie die Taste F U N C . am Gerät oder auf der Fernbedienung, um das Gerät einzuschalten. -
Page 23: Tonfunktionen
9.4. Tonfunktionen 9.4.1. Lautstärke einstellen Regeln Sie die Lautstärke mit – dem Regler V O L + am Gerät oder – mit den Tasten / + auf der Fernbedienung. Drücken Sie , um den Ton stumm zu schalten. Im Display erscheint das gleichaussehende Symbol. -
Page 24: Alarm
Wählen Sie mit / den Eintrag TIME SETUP und bestätigen mit O K . Wählen Sie mit / den Eintrag TIME FORMAT und bestätigen mit O K . Stellen Sie mit / 12- oder 24-Stundenformat ein und bestätigen mit die Tas- te O K . -
Page 25: Sleeptimer
– SAVE – Vorgenommene Einstellungen speichern Wählen Sie nach Abschluss aller Einstellungen den Eintrag SAVE und bestätigen mit O K . Der Alarm ist eingestellt. Im Display erscheint bei eingeschaltetem Alarm ein Glo- ckensymbol mit der ensprechend eingestellten Zeit. 9.6.2. -
Page 26: Radiobetrieb
10. Radiobetrieb Mit diesem Radio können Sie UKW-Sender und DAB-Sender empfangen. Ihr Radio verfügt über das Informationsangebot Dynamic Label Segment (DLS), bei dem Informationen wie z.B. Interpret, Musiktitel oder aktuelle Verkehrsnachrichten über den Display ausgegeben werden. 10.1. DAB-Modus Beim ersten Betrieb im DAB-Modus sucht das Gerät automatisch nach allen emp- fangbaren DAB-Sendern und speichert sie dauerhaft, so dass der Sendersuchlauf nur einmal vorgenommen werden muss. -
Page 27: Menüeinstellungen
10.1.3. Gespeicherten DAB-Sender aufrufen Drücken Sie die Taste P R E S E T . Im Display erscheint die Liste der gespeicher- ten Sender. Wählen Sie mit / den gewünschten Speicherplatz. Drücken Sie die Taste O K , um den Radiosender abzuspielen. 10.2. -
Page 28: Informationen Im Display Anzeigen
10.3.3. UKW-Sender speichern Sie können bis zu 30 voreingestellte DAB-Sender in einer separaten Senderliste spei- chern. Wählen Sie zunächst den Sender, der gespeichert werden soll. Halten Sie die Taste P R E S E T gedrückt, um die Liste der gespeicherten Sender aufzurufen. -
Page 29: Disk Einlegen/Auswerfen
10.6. Disk einlegen/auswerfen Achten Sie darauf, dass vor dem Gerät ca. 15 cm Platz ist, so dass die beim Einlegen oder Auswerfen nicht behindert wird. Schieben Sie vorsichtig eine CD mit der beschrifteten Seite nach oben in den CD-Schacht. Die CD wird automatisch eingezogen und erscheint READING im Display. -
Page 30: Abspielreihenfolge Programmieren
Führen Sie einen Kopplungsvorgang am externen Gerät durch. Lesen Sie dazu die Anleitung ihres externen Gerätes. Der Name des Audiosystems ist „MEDION MD 44007“. Im Display erscheint CONNECTED dauerhaft, die Kopplung ist abgeschlossen und das externe Gerät kann am Mikro-Audio-System genutzt werden. -
Page 31: Externes Wiedergabegerät Anschließen
Damit können Sie Einstellungen vornehmen, um die Sprachsteu- erung zu aktivieren. Installieren Sie zunächst die App Medion Speaker auf Ihrem Smartphone. Diese ist im App Store (Apple) bzw. Google Play Store (Android) kostenlos verfügbar. Mit einem QR-Code Scanner auf Ihrem Smartphone gelangen Sie einfach zur App im Play oder App Store. - Page 32 Folgen Sie auch hier den Anweisungen auf dem Bildschirm. Um Amazon Alexa® zu aktivieren, melden Sie das Mikro Audio System an Ihrem Amazon-Konto an. Dazu müssen Sie bereits bei Amazon registriert sein. Nach Abschluss der Einstellungen können Sie die Medion Speaker App schlie- ßen. 10.15.2.
-
Page 33: Über Spotify® Musik Hören
10.16. Über Spotify® Musik hören Sie können Audiodaten vom Musikstreaming-Dienst Spotify® über das Internetradio abspielen. Voraussetzung ist, dass Sie auf Ihrem Smartphone oder Tablet PC die Pre- mium-Version der Spotify-App installiert haben und dass das Internetradio und das Gerät mit der Spotify-App im selben Netzwerk angemeldet sind. Spotify installieren ... -
Page 34: Softwareversion Anzeigen
13. Softwareversion anzeigen Öffnen Sie das Menü durch Druck auf die Taste M E N U . Wählen Sie mit / den Eintrag MAIN MENU und bestätigen mit O K . Je nach Betriebsart wird das Menü MAIN MENU nach Druck auf die Taste MENU direkt geöffnet. -
Page 35: Außerbetriebnahme
Störung Mögliche Ursache Maßnahme Ziehen Sie das Stecker- netzteil aus der Steckdo- Kondensation hat sich gebil- se und warten Sie, bis sich det. das Gerät und die CD an die Umgebungsbedingun- gen angepasst hat. Das Gerät unterstützt aus- CD wird nicht abgespeilt. -
Page 36: Entsorgung
17. Entsorgung VERPACKUNG Ihr Gerät befindet sich zum Schutz vor Transportschäden in einer Verpa- ckung. Verpackungen sind aus Materialien hergestellt, die umweltscho- nend entsorgt und einem fachgerechten Recycling zugeführt werden können. GERÄT Altgeräte dürfen nicht im normalen Hausmüll entsorgt werden. Entsprechend Richtlinie 2012/19/EU ist das Gerät am Ende seiner Le- bensdauer einer geordneten Entsorgung zuzuführen. -
Page 37: Technische Daten
18. Technische Daten Gerät Eingangsspannung 15 V 1,5 A Leistungsaufnahme Betrieb max. 22,5 Watt Leistungsaufnahme Aus-Zustand ca. 4 Watt Ausgangsleistung 1 x 15 Watt RMS Laserleistung Laser Klasse 1 Unterstützte Formate CD-R, CD-RW, Audio-CD Anzahl Speicherplätze der pro- 99 Titel (CD) grammierbaren Wiedergabe Radio Radiofrequenzbereich UKW... - Page 38 Betriebsfrequenz 2.4 GHz WLAN Frequenzbereich 2412–2472 MHz Maximale Sendeleistung 18,9 dBm Kanal 1–13 WLAN Standard: 802.11 b/g/n Verschlüsselung: WEP/WPA/WPA2 Umgebungswerte In Betrieb: 10 °C ~ +45 °C Temperaturen Nicht in Betrieb (in Verpackung): -20 °C ~ +60 °C Feuchtigkeit In Betrieb: < 0 ~ 80 % (nicht kondensierend) Nicht in Betrieb (in Verpackung): <...
-
Page 39: Symbole Auf Dem Typenschild Und Dem Netzteil
Ihre Erfahrungen austauschen und Ihr Wissen weiter- geben. Sie finden unsere Service Community unter http://community.medion.com. • Gerne können Sie auch unser Kontaktformular unter www.medion.com/contact nutzen. • Selbstverständlich steht Ihnen unser Serviceteam auch über unsere Hotline oder postalisch zur Verfügung. - Page 40 Mo. - Fr.: 07:00 - 23:00 0201 22099-222 Sa. / So.: 10:00 - 18:00...
- Page 41 Deutschland Österreich Öffnungszeiten Rufnummer Mo. - Fr.: 08:00 - 21:00 01 9287661 Sa. / So.: 10:00 - 18:00 Serviceadresse MEDION Service Center Franz-Fritsch-Str. 11 4600 Wels Österreich Schweiz Öffnungszeiten Rufnummer Mo. - Fr.: 09:00 - 19:00 0848 - 33 33 32...
- Page 42 5981 XC Panningen Nederland Deutschland Diese und viele weitere Bedienungsanleitungen stehen Ihnen über das Serviceportal www.medion.com/de/service/start/ zum Download zur Verfügung. Dort finden Sie auch Treiber und andere Software zu diversen Geräten. Sie können auch den nebenstehenden QR Code scannen und die Bedienungsanleitung über das Serviceportal auf Ihr mobiles...
-
Page 43: Impressum
Belgien Diese und viele weitere Bedienungsanleitungen stehen Ihnen über das Serviceportal www.medion.com/be/nl/service/start/ zum Download zur Verfügung. Dort finden Sie auch Treiber und andere Software zu diversen Geräten. Sie können auch den nebenstehenden QR Code scannen und die Bedienungsanleitung über das Serviceportal auf Ihr mobiles Endgerät laden. - Page 44 Table of Contents Information about these operating instructions ........47 1.1. Key to symbols .....................47 Proper use ....................48 EU – Declaration of Conformity ..............49 3.1. Trademark information ..................49 Safety information ..................50 4.1. Restricted group of people ................50 4.2.
- Page 45 10.5. Playing back CDs and USB storage media ..........71 10.6. Inserting/removing a disc ................71 10.7. Connecting USB devices ...................71 10.8. Start/pause/stop playback ................71 10.9. Track selection, rewind/fast forward ............71 10.10. Repeat/random playback .................72 10.11. Programming the track playing order ............72 10.12.
-
Page 46: Information About These Operating Instructions
1. Information about these operating instructions Thank you for choosing our product. We hope you enjoy using this de- vice. Please read the safety instructions and all other instructions carefully be- fore using the device for the first time. Note the warnings on the device and in the operating instructions. -
Page 47: Proper Use
WARNING! Warning: risk of electric shock! • Bullet point/information on steps during operation Instruction to be carried out 2. Proper use Your device can be used in a range of ways: The device is intended for playing sound media (CDs, MP3 data media, via USB, via Bluetooth) for analogue and digital radio re- ception and features voice control using Amazon Alexa®. -
Page 48: Eu - Declaration Of Conformity
3. EU – Declaration of Conformity MEDION AG hereby declares that this device complies with the fundamental re- quirements and the other relevant provisions of: • Radio Equipment Directive 2014/53/EU • Ecodesign Directive 2009/125/EC • RoHS Directive 2011/65/EU You can download the complete EU Declaration of Conformity at www.medion. -
Page 49: Safety Information
4. Safety information 4.1. Restricted group of people • This device is not intended for use by people (including chil- dren) with reduced physical, sensory or mental abilities or by those without experience and/or knowledge, unless they are supervised by a person responsible for their safety or they have been instructed in its use by that person. -
Page 50: Operating Safety
4.2. Operating safety Before using the device for the first time, check the device for damage. A defective or damaged device may not be used. DANGER! Risk of electric shock! Risk of injury from electric shock due to live parts. They pose a risk of electric shock or fire if an unintentional short circuit occurs. -
Page 51: Power Supply
4.3. Power supply DANGER! Risk of electric shock! Risk of injury from electric shock due to live parts. Only connect the device to a properly installed earthed mains socket (230 V ~ 50 Hz) that is easy to reach and close to the place where you have set up the device. -
Page 52: Installation Location/Surroundings
4.4. Installation location/surroundings DANGER! Risk of electric shock! Major changes in temperature or fluctuations in hu- midity can cause moisture to build up within the device due to condensation – this can cause an electrical short circuit. After transporting the device, wait until it has reached ambient temperature before switching it on. -
Page 53: Repairs
4.5. Repairs DANGER! Risk of electric shock! There is a risk of electric shock due to live parts. Check the device and the connection cable for dam- age before using the device for the first time, and af- ter each use. ... -
Page 54: Handling Batteries
4.8. Handling batteries The remote control for this device is operated with two batter- ies. Please note the following: • Keep new and used batteries out of the reach of children. Do not swallow batteries as they can cause chemical burns. WARNING! Risk of chemical burns! The remote control supplied with the device contains... -
Page 55: Cleaning The Device
• Store batteries in a cool, dry place. Strong direct heat can damage batteries. Do not expose the device to sources of in- tense heat. • Never short circuit or dismantle batteries. • Never throw batteries into a fire. Risk of explosion! •... -
Page 56: Package Contents
5. Package contents DANGER! Risk of choking and suffocation! Risk of choking and suffocation due to swallowing or inhaling small parts or plastic wrap. Keep the plastic packaging out of the reach of chil- dren. Remove the product from the packaging and remove all packaging material. ... -
Page 57: Device Overview
6. Device overview 6.1. Front Nav. / Info Func. VOL + – Volume controller OK – Confirm selection in menu NAV – Navigate in the menu – Eject CD CD compartment – Deactivate microphone for Alexa – Activate Alexa ALARM –... -
Page 58: Top
Flashing blue: processing a voice command Pulsing blue: voice response active Green–yellow–yellow: no connection to the WLAN router Display Infrared sensor for remote control 6.2. Top Sleep 1, 2, 3, 4+ – Memory spaces for radio stations SLEEP – Set sleep mode SNOOZE –... -
Page 59: Rear
6.3. Rear 1.5A 25 24 Telescopic aerial Type plate 1A – Connection port for USB storage media – Connection socket for headphones AUX IN – Jack for external device DC IN 15V 1.5A – Connection socket for mains power adapter... -
Page 60: Remote Control
6.4. Remote control FUNC. – Eject CD Snooze SLEEP – Set sleep mode Dimmer Sleep Alarm ALARM – Set alarm 1/2 – Mute MENU – Open the menu MODE MENU SCAN – Scan for radio stations PRESET – Retrieve preset radio station Number buttons /+ –... -
Page 61: Inserting/Replacing Batteries In The Remote Control
7. Inserting/replacing batteries in the remote control Insert two 1.5 V R03/LR03/AAA/micro batteries in the remote control. WARNING! Risk of explosion! Risk of explosion if battery is replaced incorrectly. Replace batteries only with the same or equivalent type. ... -
Page 62: Aerial Reception
8.2. Aerial reception There is a telescopic aerial on the back of the device. Fully extend the aerial and adjust it for optimal reception. 8.3. Connecting external devices 1.5A 8.3.1. Connecting the headphones You will find a 3.5 mm headphone socket on the back of the device. ... -
Page 63: Operating The Device
8.3.2. Connecting USB devices USB memory sticks can be connected to the USB port. This enables music tracks to be played from a USB memory stick. The USB port does not support video playback. Charging, for example of a smartphone, is also supported. ... -
Page 64: Switch On/Switch To Standby Mode
9.1. Switch on/switch to standby mode As soon as the device is connected to the power supply, the date and time are shown in the display. The device is in standby mode. Alexa voice commands can also be used in standby mode. ... -
Page 65: Audio Functions
9.4. Audio functions 9.4.1. Setting the volume To adjust the volume, use – the VOL + controller on the device or – the /+ buttons on the remote control. Press to mute the sound. The same symbol appears on the display. Press the button again to cancel the mute setting. -
Page 66: Alarm
9.5.3. Automatic synchronisation The date and time can be set automatically, eliminating the need to set the time and date manually. Data from the radio signal is used for this. Press the MENU button to open the menu. If a track is to be played back, use / to select MAIN MENU and press OK to confirm. -
Page 67: Sleep Timer
9.6.2. Stopping the alarm When the alarm sounds, you can stop it immediately by pressing the FUNC. but- 9.6.3. Snooze function You can sound the alarm again after approx. 9 minutes by pressing SNOOZE. The remaining time is shown on the display. ... -
Page 68: Menu Settings
10.1.1. Playing DAB stations All stations that can be received are automatically stored in a general station list. Press the / to retrieve the station list. Use / to select the desired radio station. Press OK to play the radio station. 10.1.2. -
Page 69: Fm Mode
10.3. FM mode 10.3.1. Storing stations automatically Press and hold the SCAN button until the station search starts. All stations found are stored by frequency. 10.3.2. Searching for FM stations manually You can search stations in several ways: Press the SCAN button. An automatic station search starts until the next sta- tion is found. -
Page 70: Playing Back Cds And Usb Storage Media
10.5. Playing back CDs and USB storage media Note the following: • Due to the numerous different file systems and file formats, connected USB memory sticks cannot be guaranteed to function. • Depending on the size of the data medium, it may take some time for the sys- tem to be detected. -
Page 71: Repeat/Random Playback
10.10. Repeat/random playback Press the MENU button to open the menu. Use / to select CD REPEAT or USB REPEAT and press OK to confirm. Use / to select the desired entry. – Repeat switched off (REPEAT OFF appears on the display; only in CD mode). –... -
Page 72: Connecting An External Playback Device
Perform pairing on the external device. Refer to the instructions for your exter- nal device for more information. The name of the radio is "MEDION MD 44007". CONNECTED appears on the display permanently and the pairing process is now complete;... -
Page 73: Amazon Alexa® Voice Control
The device is now in configuration mode. Add a device to the app and select the model MEDION MD44007 from the list in the following steps. Follow the instructions in the app and search for network-enabled devices in the WLAN settings of your smartphone. -
Page 74: Listening To Music On Spotify
10.16. Listening to music on Spotify® You can play back audio data from the music streaming service Spotify® via the internet radio. The prerequisite is that you have the premium version of the Spotify app in- stalled on your smartphone or tablet PC and the internet radio and the device with the Spotify app are registered on the same network. -
Page 75: Displaying The Software Version
13. Displaying the software version Press the MENU button to open the menu. Use / to select MAIN MENU and press OK to confirm. Depending on the operating mode, the MAIN MENU is opened directly after the MENU button is pressed. ... -
Page 76: End Of Operation
Fault Possible cause Corrective action Pull the mains power adapter out of the socket and wait until the device Condensation has formed. and the CD has adapted to the environmental con- ditions. CD is not The device only supports played. -
Page 77: Disposal
17. Disposal PACKAGING Your device has been packaged to protect it from damage in transit. The packaging is made of materials that can be recycled in an environmen- tally friendly manner. DEVICE Do not dispose of old devices in normal household waste. In accordance with Directive 2012/19/EU, these devices must be dis- posed of correctly at the end of their service life. -
Page 78: Technical Specifications
18. Technical specifi cations Device Input voltage 15 V 1.5 A Power consumption during op- Max. 22.5 W eration Power consumption when Approx. 4 W switched off Output power 1 x 15 watt RMS Laser output Class 1 laser product Supported formats CD-R, CD-RW, audio CD Number of memory slots of the... - Page 79 Range Up to 10 metres (without obstacles) Operating frequency 2.4 GHz WLAN Frequency range 2412–2472 MHz Maximum transmission power 18.9 dBm Channel 1–13 WLAN standard: 802.11 b/g/n Encryption: WEP/WPA/WPA2 Environmental conditions In operation: 10°C to +45°C Temperatures Not in operation (in packaging): -20°C to +60°C Humidity In operation: <...
-
Page 80: Symbols On The Type Plate And Power Pack
Remote control Battery 2 x 1.5 V R03/LR03/AAA/micro batteries 18.1. Symbols on the type plate and power pack Protection class II Electrical devices in protection class II are devices that have dou- ble and/or reinforced insulation throughout, and do not have an option for connecting a protective earth. -
Page 81: Service Information
In our Service Community, you can meet other users, as well as our staff, and you can exchange your experiences and pass on your knowledge there. You will find our Service Community at http://community.medion.com. • Alternatively, use our contact form at www.medion.com/contact. -
Page 82: Legal Notice
These operating instructions are protected by copyright. Mechanical, electronic and any other forms of reproduction are prohibited without the written permission of the manufacturer. Copyright is owned by the company: MEDION AG Am Zehnthof 77 45307 Essen Germany Please note that you cannot use the address above for returns. Please always con-... - Page 84 Sommaire Informations concernant la présente notice d’utilisation ...... 87 1.1. Explication des symboles .................87 Utilisation conforme .................. 88 Information relative à la conformité UE........... 89 3.1. Informations sur les marques déposées .............89 Consignes de sécurité................90 4.1. Catégorie de personnes restreinte ...............90 4.2.
- Page 85 10.5. Lecture de CD et supports USB ..............112 10.6. Insertion/éjection d’un disque ..............112 10.7. Raccordement d’un périphérique USB............. 112 10.8. Lancement/interruption/arrêt de la lecture ........... 112 10.9. Sélection de titres, retour/avance rapides ..........113 10.10. Répétition/lecture aléatoire ................. 113 10.11.
-
Page 86: Informations Concernant La Présente Notice D'utilisation
1. Informations concernant la présente notice d’utilisation Merci d’avoir choisi notre produit. Nous vous souhaitons une bonne uti- lisation. Veuillez lire attentivement les consignes de sécurité et la notice d’utili- sation dans son intégralité avant la mise en service de l’appareil. Tenez compte des avertissements figurant sur l’appareil et dans la notice d’uti- lisation. -
Page 87: Utilisation Conforme
AVERTISSEMENT ! Risque d’électrocution ! Énumération/Information sur des événements se produisant pen- • dant l’utilisation Action à exécuter 2. Utilisation conforme Cet appareil vous offre les possibilités d’utilisation suivantes : il permet la lecture de musique à partir de différents supports (CD, support de données MP3, USB, via Bluetooth), la réception radio analogique et numérique, ainsi que la commande vocale avec Amazon Alexa®. -
Page 88: Information Relative À La Conformité Ue
3. Information relative à la conformité UE Par la présente, MEDION AG déclare que cet appareil est conforme aux exigences de base et aux autres réglementations en vigueur : • Directive RE 2014/53/UE • Directive sur l’écoconception 2009/125/CE • Directive RoHS 2011/65/UE La déclaration de conformité... -
Page 89: Consignes De Sécurité
4. Consignes de sécurité 4.1. Catégorie de personnes restreinte • L’appareil n’est pas destiné à des personnes (y compris des enfants) présentant des capacités physiques, sensorielles ou mentales restreintes ou manquant d’expérience et/ou de connaissances, à moins qu’elles ne soient surveillées par une personne responsable de leur sécurité... -
Page 90: Sécurité De Fonctionnement
4.2. Sécurité de fonctionnement Avant chaque utilisation, vérifiez que l’appareil ne soit pas en- dommagé. N’utilisez pas un appareil défectueux ou endom- magé. DANGER ! Risque d’électrocution ! Risque de blessure par électrocution par des pièces conductrices de courant. En cas de court-circuit intem- pestif, celles-ci présentent un risque d’électrocution ou d’incendie. -
Page 91: Alimentation Électrique
4.3. Alimentation électrique DANGER ! Risque d’électrocution ! Risque de blessure par électrocution par des pièces conductrices de courant. Branchez l’appareil uniquement sur une prise de terre réglementaire (230 V ~ 50 Hz) facilement acces- sible située à proximité du lieu d’installation de l’ap- pareil. -
Page 92: Lieu D'installation/Environnement
4.4. Lieu d’installation/environnement DANGER ! Risque d’électrocution ! En cas de fortes variations de température ou d’humi- dité, il est possible que de l’humidité par condensa- tion se forme dans l’appareil, ce qui peut provoquer un court-circuit. Après le transport de l’appareil, attendez que celui-ci soit à... -
Page 93: Réparation
– ce qu’il n’y ait aucune source de feu nu (par ex. bougies en combustion) à proximité de l’appareil ; – ne pas plier ni tendre trop fortement l’adaptateur secteur. 4.5. Réparation DANGER ! Risque d’électrocution ! Les pièces sous tension présentent un risque de choc électrique. -
Page 94: Manipulation Des Piles
4.8. Manipulation des piles La télécommande de l’appareil fonctionne avec deux piles. Veuillez respecter les consignes suivantes : • Conservez les piles neuves et usagées hors de portée des enfants. L’ingestion de piles présente un risque de brûlure chimique. AVERTISSEMENT ! Risque de brûlure ! La télécommande fournie avec l’appareil comporte deux piles. -
Page 95: Nettoyage De L'appareil
• Stockez les piles dans un endroit frais et sec. Une forte source de chaleur directe peut endommager les piles. N’exposez donc pas l’appareil à des sources de chaleur extrêmes. • Ne court-circuitez pas les piles et ne les démontez pas. •... -
Page 96: Contenu De L'emballage
5. Contenu de l’emballage DANGER ! Risque de suffocation ! L’ingestion ou l’inhalation de petites pièces ou de films présente un risque de suffocation. Conservez le film d’emballage hors de portée des en- fants. Retirez le produit de l’emballage et enlevez tous les autres matériaux d’embal- lage. -
Page 97: Vue D'ensemble De L'appareil
6. Vue d’ensemble de l’appareil 6.1. Face avant Nav. / Info Func. VOL + – Bouton de réglage du volume OK – Confirmation de la sélection dans le menu NAV – Navigation dans le menu – Éjection du CD Compartiment CD –... -
Page 98: Face Supérieure
Rouge : microphone désactivé Bleu : en attente de commande vocale Bleu clignotant : traitement d’une commande vocale Impulsions bleues : message vocal en cours Vert-jaune-jaune : aucune connexion au routeur Wi-Fi Écran Capteur infrarouge pour la télécommande 6.2. Face supérieure Sleep 1, 2, 3, 4+ –... -
Page 99: Face Arrière
6.3. Face arrière 1.5A 25 24 Antenne télescopique Emplacement de la plaque signalétique 1A – Port pour support de stockage USB – Port pour casque AUX IN – Port pour périphérique externe DC IN 15V 1.5A – Prise de branchement pour l’adaptateur secteur... -
Page 100: Télécommande
6.4. Télécommande FUNC. – Éjection du CD Snooze SLEEP – Réglage du mode Sommeil Dimmer Sleep Alarm ALARM – Réglage de l’alarme 1/2 – Mise en sourdine MENU – Ouverture du menu MODE MENU SCAN – Recherche des stations de radio PRESET –... -
Page 101: Insertion/Remplacement Des Piles De La Télécommande
7. Insertion/remplacement des piles de la télécommande Insérez deux piles R03/LR03/AAA/Micro 1,5 V dans la télécommande. AVERTISSEMENT ! Risque d’explosion ! Risque d’explosion en cas de remplacement non conforme des piles. Remplacez les piles uniquement par des piles du même type ou d’un type équivalent. -
Page 102: Réception D'antenne
8.2. Réception d’antenne L’appareil comporte au dos une antenne télescopique. Sortez complètement l’antenne et orientez-la pour une réception optimale. 8.3. Branchement des périphériques externes 1.5A 8.3.1. Raccordement d’un casque L’appareil est équipé à l’arrière d’une prise casque de 3,5 mm. ... -
Page 103: Utilisation De L'appareil
8.3.2. Raccordement d’un périphérique USB Vous pouvez raccorder des clés USB au port USB. Cela vous permet d’écouter de la musique à partir d’une clé USB. Le port USB ne prend pas en charge la lecture de vi- déos. Il permet également de charger un smartphone par exemple. ... -
Page 104: Mise En Marche/Mise En Veille
9.1. Mise en marche/mise en veille Dès que l’appareil est raccordé à l’alimentation électrique, la date et l’heure sont af- fichées sur l’écran. L’appareil est en mode veille. Les commandes vocales Alexa sont également disponibles en mode veille. Appuyez sur la touche FUNC. de l’appareil ou de la télécommande pour allumer l’appareil. -
Page 105: Fonctions Sonores
9.4. Fonctions sonores 9.4.1. Réglage du volume Réglez le volume à l’aide – du bouton VOL + sur l’appareil ou – des touches /+ de la télécommande. Appuyez sur pour mettre l’appareil en sourdine. Le même symbole s’affiche à... -
Page 106: Alarme
9.5.2. Format de l’heure L’heure peut être affichée au format 12 ou 24 heures. Ouvrez le menu en appuyant sur la touche MENU. Si un titre est en cours de lecture, utilisez les touches / pour sélectionner l’option MAIN MENU puis confirmez avec OK. ... -
Page 107: Minuterie De Sommeil
– ENABLE – désactivation de l’alarme (OFF) ; définition d’une alarme quoti- dienne (DAILY) ou unique (ONCE). Il est possible de configurer des alarmes régulières en semaine (WEEKDAYS) et le week-end (WEEKENDS), – TIME – réglage de l’heure de l’alarme, –... -
Page 108: Variation De La Luminosité
9.8. Variation de la luminosité Vous pouvez régler quatre niveaux de luminosité de l’écran. Appuyez une ou plusieurs fois sur la touche DIMMER pour faire varier la lumino- sité de l’écran. 10. Fonctionnement de la radio Cette radio vous permet de capter des stations FM et DAB. Votre radio dispose de l’offre d’informations DLS (Dynamic Label Segment –... -
Page 109: Réglages Du Menu
10.1.2. Mémorisation de stations DAB Vous pouvez mémoriser jusqu’à 30 stations DAB préréglées dans une liste de sta- tions séparée. Commencez par sélectionner la station que vous souhaitez mémoriser. Maintenez la touche PRESET enfoncée pour afficher la liste des stations mémo- risées. -
Page 110: Mode Fm
10.3. Mode FM 10.3.1. Mémorisation automatique de stations Maintenez la touche SCAN enfoncée jusqu’à ce que la recherche démarre. Toutes les stations trouvées sont mémorisées par fréquence. 10.3.2. Recherche manuelle de stations FM Vous pouvez rechercher des stations de plusieurs manières : ... -
Page 111: Affichage D'informations À L'écran
10.4. Affi chage d’informations à l’écran En mode DAB ou FM, appuyez sur la touche OK de la télécommande ou sur la touche INFO de l’appareil pour lire successivement les informations suivantes à l’écran : erreur de signal (DAB), intensité du signal, nom/informations de la station, type de programme, numéro de canal/fréquence, date, débit binaire/codec/canal. -
Page 112: Sélection De Titres, Retour/Avance Rapides
10.9. Sélection de titres, retour/avance rapides Appuyez sur la touche pour revenir au début d’un titre lu (CD uniquement). Appuyez à nouveau sur la touche pour revenir au titre précédent. Appuyez sur la touche pour passer au titre suivant. ... -
Page 113: Mode Bluetooth
Effectuez un appairage avec le périphérique externe. Lisez à ce sujet la notice d’utilisation du périphérique externe. Le nom du système audio est « MEDION MD 44007 ». CONNECTED s’affiche en permanence à l’écran, le couplage est terminé et le péri- phérique externe peut être utilisé... -
Page 114: Branchement D'un Périphérique De Lecture Externe
Vous pourrez ainsi procéder aux réglages pour activer la commande vocale. Commencez par installer l’application Medion Speaker sur votre smartphone. Elle est disponible gratuitement dans l’App Store (Apple) ou le Google Play Store (Android). Le scanner de code QR sur votre smartphone vous permet d’accéder directement à... -
Page 115: Écoute De Musique Avec Spotify
® Pour activer Amazon Alexa , connectez la micro chaîne audio à votre compte Ama- zon. Pour cela, vous devez déjà disposer d’un compte Amazon. Lorsque la configuration est terminée, vous pouvez fermer l’application Medion Speaker. 10.15.2. Commande La commande vocale réagit à votre voix. Lorsque vous vous adressez à votre appa- reil avec le mot «... -
Page 116: Réglage De La Luminosité De L'écran
11. Réglage de la luminosité de l’écran Le menu peut être affiché dans différentes langues : Ouvrez le menu en appuyant sur la touche MENU. À l’aide des touches /, sélectionnez l’option MAIN MENU puis confirmez avec OK. En fonction du mode de fonctionnement, le menu MAIN MENU s’ouvre directe- ment lorsque vous appuyez sur la touche MENU. -
Page 117: Nettoyage
14. Nettoyage • Avant le nettoyage, débranchez la fiche de la prise de courant. Nettoyez les faces extérieures de l’appareil avec un chiffon doux et sec. Évitez les solvants et pro- duits d’entretien chimiques qui pourraient endommager la surface et/ou les ins- criptions sur l’appareil. - Page 118 Problème Cause possible Mesure Débranchez l’adaptateur secteur de l’appareil de la De la condensation s’est for- prise de courant et atten- mée. dez que l’appareil et le CD s’adaptent aux conditions ambiantes. L’appareil est uniquement CD non lu compatible avec les for- Le format de CD n’est pas pris mats de CD indiqués dans...
-
Page 119: Mise À L'arrêt
16. Mise à l’arrêt Si vous n’utilisez pas l’appareil durant une période prolongée, veuillez le mettre hors tension. Pour ce faire, débranchez la fiche d’alimentation de la prise de courant et retirez les piles. L’appareil s’éteint automatiquement au bout de 15 minutes d’inactivité. ... -
Page 120: Caractéristiques Techniques
18. Caractéristiques techniques Appareil Tension d’entrée 15 V 1,5 A Consommation pendant le fonc- max. 22,5 watts tionnement Consommation à l’arrêt Env. 4 watts Puissance de sortie 1 x 15 watts RMS Puissance du laser Laser de classe 1 Formats pris en charge CD-R, CD-RW, CD audio Nombre d’emplacements mé- moire de la lecture program-... - Page 121 Profils A2DP, AVRCP 1.4 Portée Jusqu’à 10 mètres (sans obstacles) Fréquence de fonctionnement 2,4 GHz Wi-Fi Plage de fréquences 2 412 à 2 472 MHz Puissance d’émission maximale 18,9 dBm Canal 1-13 Norme Wi-Fi : 802.11 b/g/n Cryptage : WEP/WPA/WPA2 Valeurs ambiantes En fonctionnement : 10 °C ~ +45 °C Températures...
-
Page 122: Symboles Sur La Plaque Signalétique Et L'adaptateur Secteur
Classe de protection Télécommande Piles 2 piles de 1,5 V R03/LR03/AAA/Micro 18.1. Symboles sur la plaque signalétique et l’adaptateur secteur Classe de protection II Les appareils électriques de la classe de protection II sont des appa- reils électriques qui possèdent une isolation double continue et/ou renforcée et qui ne présentent pas de possibilité... -
Page 123: Informations Relatives Au Service Après-Vente
Électroménager et électronique grand public Lun - Ven : 7h00 à 23h00 0848 - 24 24 26 Sam/Dim : 10h00 à 18h00 Hotline SAV 0848 - 33 33 32 Adresse du service après-vente MEDION/LENOVO Service Center Ifangstrasse 6 8952 Schlieren Suisse... - Page 124 Belgique Horaires d’ouverture Hotline SAV Lun - Ven : 9h00 à 19h00 02 - 200 61 98 Adresse du service après-vente MEDION B.V. John F.Kennedylaan 16a 5981 XC Panningen Nederland Luxembourg Horaires d’ouverture Hotline SAV Lun - Ven : 9h00 à 19h00 34 - 20 808 664 Adresse du service après-vente...
-
Page 125: Mentions Légales
La présente notice d’utilisation est protégé par les droits d’auteur. Toute reproduction sous forme mécanique, électronique ou sous toute autre forme que ce soit est interdite sans l’autorisation préalable écrite du fabricant. L’entreprise suivante possède les droits d’auteur : MEDION AG Am Zehnthof 77 45307 Essen Allemagne Veuillez noter que l’adresse ci-dessus n’est pas celle du service des retours. - Page 126 Índice Información acerca de este manual de instrucciones ......129 1.1. Explicación de los símbolos ................129 Uso conforme a lo previsto ..............130 Información sobre la conformidad UE ........... 131 3.1. Información sobre marcas registradas ............. 131 Indicaciones de seguridad ..............132 4.1.
- Page 127 10.5. Reproducción de CD y memorias USB............154 10.6. Inserción/expulsión del disco ..............154 10.7. Conexión de dispositivos USB ..............154 10.8. Inicio/detención/parada de la reproducción ......... 154 10.9. Selección de pistas, avance/retroceso rápido ........154 10.10. Repetición/Reproducción aleatoria ............155 10.11.
-
Page 128: Información Acerca De Este Manual De Instrucciones
1. Información acerca de este manual de instrucciones Muchas gracias por haber elegido nuestro producto. Le deseamos que disfrute con este aparato. Antes de la puesta en servicio, lea atentamente las indicaciones de segu- ridad y todo el manual. Tenga en cuenta las advertencias que aparecen en el propio aparato y en el manual de instrucciones. -
Page 129: Uso Conforme A Lo Previsto
ADVERTENCIA! Advertencia de peligro por descarga eléctrica. • Signo de numeración/información sobre eventos durante el manejo Instrucción operativa que debe ejecutarse 2. Uso conforme a lo previsto Su aparato le ofrece diversas posibilidades de uso: el aparato sirve para reproducir medios de audio (CD, reproduc- tores MP3, a través de USB, a través de Bluetooth), para la recep- ción analógica y digital de radio y para el control por voz con Amazon Alexa®. -
Page 130: Información Sobre La Conformidad Ue
3. Información sobre la conformidad UE Por la presente, MEDION AG declara que este aparato cumple los requisitos básicos y el resto de disposiciones pertinentes: • Directiva 2014/53/UE sobre la comercialización de equipos radioeléctricos • Directiva 2009/125/CE sobre diseño ecológico •... -
Page 131: Indicaciones De Seguridad
4. Indicaciones de seguridad 4.1. Grupo de personas limitado • El aparato no está concebido para ser usado por personas (in- cluidos niños) con capacidades físicas, sensoriales o menta- les limitadas o que carezcan de experiencia y/o conocimien- tos, a menos que les supervise una persona responsable de su seguridad o reciban indicaciones sobre cómo usar el aparato. -
Page 132: Seguridad Operativa
4.2. Seguridad operativa Antes de utilizarlo, inspeccione el aparato para asegurarse de que no presenta daños. Un aparato defectuoso o dañado no debe utilizarse. PELIGRO! ¡Peligro de descarga eléctrica! Peligro de sufrir lesiones por descarga eléctrica debi- do a piezas conductoras de corriente. Existe el peligro de que, en caso de un cortocircuito involuntario, estos componentes causen una descarga eléctrica o un in- cendio. -
Page 133: Alimentación Eléctrica
4.3. Alimentación eléctrica PELIGRO! ¡Peligro de descarga eléctrica! Peligro de sufrir lesiones por descarga eléctrica debido a piezas conductoras de corriente. Conecte el aparato exclusivamente a una toma de corriente con puesta a tierra (230 V ~ 50 Hz) fácil- mente accesible y debidamente instalada cerca del lugar de emplazamiento. -
Page 134: Lugar De Instalación/Entorno
4.4. Lugar de instalación/entorno PELIGRO! ¡Peligro de descarga eléctrica! En caso de grandes variaciones de temperatura o hu- medad, puede formarse humedad dentro del aparato por condensación y esta puede provocar un cortocir- cuito eléctrico. Después de transportar el aparato, espere hasta que este tenga la temperatura ambiente antes de poner- lo en funcionamiento. -
Page 135: Reparación
– no haya llamas abiertas (p. ej., velas encendidas) cerca del aparato; – el cable de conexión no se halle bajo tensión de tracción y no se doble. 4.5. Reparación PELIGRO! ¡Peligro de descarga eléctrica! Existe peligro de descarga eléctrica a causa de las pie- zas conductoras de electricidad. -
Page 136: Manipulación De Las Pilas
4.8. Manipulación de las pilas El mando a distancia de este aparato funciona con dos pilas. Ob- serve al respecto las siguientes indicaciones: • Mantenga las pilas nuevas y usadas alejadas de los niños. No ingiera las pilas, ya que existe peligro de quemaduras quími- cas. -
Page 137: Limpieza Del Aparato
• Almacene las pilas en un lugar fresco y seco. El calor intenso directo puede dañar las pilas. Por ello, no exponga el aparato a fuentes de calor intensas. • No cortocircuite las pilas ni las despiece. • Nunca tire las pilas al fuego. ¡Peligro de explosión! •... -
Page 138: Volumen De Suministro
5. Volumen de suministro PELIGRO! ¡Peligro de asfixia! Existe peligro de asfixia por la ingestión o inhalación de piezas pequeñas o láminas de plástico. Mantenga la lámina de plástico del embalaje alejada de los niños. Extraiga el producto del embalaje y retire todo el material de embalaje. ... -
Page 139: Vista General Del Aparato
6. Vista general del aparato 6.1. Parte delantera Nav. / Info Func. VOL +: regulador de volumen OK: confirmar selección en el menú NAV: navegar por el menú : expulsar el CD Compartimiento de CD : desactivar el micrófono para Alexa : activar Alexa ALARM: ajustar alarma 1/2 MENU: abrir menú... -
Page 140: Parte Superior
azul intermitente: procesando un comando de voz azul vibrante: mensaje de voz activo verde-amarillo-amarillo: sin conexión con el router wifi Pantalla Sensor infrarrojo para el mando a distancia 6.2. Parte superior Sleep 1, 2, 3, 4+: posiciones de memoria para emisoras de radio SLEEP: ajustar el modo sleep SNOOZE: repetición de alarma DIMMER: ajustar brillo de pantalla... -
Page 141: Parte Trasera
6.3. Parte trasera 1.5A 25 24 Antena telescópica Posición de la placa de características 1A: jack para medio de almacenamiento USB : jack para auriculares AUX IN: jack para dispositivo externo DC IN 15V 1.5A : jack para fuente de alimentación del conector... -
Page 142: Mando A Distancia
6.4. Mando a distancia FUNC. : expulsar el CD Snooze SLEEP: ajustar el modo Sleep Dimmer Sleep Alarm ALARM: ajustar alarma 1/2 : modo silencioso MENU: abrir menú MODE MENU SCAN: escanear emisoras de radio PRESET: consultar emisoras de radio guardadas Teclas numéricas /+: subir/bajar el volumen... -
Page 143: Colocación/Cambio De Las Pilas En El Mando A Distancia
7. Colocación/cambio de las pilas en el mando a distancia Introduzca dos pilas de 1,5 V R03/LR03/AAA/Micro en el mando a distancia. ADVERTENCIA! ¡Peligro de explosión! Peligro de explosión en caso de un cambio inadecuado de la pila. Las pilas solo deben sustituirse por otras del mismo tipo o un tipo equivalente. -
Page 144: Recepción De Antena
8.2. Recepción de antena En la parte trasera del aparato hay una antena telescópica. Extráigala completamente y ajústela para una recepción óptima. 8.3. Conexión de dispositivos externos 1.5A 8.3.1. Conexión de los auriculares En la parte posterior del aparato hay una conexión para auriculares de 3,5 mm. ... -
Page 145: Manejo Del Aparato
8.3.2. Conexión de dispositivos USB En la conexión USB puede conectar memorias USB. De este modo, pueden reprodu- cirse canciones de una memoria USB. La conexión USB no es compatible con la re- producción de vídeo. Además, se soporta la carga de p. ej. un smartphone. ... -
Page 146: Encendido/Cambio Al Modo Standby
9.1. Encendido/cambio al modo Standby En cuanto se ha conectado el aparato a la alimentación eléctrica, en la pantalla se muestra la fecha y la hora. El aparato se encuentra en el modo Standby. En el modo Standby también son posibles órdenes de voz para Alexa. ... -
Page 147: Funciones De Audio
9.4. Funciones de audio 9.4.1. Ajuste del volumen Regule el volumen con – el regulador VOL + del aparato o – con las teclas /+ del mando a distancia. Pulse para silenciar el audio. En la pantalla aparece el símbolo idéntico. Vuel- va a pulsar la tecla para desactivar el modo silencioso. -
Page 148: Alarma
9.5.2. Formato de hora La hora puede visualizarse en el formato de 12 o 24 horas. Abra el menú pulsando la tecla MENU. En caso de que se esté reproduciendo una pista, seleccione con / la entrada MAIN MENU y confírmela con OK. ... -
Page 149: Temporizador De Apagado
– PRESET: selección de una emisora de radio de una lista de emisoras con la que debe iniciarse la alarma o LAST PRESET para la última emisora ajustada, – VOLUME: seleccionar volumen de la alarma, – SAVE: guardar los ajustes realizados ... -
Page 150: Funcionamiento De Radio
10. Funcionamiento de radio Con esta radio puede sintonizar emisoras VHF y emisoras DAB. Su radio dispone del servicio de información Segmento de Etiqueta Dinámica (DLS, por sus siglas en inglés), que muestra a través de la pantalla información como el in- térprete, el título de la canción o las noticias de tráfico disponibles. -
Page 151: Ajustes De Menú
10.1.3. Consulta de emisoras DAB memorizadas Pulse la tecla PRESET. En la pantalla aparece la lista con las emisoras memoriza- das. Seleccione con / la posición de memoria que desee. Pulse la tecla OK para reproducir la emisora de radio. 10.2. -
Page 152: Modo Fm
10.3. Modo FM 10.3.1. Memorización automática de emisoras Mantenga pulsada la tecla SCAN hasta que se inicie la búsqueda. Todas las emi- soras encontradas se guardan ordenadas por frecuencia. 10.3.2. Búsqueda manual de emisoras VHF Puede buscar las emisoras de distintas formas: ... -
Page 153: Visualización De Información En La Pantalla
10.4. Visualización de información en la pantalla En el modo DAB o FM pulse la tecla OK del mando a distancia o INFO en el aparato para leer la siguiente información consecutivamente en la pantalla: error de señal (DAB), intensidad de señal, nombre/información de la emisora, tipo de programa, número de canal/frecuencia, fecha, tasa de bits/códec/canal. -
Page 154: Repetición/Reproducción Aleatoria
10.10. Repetición/Reproducción aleatoria Abra el menú pulsando la tecla MENU. Seleccione con / la entrada CD REPEAT y/o USB REPEAT y confírmela con Seleccione con / la entrada que desee. – Repetición apagada (REPEAT OFF aparece en la pantalla; solo en el modo CD), –... -
Page 155: Conexión De Un Dispositivo De Reproducción Externo
10.13.1. Primera conexión de aparatos con Bluetooth Cambie al modo Bluetooth. En la pantalla aparece CONNECTING... Active también la función de Bluetooth en su dispositivo externo. El sistema de audio micro se halla automáticamente en el modo de emparejamien- ... -
Page 156: Control Por Voz Amazon Alexa
Con ella puede llevar a cabo los ajustes ne- cesarios para activar el control por voz. Instale en primer lugar la app Medion Speaker en su smartpho- ne. Dicha app está disponible gratuitamente en la App Store (Apple) o Google Play Store (Android). -
Page 157: Escuchar Música A Través De Spotify
10.15.3. Modo silencioso del micrófono Pulse la tecla de modo silencioso del micrófono si desea silenciar temporalmen- te el micrófono de su aparato. En este caso, Amazon Alexa® no recibe ninguna señal y está desactivado. El indicador LED debajo de la pantalla se enciende permanente- mente en rojo. -
Page 158: Restablecimiento De La Configuración De Fábrica
12. Restablecimiento de la confi guración de fábrica Si el aparato presenta un funcionamiento defectuoso, puede restablecerlo a la con- figuración de fábrica. En este caso se borran todos los ajustes, como las emisoras de radio guardadas y la configuración wifi. ... -
Page 159: En Caso De Fallos
15. En caso de fallos En caso de que se produzcan fallos, compruebe primero si puede solucionar usted mismo el problema. El siguiente sinóptico puede resultarle de ayuda. Fallo Posible causa Medida Desenchufe la fuente de Aparato averiado a causa de alimentación del conector tormenta, una descarga está- de la toma de corriente y... -
Page 160: Puesta Fuera De Servicio
Fallo Posible causa Medida Compruebe si está ajusta- da la hora de alarma co- La alarma no La alarma no está correcta- rrecta. se enciende mente ajustada. Compruebe si la alarma está activada. PELIGRO! ¡Peligro de descarga eléctrica! Peligro de sufrir lesiones por descarga eléctrica debido a piezas conductoras de corriente. -
Page 161: Eliminación
17. Eliminación EMBALAJE El aparato se envía embalado para protegerlo de posibles daños duran- te el transporte. Los embalajes están hechos con materiales que pueden desecharse de forma respetuosa con el medioambiente y llevarse a un punto de reciclaje. APARATO Los aparatos usados no deben desecharse con la basura doméstica nor- mal. -
Page 162: Datos Técnicos
18. Datos técnicos Aparato Tensión de entrada 15 V 1,5 A Consumo de potencia en funcio- max. 22,5 W namiento Consumo de potencia apagado aprox. 4 W Potencia de salida 1 x 15 vatios RMS Potencia láser Láser clase 1 Formatos soportados CD-R, CD-RW, CD de audio Número de posiciones de me-... - Page 163 Perfil A2DP, AVRCP 1.4 Alcance hasta 10 metros (sin obstáculos) Frecuencia de servicio 2,4 GHz WLAN Rango de frecuencia 2412-2472 MHz Potencia de emisión máx. 18,9 dBm Canal 1-13 Wifi estándar: 802.11 b/g/n Cifrado: WEP/WPA/WPA2 Valores ambientales Durante el servicio: 10 °C ~ +45 °C Temperaturas Fuera de servicio (en el embalaje): -20 °C ~ +60 °C...
-
Page 164: Símbolos Que Aparecen En La Placa De Características Y En La Fuente De Alimentación
Clase de protección Mando a distancia Pila 2x pilas de 1,5 V R03/LR03/AAA/Micro 18.1. Símbolos que aparecen en la placa de características y en la fuente de alimentación Clase de protección II Los aparatos eléctricos de la clase de protección II son aparatos que disponen de un aislamiento doble y/o reforzado continuo y que no tienen posibilidad de conexión de un conductor de puesta a tierra. -
Page 165: Informaciones De Asistencia Técnica
• Si lo desea, también puede utilizar nuestro formulario de contacto que encon- trará en www.medion.com/contact. • Por supuesto, nuestro equipo de asistencia técnica también está a su disposición a través de nuestra línea directa o por correo postal. -
Page 166: Aviso Legal
Este manual de instrucciones está protegido por derechos de autor. Queda prohibida la reproducción mecánica, electrónica o de cualquier otro tipo sin la autorización por escrito del fabricante. El copyright pertenece a la empresa: MEDION AG Am Zehnthof 77 45307 Essen Alemania Tenga en cuenta que la dirección indicada arriba no es una dirección para devolu-... - Page 168 Contenuto Informazioni relative alle presenti istruzioni per l’uso ......171 1.1. Spiegazione dei simboli ................. 171 Utilizzo conforme ..................172 Informazioni sulla conformità UE ............173 3.1. Informazioni sui marchi ................. 173 Indicazioni di sicurezza ................174 4.1. Limitazione d’uso ..................... 174 4.2.
- Page 169 10.5. Riproduzione di CD e supporti di memorizzazione USB ....195 10.6. Inserimento/espulsione del CD ..............196 10.7. Inserimento di un dispositivo USB ............. 196 10.8. Avvio/pausa/arresto della riproduzione ..........196 10.9. Selezione della traccia, scorrimento veloce avanti/indietro ..... 196 10.10.
-
Page 170: Informazioni Relative Alle Presenti Istruzioni Per L'uso
1. Informazioni relative alle presenti istruzioni per l’uso La ringraziamo per l’acquisto di questo prodotto. Ci auguriamo che sia soddisfatto del dispositivo. Prima di utilizzare il prodotto, leggere attentamente e interamente le in- dicazioni di sicurezza e le presenti istruzioni per l’uso. Osservare le av- vertenze riportate sul dispositivo e nelle istruzioni per l’uso. -
Page 171: Utilizzo Conforme
AVVERTENZA! Pericolo di scosse elettriche! Punto elenco/informazioni relative a eventi che si possono verifica- • re durante l’utilizzo Istruzioni operative da seguire 2. Utilizzo conforme Il dispositivo può essere utilizzato in diversi modi: Il dispositivo serve per riprodurre supporti audio (CD, suppor- ti dati MP3, tramite USB, con tecnologia Bluetooth), per ricevere stazioni radio analogiche e digitali e per interagire con l’assisten- te vocale Amazon Alexa®. -
Page 172: Informazioni Sulla Conformità Ue
3. Informazioni sulla conformità UE MEDION AG dichiara che il dispositivo è conforme ai requisiti basilari e alle altre di- sposizioni in materia: • Direttiva RED 2014/53/UE • Direttiva Ecodesign 2009/125/CE • Direttiva RoHS 2011/65/UE La dichiarazione di conformità UE completa può essere scaricata alla pagina www. -
Page 173: Indicazioni Di Sicurezza
4. Indicazioni di sicurezza 4.1. Limitazione d’uso • Questo dispositivo non è destinato a essere utilizzato da per- sone (inclusi i bambini) con capacità fisiche, sensoriali o co- gnitive limitate o con mancanza di esperienza e/o cono- scenze, a meno che non siano controllate da una persona responsabile della loro sicurezza o ricevano da questa ade- guate istruzioni sull’uso del dispositivo. -
Page 174: Utilizzo Sicuro
4.2. Utilizzo sicuro Prima di utilizzare il dispositivo controllare che non sia dan- neggiato. Un dispositivo difettoso o danneggiato non deve essere utilizzato. PERICOLO! Pericolo di scossa elettrica! Pericolo di lesioni da scossa elettrica per la presenza di parti sotto tensione. Un cortocircuito accidentale delle parti sotto tensione può... -
Page 175: Alimentazione Elettrica
4.3. Alimentazione elettrica PERICOLO! Pericolo di scossa elettrica! Pericolo di lesioni da scossa elettrica per la presenza di parti sotto tensione. Collegare il dispositivo solo a una presa con messa a terra (230 V ~ 50 Hz) facilmente raggiungibile, in- stallata a regola d’arte e vicina al punto d’installazio- ne. -
Page 176: Luogo Di Installazione/Ambiente
4.4. Luogo di installazione/ambiente PERICOLO! Pericolo di scossa elettrica! In caso di forte escursione termica o di notevoli varia- zioni dell’umidità dell’aria, la formazione di condensa all’interno del dispositivo può causare un cortocircuito. Dopo avere trasportato il dispositivo, aspettare che abbia raggiunto la temperatura ambiente prima di metterlo in funzione. -
Page 177: Riparazione
4.5. Riparazione PERICOLO! Pericolo di scossa elettrica! Pericolo di scossa elettrica dovuto alla presenza di com- ponenti sotto tensione. Prima e dopo ogni utilizzo verificare che il dispositivo e il cavo di alimentazione non siano danneggiati. Non usare il dispositivo se presenta danni visibili. ... -
Page 178: Utilizzo Delle Batterie
4.8. Utilizzo delle batterie Il telecomando del dispositivo funziona a batterie. Osservare le indicazioni seguenti: • Tenere le batterie nuove e usate fuori dalla portata dei bambi- ni. Non ingerire le batterie. Pericolo di ustione chimica. AVVERTENZA! Pericolo di ustione chimica! Il telecomando fornito in dotazione contiene due batte- rie. -
Page 179: Pulizia Del Dispositivo
• Conservare le batterie in un luogo fresco e asciutto. Fonti di calore diretto possono danneggiare le batterie. Non esporre il dispositivo a fonti di calore eccessive. • Non cortocircuitare o scomporre le batterie. • Non gettare le batterie nel fuoco. Pericolo di esplosione! •... -
Page 180: Contenuto Della Confezione
5. Contenuto della confezione PERICOLO! Pericolo di soffocamento! Pericolo di soffocamento in caso di ingestione o inala- zione di componenti piccoli o pellicole dell’imballaggio. Tenere la pellicola dell’imballaggio fuori dalla porta- ta dei bambini. Estrarre il prodotto dalla confezione e rimuovere tutto il materiale d’imballaggio. ... -
Page 181: Panoramica Del Dispositivo
6. Panoramica del dispositivo 6.1. Lato anteriore Nav. / Info Func. VOL + – Manopola di regolazione del volume OK – Conferma della selezione nel menu NAV – Navigazione all’interno del menu – Espulsione CD Vano CD – Disattivazione del microfono per Alexa –... -
Page 182: Lato Superiore
spento: pronto all’uso rosso: microfono disattivato blu: in attesa di comando vocale blu lampeggiante: elaborazione di un comando vocale blu a luce pulsata: riproduzione vocale attiva verde-giallo-giallo: nessuna connessione con il router WiFi Display Sensore a infrarossi per il telecomando 6.2. -
Page 183: Lato Posteriore
6.3. Lato posteriore 1.5A 25 24 Antenna telescopica Posizione della targhetta 1A – Presa di collegamento per supporto di memoria USB – Presa di collegamento per cuffie/auricolari AUX IN – Presa di collegamento per dispositivo esterno DC IN 15V 1.5A – Presa di collegamento per alimentatore a spina... -
Page 184: Telecomando
6.4. Telecomando FUNC. – Espulsione CD Snooze SLEEP – Impostazione della modalità Dimmer Sleep Alarm Sleep ALARM – Impostazione sveglia 1/2 – Disattivazione dell’audio MODE MENU MENU – Apertura menu SCAN – Ricerca delle stazioni radio PRESET – Richiamo di stazioni radio me- morizzate Tasti numerici /+ –... -
Page 185: Inserimento/Sostituzione Della Batteria Del Telecomando
7. Inserimento/sostituzione della batteria del telecomando Inserire nel telecomando due batterie R03/LR03/AAA/Micro da 1,5 V. AVVERTENZA! Pericolo di esplosione! Pericolo di esplosione in caso di sostituzione scorretta della batteria. Sostituire le batterie soltanto con batterie dello stes- so tipo o di tipo equivalente. ... -
Page 186: Ricezione Antenna
8.2. Ricezione antenna Sul lato posteriore del dispositivo si trova un’antenna telescopica. Estrarla completamente e regolarla per ottenere una ricezione ottimale. 8.3. Collegamento di dispositivi esterni 1.5A 8.3.1. Collegamento di cuffie/auricolari Sul lato posteriore del dispositivo si trova una presa di collegamento per cuffie/auri- colari da 3,5 mm. -
Page 187: Utilizzo Del Dispositivo
8.3.2. Collegamento di un dispositivo USB La presa USB è idonea al collegamento di chiavette USB. In tal modo è possibile ri- produrre brani musicali memorizzati sulla chiavetta USB. La presa USB non suppor- ta la riproduzione di video. Inoltre la ricarica può essere supportata, per es. da uno smartphone. -
Page 188: Accensione/Impostazione Della Modalità Standby
9.1. Accensione/impostazione della modalità standby Non appena il dispositivo è collegato all’alimentazione di corrente, sul display com- paiono la data e l’ora. Il dispositivo si trova in modalità standby. Si possono utilizzare i comandi vocali di Alexa anche quando il dispositivo è in stan- dby. -
Page 189: Funzioni Audio
9.4. Funzioni audio 9.4.1. Regolazione del volume Regolare il volume con – la manopola VOL + sul dispositivo o – con i tasti /+ sul telecomando. Premere per disattivare l’audio. Sul display compare lo stesso simbolo. Pre- mere nuovamente il tasto per riattivare l’audio. -
Page 190: Sveglia
Con / selezionare la voce TIME FORMAT e confermare con OK. Con / selezionare il formato a 12 o 24 ore e confermare con il tasto OK. 9.5.3. Sincronizzazione automatica L’ora e la data possono essere impostate automaticamente, per cui non è necessaria alcuna impostazione manuale. -
Page 191: Timer Di Spegnimento
La sveglia è impostata. Se la sveglia è attivata, sul display compare il simbolo di una campana con a fianco l’orario impostato. 9.6.2. Spegnimento della sveglia Quando suona, la sveglia può essere spenta immediatamente premendo FUNC.. 9.6.3. Ripetizione della sveglia ... -
Page 192: Funzionamento Della Radio
10. Funzionamento della radio Questa radio consente di ricevere le stazioni FM e DAB. La radio è dotata di Dynamic Label Segment (DLS) per visualizzare sul display infor- mazioni quali, ad esempio, interprete, titolo di un brano musicale o informazioni at- tuali sul traffico. -
Page 193: Impostazioni Del Menu
10.1.3. Richiamo di una stazione DAB Premere il tasto PRESET. Sul display viene visualizzato l’elenco delle stazioni ra- dio memorizzate. Selezionare con / la posizione di memoria desiderata. Premere il tasto OK per sentire la stazione radio. 10.2. -
Page 194: Visualizzazione Di Informazioni Sul Display
10.3.3. Memorizzazione di stazioni FM Si possono memorizzare fino a 30 stazioni DAB preimpostate in un elenco di stazio- ni a parte. Selezionare come prima cosa la stazione che deve essere memorizzata. Tenere premuto il tasto PRESET per richiamare l’elenco delle stazioni memoriz- zate. -
Page 195: Inserimento/Espulsione Del Cd
10.6. Inserimento/espulsione del CD Assicurarsi che davanti al dispositivo vi sia uno spazio libero di circa 15 cm, in modo da poter inserire ed espellere il CD senza difficoltà. Inserire delicatamente il CD nel relativo vano con il lato scritto rivolto in alto. Il CD viene prelevato automaticamente e sul display viene visualizzata l’indicazione READING. -
Page 196: Programmazione Di Una Sequenza Di Riproduzione
Eseguire una procedura di associazione sul dispositivo esterno. A tale scopo leg- gere le istruzioni del dispositivo esterno. Il nome dell’impianto stereo è "MEDION MD 44007". Sul display compare CONNECTED, l’associazione è completata e il dispositivo ester- no può essere utilizzato con il micro impianto stereo. -
Page 197: Collegamento Di Un Dispositivo Di Riproduzione Esterno
Tramite tale app si possono eseguire le im- postazioni necessarie per attivare l’assistente vocale. Per prima cosa installare l’app Medion Speaker sul proprio smar- tphone. Quest’app è disponibile gratuitamente nell’App Store (Apple) o nel Google Play Store (Android). Se lo smartphone è do- tato di uno scanner di codici QR sono sufficienti pochi istanti per accedere all’app nel Play Store o nell’App Store. - Page 198 Per attivare Amazon Alexa®, registrare il micro impianto stereo sull’account Amazon. A tale fine è necessario essere già registrati sul sito di Amazon. Dopo aver effettuato tutte le impostazioni è possibile chiudere l’app Medion Speaker. 10.15.2.
-
Page 199: Ascolto Di Musica Tramite Spotify
10.16. Ascolto di musica tramite Spotify® È possibile riprodurre dati audio del servizio di streaming musicale Spotify® tramite la radio Internet. Il presupposto fondamentale è che sullo smartphone o sul PC tablet sia già installata la versione premium dell’app Spotify e che la radio Internet e il disposi- tivo con l’app Spotify siano connessi alla stessa rete. -
Page 200: Visualizzazione Della Versione Software
13. Visualizzazione della versione software Aprire il menu premendo il tasto MENU. Con / selezionare la voce MAIN MENU e confermare con OK. A seconda della modalità, il menu MAIN MENU si apre non appena viene pre- muto il tasto MENU. ... -
Page 201: Messa Fuori Servizio Del Dispositivo
Anomalia Possibile causa Provvedimento Staccare l’alimentato- re dalla presa e attendere Si è formata della condensa. che il dispositivo e il CD si siano adattati alle condi- zioni ambientali. Il CD non viene Il dispositivo supporta riprodotto. Formato CD sbagliato solo i formati CD indicati nei Dati tecnici. -
Page 202: Smaltimento
17. Smaltimento IMBALLAGGIO L’imballaggio protegge il dispositivo da eventuali danni durante il tra- sporto. Gli imballaggi sono prodotti con materiali che possono essere smaltiti nel rispetto dell’ambiente e destinati a un corretto riciclaggio. DISPOSITIVO I dispositivi usati non devono essere smaltiti insieme ai rifiuti domestici. Come previsto dalla direttiva 2012/19/UE, al termine del ciclo di vita del dispositivo occorre smaltirlo correttamente. -
Page 203: Dati Tecnici
18. Dati tecnici Dispositivo Tensione in entrata 15 V 1,5 A Potenza assorbita durante il fun- 22,5 Watt max. zionamento Consumo di energia in modali- 4 Watt circa tà OFF Potenza di uscita 1 x 15 Watt RMS Potenza laser Laser di classe 1 Formati supportati CD-R, CD-RW, CD audio... - Page 204 Profili A2DP, AVRCP 1.4 Portata fino a 10 metri (senza ostacoli) Frequenza operativa 2.4 GHz WLAN Gamma di frequenza 2412-2472 MHz Potenza di trasmissione massima 18,9 dBm Canale 1-13 Standard Wi-Fi: 802.11 b/g/n Crittografia: WEP/WPA/WPA2 Valori ambientali In funzione: 10 °C ~ +45 °C Temperature Non in funzione (all’interno dell’imballaggio): -20 °C ~ +60 °C...
-
Page 205: Simboli Sulla Targhetta E Sull'alimentatore
Alimentatore DongGuan Yingna Electronic Technology Co., Costruttore Ltd. Modello YN-24WA150150EU Tensione in entrata AC 100-240 V ~ 50/60 Hz 0,75 A Tensione di uscita DC 15 V 1,5 A Classe di protezione Classe di protezione II Telecomando 2 batterie da 1,5 V di tipo R03/LR03/AAA/mi- Batteria 18.1. -
Page 206: Informazioni Relative Al Servizio Di Assistenza
Lun.-ven.: 9.00-19.00 0848 - 24 24 26 Assistenza Post-Vendita 0848 - 33 33 32 Indirizzo del servizio di assistenza MEDION/LENOVO Service Center Ifangstrasse 6 8952 Schlieren Svizzera Italia Queste e altre istruzioni per l’uso possono essere scaricate dal portale dell’assistenza www.medion.com/it/. -
Page 207: Note Legali
Svizzera Queste e altre istruzioni per l’uso possono essere scaricate dal portale dell’assistenza www.medion.com/ch/de/service/start/. Lì sono disponibili anche driver e altri software per diversi dispo- sitivi. È inoltre possibile effettuare una scansione del codice QR ripor- tato a fianco e scaricare le istruzioni per l’uso dal portale dell’as- sistenza utilizzando un dispositivo portatile. - Page 208 Inhoudsopgave Informatie over deze gebruiksaanwijzing ..........211 1.1. Betekenis van de symbolen ................211 Gebruiksdoel .................... 212 EU-conformiteitsinformatie ..............213 3.1. Informatie over handelsmerken ..............213 Veiligheidsvoorschriften................. 214 4.1. Personen die het apparaat niet mogen gebruiken ......214 4.2. Veilig gebruik ..................... 215 4.3.
- Page 209 10.5. Cd's en USB-opslag weergeven..............235 10.6. Cd plaatsen/uitwerpen .................. 236 10.7. USB-stick aansluiten ..................236 10.8. Afspelen starten/onderbreken/stoppen ..........236 10.9. Nummers selecteren, snel terug/vooruit ..........236 10.10. Herhaling/shuffle ..................... 236 10.11. Afspeelvolgorde programmeren ..............236 10.12. Nummerinformatie (ID3) ................237 10.13.
-
Page 210: Informatie Over Deze Gebruiksaanwijzing
1. Informatie over deze gebruiksaanwijzing Hartelijk dank dat u voor ons product hebt gekozen. Wij wensen u veel plezier met het apparaat. Lees de veiligheidsvoorschriften en de volledige gebruiksaanwijzing aandachtig door voordat u het apparaat in gebruik neemt. Neem de waarschuwingen op het apparaat en in de gebruiksaanwijzing in acht. -
Page 211: Gebruiksdoel
WAARSCHUWING! Waarschuwing voor gevaar door een elektrische schok! Opsommingsteken/informatie over gebeurtenissen die zich tijdens • de bediening kunnen voordoen Instructie voor een uit te voeren handeling 2. Gebruiksdoel Het apparaat heeft veel gebruiksmogelijkheden: Het apparaat dient voor het afspelen van geluidsmedia (cd’s, mp3-gegevensdragers, via USB, via Bluetooth), voor de analoge en digitale radio-ontvangst, en ondersteunt spraakbesturing via Amazon Alexa®. -
Page 212: Eu-Conformiteitsinformatie
– hoge luchtvochtigheid of vocht; – extreem hoge en lage temperaturen; – direct zonlicht; – open vuur. 3. EU-conformiteitsinformatie Hierbij verklaart MEDION AG dat dit apparaat in overeenstemming is met de funda- mentele eisen en de overige toepasselijke voorschriften: • RE-richtlijn 2014/53/EU •... -
Page 213: Veiligheidsvoorschriften
4. Veiligheidsvoorschriften 4.1. Personen die het apparaat niet mogen gebruiken • Het apparaat is niet bedoeld om te worden gebruikt door per- sonen (inclusief kinderen) met een lichamelijke, zintuiglijke of geestelijke beperking of met onvoldoende kennis en/of er- varing, tenzij iemand die verantwoordelijk is voor hun veilig- heid, toezicht op hen houdt of hen instructie heeft gegeven hoe ze het apparaat moeten gebruiken. -
Page 214: Veilig Gebruik
4.2. Veilig gebruik Controleer het apparaat vóór gebruik op beschadigingen. Een defect of beschadigd apparaat mag niet worden gebruikt. GEVAAR! Gevaar voor een elektrische schok! Gevaar voor letsel als gevolg van elektrische schokken door stroomvoerende onderdelen. Bij deze onderdelen bestaat gevaar voor elektrische schokken of brand door onbedoelde kortsluiting. -
Page 215: Stroomvoorziening
4.3. Stroomvoorziening GEVAAR! Gevaar voor een elektrische schok! Gevaar voor letsel als gevolg van elektrische schokken door stroomvoerende onderdelen. Sluit het apparaat alleen aan op een goed bereikbaar en volgens voorschrift geïnstalleerd, geaard stop- contact (230 V~/50 Hz) in de buurt van het apparaat. Zorg ervoor dat het stopcontact altijd goed toegan- kelijk is, zodat de netadapter ongehinderd kan wor- den uitgetrokken. -
Page 216: Plaats Van Opstelling / Omgeving
4.4. Plaats van opstelling / omgeving GEVAAR! Gevaar voor een elektrische schok! Bij grote schommelingen in temperatuur of luchtvoch- tigheid kan er door condensatie vocht in het apparaat terechtkomen, waardoor er kortsluiting kan ontstaan. Neem het apparaat nadat het is vervoerd pas weer in gebruik als het de omgevingstemperatuur heeft aan- genomen. -
Page 217: Reparatie
– Let op dat zich geen bronnen van open vuur (zoals bran- dende kaarsen) in de buurt van het apparaat bevinden. – Zorg ervoor dat het netsnoer niet onder trekspanning staat en niet is geknikt. 4.5. Reparatie GEVAAR! Gevaar voor een elektrische schok! Er bestaat gevaar voor een elektrische schok door stroomvoerende onderdelen. -
Page 218: Drives En Aansluitingen
4.7. Drives en aansluitingen • Steek geen vreemde voorwerpen in de openingen van de cd-speler. Het apparaat kan hierdoor beschadigd raken. • Plaats cd's altijd met het label naar voren in de cd-lade. Oefen bij het plaatsen van een cd of het aansluiten van een extern apparaat nooit veel kracht uit. - Page 219 • Plaats uitsluitend nieuwe batterijen van hetzelfde type. Ge- bruik nooit oude en nieuwe batterijen door elkaar. • Let bij het plaatsen van de batterijen op de polariteit (+/-). • Als de batterijen niet op de juiste manier worden vervangen, bestaat er explosiegevaar.
-
Page 220: Apparaat Reinigen
4.9. Apparaat reinigen GEVAAR! Gevaar voor een elektrische schok! Gevaar voor letsel als gevolg van elektrische schokken door stroomvoerende onderdelen. Trek de stekker uit het stopcontact voordat u het ap- paraat reinigt. LET OP! Mogelijke materiële schade Door verkeerde behandeling van kwetsbare oppervlak- ken kan het apparaat beschadigd raken. -
Page 221: Overzicht Van Het Apparaat
6. Overzicht van het apparaat 6.1. Voorkant Nav. / Info Func. VOL + – Volumeregelaar OK – Keuze in het menu bevestigen NAV – In het menu navigeren – Cd uitwerpen Cd-lade – Microfoon voor Alexa deactiveren – Alexa activeren ALARM –... -
Page 222: Bovenkant
blauw: wachten op spraakopdracht blauw knipperend: verwerking van een spraakopdracht blauw pulserend: spraakweergave actief groen-geel-geel: geen verbinding met de wifi-router Display Infraroodsensor voor de afstandsbediening 6.2. Bovenkant Sleep 1, 2, 3, 4+ – Geheugenplaatsen voor radiozender SLEEP – Sleepmodus instellen SNOOZE –... -
Page 223: Achterkant
6.3. Achterkant 1.5A 25 24 Telescoopantenne Positie van het typeplaatje 1A – Connector voor USB-opslagmedium – Connector voor hoofdtelefoon AUX IN – Connector voor extern apparaat DC IN 15V 1.5A – Connector voor netadapter... -
Page 224: Afstandsbediening
6.4. Afstandsbediening FUNC. – Cd uitwerpen Snooze SLEEP – Sleepmodus instellen Dimmer Sleep Alarm ALARM – Alarm 1/2 instellen – geluid dempen MENU – Menu openen MODE MENU SCAN – Radiozenders scannen PRESET – Opgeslagen radiozenders op- roepen Cijfertoetsen /+ – Volume verlagen/verhogen ... -
Page 225: Batterij In De Afstandsbediening Plaatsen/Vervangen
7. Batterij in de afstandsbediening plaatsen/ vervangen Plaats twee 1,5 V-batterijen R03/LR03/AAA/Micro in de afstandsbediening. WAARSCHUWING! Explosiegevaar! Er bestaat explosiegevaar als de batterijen niet op de juiste manier worden vervangen. Vervang batterijen alleen door hetzelfde of een ge- lijkwaardig type. -
Page 226: Antenne-Ontvangst
8.2. Antenne-ontvangst Aan de achterkant van het apparaat bevindt zich een telescoopantenne. Trek deze er helemaal uit en stel deze voor de optimale ontvangst af. 8.3. Externe apparaten aansluiten 1.5A 8.3.1. Hoofdtelefoon aansluiten Aan de rechterkant van het apparaat bevindt zich een 3,5 mm aansluiting voor een hoofdtelefoon. -
Page 227: Apparaat Bedienen
8.3.2. USB-apparaat aansluiten Op de USB-aansluiting kunt u USB-sticks aansluiten. Zo kunt u met het apparaat muziek van een USB-stick afspelen. De USB-aansluiting ondersteunt geen video- weergave. Bovendien wordt het opladen van bijv. een smartphone ondersteund. Sluit een USB-apparaat op de USB-aansluiting USB 5V 1A aan. -
Page 228: Inschakelen/In De Stand-Bymodus Schakelen
9.1. Inschakelen/in de stand-bymodus schakelen Zodra het apparaat op het stroomnet is aangesloten, wordt op het display de da- tum en de tijd weergegeven. Het apparaat bevindt zich in de stand-bymodus. Alexa-spraakopdrachten zijn ook in de stand-bymodus mogelijk. Druk op de toets FUNC. aan het apparaat of op de afstandsbediening om het apparaat in te schakelen. -
Page 229: Geluidsfuncties
9.4. Geluidsfuncties 9.4.1. Volume instellen Regel het volume met – de regelaar VOL + aan het apparaat of – met de toetsen /+ op de afstandsbediening. Druk op om het geluid uit te schakelen. Op het display verschijnt het gelijk uitziende symbool. -
Page 230: Alarm
Selecteer met / de optie TIME FORMAT en bevestig met OK. Stel met / het 12- of 24-uursformaat in en bevestig met de toets OK. 9.5.3. Automatische synchronisatie De tijd en de datum kunnen automatisch worden ingesteld zodat er geen handma- tige instelling nodig is. -
Page 231: Sleeptimer
9.6.2. Alarm beëindigen Als het alarm weerklinkt, kunt u dit door op FUNC. te drukken onmiddellijk be- eindigen. 9.6.3. Sluimerfunctie U kunt door op SNOOZE te drukken het weksignaal na 9 minuten opnieuw la- ten weerklinken. Op het display verschijnt een aflopende tijd. ... -
Page 232: Dab-Modus
10.1. DAB-modus De eerste keer dat het apparaat wordt gebruikt in de DAB-modus, gaat het automa- tisch naar alle te ontvangen DAB-zenders zoeken en slaat het iedere zender die het vindt, direct op, zodat het zoeken van zenders maar één keer hoeft te gebeuren. ... -
Page 233: Menu-Instellingen
10.2. Menu-instellingen De bediening in het menu gebeurt zoals in het hoofdstuk “9. Apparaat bedienen" op blz. 228 beschreven. Druk op de toets MENU om naar het menu te gaan. STATION LIST Zenderlijst weergeven FULL SCAN Volledig zoeken naar zenders en opslaan van alle ge- vonden zenders MANUAL TUNE Handmatige selectie van de frequentie... -
Page 234: Informatie Weergeven Op Het Display
Selecteer met / de gewenste geheugenplaats. Druk op de toets OK om de radiozender op te slaan. Er wordt een bevestiging op het display weergegeven. Radiozenders die zich in de lijst van de opgeslagen zenders bevinden, worden op het display met een sterretje en het nummer van de geheugenplaats weergegeven. -
Page 235: Cd Plaatsen/Uitwerpen
10.6. Cd plaatsen/uitwerpen Zorg ervoor dat er vóór het apparaat ca. 15 cm plaats is, zodat de cd bij het plaatsen of uitwerpen niet wordt gehinderd. Schuif voorzichtig een cd met de beschreven zijde naar boven in de cd-schacht. De cd-lade wordt automatisch gesloten en in het display verschijnt READING. -
Page 236: Nummerinformatie (Id3)
Voer de koppelingsprocedure op het externe apparaat uit. Zie hiervoor de hand- leiding van het externe apparaat. De naam van het audiosysteem is "MEDION MD 44007". Zodra CONNECTED in het display niet meer knippert, is de koppeling voltooid en kan het externe apparaat worden gebruikt op het micro-audiosysteem. -
Page 237: Extern Afspeelapparaat Aansluiten
Met de app kunt u instellin- gen voor het activeren van de spraakbesturing definiëren. Installeer eerst de app Medion Speaker op uw smartphone. Deze kan gratis worden gedownload in de Google Play Store (Android) of de App Store (Apple). - Page 238 Volg ook daarvoor de instructies op het display. Meld u op het micro-audiosysteem bij uw Amazon-account aan om Amazon Alexa® te activeren. Daarvoor moet u al geregistreerd zijn bij Amazon. Zodra u klaar bent met de instellingen, kunt u de Medion Speaker-app sluiten. 10.15.2. Bediening De spraakbesturing reageert op uw stem.
-
Page 239: Muziek Beluisteren Via Spotify
10.16. Muziek beluisteren via Spotify® U kunt met de internetradio audiobestanden van de mu- ziekstreamingservice Spotify® afspelen. Als voorwaarde geldt dat uw smartphone of tablet beschikt over de premi- um-versie van de Spotify-app en dat de internetradio en het apparaat met de Spo- tify-app zijn verbonden via hetzelfde netwerk. -
Page 240: Softwareversie Weergeven
13. Softwareversie weergeven Open het menu door op de toets MENU te drukken. Selecteer met / de optie MAIN MENU en bevestig met OK. Afhankelijk van de modus wordt het menu MAIN MENU na het indrukken van de toets MENU onmiddellijk geopend. ... -
Page 241: Buiten Gebruik Stellen
Storing Mogelijke oorzaak Maatregel Trek de netadapter uit het stopcontact en wacht tot Er heeft zich condens ge- het apparaat en de cd zich vormd. aan de omgevingsomstan- digheden hebben aange- past. Cd wordt niet Het apparaat ondersteunt afgespeeld. -
Page 242: Afvalverwerking
17. Afvalverwerking VERPAKKING Het apparaat zit ter bescherming tegen transportschade in een verpak- king. Verpakkingen zijn gemaakt van materialen die milieuvriendelijk kunnen worden afgevoerd en vakkundig kunnen worden gerecycled. APPARAAT Afgedankte apparaten mogen niet bij het normale huisvuil worden ge- daan. -
Page 243: Technische Gegevens
18. Technische gegevens Apparaat Ingangsspanning 15 V 1,5 A Opgenomen vermogen tijdens max. 22,5 watt gebruik Opgenomen vermogen in uitge- ca. 4 watt schakelde toestand Uitgangsvermogen 1 x 15 watt RMS Laservermogen Klasse 1 - laserproduct Ondersteunde indelingen cd-r, cd-rw, audio-cd Aantal geheugenplaatsen voor 99 nummers (cd) de programmeerbare weergave... - Page 244 Bereik tot 10 meter (zonder obstakels) Gebruiksfrequentie 2.4 GHz WLAN Frequentiebereik 2412-2472 MHz Maximaal zendvermogen 18,9 dBm Kanaal 1-13 Wifi-standaard 802.11 b/g/n Codering: WEP/WPA/WPA2 Omgevingswaarden In bedrijf: 10 °C ~ +45 °C Temperaturen Niet in bedrijf (in de verpakking): -20 °C ~ +60 °C Vochtigheid In bedrijf: <...
-
Page 245: Symbolen Op Het Typeplaatje En De Netadapter
Netadapter DongGuan Yingna Electronic Technology Co., Fabrikant Ltd. Model YN-24WA150150EU Ingangsspanning AC 100-240 V ~ 50/60 Hz 0,75 A Uitgangsspanning DC 15 V 1,5 A Veiligheidsklasse Veiligheidsklasse II Afstandsbediening Batterij 2x 1,5 V batterijen R03/LR03/AAA/Micro 18.1. Symbolen op het typeplaatje en de netadapter Veiligheidsklasse II Elektrische apparaten van veiligheidsklasse II zijn elektrische appa- raten die zijn voorzien van een dubbele en/of extra sterke isolatie en... -
Page 246: Service-Informatie
• In onze Service Community vindt u andere gebruikers en onze medewerkers en daar kunt u uw ervaringen uitwisselen en uw kennis delen. U vindt onze Service Community onder http://community.medion.com. • U kunt natuurlijk ook ons contactformulier gebruiken onder www.medion.com/contact. - Page 247 Luxemburg Openingstijden Klantenservice Ma - vr: 09:00 - 19:00 34 - 20 808 664 Serviceadres MEDION B.V. John F.Kennedylaan 16a 5981 XC Panningen Nederland Nederland Deze en vele andere gebruiksaanwijzingen staan ter beschikking om te downloaden via het serviceportaal www.medion.com/nl/service/start/.
-
Page 248: Colofon
Deze gebruiksaanwijzing is auteursrechtelijk beschermd. Verveelvoudiging in mechanische, elektronische of welke andere vorm dan ook zonder schriftelijke toestemming van de fabrikant is verboden. Het copyright berust bij de firma: MEDION AG Am Zehnthof 77 45307 Essen Duitsland Houd er rekening mee dat het bovenstaande adres geen retouradres is. Neem eerst...
Need help?
Do you have a question about the LIFE P64007 and is the answer not in the manual?
Questions and answers