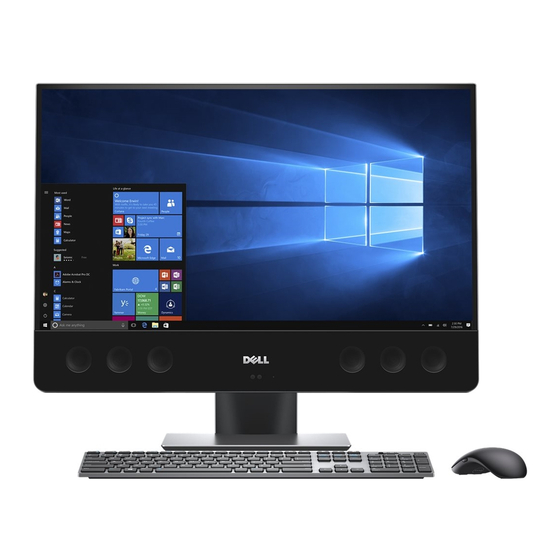
Dell XPS 27 Setup And Specifications
Hide thumbs
Also See for XPS 27:
- Service manual (147 pages) ,
- Quick start manual (2 pages) ,
- Owner's manual (117 pages)

Related Manuals for Dell XPS 27


Summary of Contents for Dell XPS 27
- Page 1 XPS 27 Setup and Specifications Computer Model: XPS 7760 Regulatory Model: W13C Regulatory Type: W13C001...
- Page 2 WARNING: A WARNING indicates a potential for property damage, personal injury, or death. © 2018 Dell Inc. or its subsidiaries. All rights reserved. Dell, EMC, and other trademarks are trademarks of Dell Inc. or its subsidiaries. Other trademarks may be trademarks of their respective owners.
-
Page 3: Table Of Contents
Contents Set up your computer............ 5 Views................11 ......................11 ......................11 Front .....................12 Bottom ......................13 Left ......................14 Right ......................15 Back ....................16 Transform ......................17 Tilt Specifications...............19 ................19 Dimensions and weight .................. 19 System information ....................19 Memory ................20 Ports and connectors .................. - Page 4 Display Built-in Self Test button........25 Getting help and contacting Dell........27 ..................27 Self-help resources ..................28 Contacting Dell...
-
Page 5: Set Up Your Computer
Set up your computer Set up the keyboard and mouse. See the documentation that shipped with the keyboard and mouse. - Page 6 Install your wireless keyboard/mouse USB dongle. Tilt the display. Press and pull the USB dongle-bay cover. Insert the USB dongle. Replace the USB dongle cover and snap it into place.
- Page 7 Connect the power cable. NOTE: Route the cable through the stand to avoid potential damage to the cable.
- Page 8 Press the power button.
- Page 9 Finish Windows setup. a) Connect to your network. b) Sign-in to your Microsoft account or create a local account.
- Page 10 Explore Dell resources on your desktop. Table 1. Dell resources Register your computer Dell Help & Support SupportAssist — Check and update your computer...
-
Page 11: Views
Views Array microphones (4) Provide digital sound input for audio recording, voice calls, and so on. Front Infrared emitters (2) -
Page 12: Bottom
Display Built-in Self Test button The Service Tag is a unique Press to run a built-in self-test for alphanumeric identifier that enables the display. Dell service technicians to identify For more information, see Display the hardware components in your Built-in Self Test button computer and access warranty information. -
Page 13: Left
Left SD-card slot Reads from and writes to the SD card. Headset port Connect a headphone or a headset (headphone and microphone combo). -
Page 14: Right
Press to put the computer in sleep state if it is turned on. Press and hold for 4 seconds to force shut‑down the computer. NOTE: You can customize the power-button behavior in Power Me and My Dell at Options. For more information, see www.dell.com/ support/manuals. -
Page 15: Back
Back Thunderbolt 3 (USB Type-C) ports (2) Supports USB 3.1 Gen 2, DisplayPort 1.2, Thunderbolt 3 and also enables you to connect to an external display using a display adapter. Provides data transfer rates up to 10 Gbps for USB 3.1 Gen 2 and up to 40 Gbps for Thunderbolt 3. -
Page 16: Transform
Connect peripherals such as storage devices and printers. Provides data transfer speeds up to 5 Gbps HDMI port Connect a TV or another HDMI-in enabled device. Provides video and audio output. Line-out port (configurable) Connect audio-output devices such as speakers and amplifiers. NOTE: Audio line-out port can be configured to support audio line-in, microphone and headphones. -
Page 17: Tilt
Tilt Pedestal stand... - Page 18 Articulating stand...
-
Page 19: Specifications
Specifications Dimensions and weight Table 2. Dimensions and weight Touch Non-touch Height 435.05 mm (17.13 in) 430.35 mm (16.94 in) Width 624.80 mm (24.60 in) 613.05 mm (24.14 in) Depth 80.20 mm (3.16 in) 81.60 mm (3.21 in) Weight (maximum) 17.32 kg (38.18 lb) 13.01 kg (28.68 lb) NOTE: The weight of your computer varies... -
Page 20: Ports And Connectors
Configurations supported 4GB, 8GB, 12GB, 16GB, 24GB, 32GB, 48GB, and 64GB Ports and connectors Table 5. Ports External Network One RJ45 port • One USB 3.0 port with PowerShare • Two Thunderbolt 3 (USB Type-C) ports • Four USB 3.0 ports Audio/Video •... -
Page 21: Communications
Communications Table 7. Communications Ethernet 10/100/1000 Mbps Ethernet controller integrated on system board Wireless • Wi-Fi 802.11ac • Wi-Fi 802.11b/g/n • Bluetooth 4.1 Audio Table 8. Audio Controller Realtek ALC3266CG with Waves MaxxAudio Pro Speakers Eight Speaker Output • Average – 10 W •... -
Page 22: Media-Card Reader
Media-card reader Table 10. Media-card reader Type One 4–in 1 slot Cards supported • SD card • Multi Media Card (MMC) • SD Extended Capacity (SDXC) card • SD High Capacity (SDHC) card Power Ratings Table 11. Power ratings Type 360 W Input Voltage 100 VAC to 240 VAC... -
Page 23: Stand
Screw type Minimum clearance from wall 20 mm (0.79 in) Stand Table 14. Stand Touch Non-touch Width 258 mm (10.16 in) 260 mm (10.24 in) Depth 260 mm (10.24 in) 183.10 mm (7.21 in) Video Table 15. Video Integrated Discrete Controller Intel HD Graphics 530 •... -
Page 24: Computer Environment
Type 27-in UHD touch screen 27-in UHD Non-touch screen Pixel pitch 0.1554 mm x 0.1554 mm Controls Brightness can be controlled through the display- brightness increase/decrease button Computer environment Airborne contaminant level: G1 as defined by ISA-S71.04-1985 Table 17. Computer environment Operating Storage Temperature range... -
Page 25: Display Built-In Self Test Button
Display Built-in Self Test button Press and hold the Display Built-in Self Test button. Press and release the power button. Display Built-in Self Test button Power button After performing the above steps, your computer will begin to display a white screen followed by black, red, green and blue screens. -
Page 27: Getting Help And Contacting Dell
Getting help and contacting Dell Self-help resources You can get information and help on Dell products and services using these self-help resources: Table 18. Self-help resources Information about Dell products and www.dell.com services Dell Help & Support app Tips Contact Support In Windows search, type Contact Support, and press Enter. -
Page 28: Contacting Dell
Enter the Service Tag number or Product ID in the search bar. Contacting Dell To contact Dell for sales, technical support, or customer service issues, see www.dell.com/contactdell. NOTE: Availability varies by country and product, and some services may not be available in your country.
Need help?
Do you have a question about the XPS 27 and is the answer not in the manual?
Questions and answers