
Subscribe to Our Youtube Channel
Related Manuals for Klarstein VitAir Turbo SMART


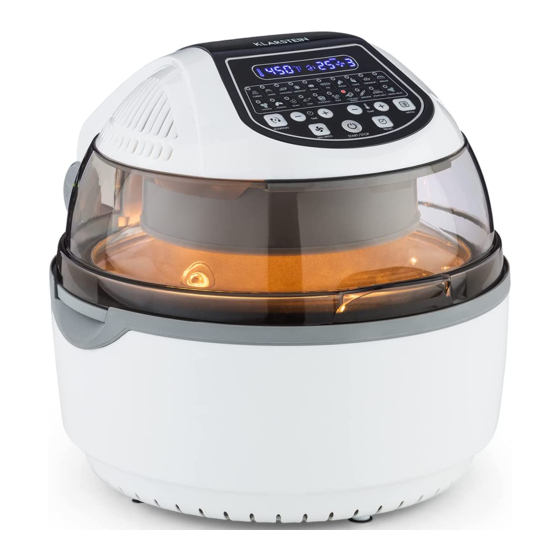
Summary of Contents for Klarstein VitAir Turbo SMART
- Page 1 VitAir Turbo SMART VitAir Turbo S US-10032732 (Wifi) US-10032746 US-10032747 US-10032748...
- Page 2 Ich bin ein Berliner* * John F. Kennedy on June 26, 1963 in his speech in Berlin, on the occasion of the 15th anniversary of the Berlin Airlift.
-
Page 3: Table Of Contents
Dear customer, Congratulations on your purchase. Please carefully read the following instructions for the connection and use of this product. It is important to carefully follow these instructions to prevent serious personal injury or damage to the product. We assume no liability for damage caused by disregarding the instructions in this manual or otherwise for improper use of this product. -
Page 4: Warning
WARNING CAUTION RISK OF ELECTRIC SHOCK DO NOT OPEN CAUTION: TO REDUCE THE RISK OF ELECTRIC SHOCK, DO NOT REMOVE ANY COVER. NO USER-SERVICEABLE PARTS INSIDE. REFER SERVICING TO QUALIFIED SERVICE PERSONNEL ONLY. Triangle with lightning plus explanation as follows: DANGEROUS VOLTAGE: The lightning fl ash with arrowhead symbol within the equilateral triangle is intended to alert the user to the presence of uninsulated dangerous voltage within the product’s enclosure that may... -
Page 5: Safety Instructions
SAFETY INSTRUCTIONS FAILURE TO CAREFULLY FOLLOW THESE INSTRUCTIONS MAY LEAD TO SERIOUS PERSONAL INJURY AND DAMAGE TO YOUR PRODUCT. General Instructions • This appliance should not be used by young children or incapacitated persons. Supervise older children closely. Close supervision is necessary when Deep Fryer is used near children. - Page 6 Special Instructions • Do not use this appliance for other than its intended use. • Do not carry the appliance by the power cord. Always pull the plug from the socket, do not pull the cord. • The use of accessory attachments not recommended by the manufacturer may cause damage to the unit and will invalidate your warranty.
- Page 7 FCC Rules This device complies with part 15 of the FCC Rules. Operation is subject to the following two conditions: (1) This device may not cause harmful interference, and (2) this device must accept any interference received, including interference that may cause undesired operation.
-
Page 8: Warranty
Company. In order to register the Product, the original retail purchaser must complete and return the registration documents provided along with the Product to the Company or register online at www.klarstein.com/warranty within ninety (90) days of the days of the original purchase. -
Page 9: Device Overview
DEVICE OVERVIEW Control panel Hot air vent Lid handle Lid release Housing Transparent lid... -
Page 10: Accessories
ACCESSORIES Included with delivery Tongs High / low grate Baking basket Poultry fork Frying pan Optionally available accessories (not included with delivery) Steak basket Skewer insert Steamer... -
Page 11: Control Panel And Buttons 1
CONTROL PANEL AND BUTTONS LED screen ON / OFF button Rotation button Temperature (+) Time adjustment button (+) Memory button Fan button Temperature (-) Time adjustment button (-) Menu key... -
Page 12: Getting Started
GETTING STARTED Pull the lid upwards using the lid handle. Add the container, the accessories (if necessary) and the food you want to prepare. • When using the grate or steamer, pour some water into the container. • If rotation is available for the selected mode, make sure the fork is properly seated. - Page 13 Press the Start / Stop button to start the device. The heating element may stop when a certain temperature has been reached. When the temperature drops, the heating element will automatically switch on again. This process will repeat until the time you set has elapsed. If you want to add more food during cooking, unlock the lid release and pull the lid upwards using the lid handle.
-
Page 14: Recommended Settings For Different Modes
RECOMMENDED SETTINGS FOR DIFFERENT MODES Make sure that the total weight of the food used does not exceed 5 kg. All modes are factory set to be used with rotation. Press the rotate button once to disable rotation. Mode °F Minutes Fan Level Accessories... -
Page 15: Using The Accessories
USING THE ACCESSORIES Grate | Frying pan | Steamer (not included with delivery) Place the grate in the container. Place the food directly on the grate or place the steamer or frying pan on the grate, place the food in it, select a function and start the device. - Page 16 Poultry fork Put a tip on the fork. Fix with a screw. Stick a chicken on the other side. Then place another tip on the fork to secure the chicken. Insert the rod into the hole in the container. Select the "Roast" function and press the Start / Stop button. Note: Use the food tongs to remove the accessories and food.
- Page 17 Baking basket Insert the rod into the baking basket. Fix it firmly with a screw. Open the cover of the baking basket. Put the food in the baking basket and close the cover. Insert the rod into the hole in the container. Select the "Deep fry"...
- Page 18 Skewer insert (not included with delivery) Insert the attachments on both sides of the bar and secure each one with a screw. Put food on the skewer and insert the ends of each skewer into the holes in the attachments. Fix the skewer insert to the container.
-
Page 19: Cleaning And Care
CLEANING AND CARE Note: To prevent burns, allow the housing to cool before each cleaning. • Disconnect the power plug from the mains power before cleaning. • The device housing can be cleaned with a slightly damp cloth. • The accessories can be cleaned with water and a mild detergent. •... -
Page 20: Device Control By Smartphone
If you integrate the device into your home WiFi, you can conveniently operate it via the associated Klarstein app. The app not only allows you to remotely control the device via your smartphone, but also gives you access to recipes and additional information. - Page 21 Simultaneously press the TEMP (+) and TEMP (-) buttons until the unit beeps. The WiFi icon will flash and the device will automatically search for other WiFi devices in the area. Open the Klarstein app. Open the device control of the VitAir. Follow the instructions from the app.
- Page 23 Estimado cliente: Le felicitamos por la adquisición de este aparato. Lea atentamente el siguiente manual de instalación y uso del producto. Es importante que siga cuidadosamente las instrucciones con el fin de evitar posibles lesiones personales graves o daños al equipo. La empresa no se responsabiliza de los daños ocasionados por un uso indebido del producto o por haber desatendido las instrucciones de este manual.
-
Page 24: Advertencia
ADVERTENCIA ATENCIÓN RIESGO DE DESCARGAS ELÉCTRICAS NO ABRIR ATENCIÓN: PARA REDUCIR EL RIESGO DE DESCARGAS ELÉCTRICAS, NO RETIRE LAS TAPAS. EL APARATO NO CONTIENE EN SU INTERIOR PIEZAS QUE EL USUARIO PUEDA REPARAR. TODA REPARACIÓN DEBE SER RALIZADA POR PERSONAL TÉCNICO CUALIFICADO. Un triángulo con relámpago más la siguiente explicación: VOLTAJE PELIGROSO: El símbolo de relámpago con una fl echa dentro de un triángulo equilátero indica al usuario que en el interior del... -
Page 25: Instrucciones De Seguridad
INSTRUCCIONES DE SEGURIDAD EL INCUMPLIMIENTO DE ESTAS INSTRUCCIONES PUEDE PROVOCAR LESIONES PERSONALES GRAVES Y DAÑO AL PRODUCTO. Instrucciones generales • Este aparato no debe ser utilizado por niños pequeños o personas incapacitadas. Supervise de cerca a los niños mayores. Cuando se utiliza Deep Fryer cerca de niños, es necesario supervisarlo de cerca. - Page 26 Instrucciones especiales • No utilice el aparato con otro fi n distinto al de indicado en estas instrucciones. • No transporte el aparato tirando del cable de alimentación. Para desenchufar el aparato no tire del cable, sino del cuerpo del enchufe. •...
- Page 27 Normas FCC Este dispositivo cumple con la parte 15 de las normas de la FCC. El funcionamiento está sujeto a las dos condiciones siguientes: (1) Este dispositivo no puede causar interferencias perjudiciales, y (2) este dispositivo debe aceptar cualquier interferencia recibida, incluyendo interferencias que puedan causar un funcionamiento no deseado.
- Page 28 Producto ante la Compañía. Para registrar el Producto, el comprador minorista original debe completar y enviar los documentos de registro suministrados junto con el Producto a la Compañía o registrarlo en línea en www.klarstein.com/warranty en un plazo de noventa (90) días tras la compra original.
-
Page 29: Descripción Del Aparato
DESCRIPCIÓN DEL APARATO Panel de control Salida de aire caliente Asa de la cubierta Desbloqueo de la cubierta Carcasa Cubierta transparente... -
Page 30: Accesorios
ACCESORIOS Incluidos en el envío Pinzas Rejilla alta/profunda Cesta de horneado Tenedor para aves Sartén para freír Accesorios opcionales (no incluidos en el envío): Cesto para filetes Espetón Vaporera... -
Page 31: Panel De Control Y Teclas
PANEL DE CONTROL Y TECLAS Monitor LED Botón para encender / apagar Botón de rotación Temperatura (+) Botón de ajuste de tiempo (+) Botón de guardado Botón del ventilador Temperatura (-) Botón de ajuste de tiempo (-) Botón de menú... -
Page 32: Puesta En Marcha Y Uso
PUESTA EN MARCHA Y USO Tire del asa de la cubierta hacia arriba. Introduzca el recipiente, el accesorio (si fuera necesario) y los alimentos que desee preparar. • Añada un poco de agua al recipiente cuanto utilice la rejilla o la vaporera. - Page 33 Pulse el botón Start/Stop para iniciar el aparato. Puede ocurrir que la resistencia se apague cuando se alcance una temperatura determinada. Si la temperatura cae, la resistencia se vuelve a encender automáticamente. Este proceso se repetirá hasta que haya transcurrido el tiempo programado. Si desea añadir alimentos durante la preparación, desbloquee el cierre de la cubierta y suba esta última utilizando el asa.
-
Page 34: Ajustes Recomendados Para Diferentes Modos
AJUSTES RECOMENDADOS PARA DIFERENTES MODOS Asegúrese de que el peso total de los alimentos seleccionados no supere los 5 kg. Todos los modos están ajustados de fábrica para que pueda utilizarlos con rotación. Pulse el botón de rotación una vez para desactivar dicha función. Modo °F Minu-... -
Page 35: Uso De Los Accesorios
USO DE LOS ACCESORIOS Parrilla | Sartén para freír | Vaporera (no incluidos en el envío) Coloque la rejilla en el recipiente. Coloque los alimentos directamente sobre la rejilla o coloque la vaporera o la sartén para freír sobre la misma y luego introduzca ahí... - Page 36 Tenedor para aves Coloque una punta en el tenedor. Fíjela con un tornillo. Del otro extremo, clave un pollo. A continuación, coloque otra punta en el tenedor para fijar el pollo de manera segura. Encaje la barra en el orificio del recipiente. Seleccione la función "Roast"...
- Page 37 Cesta de horneado Encaje la barra en el cesto para hornear. Fíjela con un tornillo. Abra la tapa del cesto para hornear. Coloque los alimentos en el cesto para hornear y cierre la tapa. Encaje la barra en el orificio del recipiente. Seleccione la función „Deep Fry“...
- Page 38 Espetón (No incluido en el envío) Encaje el accesorio en ambos lados de la barra y fíjelo con un tornillo. Encaje los alimentos en la barra y a continuación coloque los extremos de la misma en los orificios correspondientes. Fije el espetón en el recipiente. Seleccione la función deseada y pulse el botón Start/Stop.
-
Page 39: Limpieza Y Cuidado
LIMPIEZA Y CUIDADO Nota: Deje que la carcasa se enfríe antes de cada uso para evitar quemaduras. • Desconecte el enchufe antes de limpiar el aparato. • La carcasa del aparato puede limpiarse con un paño ligeramente humedecido. • El accesorio puede lavarse con agua y un detergente neutro. •... -
Page 40: Control Del Dispositivo Por Smartphone
Si conecta el aparato a su red WLAN doméstica, podrá controlarlo cómodamente mediante la App correspondiente de Klarstein. La App le permite no solo controlar el aparato mediante su smartphone, sino que también le ofrece acceso a recetas y otra información adicional. - Page 41 TEMP (-) hasta que el aparato emita un pitido. El símbolo wifi parpadea y el aparato busca automáticamente otros dispositivos Wifi en la zona. Abra la app de Klarstein. Abra los controles de la VitAir. Siga las instrucciones que aparecerán en la app.
Need help?
Do you have a question about the VitAir Turbo SMART and is the answer not in the manual?
Questions and answers