Sign In
Upload
Download
Table of Contents
Contents
Add to my manuals
Delete from my manuals
Share
URL of this page:
HTML Link:
Bookmark this page
Add
Manual will be automatically added to "My Manuals"
Print this page
×
Bookmark added
×
Added to my manuals
Manuals
Brands
CHC Manuals
GPS
X900+
User manual
CHC X900+ User Manual
Rtk gps receiver
Hide thumbs
1
2
Table Of Contents
3
4
5
6
7
8
9
10
11
12
13
14
15
16
17
18
19
20
21
22
23
24
25
26
27
28
29
30
31
32
33
34
35
36
37
38
39
40
41
42
43
44
45
46
47
48
49
50
51
52
53
page
of
53
Go
/
53
Contents
Table of Contents
Troubleshooting
Bookmarks
Table of Contents
X900+ X91+ W/ CHC Radios RTK GPS Receiver User Manual
User Manual
FCC Compliance
Table of Contents
Introduction
Training Videos
Survce Manual
ADL Vantage Pro UHF Radio Manual
LT30 Data Collector
What's in the Box
Safety Information
Warnings and Cautions
Use and Care
Battery Safety and Disposal
Battery Warnings
Batteries
Battery Charger
Radio Hazards
Bluetooth Radio
UHF Radios
Safety and General Information
Medical Devices - Hearing Aids
Other Medical Devices
Blasting Caps and Areas
FCC Licensing Information
Front Panel Operation
Pushbuttons
On/Off Pushbutton
Record Files' Pushbutton
LED Indicators
Power
Sv's (Satellite Count)
Serial
Files
When the Receiver Turns on
Setting up an RTK Base Receiver
Choosing a Good Location for the Base
Configuring a UHF Base with External ADL Vantage Pro Radio
Base Radio Battery
Setting up an ADL Vantage Pro Radio with Cable Connection to Base
Configuring a UHF Rover
Troubleshooting a UHF Base / Rover Pair
Provisioning GSM SIM Card in Data Collector
Connect to Every Wi-Fi Access Point, NOT
Configuring a NTRIP Network Rover
Using the Internal GSM Modem in a X91+ or X900+ Receiver
Troubleshooting a Network Rover
Building, Loading and Using a GSF (GEOID Separation File)
GEOID Tools
Building a GSF File for a Project
Connecting Data Collector by Bluetooth to PC 'Windows Mobile Device Center
X900+: Fixed - Verified Fix
Collecting Static Data
Downloading Observation Data from a Receiver
Troubleshooting the X91+ or X900+ Receiver
Receiver Won't Turn on
Is the Receiver Tracking Satellites
Is the Receiver Storing Observation Data
The RED Power LED Is Flashing
The GPS Receiver Won't Mount as a Disk Drive
Configuring the Radio Channel List in the Receiver
Hcconfig
X9Xradiofrequency Tool
X9X 10-Pin Connector
X9X GPS to PC Data Cable
Battery Clips
Warranty
Exclusions
Rma
Advertisement
Quick Links
1
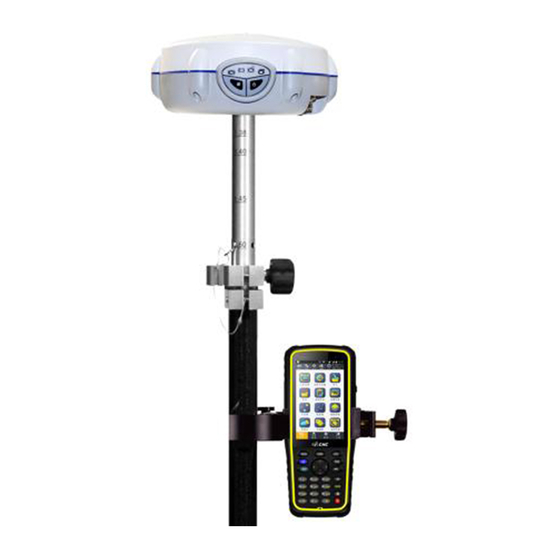
X900+ X91+ W/ Chc Radios Rtk Gps Receiver User Manual
2
Training Videos
3
Setting up an Rtk Base Receiver
4
Collecting Static Data
Download this manual
X900+
X91+
w/ CHC Radios
RTK GPS Receiver
User Manual
This manual is for use with X900+ and X91+ CHC receivers sold by iGage Mapping Corporation. Receivers with similar model
numbers typically will not match devices provisioned by iGage.
Revision N - 10 January 2015
Table of
Contents
Previous
Page
Next
Page
1
2
3
4
5
Advertisement
Table of Contents
Troubleshooting
Troubleshooting a UHF Base / Rover Pair
24
Troubleshooting a Network Rover
38
Troubleshooting the X91+ or X900+ Receiver
47
Need help?
Do you have a question about the X900+ and is the answer not in the manual?
Ask a question
Questions and answers
Related Manuals for CHC X900+
GPS CHC X91+ User Manual
Rtk gps receiver (53 pages)
GPS CHC i80 User Manual
Gnss (103 pages)
GPS CHC LT30 Getting Started Manual
Gps/gis handheld controller (14 pages)
This manual is also suitable for:
X91+
Table of Contents
Print
Rename the bookmark
Delete bookmark?
Delete from my manuals?
Login
Sign In
OR
Sign in with Facebook
Sign in with Google
Upload manual
Upload from disk
Upload from URL


Need help?
Do you have a question about the X900+ and is the answer not in the manual?
Questions and answers