Table of Contents
Advertisement
User Manual
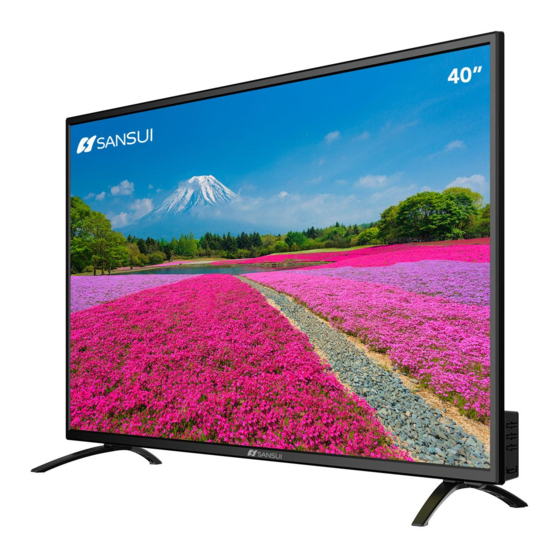
SMX4019SM
101.60cm
40" LED SMART FHD TV
THE OPERATION OF THIS EQUIPMENT IS SUBJECT TO THE FOLLOWING TWO CONDITIONS:
1) IT IS POSSIBLE THAT THIS DEVICE OR DEVICE WILL NOT CAUSE HARMFUL INTERFERENCE AND
2) THIS EQUIPMENT MUST ACCEPT ANY INTERFERENCE INCLUDING THE ONE THAT CAN CAUSE
YOUR OPERATION NOT DESIRED.
BEFORE USING THIS PRODUCT READ THE INSTRUCTION AND CONSERVE FOR FUTURE REFERENCE,
IF THE POWER CORD BECOMES A TOTAL OR PARTIAL DAMAGE, DO NOT TRY TO REPAIR IT
GO TO THE SERVICE CENTER MARKED IN YOUR GUARANTEE; WITH A SPECIALIST TECHNICIAN,
OR, WITH YOUR MANUFACTURER.
IMPORTED BY:
CTM DIGITAL S.A. de C.V.
Av. Lago Zurich No. 219, 12th floor, Plaza Carso Building, Col. Amplicon Granada, 11529
Mexico, Mexico City. Tel. (55) 4124-0114
ELECTRICAL SPECIFICATIONS: 100-240 See 50/60 Hz 70W
THE REMOTE CONTROL USES 2 "AAA" TYPE BATTERIES OF 1.5 V DC each (3 Vcc)
1
Advertisement
Table of Contents

Related Manuals for Sansui SMX4019SM


Summary of Contents for Sansui SMX4019SM
-
Page 1: User Manual
User Manual SMX4019SM 101.60cm 40” LED SMART FHD TV THE OPERATION OF THIS EQUIPMENT IS SUBJECT TO THE FOLLOWING TWO CONDITIONS: 1) IT IS POSSIBLE THAT THIS DEVICE OR DEVICE WILL NOT CAUSE HARMFUL INTERFERENCE AND 2) THIS EQUIPMENT MUST ACCEPT ANY INTERFERENCE INCLUDING THE ONE THAT CAN CAUSE YOUR OPERATION NOT DESIRED. -
Page 2: Safety Information
Safety information High voltages are used in the CAUTION operation of this product, to avoid the risk of electric shock, do not remove the back cover of the TV. Please go to the RISK OF ELECTRIC SHOCK qualified personnel for service. DO NOT OPEN The use of controls, adjustments or carrying out procedures other than those specified here, may cause dangerous... - Page 3 Important security 1. Read these instructions. 2. Keep this instruction manual. 3. Follow all warnings. 4. Follow all instructions. 5. Do not use this equipment near water. 6. Clean only with soft and dry cloth. 7. Do not block the ventilation slots. Install according to the manufacturer's instructions.
- Page 4 Important security instructions Installing the TV on the wal 1. First, put the TV on a flat table, on which you must put something soft to prevent the panel from being scratched or damaged. 2. Use the screwdriver to remove the 4 screws that hold the base of the TV (the direction of the arrows, reference image 1) and, remove the base (guard the screws and the base carefully).
- Page 5 TV buttons and connection TV buttons Note: The following is a functional diagram only, the arrangement and position of the buttons between the different models, may vary. : To turn on / off the TV. SOURCE: To select the external input signal. MENU: To show the main MENU and confirm the selected menu option.
- Page 6 Installation and Connection of the TV TV installation Put the TV in a firm place, which must support the weight of the TV. To avoid risks, please do not expose the TV to hot or humid places (as well as near lights, candles heaters), and do not block the ventilation on the back of the TV.
- Page 7 Remote Control Operation of the remote control POWER NUMERIC BUTTONS Turn on or off (standby) the TV Press 0-9 to select a channel directly when it is watching TV. Mute The channel changes after 2 Press to suspend the sound, seconds.
- Page 8 Installation of the batteries in the remote control 1. Open the back cover. 2. Use AAA batteries. When inserting the batteries, make sure that the polarity is correct, that is, that the "+" marks are oriented as indicated in the compartment. 3.
- Page 9 Remote Control Use the "source" button to display the input source, select the source of Input signal using the buttons up / down, press the confirm button to enter the chosen signal source. Remote Control Press the "menu" button to display the menu, press the keys up and down to select the desired configuration, press the right button to enter the relevant settings.
- Page 10 Image Image Mode Choose the image menu with the left and right keys, and press the ENTER button for the next operation. Then, the arrows towards up and down can be used to select this element. Image mode can be changed to standard / soft / light / user.
- Page 11 Noise reduction Press the up / down key to select the option "Reduction of noise ". Press the left / right key to select "Off", "Weak", "Medium", "Strong" and "Automatic" to improve the sharpness of the image. SOUND Sound mode Select the sound menu with the up and down keys down, press the right button on the "sound mode"...
-
Page 12: Auto Search
Automatic volume, Surround Select the automatic volume control options, and choose with the arrows, this method is also suitable for adjusting the sound envelope. SPDIF mode This is used to select "SPDIF Mode". This option is only used in HDMI / DTV mode. - Page 13 MANUAL SEARCH FOR DTV To perform the manual search, choose the desired frequency, you can choose the color format and sound. With the arrow keys select the "search" option and press the ENTER key to start, select the best frequency. CHANNEL EDITING Select the signal information option, press the ENTER key to enter the intensity of the signal will be displayed.
- Page 14 ADJUSTMENTS OSD time Press the "menu display time" option, through the Left and right arrow keys can be changed to 5 seconds, 10 seconds, 15 seconds, 20 seconds and 30 seconds. PVR Option Press the up / down button (to select the option "Option PVR ". No signal on hold Press the up / down button to select the option "No signal activated."...
-
Page 16: Time Setting
TIME SETTING Date, current time It is not adjustable, the calibration signal is automatic. Sleep time The system provides many suspension time options. BLOCKING... - Page 17 Choose the Lock system option with the up and down keys down. Then, open the lock function with the left and right. Remember that the initial password is 0000. If you want to adjust the password, you must first select the option of set the password and then enter the previous password and the new password.
- Page 18 HOTEL In this mode, you can manage the opening and closing of channels relevant, establish the language and the screen relation operation.
- Page 19 MULTIMEDIA Image With the keys up and down select the icon of "image", press the confirmation button to confirm, and then press to the right to go to the folder, press the button confirmation to open the appropriate folder. After selecting the image, press the confirmation key to open the image, you can perform some operation using the left and right.
- Page 20 Android Star The main page used is divided into: NOVELTIES, APPLICATIONS, MUSICA, SPORTS...
- Page 21 Configuration Choose the configuration option and press the OK button so that the interface of the android configuration. The following is a brief description of the function of each menu. Enter the "Network" menu "Wi-Fi can open or close the function of Wi-Fi connection, there are 4 types of Connection: select the most appropriate in the connection...
- Page 22 Applications In the menu, you can see the installation application and run applications. storage and restoration about Storage and restoration Here you can see the details of the internal storage space and the use of the SD card, and in the option of backup and restore, you can restore the factory data.
- Page 23 Date & Hour In this part, you can modify the date and time, and also choose to synchronize with the date and time. Language You can select the System Language here. Keyboard Users can rely on the personal preferences of the keyboard input configuration, and can also see the dictionary.
- Page 24 Security & restrictions The user can set the security function in the menu to allow the installation of an unknown program, verify applications of the program, and limit the application to access your account, allow the Android device administrator to block the device or delete the data on the device.
- Page 25 Faults Guide It does not turn on Check that the AC power cord of the TV is connected. If the continuous problem, disconnect the TV and connect it again after 60 seconds and try to turn on the TV again. The received The cause of double image or ghosts is caused by tall signal is not...
- Page 26 Horizontal Adjust the horizontal Audio sound in the main menu to interference lines clean the horizontal lines. (PC mode) The image is very Adjust the contrast or brightness level in the main menu. light or very dark (PC mode) The PC function Check the computer settings if the resolution is does not respond compatible.
- Page 27 User Manual...
Need help?
Do you have a question about the SMX4019SM and is the answer not in the manual?
Questions and answers
Where is the settings button located at on my remote