
Related Manuals for REMKO RVS Series


Summary of Contents for REMKO RVS Series
-
Page 1: Installation Instructions
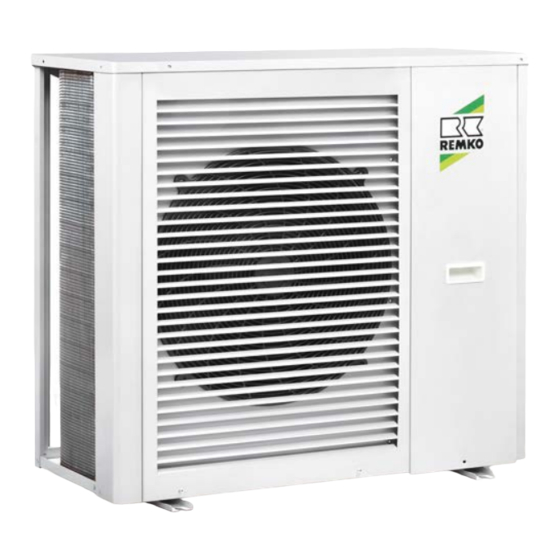
Operating and installation instructions REMKO RVS series Chiller RVS 50 DC, RVS 80 DC, RVS 130 DC, RVS 180 DC Edition EN - N12 Read the instructions prior to performing any task! -
Page 3: Table Of Contents
Content Safety notes Environmental protection and recycling Guarantee Transportation and packaging Unit description Cooling cycle Service limits Operation 8-18 Installation instructions for qualified personnel Installation 20-25 Care and maintenance Shutdown 27-28 Electrical wiring 29-32 Electrical drawings Leak testing Before commissioning 33-34 Commissioning Overhaul and repair... -
Page 4: Safety Notes
Modification of the units sure the unit does not pose ■ and components supplied by a danger to persons. REMKO is not permitted and In order to make warranty claims, can cause malfunctions. The units and components it is essential that the ordering ■... -
Page 5: Transportation And Packaging
In cooling mode, the unit (an a circulation pump and a flow products, REMKO GmbH & Co. air-cooled chiller) takes heat out switch. KG reserve the right to carry of the operating medium to be... -
Page 6: Cooling Cycle
REMKO series RVS Cooling cycle Legend: Tube bundle heat exchanger Compressor Filter dryer Schrader valve Electronic expansion valve High-pressure switch Fin condenser 4-way changeover valve Low-pressure switch... -
Page 7: Service Limits
Service limits RVS DC units are chillers with heat pump function. The primary purpose of the units here is cooling operation, whilst the heating function represents an additional function by means of reverse circulation. For trouble-free unit operation and compliance with the legal warranty conditions, it is essential that the unit is be used within its respective operational limits. -
Page 8: Operation
REMKO series RVS Operation Display/control unit The controller of the chiller is to be operated with the touch pad, which is located right on the unit in a housing protected from splashed water. To open the housing, press the "PRESS" button on the right-hand side of the housing. -
Page 9: Operation
Button symbol Designation Description Cooling mode Is displayed when the system is in cooling mode Heating mode Is displayed when the system is in heating mode Defrosting operation Appears during the defrosting procedure (only in heating mode) Compressor Appears when the compressor is running Circulation pump Appears when the circulation pump is running Appears when the fan is running... - Page 10 REMKO series RVS Switching the unit on The unit is switched on by pressing the key for 1 second. A further 1 second press of the key in the start screen will switch the unit back off again. After one minute without being used, the display darkens.
- Page 11 Setting the time To set the system time, briefly press the keys simultaneously. key appears on the right-hand side of the screen. Press this briefly and the display for the hours starts to flash. The hours can now be adjusted with the keys.
- Page 12 REMKO series RVS Saving timer programs To save a timer program, briefly press the keys simultaneously. key appears on the right-hand side of the screen. Press this for 2 seconds. Now you can select a switch-on or switch-off point with the keys.
- Page 13 If the system is deactivated and the time set for a switch-on point (ON1, ON2) is reached, the system activates autonomously. It then carries out the operation with the settings before deactivating again. If the system is activated and the time set for a switch-off point (OFF1, OFF2) is reached, the system de-activates autonomously.
- Page 14 REMKO series RVS Deleting timer programs To delete a timer program, briefly press the keys simultaneously. key appears on the right-hand side of the screen. Press this for 2 seconds. Now you can select a switch-on or switch-off point that you wish to delete with the keys.
- Page 15 Malfunction indication If a fault arises on the unit, the controller reports this automatically. The screen shifts to the fault display and displays a fault code. The meanings of the various codes are listed in the Faults and fault causes chapter. If multiple faults arise at the same time it is possible to switch between the fault displays with the keys.
- Page 16 REMKO series RVS Calling up operating parameters To display the operating parameters, briefly press the key on the start screen. Now the sensor values and other operating conditions can be called up here. The keys can be used to navigate between the different operating parameters.
- Page 17 If glycol is used, it is possible to change the parameters to operate at lower temperatures, depending on the glycol concentration. The table below can be helpful for this. Adjustment is only possible after password input. For this purpose, please contact REMKO. CAUTION...
- Page 18 REMKO series RVS Setting the anti-freeze protection parameters Press the key on the start screen briefly to access the operating parameters level. Then press the key in the operating parameters level for 2 seconds to access the next level down. A password will be required for this.
-
Page 19: Installation Instructions For Qualified Personnel
Installation Instructions for qualified personnel Important notes prior Comply with all regulations The unit must be kept upright ■ ■ to installation governing structural and when transporting to a higher building requirements and elevation: Observe the manuals for conditions with regard to ■... -
Page 20: Installation
REMKO series RVS Installation 4. Ensure that structure-borne Installation materials sound is not transferred to parts of the building. The unit is fastened on vibration NOTE dampers (accessories) to the floor 5. Connect the medium piping. by means of bolts. The carrying... - Page 21 Selecting the installation location The unit is designed for horizontal installation on a base in outdoor areas. The installation site must be The finned condenser gives level, flat and firm. The unit should off heat in cooling mode. also be secured to prevent it from tipping over.
- Page 22 REMKO series RVS Connection of the medium piping Observe minimum flow volume of The display should be able to be the chiller. shut off. The connection of the lines ■ The lines are to be insulated against Temperature sensors are located...
- Page 23 Diaphragm expansion vessel (MAG) Air bleeding valves External medium storage tank To avoid pressure fluctuations The unit has manual air bleeding If, for example, the required during standstill because of valves. The unit can be bled here capacity of the cold water temperature changes, diaphragm after the system has been filled.
- Page 24 REMKO series RVS Condensate drainage connection Minimum clearances and secure discharge Fig. 5 shows the minimum Condensate drain clearances for trouble-free Condensate drainage connection operation of the units. If the temperature falls below The protective zones serve to the dew point, condensation will...
- Page 25 Necessary system components System components Legend: Expansion pipe coupling Shut-off valve Fill and drain device Safety valve Dirt trap Valve for hydronic balancing Manometer Diaphragm expansion vessel NOTE The system layout shown above shows the recommended pipework components to be established on- site.
-
Page 26: Care And Maintenance
• • Measure voltage and current specialists or at collection points. • • Check direction of rotation REMKO GmbH & Co. KG or your • • Check compressor contractual partner will be pleased • • Check fan to provide a list of certified firms •... -
Page 27: Electrical Wiring
Electrical wiring All electrical connections Power supply ■ CAUTION such as network supply, cable All electrical installation remote control etc. must be The units require a fixed AC or work is to be performed carried out in the unit's switch three-phase current connection. - Page 28 REMKO series RVS External enabling contact Operation/Standby Terminal blocks In addition to being operated RVS 80 DC with the controller or the cabled remote control, the unit can be switched on (normal operation) and switched off (Stand-By) via an external potential-free contact (normally-closed).
-
Page 29: Electrical Drawings
Electrical drawings RVS 50 DC... - Page 30 REMKO series RVS Electrical drawings RVS 80 DC...
- Page 31 Electrical drawings RVS 130 DC...
- Page 32 REMKO series RVS Electrical drawings RVS 180 DC...
-
Page 33: Leak Testing
Leak testing Before commissioning The leak test is carried out after If the unit is positioned ■ the connection has been made. Filling the system at the lowest point in the system, the unit preliminary 1. Flush the system twice with The system is filled at pressure (=non-circulating clean tap water. - Page 34 REMKO series RVS Diaphragm expansion vessel Additional checks NOTE The units are equipped The preliminary pressure for General checks ■ with a phase sequence relay the diaphragm expansion vessel which prevents the operation must be adjusted individually to Checking that minimum ■...
-
Page 35: Commissioning
Commissioning - The circulation pump starts - The circulation pump starts NOTE and the controller checks and the controller checks Commissioning should only be the medium flow rate via the medium flow rate via performed by specially trained the differential pressure/flow the differential pressure/flow personnel and documented switch. -
Page 36: Overhaul And Repair
REMKO series RVS Overhaul and repair Medium cycle Electrical components NOTE Overhaul and repairs should Repairs on electrical components Repairs on the medium cycle are only be performed and and parts are to be carried out and to be carried out and documented... -
Page 37: Troubleshooting And Customer Service
Troubleshooting and customer service The unit has been manufactured using state-of-the-art production methods and has been tested several times to ensure that it works properly. If malfunctions should occur, please check the unit as detailed in the list below. Please inform your dealer if the unit is still not working correctly after all the function checks have been performed. - Page 38 REMKO series RVS Malfunction Possible cause Checks Remedial measures Major Check: - Bleed medium cycle - Air in the medium piping - Open shut-off valves - Open shut-off devices - Increase medium pressure Medium flow disturbance - Medium pressure - Have circulation pump,...
- Page 39 Malfunction Possible cause Checks Remedial measures Major Check: - Reduce pressure difference Compressor current draw, by raising the low pressure or IPM current probe Pressure difference, high/low lowering the high pressure pressure - Replace inverter board Check: - Reduce pressure difference Compressor overcurrent Compressor current draw, E33 / E34...
-
Page 40: Resistance Table
REMKO series RVS Malfunction Possible cause Checks Remedial measures Major Check: F032 Fan motor 1 defective - Fan motor operation - Replace the fan motor. - Fan motor current draw Check: Communication fault between - Connections between - Replace fan speed controller... -
Page 41: Dimensions
Dimensions Unit dimensions RVS 50 DC RVS 80 DC RVS 130 DC RVS 180 DC... -
Page 42: Technical Data
REMKO series RVS Technical data Series RVS 50 DC RVS 80 DC RVS 130 DC RVS 180 DC Compact air-cooled chiller for external installation Operating mode with seamless power regulation for cooling and heating Nominal cooling output (1.6 - 5.6) (2.0 - 10.0) 13.5... - Page 44 REMKO QUALITY WITH SYSTEMS Air-Conditioning | Heating | New Energies REMKO GmbH & Co. KG Telephone +49 (0) 5232 606-0 Hotline within Germany Klima- und Wärmetechnik Telefax +49 (0) 5232 606-260 +49 (0) 5232 606-0 Im Seelenkamp 12 E-mail info@remko.de...
Need help?
Do you have a question about the RVS Series and is the answer not in the manual?
Questions and answers