Yoder Smokers S Series Operation Manual
Hide thumbs
Also See for S Series:
- Installation instructions manual (38 pages) ,
- Installation instructions manual (16 pages) ,
- Operation manual (38 pages)
Table of Contents
Advertisement
Quick Links
Advertisement
Table of Contents

Related Manuals for Yoder Smokers S Series


Summary of Contents for Yoder Smokers S Series
- Page 1 O P E R A T I O N M A N U A L...
-
Page 4: Table Of Contents
Contents Dangers, Warnings & Cautions..........................6 Yoder Components..............................9 Smoker Arrival & Assembly.............................10 Quick Start Guide..............................12 Yfi App Connection..............................16 Smoker Placement & Leveling..........................30 Operating the Smoker..............................31 Initial Burn Off................................31 Lighting Your Smoker...............................31 Pre-Heating.................................31 Lid Position..................................31 Pellet Usage................................31 Door Open Function..............................31 Prime Button................................31 Pre-Grill Checklist/Routine Maintenance......................32 Startup Procedure..............................35 Shutting Down the Smoker.............................37... - Page 5 Contents Grill Maintenance..............................44 Preparing the Grill For Season..........................44 Painted Surfaces...............................44 Cooking Grates.................................44 Heat Diffuser/Drip Plate............................44 Cooking Chamber..............................44 Firebox and Burn Grate Assembly Maintenance....................45 Stainless Steel Burn Grate.............................45 Burn Grate Inspection..............................45 Igniter...................................47 Fan Cooled Hopper Assembly..........................48 Grease Management Area and Bucket.......................48 Additional Maintenance............................48 Fuse Replacement..............................49 Storing Your Grill................................49...
-
Page 6: Dangers, Warnings & Cautions
DANGERS, WARNINGS AND CAUTIONS • Failure to follow the “Dangers, Warnings and Cautions” may result in serious bodily injury, death, or fire. • Read this manual completely before using your Yoder for the first time. • Keep the grill a minimum of 18 inches away from combustible surfaces. •... - Page 7 • If your grill is stored outside, care should be taken to assure that water does not enter the pellet hopper. (The use of a grill cover is highly recommended). • When you are finished cooking, turn the power switch to the “off” position. The fan will continue to run for 18 minutes or until the temperature inside the cooking chamber falls below 125°...
-
Page 9: Yoder Components
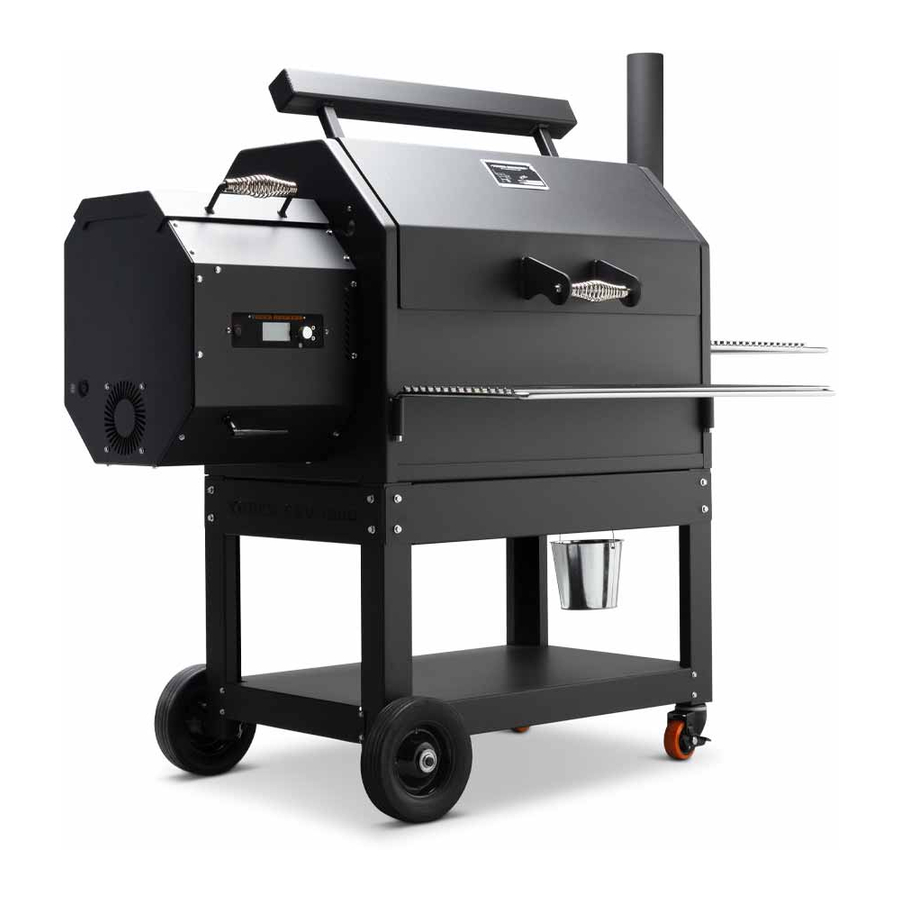
COOKING GRATES HEAT DIFFUSER HOPPER CONTROLS BURN GRATE IGNITER FIRE POT VARIABLE DISPLACEMENT DAMPER... -
Page 10: Smoker Arrival & Assembly
SMOKER ASSEMBLY Smoker Arrival Your Yoder Smoker will arrive boxed and ready to assemble. Please follow the assembly instructions. If you purchased the competition cart, then it arrived on a pallet wrapped, and held on with bands. Cut the bands and remove the plastic wrap and foam from the smoker. Remove the smoker from the pallet. It is recommended that two people remove the Yoder from the pallet due to its size and weight. - Page 11 Place the cooking grates inside the cooking chamber. (FIG 3) FIG 3 Attach the front and side shelves to the Yoder. (FIG 4) FIG 4 Use the side shelf to assist in moving the Yoder into positon. It is recommended that two people move the Yoder due to its size and weight.
-
Page 12: Quick Start Guide
QUICK START GUIDE CONTROLLER LAYOUT SECTION 1.A POWER SELECTION LCD DISPLAY ROTARY INDICATOR TEMPERATURE BUTTON BUTTONS SCREEN SELECTOR LIGHT PROBE JACKS POWER BUTTON – Powers the grill on and off. Once the grill is turned on, and a fire has started, pressing the power button to turn the unit off will initiate shut down mode. - Page 13 home screen SECTION 1.C OPERATING MODE SET TEMPERATURE INDICATOR 350°F 350°F °F °F PROBE/CHANNEL 1 TEMPERATURE GRILL PROBE/CHANNEL 2 TEMPERATURE TEMPERATURE GRILL TEMPERATURE – Displays the current temperature of the grill at the center of the main cooking surface. Upon startup, the display will flash “HEAT UP” until the internal temperature of the unit reaches 125°F.
- Page 14 in-cook selection menu SECTION 1.D This menu allows access to options that are available during a cook. To access the menu, press any of the three selection buttons while at the home view screen. The menu will appear and allow for a selection to be made for three seconds before returning to the home view.
- Page 15 main menu SECTION 1.F The main menu is accessible in either the start-up menu or in the in-cook selection menu. This menu allows the user to access their different programs, settings, and general information about their grill. Navigate the available selections in the main menu by using the rotary selector knob. You can turn the knob clockwise or counter-clockwise to change your selection and press inward on the knob to make a selection.
-
Page 16: Yfi App Connection
CONNECT TO THE APP App Install + Account Creation The very first thing you’ll need to do is download the free FireBoard app onto your smartphone or tablet. From your mobile device, please visit https://apps.yodersmokers.com to obtain download links for iOS or Android platforms. After installing and opening the FireBoard app, you’ll be presented with a login screen (FIG 5). - Page 17 pairing your device Next, make sure your cooker is plugged in, and the power button has been pushed. You should see the default screen with the “YS” logo and the default menu displayed on your cooker. Also, please make sure your mobile device’s Bluetooth connectivity is on. It should be noted, Android users must have their mobile device’s location services enabled, or the Bluetooth pairing will fail.
- Page 18 CONFIGURING WIFI Tap your cooker’s serial number from the list, and a few tasks can be accomplished from this new screen (FIG 11), but for now, we’re interested in getting Wi-Fi connectivity configured, so tap on the “Manage Wi-Fi” option. In this new screen (FIG 12), you’ll notice a place for a network name and a password.
- Page 19 THE APP IN DEPTH Before we get into all the details, we’d like to point out that the cooker cannot be started from the app. You will have full control once it has been started - including the ability to shut it down - but the cooker must be started from its front panel before the app can do anything aside from reporting current status.
- Page 20 NOTABLE DASHBOARD FEATURES • You can change the pit’s setpoint by tapping on the setpoint in the grey banner (Figure 17). Simply enter your new desired setpoint and tap the “Set” button. Please note that changes to the setpoint take a few seconds to take effect. Please be patient for them to be reflected in the cooker and in the app’s dashboard.
- Page 21 NOTABLE DASHBOARD FEATURES (CONTINUED) • You can choose between two visualizations of the running temperature data: a basic chart, and a detailed chart. You can toggle between the two by tapping on the word “Chart” or “Detail,” respectively, in the title bar area of the app (FIG 20, 21). •...
- Page 22 SESSIONS The second icon from the left on the icon bar will navigate you to the sessions screen. This is straight-forward. A session is a record of pit and probe temperatures throughout a cook. Sessions are created automatically when probes are plugged in, or your cooker is started. By clicking the plus sign (on Android) or the “New”...
- Page 23 PROGRAMS (CONTINUED) You have three options: • Time Cook: Cooks at a given setpoint for a given amount of time. Once complete, the cooker will change its setpoint to given holding temperature. All three parameters are user-definable. • Temp Cook: Cooks at a given temperature until one of the probes reaches a given temperature. Once complete, the cooker will change its setpoint to a given holding temperature.
- Page 24 PROGRAMS (CONTINUED) Steps save automatically. Just press the back button to return to the previous screen, and add a second step. This time, we’ll set the cooker to run at 450° until the measured temperature on probe 1 has reached 145°. You’ll note we’re also setting a hold temperature of 180° (FIG 28). In actuality, this automatically creates a third step with a setpoint of 180°...
- Page 25 PROGRAMS (CONTINUED) While a program is running, you have the freedom to tap on any other step in the program, which will cause the cooker to skip to that step after a few seconds. You may also stop or pause a running program at any time, or delete a program by tapping into it and then tapping the “Delete”...
- Page 26 SETTINGS Some of the information you’ll see in this screen you’re already familiar with and is covered in the First Steps section of this document, so we won’t cover that again here. Tapping on the gear icon of the tab bar in the lower right corner of your screen takes you to the settings page (FIG 14). Account Management + Alerts Tapping on the “Manage Account”...
- Page 27 Current Temperature Notification (Android Only) You can enable what’s known as a “persistent notification” – a notification that will stay in your notifications area (like the swipe-down action on many Android mobile devices) – that will show you the current temperature of your pit and the meat probes, if you have them plugged in. Simply toggle this notification on and off according to your preference (FIG 35).
- Page 28 DEVICE SETTINGS By tapping on your device, you’ll be back in the “Device Settings” section. If you have more than one device listed, these settings are specific to each of your device. Naming Your Cooker You can change the name your cooker is referred to throughout the app. By tapping on the “Change Device Name”...
- Page 29 This section of the app contains some seldom-used but occasionally helpful options regarding your preferred app temperature scale, adjusting your cooker’s display screen contrast, and a couple of troubleshooting options that should only be used as prescribed by your Yoder Smokers support representatives.
-
Page 30: Smoker Placement & Leveling
FIG 39 Smoker Placement Yoder smokers/grills should always be a minimum of 18 inches away from any combustible surface (wall, deck, rail, etc.). A heat-protective pad is recommended if the smoker is on a wooden deck. (FIG 39) Leveling the Smoker The smoker must be level front to back. -
Page 31: Initial Burn Off
Initial Burn Off Before cooking on your smoker/grill for the first time, burn off the grill to rid it of any foreign matter. Follow the instructions on Page 19 for initial start-up. Operate the grill at 350° F with the heat diffuser/drip pan and grates in place with the lid closed for one hour. -
Page 32: Pre-Grill Checklist/Routine Maintenance
Pre-Grill Checklist/Routine Maintenance Perform the following services prior to each cooking session when the grill is cool 1. Open the cooking chamber door and remove the cooking grates (FIG 40). FIG 40 2. Remove the heat diffuser/drip plate (FIG 41), remove and discard previously used protective foil cover, if foil has been applied. - Page 33 3. Remove the burn grate from the firebox (FIG 42). Inspect and clean thoroughly. Make certain that the combustion holes in the burn grate and the igniter tube in the firebox are free of debris or ash build up. Visually inspect the air way between the combustion fan and the firebox to be certain that it is free and clear of ash and debris (A shop vacuum works well for ash and debris removal).
- Page 34 7. Reinstall the heat diffuser/drip plate. The heat diffuser plate attaches to the hook on the auger shield and rests on the grease divider on the right hand side of the grill. Once installed, check to be certain that the edges are approximately one-quarter inch below the grate rails at the hopper end and that the plate is adjusted evenly from front to back.
-
Page 35: Startup Procedure
Startup Procedure (When using the Yoder with the heat diffuser/drip plate in position, it is best to start your grill 20 to 30 minutes prior to cooking. This allows the grill and cooking grates to heat completely improving heat retention and recovery when opening the cover during cooking.) 1. - Page 36 VARIABLE DISPLACEMENT DAMPER FIG 46 BURN GRATE FIREBOX FIG 47...
-
Page 37: Shutting Down The Smoker
9. Plug the female end of the cord in the receptacle on the back of the pellet hopper. Plug the male end into a 120 volt, 15 amp GFCI-protected receptacle. If an extension cord is required, please see the caution notes on page 7 of the manual. -
Page 38: Manual Startup
MANUAL START UP Here are the steps to manually light the grill in the event that the igniter fails. (Steps 2 & 3 only apply if the igniter has developed a dead short and is tripping the GFCI or blowing the fuse.) 1. - Page 39 TO IGNITER IN COOKING CHAMBER TO CONTROL BOX FIG 51 3. Unplug the igniter’s weather tight connection and push the wires back into the hopper cavity (FIG 51). 4. Reinstall the burn grate and place a small handful of pellets onto the grate. 5.
-
Page 40: Getting The Most From Your Yoder: Direct & Indirect Grilling, Smoking & Baking
Getting the Most From Your Yoder: Direct & Indirect Grilling, Smoking & Baking “How long does it take from the time I press “start” until I am ready to cook?” When the cooker is set up traditionally (diffuser plate installed), the heat up time is 20 to 30 minutes. When the cooker is set up for direct grilling (diffuser plate out), the heat up time is about 15 minutes. - Page 41 Setup #1: Smoking and baking. Heat diffuser plate in and standard cooking grates installed. In this setup, the variable displacement damper (VDD) is generally pushed in about 6 inches from the right hand side to create an even temperature across the grates (FIG 52). VARIABLE DISPLACEMENT DAMPER FIG 52...
-
Page 42: Variable Displacement Damper
VARIABLE DISPLACEMENT DAMPER The YS640 is fitted with a variable displacement damper for managing heat distribution in the pit from the firebox to the chimney end (FIG 54). DAMPER AT MID-LOCATION DAMPER AT MID-LOCATION CHIMNEY STACK FIREBOX DAMPER HANDLE FIG 54 When the YS640 is set up with the heat diffuser in place, the Variable Displacement Damper allows the pit master additional temperature control at the grate level. - Page 43 • By pushing the damper all the way in (toward the firebox), heat is concentrated for grilling on the left side of the Yoder (FIG 55). • You can create dissimilar side-to-side temperature which is useful, for example, for cooking poultry on the left at 300°...
-
Page 44: Grill Maintenance
Pre-Grill checklist (Page 32). Painted Surfaces Yoder smokers are painted with high heat silicone paint. When cleaning the smoker, surfaces should be washed down with warm soapy water using a neutral detergent, then rinsed with clean water. The paint should be periodically inspected and touched up when scuffs or bare spots are exposed. -
Page 45: Firebox And Burn Grate Assembly Maintenance
FIREBOX AND BURN GRATE ASSEMBLY MAINTENANCE It is recommended that the firebox assembly is regularly inspected to be certain that it remains free of ash and debris which will ensure proper performance. The firebox is a fully welded structure that carries the burn grate and channels the combustion air. - Page 46 If the gap is greater than 1/8”, the steps below should be followed: 1. Start by removing the burn grate from the firebox and placing it on its top. 2. Next, step on the burn grate and apply enough pressure to bend it back to its original shape. DO NOT apply too much pressure or you will overcorrect the burn grate and it will not fit back into the firebox (FIG 59).
-
Page 47: Igniter
IGNITER When inspecting the firebox assembly, confirm that the igniter assembly, tube and igniter rod are free of ash or other debris. Periodically inspect the igniter tube, to ensure it is tightly secured, by grabbing the tube and turning it clockwise (FIG 61). FIG 61... -
Page 48: Fan Cooled Hopper Assembly
FAN COOLED HOPPER ASSEMBLY Always disconnect the power to the grill before performing any service 1. Remove any debris from the combustion air fan intake. Use compressed air to remove dust and debris from both fans. 2. Inspect and clean the pellet hopper area. The interior hopper surface can be wiped down using warm water and detergent. -
Page 49: Fuse Replacement
FUSE REPLACEMENT If there is no display and the LED light isn’t on after the power button has been pushed, check the power source to verify the GFCI hasn’t tripped. If the power source is working, check the Yoder fuse. The fuse holder is located on the hopper end panel (FIG 63). - Page 50 ITEM # PART # DESCRIPTION QTY. 90737 STAINLESS HINGE 1024X12FHMSSS FLATHEAD MACHINE SCREW, STAINLESS 10-24 X 1/2 1024WHN 12-24 WHIZ NUT 24497 SERIAL PLATE 236-2489-02 POP RIVET W90780 YS640s CHAMBER LID 41435 HANDLE ROD 22866 HANDLE SPRING 22924 3/8” PUSH CAP 90901 UNIVERSAL CHROME COOKING GRATE 8”...
-
Page 51: Smoker Exploded Views
640 COOKING COMPONENTS... - Page 52 640 IGNITER AND THERMOCOUPLE COMPONENTS ITEM # PART # DESCRIPTION QTY. W90779 YS640 CHAMBER 1420WHN 1/4-20 WHIZ NUT 10X34HHSDS HEX HEAD SELF DRILLING SCREW 1420X1HB HEX BOLT 1/4-20 X 1” LONG 91713 STAINLESS AUGER COVER BRACKET W90811 STAINLESS FIRE POT 92401 STAINLESS REINFORCED BURN GRATE 24667...
- Page 54 640 HOPPER AND COOKING CHAMBER ITEM # PART # DESCRIPTION QTY. A92473 HOPPER ASSEMBLY, YS480s/YS640s WITH ACS 10X34HHSDS SCREW, HEX HEAD, SELF DRILLING 10 x 3/4 1420X12HHSTS SCREW, SLOTTED, HEX HEAD, SELF TAPPING, 1/4-20 x 2...
- Page 56 90398 AXLE 1016X38HHSMS HEX HEAD SLOTTED SHEET METAL SCREW 90172LFP YS 640s BOTTOM SHELF W90786 RIGHT FRONT LEG W90784 LEFT FRONT LEG 24252 8” WHEEL 90166LFP YS640s LONG SKIRT 90165LFP SIDE SKIRT W/ YODER SMOKERS LOGO W90782 REAR LEG (CASTER)
- Page 58 YS640s TIE DOWN 3816X1FHB FLANGE HEAD BOLT 3/8-16 x 1” LONG 3816HNNL 3/8-16 NYLOCK NUT 90527 YODER SMOKERS COMP CART SIGN 1420X12BHCSSS BUTTON HEAD CAP SCREW, STAINLESS 1/4-20 x 1/2” 1420X1FHB FLANGE HEAD BOLT 1/4-20 x 1” LONG 1420HNNL 1/4-20 NYLOCK NUT...
- Page 60 ITEM # PART # DESCRIPTION QTY. 90101 HOPPER FRONT PANEL 90102 HOPPER BULKHEAD MOUNT 90106 HOPPER FAN END PANEL W90791 STAINLESS HOPPER A91999 AUGER BUSHING ASSEMBLY 24673 CONTROLLER KNOB W92017 AUGER WELDMENT 90027 AUGER ANTI-TORQUE PLATE 90001 AUGER MOTOR 90060 INNER FAN 115 CFM 1420X12SHCS SOCKET HEAD CAP SCREW, 1/4-20 .05 LONG...
- Page 61 HOPPER ASSEMBLY...
-
Page 62: Recipes
BRATWURST SLIDERS WITH BEER CHEESE SAUCE Makes about 16 sliders 2 lb ground pork 1/4 lb ground bacon Backwoods Bratwurst Seasoning 2 T Grannie’s Hickory Mustard Smokehouse Onions (recipe below) IPA Jalapeño Cheese Sauce (recipe below) Soft Pretzel Buns Combine the ground meats, mustard and brat seasoning (dissolved in water) in the bowl of a stand mixer fitted with the paddle attachment. - Page 63 every cup of water. While the water heats up, divide the dough into about 30 small, roughly equal sized balls. Preheat your cooker to 375ºF. Working in batches, place the balls in the boiling water for one minute each, flipping halfway through cooking. Use a slotted spoon to remove them from the water, draining away as much water as you can.
- Page 64 Step 1: Place your steaks in a zip top bag with the Sweetwater Spice Ancho Chipotle Bath. Marinate for 45 minutes. Step 2: Preheat your Yoder Smokers YS640s Pellet Smoker to 475ºF, set up with GrillGrates. Remove the steaks from the marinade, and wipe off the excess with a paper towel. Season with Cattleman’s Grill Smoky Chipotle.
- Page 65 Step 1: Marinate the tri-tip in the Sweetwater Spice Tres Chiles according to the provided instructions. Step 2: Preheat your Yoder Smokers YS640s to 500ºF, and set up GrillGrates for direct grilling. Apply a 50/50 mixture of Cattleman’s Grill California Tri-tip and Oakridge BBQ Santa Maria seasonings to the surface of the tri-tip.
- Page 66 Step 2: Remove chops from container, cut horizontal pockets in each pork chop for stuffing. Preheat your Yoder Smokers YS640s to 450ºF, set up with GrillGrates. Step 3: Remove the fruits from the bourbon. Combine them with the rest of the ingredients, and put into piping bag that is not fitted with a tip.
- Page 67 1 Tablespoon flour 1 Tablespoon butter 1 Cup beef stock 2 canned chipotles in adobo sauce, diced (2 peppers, not 2 cans) 1/2 t cumin 1 t Cattleman’s Grill 8 Second Ride Carne Asada Seasoning 1 lb cheddar cheese, grated 12 corn tortillas Directions Combine beef, onions and 505 Southwestern Chipotle Honey Roasted Chiles in a skillet.
-
Page 68: Notes
NOTES:... - Page 69 NOTES:...
- Page 70 10 GAUGE COOKING BODY CONTROL SYSTEM IGNITER 1 8 1 6 E W a s p R d . H u t c h i n s o n , K S 6 7 5 0 1 8 7 7. 4 0 9 . 6 3 3 7 Y O D E R S M O K E R S .
Need help?
Do you have a question about the S Series and is the answer not in the manual?
Questions and answers